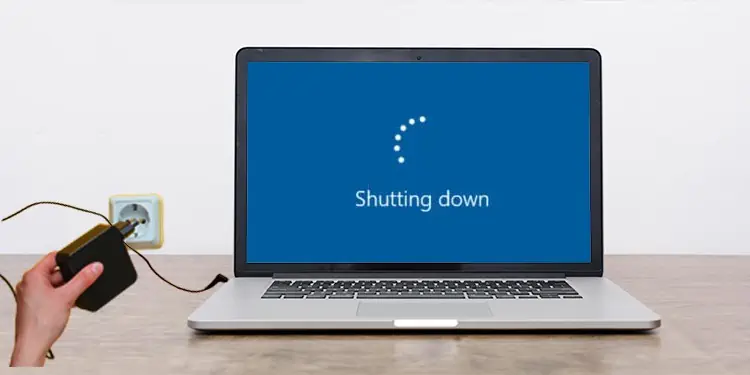
One of the benefits of a Laptop is its ability to work without AC power. But what’s the difference between a laptop and a desktop if it just shuts down when unplugged?
Our immediate thought after experiencing this issue is that the battery may be dead. It is true as well. Most laptop battery life decreases over time and becomes completely useless in the end. But it takes quite a time to reach that stage in a normal circumstance.
If your laptop’s fairly new or has just replaced the battery, then some other software and hardware issues may be the culprit. Nevertheless, we are going to provide the fixes for all the possible causes that are troubling you with this problem.
Causes for a Laptop to Shut Down When Unplugged
- Dead Battery
- Loose or Open Connection of Battery to the Laptop
- Faulty Battery Drivers
- Improper Power Management Settings
- Corrupt Chipset Drivers and BIOS
- Faulty Windows Update
Fixes to Solve Laptop Shutting Down When Unplugged
Before trying the fixes, examine the battery icon on the taskbar to see if the battery status shows a “plugged in” state when connecting a charger. If the system is not detecting the charger, the problem may be the adapter, cable, or connector. And your system may have shut down due to low battery. You can try using a different adapter to see if it works.
But, if you have enough charge on the battery for the system to function and it still shuts down when you unplug the charger, let’s try these fixes.
Observe the Battery State
The first thing you need to do is check the battery’s condition and ensure it has not reached the end of its life.
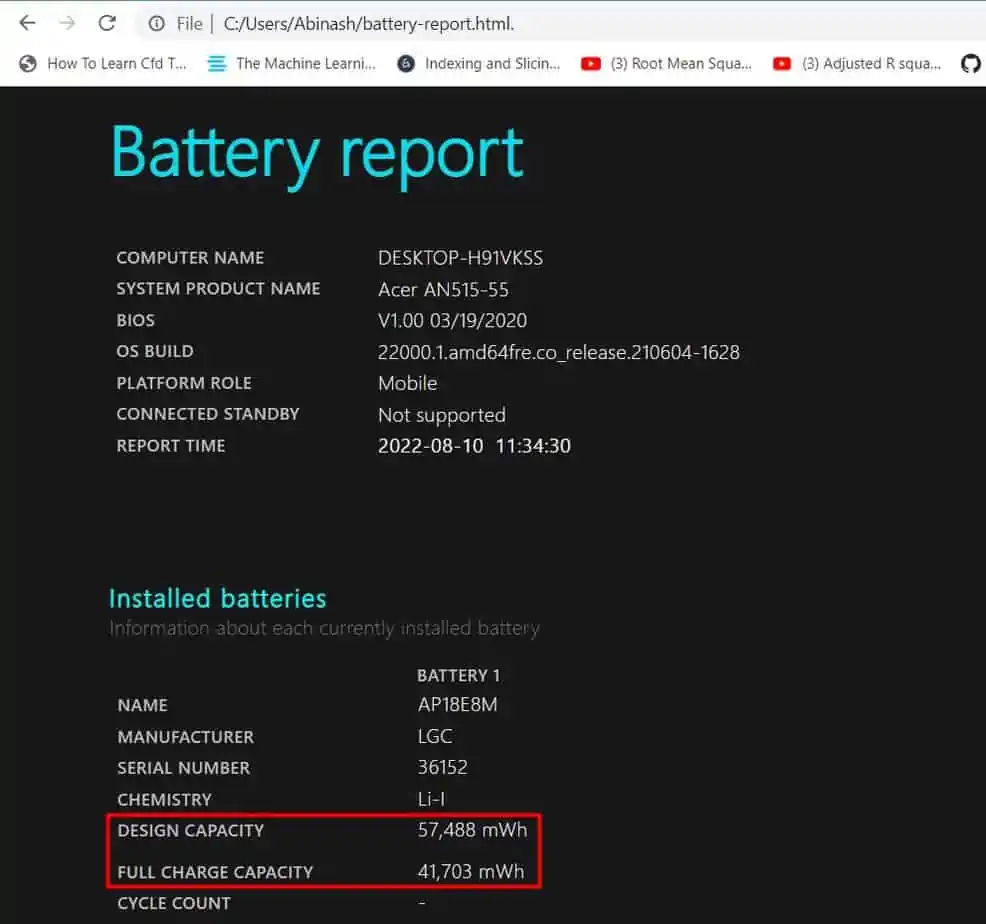
Almost all laptops provide the function to generate the battery’s report. The report consists of its power capacity when it was new and the current full charge capacity, along with several other details. You can then observe the value to determine if the battery is in a good state.
Let’s see the way to do it.
- Press Windows + ‘R’ and type
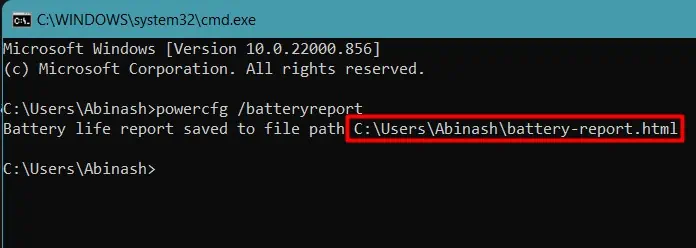
cmdin the Run dialog box to open Command Prompt. - Run the command
powercfg /batteryreport. It will save the battery life report and provide the file path.
- Copy the file path, paste it into the address bar of a browser, and press Enter. The battery life report will be displayed on your screen.
- Observe the Full charge capacity value and compare it to the Design capacity. If it is reduced to 4000 – 6000 mWh or below 10 % of design capacity, you need to replace the battery.

However, if the design capacity and full charge capacity values are comparable, then let’s move on to the next fix.
Perform Power Cycle
Sometimes the laptop’s component may have stored some residual power in it, which may interfere with its hardware and power supply. So, you can try releasing all the residual power from the system and start over by performing a power cycle.
Let’s follow the steps to do it.
- Shut down your laptop.
- Remove all the peripherals if connected.
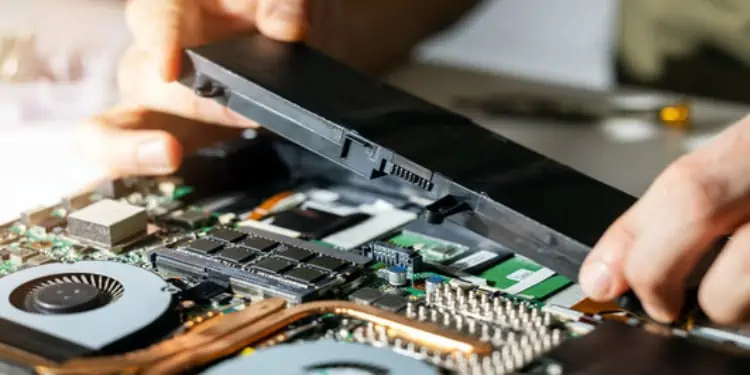
- Remove the laptop battery and the charger. Some systems may require unscrewing the nuts as well to remove the battery while some need the whole back panel to be removed.

- Now, press the power button for around 20 seconds to completely drain the residual energy.
- Re-install the battery and connect the power cable.
Power on your system and remove the charger to see if the problem is solved.
Check Power Management Settings
Windows provides the function to change the power settings on both battery and plugged state. If the power settings are abnormally changed, your laptop may be shutting down after unplugging the power cable.
For instance, the low battery percent may be fixed to 99 %, and the low battery action is changed to shut down. Then, the system believes the battery to be at low capacity, and it may power off immediately when unplugged.
You can fix this by reviewing the settings and reverting them to normal. Let’s see the way to do it.
- Press Windows + ‘R’ and type
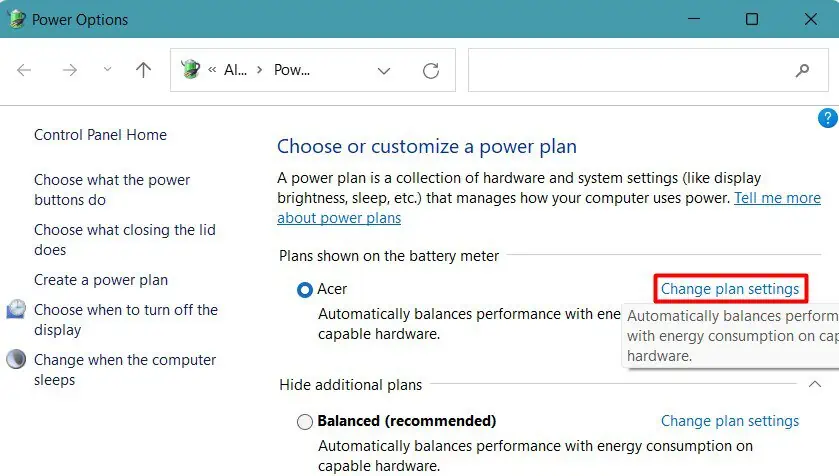
powercfg.cplto open Power Options. - Click on Change power plan at the side of your current plan.

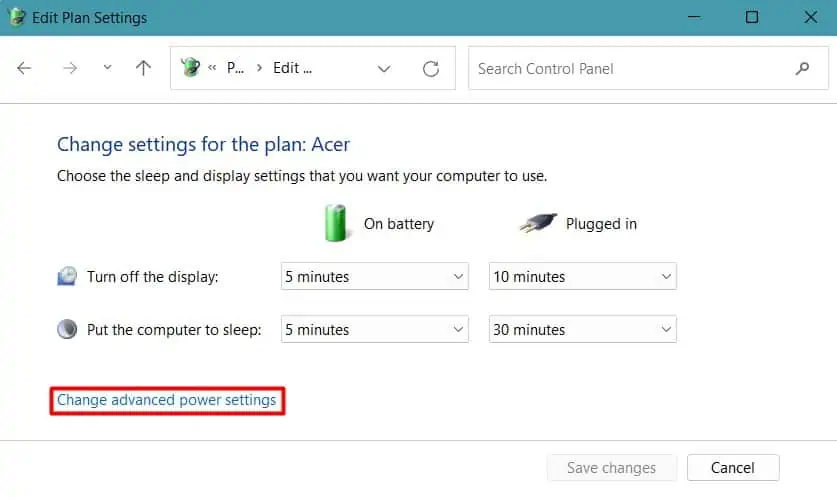
- Find Advanced power settings and click on it.

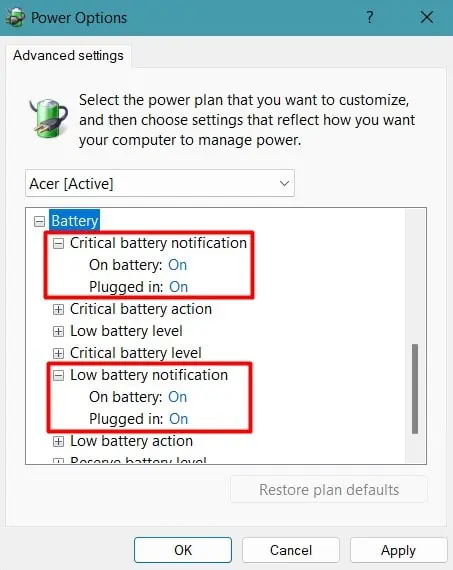
- Scroll down to Battery and expand the options.
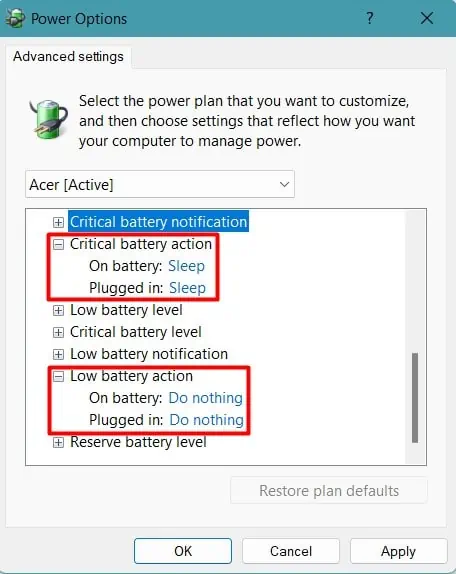
- Keep the Critical battery notification and Low battery notification to On for both Battery and plugged-in state.

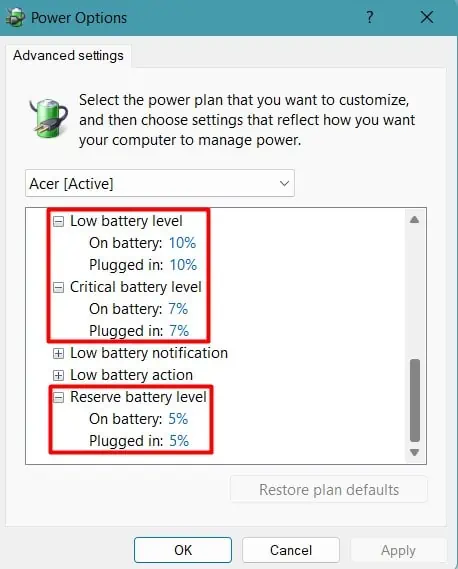
- Adjust the Low battery Level to 10%, Reserve battery level to 7%, and the Critical battery level to 5 % for both options. The order should be such that the low battery is greater than reserve battery followed by critical battery level and the value is recommended to be below 10%.

- Similarly, change the Critical battery action to Sleep and Low battery action to Do nothing.

Observe if the problem still persists.
Press Battery Reset Button
Some laptops, such as Acer Predator Helios 300, have a battery reset button near the RAM. This button resets the battery, ACPIs, and other power controls of the laptop. You can find the button at the back of your laptop near the RAM compartment.
Shut your laptop down, remove the power cable and press the button for around 15 seconds to reset the battery.
Power on your laptop to see if it fixed the issue.
Reinstall Battery Drivers and Update Chipset Driver
The battery driver coordinates with the system’s power manager to maintain the battery’s performance to the optimum. So, if the battery drivers get corrupted or are faulty, then the system may not be able to utilize the battery properly. Hence, your system may shut down while in battery mode.
Uninstalling and Reinstalling the battery drivers should solve the issues that arise from faulty driver software. Let’s go through the steps to do it.
- Press Windows + ‘R’ and type
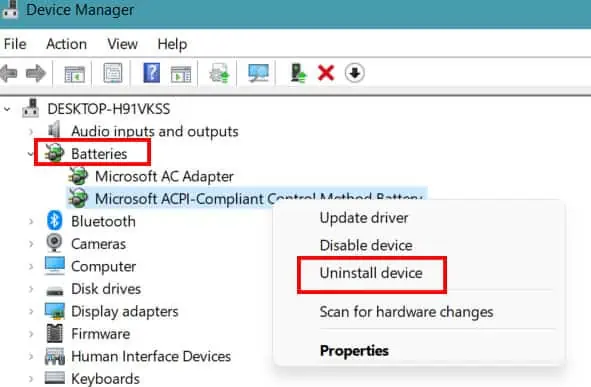
devmgmt.mscto open Device Manager. - Find the Battery option and double-click on it to expand.
- Right-click on a device and click Uninstall Device.
- Complete the uninstallation process for all the listed devices, especially all Microsoft ACPIs under Battery.

- Restart your system. It will automatically reinstall the battery drivers.
We recommend you update the chipset driver if updating the battery driver does not work. Chipset drivers provide instructions to your system to properly coordinate with the hardware and other peripherals. So, if there is any fault in the chipset drivers, then the hardware, including the battery, may not work properly.
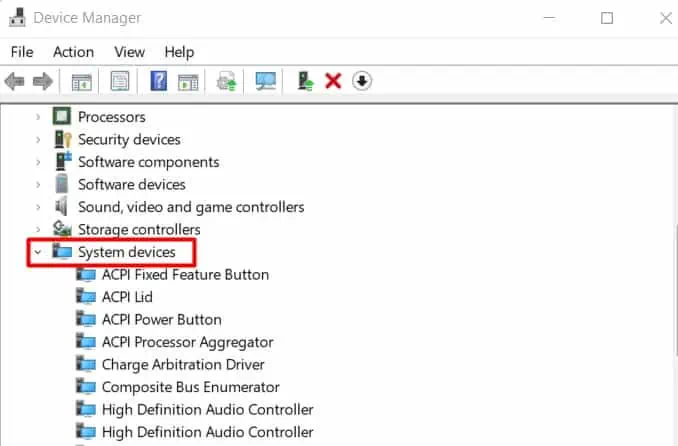
- Find System devices in the Device Manager and double-click on it.

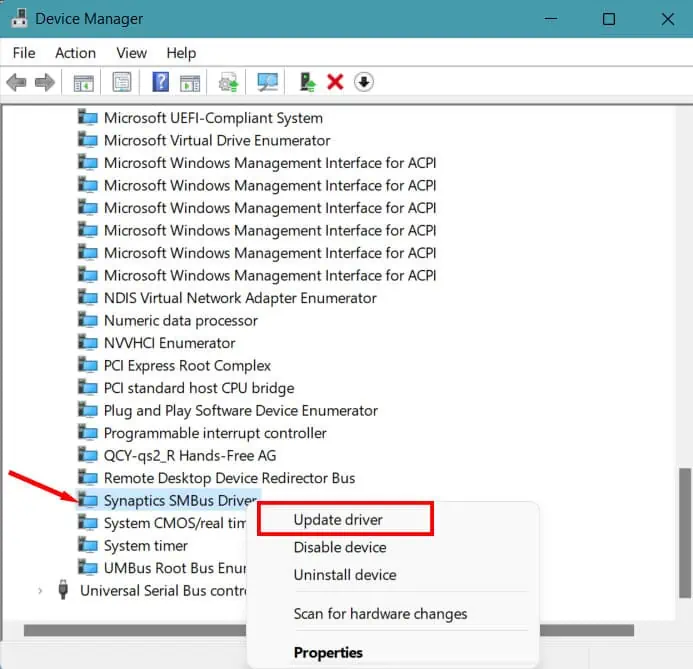
- In the list, right-click on Synaptics SMBus Driver for Intel or AMD SMBus for AMD and click Update Driver. These drivers help control and maintain the voltage and temperature within the system.

- Click Search automatically for drivers and follow the instructions.
You can also update the chipset drivers manually by finding the right chipset for your system. Unplug your charger to see if the system shuts down again.
Run Power Troubleshooter
Windows has an in-built troubleshooting feature that searches for the problem, detects it, and solves the issue. One of the windows troubleshooters, the Power troubleshooter, fixes the issues related to battery and power management in the laptop.
Let’s see the way to run the troubleshooter.
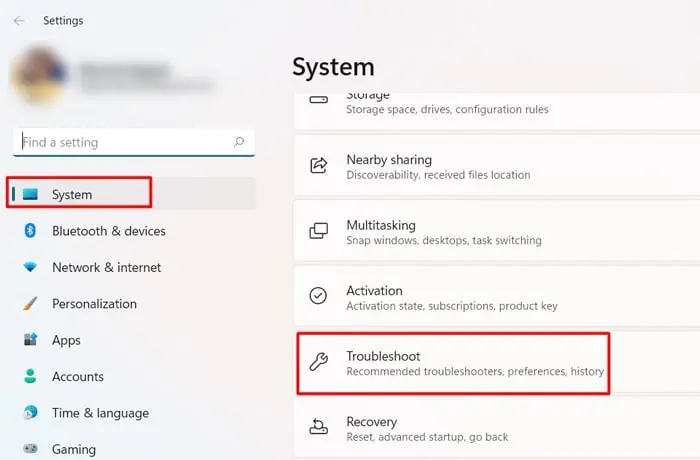
- Press Windows + ‘I’ to open Settings.
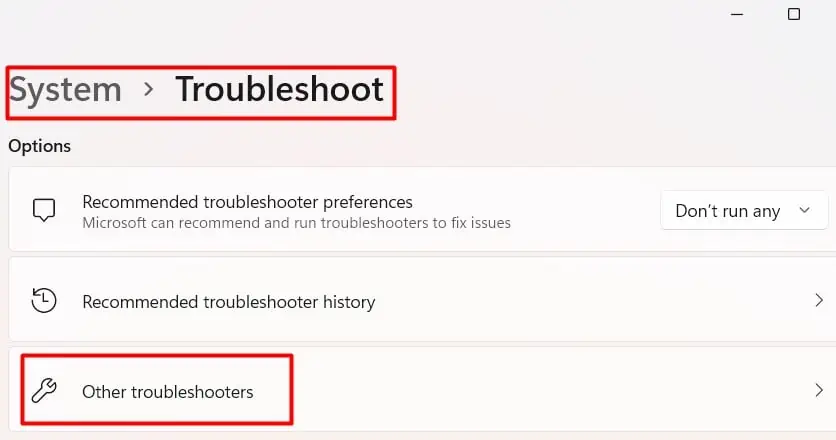
- Look for Troubleshoot under the System menu.

- Click on Other troubleshooters.

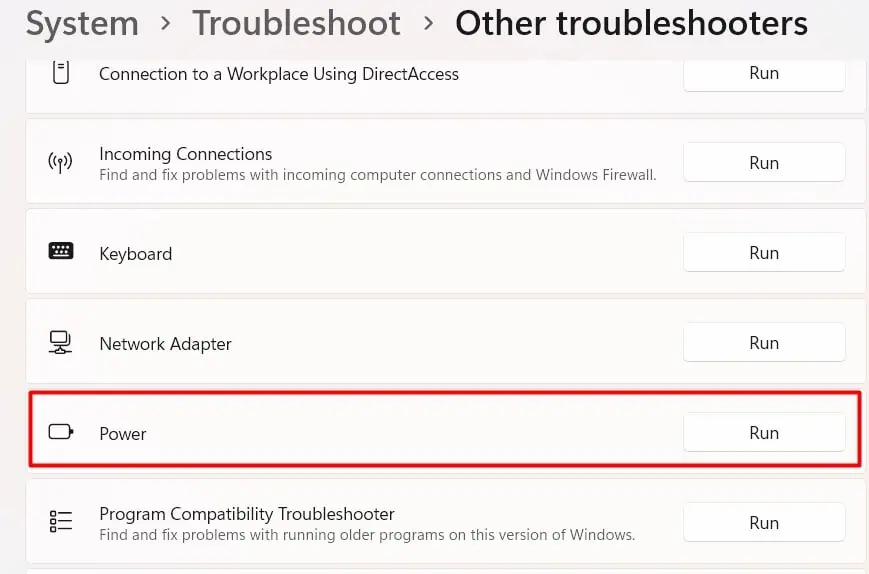
- Find Power troubleshooter and click Run. It will detect the issue and solve it automatically.

Examine whether the problem is solved.
Update BIOS
BIOS of a system initializes the power management features and provides an interface for the OS to take control of it. So, a faulty BIOS can interfere with the battery’s health and the power management operation.
Laptop manufacturers continuously release BIOS updates that solve the bugs in the earlier version. You can update your system’s BIOS by finding the correct BIOS file. However, updating BIOS is risky and can brick your system. Hence, we have provided a detailed guide for updating the BIOS safely.
Uninstall Update and Install Pending Window Update
Some Windows 10 users reported that their system started shutting down immediately when unplugged after installing Update 1809 by Microsoft. Some updates can have bugs in them, which can bring such issues.
So, uninstalling the particular update should fix the job. At the same time, installing any pending updates can fix the problem as Microsoft tries to solve the issues through Windows updates.
- Press Windows + ‘R’ and type
control updateto open Windows Update. - Click on Download & Install if any updates are pending on your system.
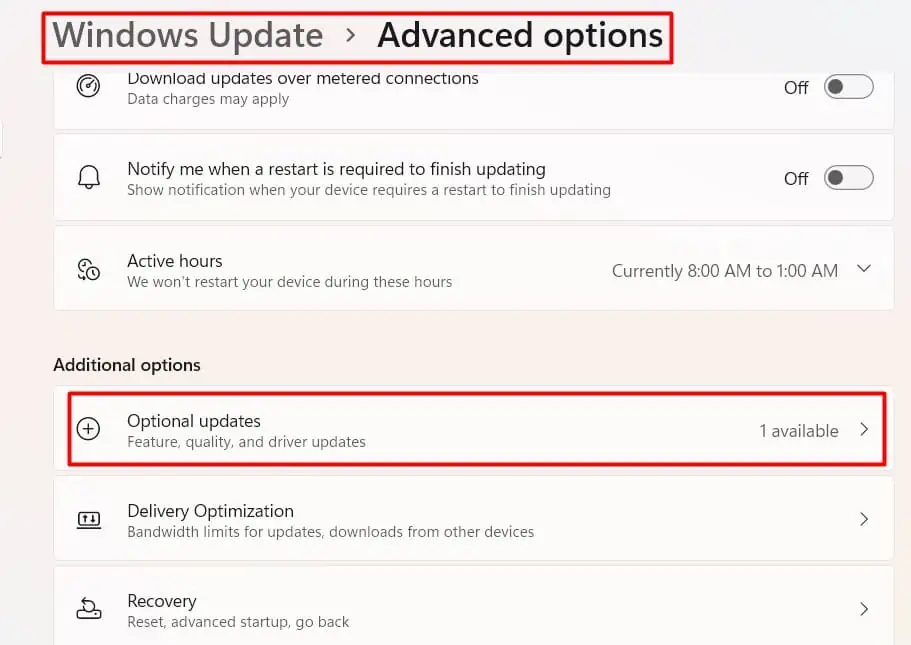
- Go to Advanced Options and select Optional updates.

- Select all the updates and click Download and Install.
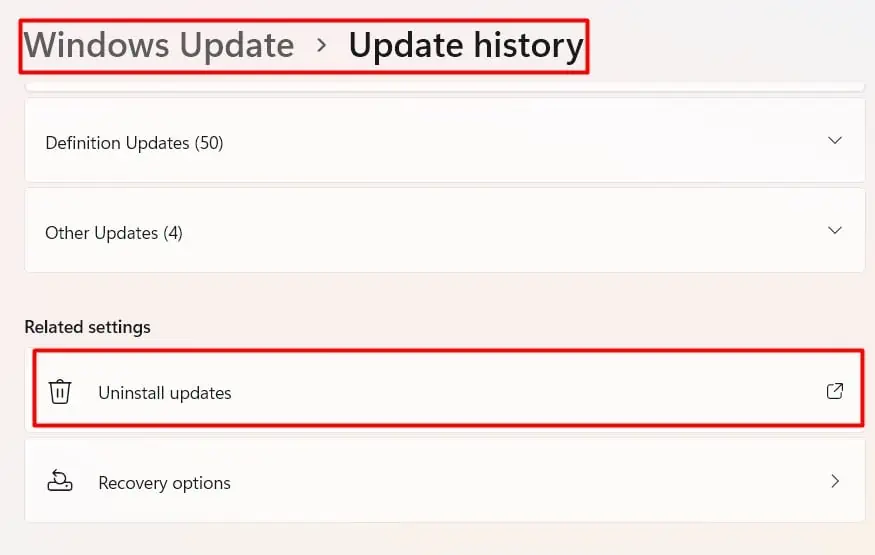
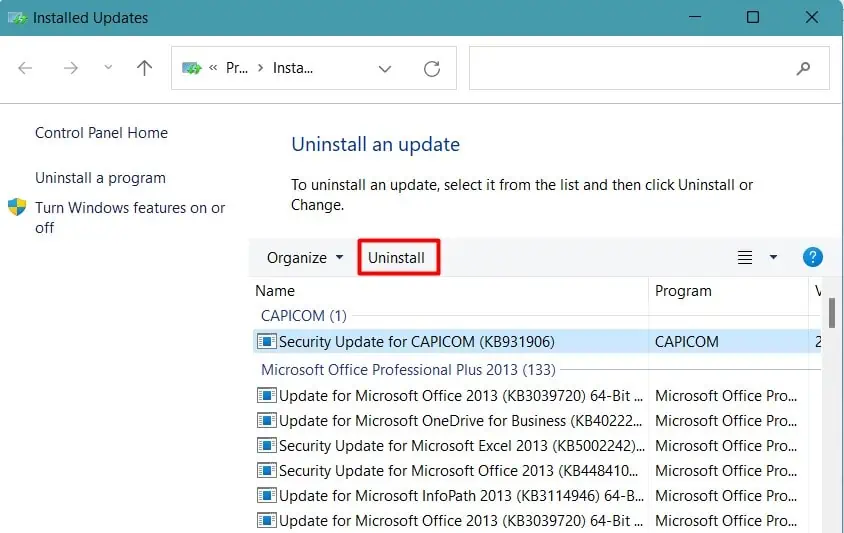
- Similarly, click on Update History on the Home page and scroll down to find Uninstall updates.

- Find the specific update, Update 1809 in this case, and click Uninstall.

You should find your system function normally.
Inspect the Battery Compartment
If your battery health is good and the solutions did not work out for you, there might be some issues with the battery connection inside the laptop.
Some metal pieces and other foreign objects may be stuck in the connection lead in the laptop compartment. You can look into the compartment by removing the battery and cleaning the space properly.
Moreover, the connection of the battery to the motherboard may be loose, preventing the system from using the battery. We recommend not to tamper with the connections yourselves. You can take the laptop to the nearest service center to repair it.

