If you’re not hearing anything from the speakers at all, there can be a few reasons at play. For example, incorrect configurations, outdated sound drivers, damaged hardware components, or the audio is simply on mute to name a few.
But thankfully, there are many effective solutions you can try that you find convenient. So, let’s move on to some more causes and how to fix laptop speakers not working.
How to Fix Windows Laptop Speakers Not Working?
Before moving on with the solutions, first test the speakers. Right-click on the speaker icon on your taskbar. You’ll see a small pop-up window with settings. Click on the Playback tab. Now, right-click on Speakers and click on Test. Windows will play sounds on both sides of the speaker.
Troubleshoot Audio Issues
This troubleshooting feature helps fix any minor bugs and errors in the audio system. Here’s how you can do it:
- Access Settings from the Start menu.
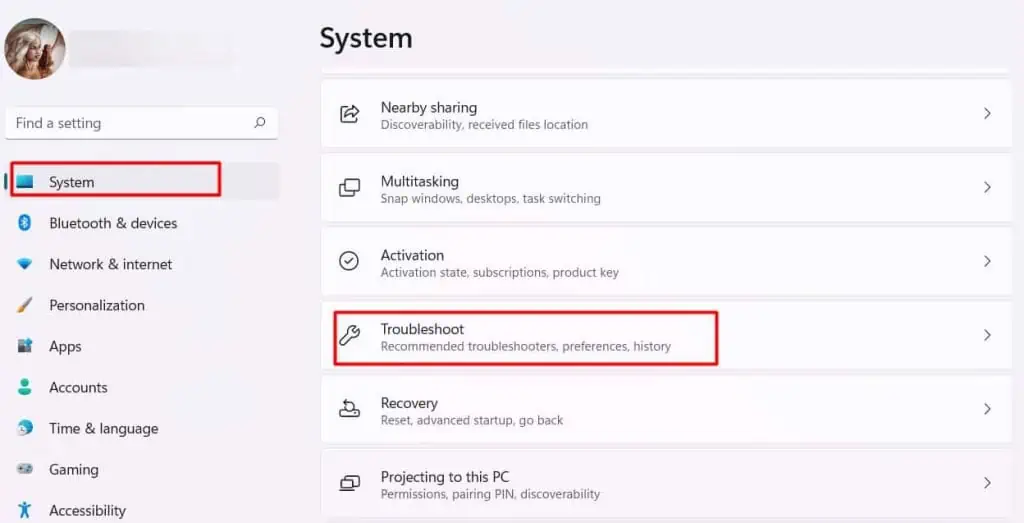
- Select System > Troubleshoot.

- Click on Other Troubleshooters.
- Click on Run next to Playing Audio.

- You’ll now see a small pop-up window showing Detecting problems. This might take a while as Windows is looking for errors.
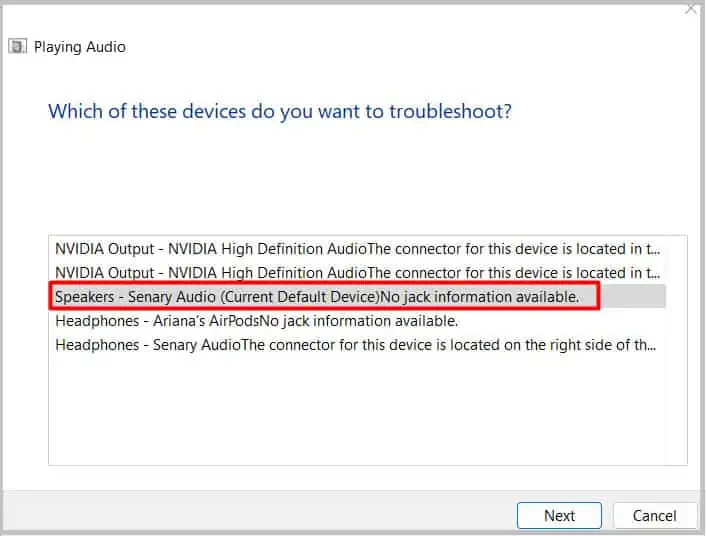
- Now, you can see the list of devices you use to listen to the audio. You can select Speakers. Then, click on Next.

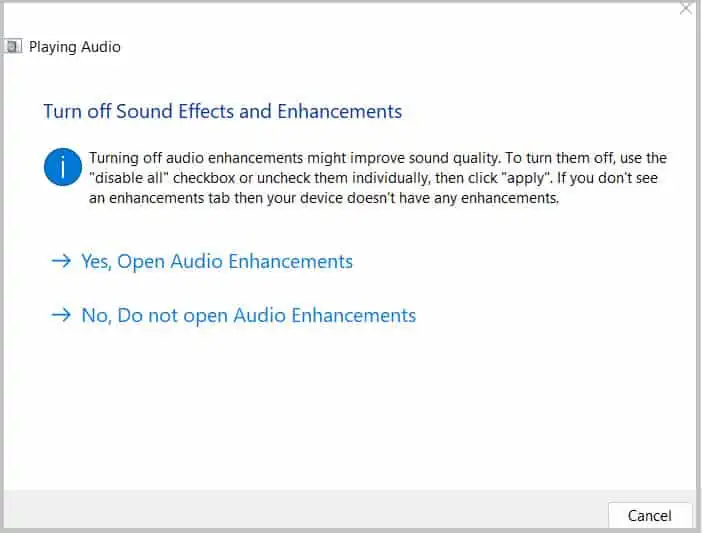
- Windows will now ask whether you want to turn on or off the sound enhancements. You can choose one and proceed.

- After the troubleshooting process is complete, you might see some detected errors. You can now close the troubleshooter.
Update/Reinstall Sound Driver
Since the audio driver monitors audio inputs and outputs, updating or reinstalling a new driver can be one effective solution. Giving your sound driver a refresh can help resolve bugs and errors if there are software-related issues with the speakers. So, here’s how you can reinstall and update your audio driver:
- Enter Device Manager on your search bar.
- You’ll now see a pop-up window where you can see the list of all the devices. Double-click on Audio inputs and outputs.
- You might see two or more devices, like Microphone and Speakers. Hit right-click on Speakers.
- Now, click on Update driver.

- If you want to reinstall the driver, first click on Uninstall device.
- To reinstall the driver, please reboot your PC.
Usually, after rebooting the PC, Windows automatically installs any missing drivers. However, if your PC is unable to find the driver, you’ll be directed to a website where you can install the latest version of the driver.
Set Speaker as Default Device
If your laptop speakers are disabled or not set as the default device, it won’t play any sound. If you aren’t sure how this happened, someone else might’ve changed the setting. However, you can always check and set your speakers as the default device to let it play sounds again. Here’s how you can do it:
- Right-click on your Speaker icon and click on Sounds.
- You’ll see a small pop-up window of menu.
- Click on the Playback tab.
- If your speaker is disabled, it’ll be in grey color. Right-click on the Speaker.
- From the list of options, click on Enable.

Disable Audio Enhancements
Audio enhancement is a feature to improve the quality of the audio on your laptop. However, it can lead to unwanted errors sometimes due to bugs. In such cases, even Microsoft recommends you turn it off to fix errors. Here’s how you can disable audio enhancements:
- Access the Control Panel from your search bar. Click on Sound.
- You can now see a tiny pop-up menu. Double-click on Speakers.
- You’ll again see another pop-up menu called Speakers Properties. From the tabs at the top of the menu, click on Enhancements.
- If you have enhancements turned on, you might see checked boxes. You can uncheck all the sound effects to disable all audio enhancements.

- Click Apply and then OK.
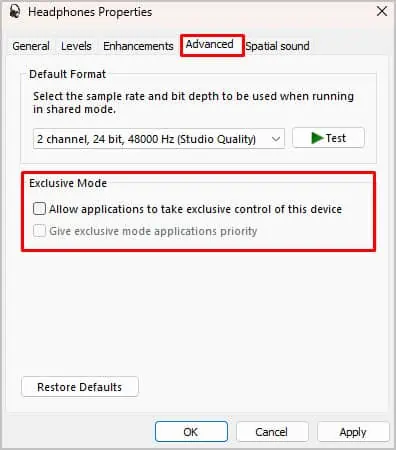
- Right next to Enhancements, click on Advanced.
- Make sure to uncheck the boxes in the Exclusive Mode section. Doing this will not allow some apps to interfere with the sound on your laptop.

- Click Apply and then OK.
You can now try playing any audio and see if this works.
Restart Your Audio Services
If most solutions aren’t working, restart the audio services to resolve internal issues with your audio components. Here’s how you can restart your audio services:
- Type Services on the search bar.
- You’ll now see a new pop-up window.
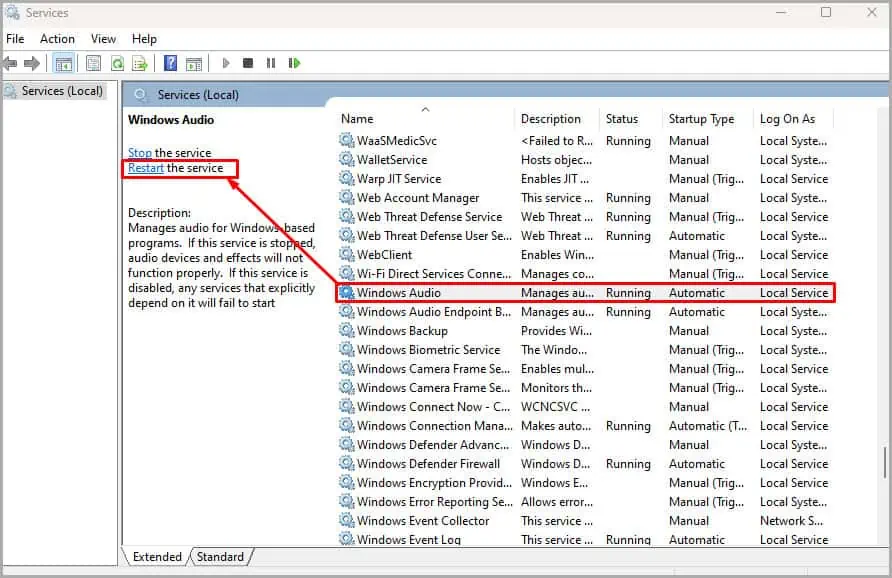
- The list of apps and devices is listed alphabetically. So, you can scroll further down and right-click on Windows Audio. Click on Restart the service.

- Below that, you can also right-click on Windows Audio Endpoint Builder and click Restart.
Clean Speaker Components
If most software-related solutions aren’t working, chances are there are accumulated dust or dirt particles inside speaker components. This can also affect the quality of the speakers. To properly clean them, we’ll need to carefully disassemble the laptop’s back panel first.
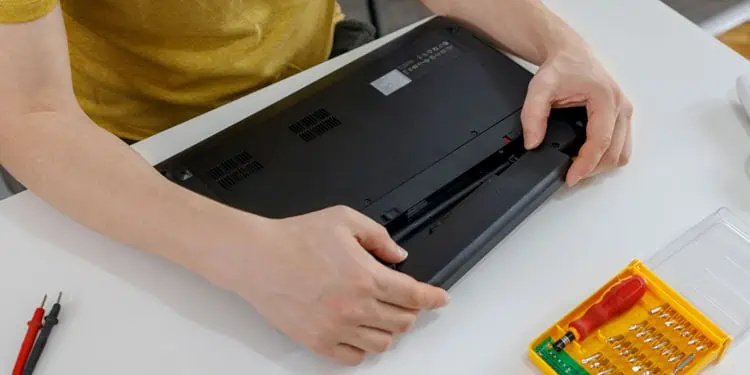
- Power off the laptop and unplug all the cables. Also, remove the battery to ensure its safety.

- Turn the laptop upside down and unscrew all corners in the back panel.

- To open the locks on the back panel of your laptop, a prying tool made up of plastic is necessary. Using it, gently remove the back panel.

- Check the location of your speakers and use a soft microfiber cloth to gently clean the dirt.
You can also use an air compressor to clean the dust. Meanwhile, avoid other harsh cleaning agents.
Experiment With Various Audio Formats
If your laptop isn’t compatible with a certain audio format, you might hear an inconsistent sound or no sound at all. So, you can try experimenting with different audio formats. Here’s how you can do it:
- Please follow our steps above to access the Speakers Properties.
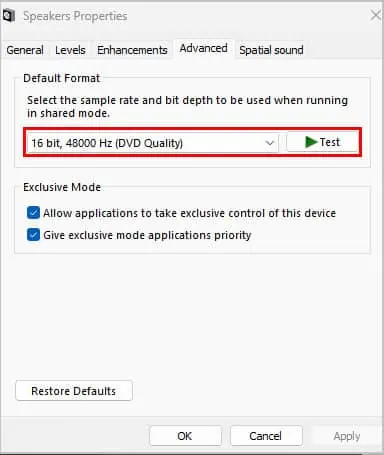
- Then, click on the Advanced tab.
- On the default format section, click and test different audio formats. You can try the one that’s sounds decent on your laptop.

- Now, click Apply and OK.
Finally, updating your Windows is one of the many solutions you can try to fix your laptop speakers not working.

