Loudness equalization is the audio enhancement feature that creates a balance between low and high pitch sound in an audio file. Whether you are listening to the low-pitched sound of a singer or a high-pitched whistling sound, loudness equalization makes the audio sound better.
Furthermore, it helps equalize the sound frequencies to protect your speaker’s diaphragm from any harm.
But despite its wide range of usefulness, people are still trying to figure out whether to use it or not. This comprehensive article about loudness equalization will help you decide.
What is Loudness Equalization?
Loudness equalization is a technique comprising of a few algorithms that reduce the volume of louder audio parts and enhance the quieter part. With this feature enabled in your speakers, you can focus on people’s voice, neglecting the noisy environments.
It is a good idea to enable it if you don’t want to keep adjusting the volume levels while listening to music or watching a movie. It also prevents you from hearing any annoying sounds.
You don’t need to crank up your volume to hear the quieter part of things with Loudness equalization. You can keep the volume level normal and still hear the quiet part with no issues.
How to Enable Loudness Equalization On Your Computer?
Windows provides a built-in loudness equalization feature integrated as a part of audio enhancement. While, On Mac, You can use the equalizer feature from the Music application.
Using System Settings
Here’re the steps to enable the loudness equilization on Windows and Mac.
On Windows
- Hit Windows + R key on your keyboard to launch the Run dialog box.
- Type
controlin the text field and hit Enter to open Control Panel. - While on the Control Panel window, navigate to Hardware and Sound > Sound.
- Click over your active speaker under the Playback tab and then click the Properties button.
- In the Speaker Properties window, jump to the Enhancements tab.
- Then check the box next to Loudness Equalization.

- Click Apply > OK to save the changes.
On Mac
- Launch the Music application.
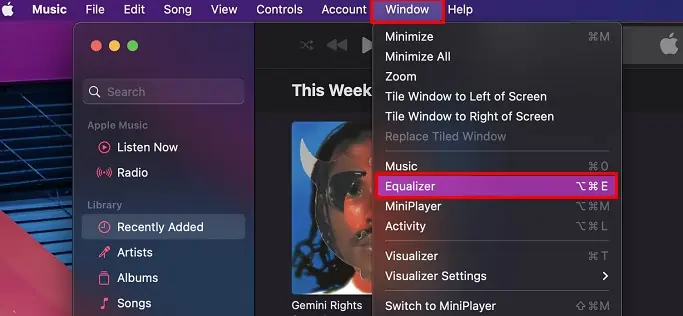
- Click the Window tab at the top of your screen.
- Choose Equalizer from the list of available options.

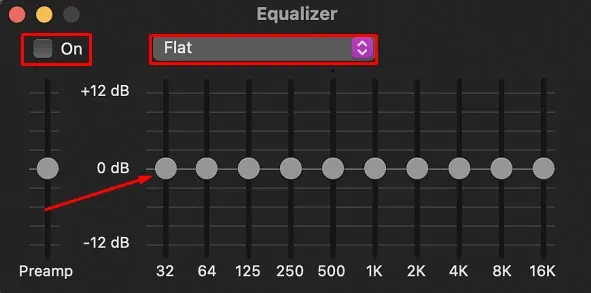
- In the Equalizer popup, check the box next to On to enable the feature.
- Drag the sliders to adjust volume for respective frequency range.

- You can also choose the predefined equalizer settings from the Choose a preset dropdown.
Use Third-party Apps
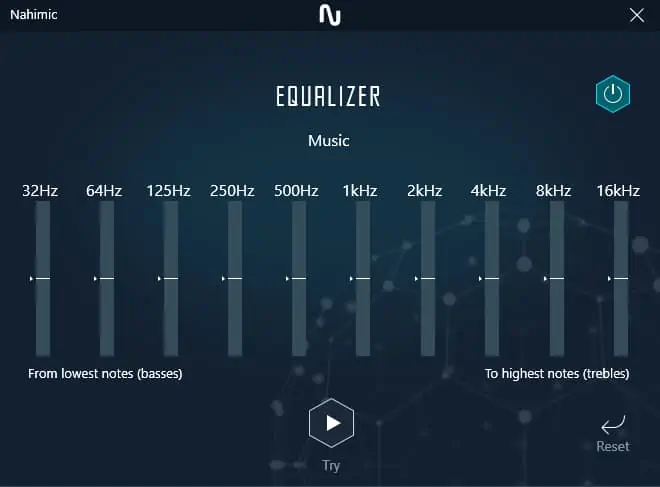
If you feel that the built-in equalization feature of Windows or Mac did not work well, you can even use third-party apps like AIMP to equalize the loudness. It is fairly simple to use and helps you boost your sound experience even better.
Pros and Cons of Loudness Equalization
- Balances the soundtrack dynamically
- Provides a better hearing experience
- Levels audio with high dynamic ranges
- Aids for people with hearing impairments
- Meets the loudness standard of audio streaming platforms
- Improves gaming experience
- May boost the wrong part of music
- Compressed dynamic ranges can distort the sound
- Equalization beyond the supported frequencies of speakers can harm them.
Application Areas of Loudness Equalization
Loudness equalization has a wide range of applications in the music and film industry. We have described some of the areas where it is widely used.
- It minimizes the Dynamic range and helps you listen to the quiet dialogue in a movie if you don’t have subtitles available. Dynamic range is basically the difference between the highest and lowest level of volume in the audio. It levels audio with high Dynamic ranges so that you can hear it better.
- It is vital in meeting the loudness standards of many streaming platforms. Spotify, Podcasts, and YouTube have their own standards for loudness. Even television and radio have their own standards. If you cannot meet the standards, the platforms may not accept your project.
- If you play Battle Royale games like PUBG, loudness equalization evens the output sound, and you can hear the in-game sounds actually more early than your squad mates.
Who Needs to Use the Loudness Equalization Feature?
If you are a sound engineer or a sound editor, you must take care of the equalization to retain your audience’s attention. Human ears are much sensitive to changes in the audio. They can even sniff a minor audio disruption that can ruin the entire hearing experience.
It does not matter how much you have invested in video making; if your audio is of low quality, it will deviate your listeners from you. For example, If you have not properly set the equalization of your podcast, your audience will find it bothersome to listen to. It will agitate them, and your audience conversion will be badly affected.
Should You Turn Loudness Equalization On or Off?
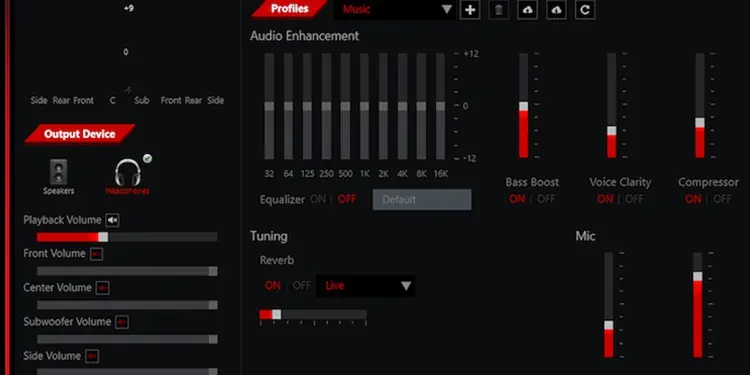
Equalization works like a charm with voices, but it can create problems while listening to music. If the song has instrumental sounds louder than the singer’s voice or vice-versa, loudness equalization helps to normalize it.
However, you can not get the best experience even using it if the song is equalized that way. The dynamic range of music gets compressed with equalization, which can create issues listening to the music.
For instance, if you are listening to the lecture recordings at your university, you feel that there are many audio pops. You cannot figure out what the lecturer is saying. Those pops can be much louder than the lecturer’s voice and prevent you from listening to the lecture effectively.
Loudness equalization automatically regulates the volume level and provides a consistent sound experience. You won’t have to encounter jarring variance in your volume level. However, you can not expect it to fix issues with the crappy audio.
As a music lover, I recommend you turn on the loudness equalization feature on your computer. It not only enhances your hearing experience but also protects your ear from any harm due to the frequency fluctuations in the audio.

