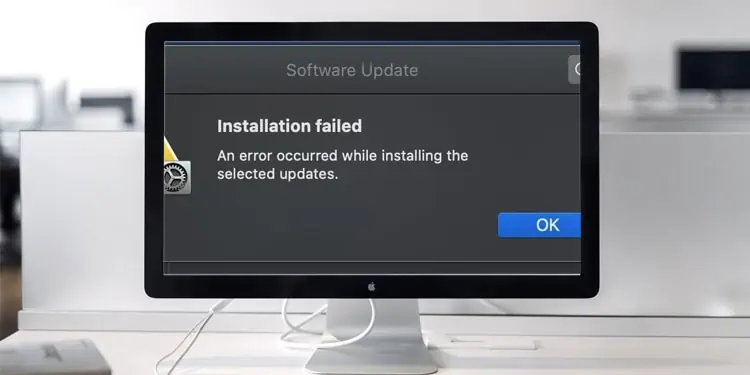
If your macOS update is stuck, you might see a frozen Apple logo or your Mac can be completely unresponsive. This error may occur due to many reasons including bugs or outdated drivers.
Before moving on quickly to the fixes, it’s best to confirm if your Mac is frozen or the update is just taking too long.
Is My macOS Update Stuck?
You can follow the given steps to check if your macOS update is actually stuck:
- Hold down your Mac’s power button for 30 seconds. Make sure that your Mac is properly powered off before restarting it again.
- If your Mac proceeds with the macOS update ceaselessly after, the only issue here is the download is taking too long. You can move your Mac closer to the router for a speedier connection.
If your macOS update process seems to be stuck despite waiting it out, the issue can be more serious than a heavy download.
Why Is My Macos Update Stuck?
These are some of the reasons that might cause a stuck macOS Update issue on your Mac:- Internet Connection based problems (router problems, signal issues, et cetera)
- Mac Battery problems
- Plugin-related issues
- NVRAM Bug
- SMC Bug
- Outdated Drivers causing Kernel panic
- Storage Issues
How to Fix a Stuck macOS Update?
Before jumping to other fixes, make sure to restart your Mac first. Doing so can be a good measure to remove temporary software glitches and continue updating.
- Press on the power button and hold it down for 10 seconds.
- Wait for your Mac to chime as it restarts.
- Try the macOS update process again.
If this does not work out, follow the given steps to resolve the issue:
Re-check for Any Battery and Charging-related Issues
Apple requires more than 50% battery or a charging status to update macOS. Your macOS might get stuck if the Mac has a low battery. Ensure that your charging port is unblocked by any tiny particles and properly connected to the power port. For best measures, make sure you use a genuine Apple charger.
Bootleg products tend to give out easily and cause issues with your Mac devices. Leave your Mac on charge for a while if low battery seems to be the issue. Make sure that your Mac fulfills the basic internet connection and battery necessities for an OS installation before it starts downloading.
Free Up the Storage Space on Your Mac
The absence of the required storage space on your Mac’s drive can also be the catalyst for software update issues. You can find yourself with a stuck update if Mac cannot determine if it has enough space for an OS installation. Updates are first downloaded onto your Mac, so you might not be able to detect the problem before it arises.
So, we recommend checking your system storage to confirm enough space for a macOS download. Follow the given steps to check system storage on your Mac:
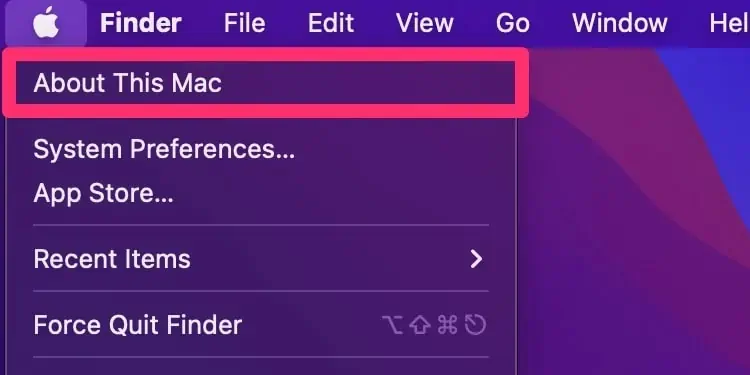
- Press on the Apple Logo on the menu bar of your screen.
- Press on About This Mac.

- Press on Storage to check the available space on your Mac for an OS installation. Re-attempt the macOS update once the proper amount of space required is cleared off.

Delete the Macos Install Data
The MacOS installer files remain dormant in the macOS Install Data folder unless you intend on reinstalling it again. These files can be a source of underlying bugs and errors. You can delete these folders to restart your macOS upgrade properly.
Simply follow the steps given below:
- Launch Finder from the dock of your Mac’s screen.
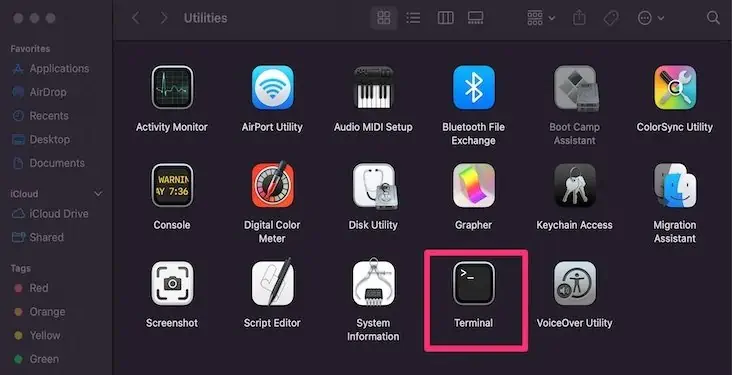
- Press on Go in the menu bar of your Mac. Press on Utilities from the pop-up menu that appears.
- Press on Terminal and launch it on your Mac.

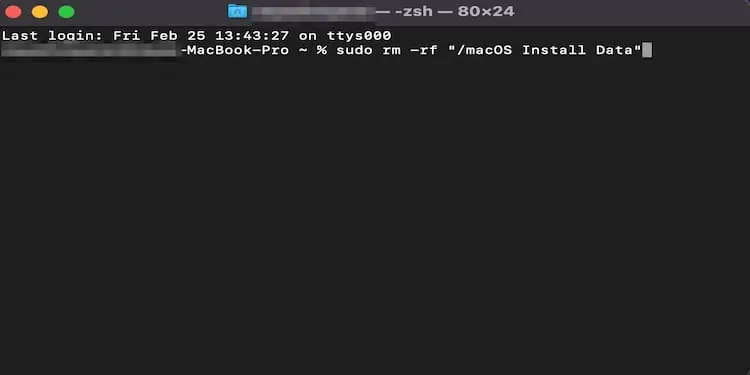
- Enter
sudo rm -rf "/macOS Install Data"
- Enter your administrator password when prompted to. Press on continue.
- Restart your Mac and initiate the installation process again.
Download the Macos Update Directly From the Apple Website
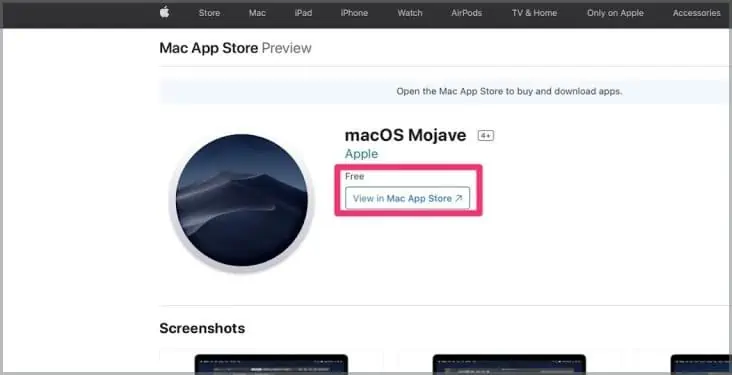
Apple’s official website can also help you update your macOS directly from the internet. To download the macOS from the Apple website, you can follow these steps:
- Search for apple.com on your web browser from Mac.
- Press on the search field located at the top of the website, towards the right, and search for macOS update. Press on the latest macOS Update option.
- The Apple website directs you to another window with details based on the available macOS update. Press on the View in Mac App Store option.

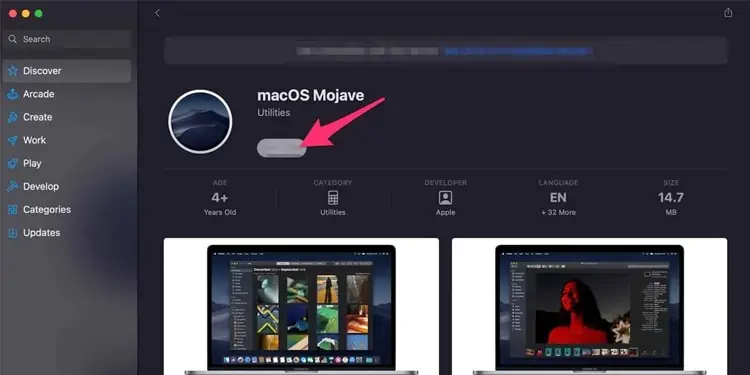
- You will now see the macOS directly in the Apple Store. Press on Update now to update your Mac through the App Store.

Check Your Router’s DNS Settings
You can check and reset the router’s DNS settings for faster internet connectivity. The macOS update process can get stuck if the network connection is relatively slow.
Follow the steps below to check and add router DNS settings:
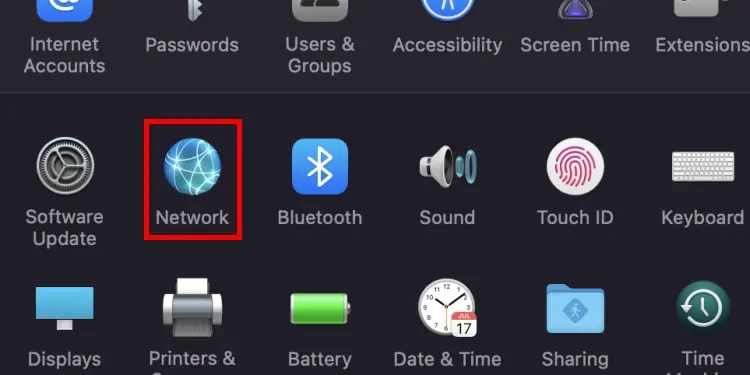
- Navigate towards System Preferences from the Apple menu.
- Press on the Network from the list of applications.

- Press on Advanced once the new window appears.
- Press on the DNS section. You can now access the current working DNS of your router.

- Press on the + symbol under the DNS Servers list. Enter a safe public DNS server and press on Ok.

Here is a list of public DNS servers you can use to improve your router’s performance:
| Server Name | Primary DNS | Secondary DNS |
| 8.8.8.8 | 8.8.4.4 | |
| OpenDNS | 208.67.222.222 | 208.67.220.220 |
| DNSWatch | 84.200.69.80 | 84.200.70.40 |
| Quad9 | 9.9.9.9 | 149.112.112.112 |
| Cloudflare | 1.1.1.1. | 1.0.0.1 |
Boot Your Mac Into Safe Mode
Safe Mode is a booting process that starts up your Mac without most of its drivers and software. This process helps resolve software system and malware infection issues. Booting up your Mac in Safe Mode ensures that such corruptions are eliminated to ensure overall software functionalities.
You can follow the given steps to boot your Mac into Safe Mode:
- Make sure that you have properly switched off your Mac.
- Power on your Mac again. As it boots up, hold down the Shift key.
- Your macOS will boot into Safe Mode as this step is carried out. Perform the macOS update as normal.
Reset Your Mac’s NVRAM
Resetting your NVRAM can be a good measure to resolve internal issues on your Mac. Any complications based on the kernel panic information can be resolved by resetting your NVRAM.
Follow the given steps to reset your Mac’s NVRAM:
- Make sure that your Mac is completely powered off.
- Switch on your Mac again. As the Mac starts up, press and hold on the Command + Option + P + R keys.

- Release the keys once you hear the startup sound again.
- The NVRAM has been successfully reset on your Mac. Reinstall your macOS update without further complications.
Reset Your Mac’s SMC
Resetting your SMC can fix various issues related to your Mac’s hardware. If there are underlying issues in the hardware itself, you can reset the SMC to resolve the problem.
Follow the given steps to reset your SMC and fix issues with a stuck macOS:
How to Reset the SMC on an Apple T2 Security Chip Mac?
Follow the steps given to reset the MacBook SMC with the T2 Security Chip (MacBook Air and MacBook Pro models from 2018 to 2020):
- Shut down your Mac properly.
- Press and hold down Shift + Left Option + Control Key for seven seconds and release.
- Once the keys are released, proceed to Restart your Mac.
How to Reset the SMC on a Non-removable Battery-powered Mac?
Follow the given steps to reset the SMC in MacBook with a non-removable battery (Mac Book Air and MacBook Pro released pre- 2018):
- Make sure that you have properly powered off your Mac.
- Press and hold down Shift + Control+ Left Option keys on your Mac keyboard. Simultaneously, press and hold down the Power button as well. Do this for 10 seconds and release the keys.
- Proceed to power on your Mac.
How to Reset the SMC on a Macbook With a Removable Battery?
Follow the given steps to reset the SMC on older MacBooks with removable batteries:
- Make sure that your Mac is properly Shut down.
- Proceed to remove your Mac’s battery.
- After the battery is removed, press and hold down the Power button of your Mac. Press the power button for five seconds and release.
- Reinstall the battery back in your Mac and boot it up normally.
Reset the PRAM on Your Mac
Resetting the PRAM on Mac helps resolve software and application issues based on clocks, lights, power buttons, networks, and so on. You can follow the given steps to reset the PRAM on your Mac:
- Make sure that your Mac is properly turned off.
- Press on the power button to start up your Mac again.
- Press and hold down Option + Command + P + R keys on your Mac keyboard. Make sure that you start holding down these keys before the grey screen appears on your Mac.
- As your Mac appears to restart, keep holding down these keys for another 20 seconds. The procedure for resetting the SMC varies depending on your Mac.
If your Mac is an older model with a startup chime, continue to hold down the keys until the second chime. Hold down the keys until the Apple logo shows and disappears for the second time on newer Macs with the T2 Security Chip. - Release the keys and wait for your Mac to finish rebooting.
Check if Your Mac’s Model Is Compatible With an OS Update.
If your Mac model is outdated, your system might not support the new macOS updates. Apple designs to support macOS versions for three years. Macs are eligible to get the latest macOS versions for about seven years.
You can check your Mac’s model and macOS version by following these given steps:
- Press on the Apple icon on the menu bar located on the screen of your Mac. Navigate towards the About this Mac option from the pop-up menu.

- You will now be able to check your Mac’s version along with the macOS it is currently using. You can check your Mac and macOS compatibility based on these details.

- You can also check Apple’s Support page to determine your macOS compatibility. The official Apple site regularly updates its latest macOS availability and versions.
Boot Your Mac Into Recovery Mode
Recovery Mode helps you boot Mac into Disk Utility and eradicate issues from the hard drive. You can boot Mac into recovery mode as a last resort for recurring problems with macOS installation. Ensure that all backup files are updated promptly on Mac Time Machine or an external drive.
Follow the given steps to Boot your Mac in Recovery Mode:
- Make sure that your Mac is completely turned off.
- Press the Power button and hold it down as it restarts.
- You will see a message stating that you can access startup options.

- Keep pressing the Power button down.
- Press on Options.
- Press on Continue to start Recovery Mode.
Check the Internet Connection
Lastly, check your internet connection. A poor connection can prolong the macOS Update process. If your router seems unstable, it’s best to restart it. Similarly, you can also contact your internet service provider.
Related Questions
Will I Lose Data if My Macos Update Is Frozen?
You do not lose data if your macOS update is frozen. Your Mac reverts to its old OS version once you are back to a normal restart. All data will still be intact if you do not boot your Mac on Recovery Mode. You can still revive your data after restarting your Mac in Recovery Mode through Time Machine.
Is There Another Way to Restart My Mac Without the Power Button in Recovery Mode?
You can also restart your Mac in Recovery Mode using the keyboard instead. Press on the Windows + R keys combination if you face some issues with the power button. Proceed to follow the same method as mentioned above.
Can I Reset the Smc in an M1 Chip Mac?
The M1 Chip-powered Mac does not have a system management controller. You can power off your Mac for 30 seconds and restart it again for a similar SMC resetting effect.

