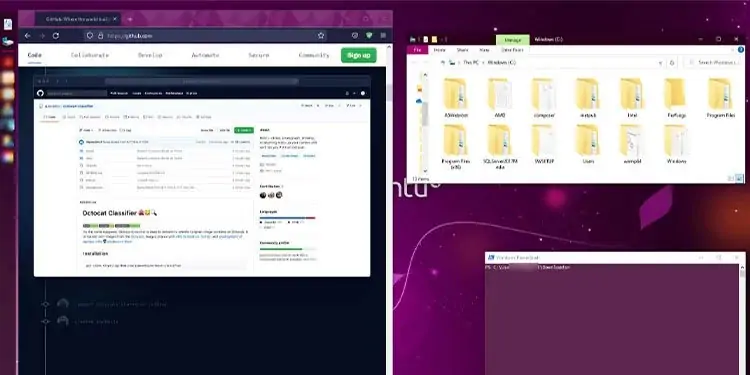
Are you a Windows user who’s decided to switch to Linux? But, maybe your work or your favorite game wants you to use Windows.
Compared to Linux, Windows doesn’t provide a lot of customization options. But that doesn’t mean you can’t tweak it to make them look better.
There are a lot of third-party applications that claim they can change how Windows look. But most of them either aren’t stable or can break your Windows. Read further on how you can make windows look like Linux in the safest possible way.
Make Windows Look Like Linux
Turn Windows Into Linux (Paid Version)
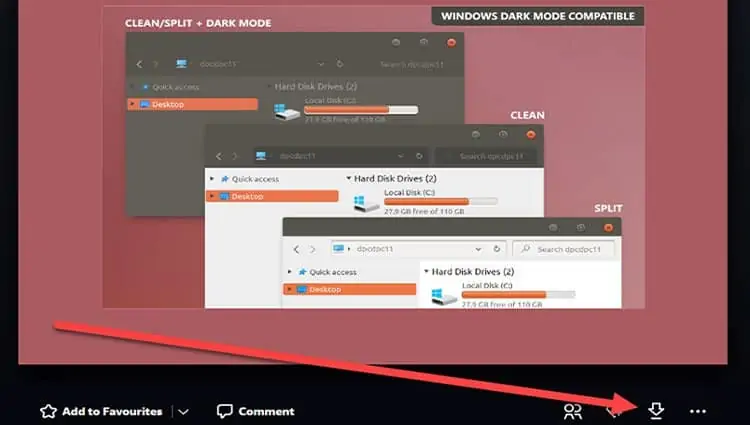
Deviantart has lots of themes designed for all versions of Windows that look a lot like Linux. They have a detailed guide on how to install it.
Turn Linux Into Windows (Free Version)
If you are looking for a free alternative, then it becomes a little complicated. You would have to piece together bits from different places. Also, the internet is full of fake applications on this topic. So you never know if you are going to break your Windows trying to force a modification.
Windows doesn’t provide a lot of flexibility in modifying its default settings. So we would need to make do with what is available for us. For example, you cannot change the system font in Windows. And, the taskbar has no customization whatsoever.
A lot of times, there is no choice but to consider third-party applications. They may not integrate well with the system and not quite what you want. I have compiled online resources into different sections. Each section tackles one aspect of customization.
Customizing to look like Linux is a very broad topic. No two Linux distributions look the same. So we will stick to customizing Windows to look like the default Ubuntu.
Change Mouse Cursor
- Down Ubuntu Cursors.
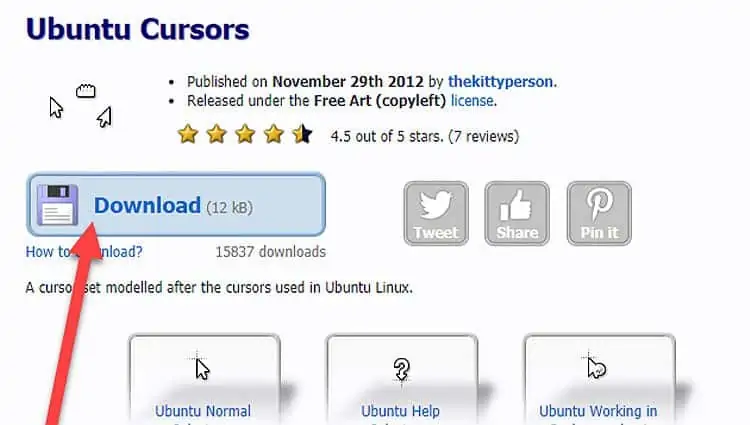
- Once the download completes, go to the Downloads folder.
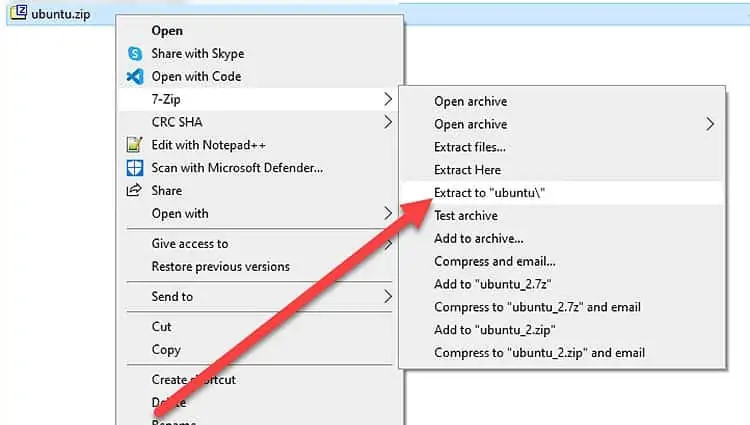
- Click on the downloaded file and select extract all.
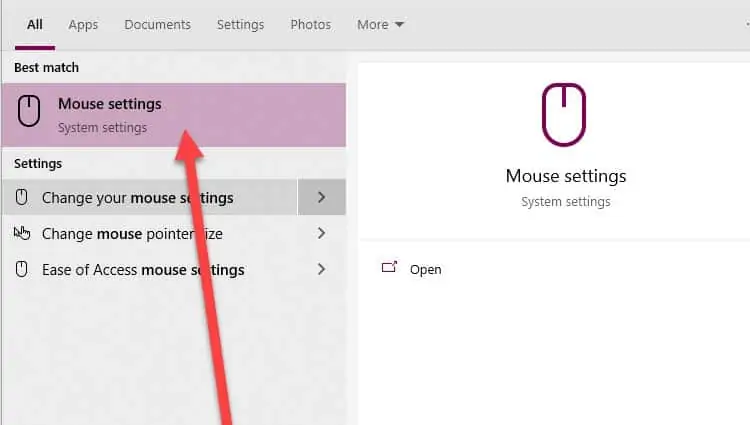
- Click on Start Menu and type Mouse settings to bring up a new window.
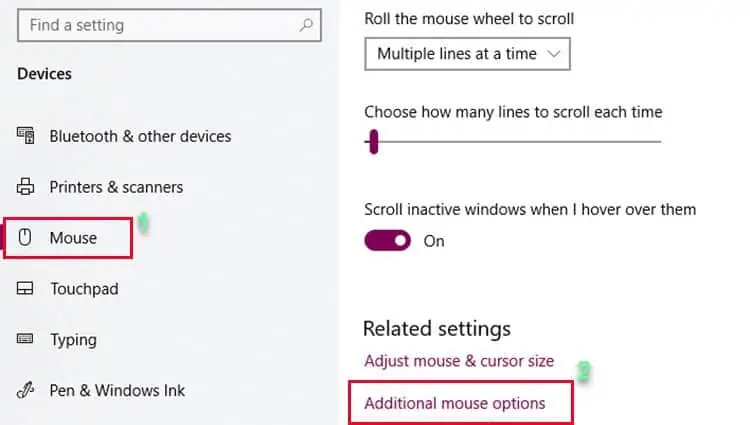
- Under Related settings, select Additional mouse options.
- Go to the Pointers tab.
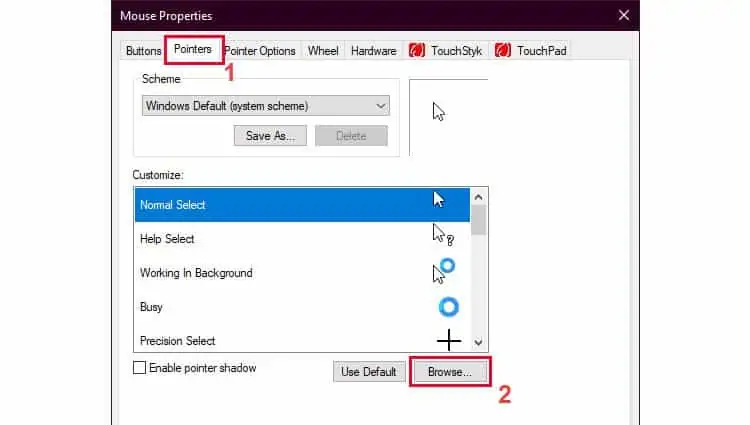
- With Normal Select selected, click on Browse.
- Head to the newly extracted folder from Step 3.
- Select Ubuntu Normal cursor file and click Open.
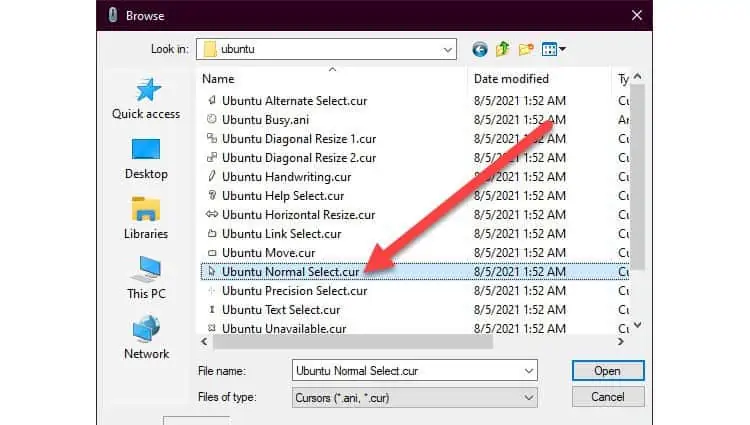
- Select Apply. The mouse cursor should now change.
- Repeat Steps 7-9 for all cursor types.
- Select OK.
Change Accent Color
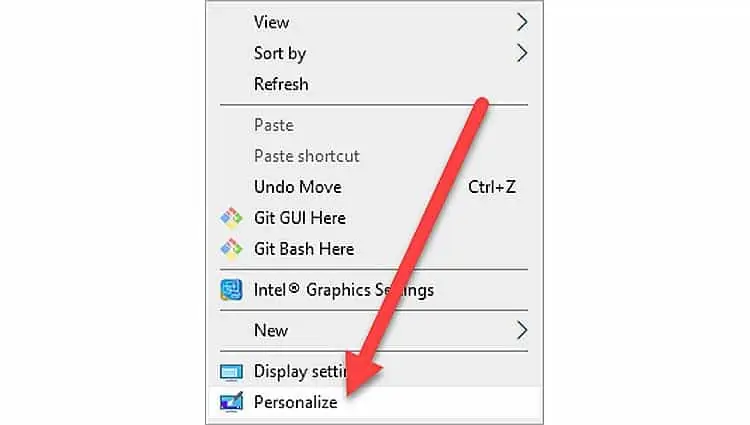
- Right-click on Desktop and select Personalize.
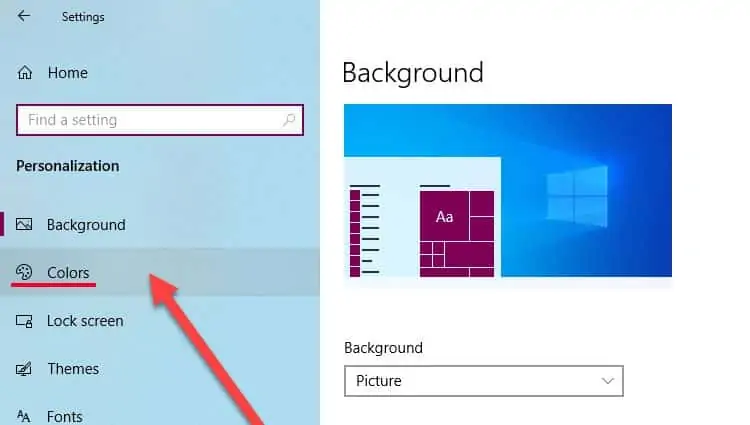
- Click on Colors.
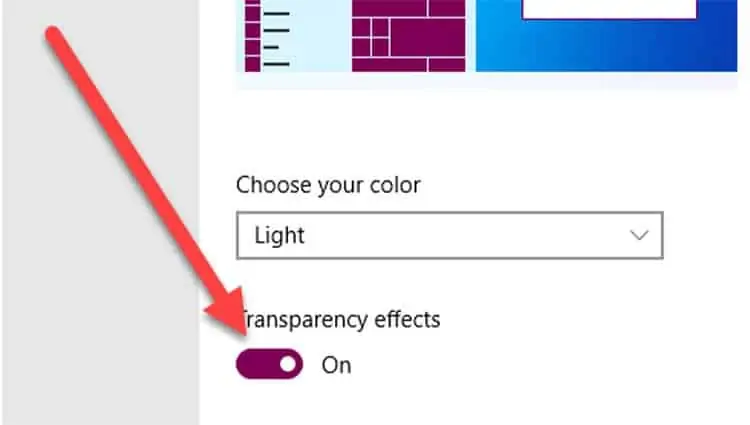
- Enable Transparency effects if not already enabled.
- Scroll down to colors and select Custom color.
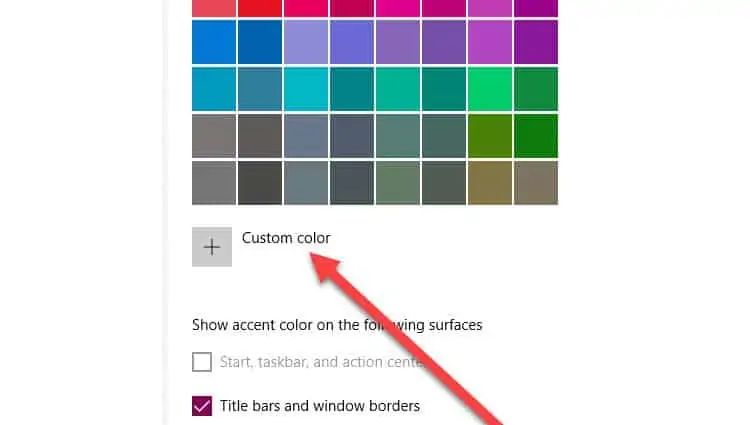
- Select More.
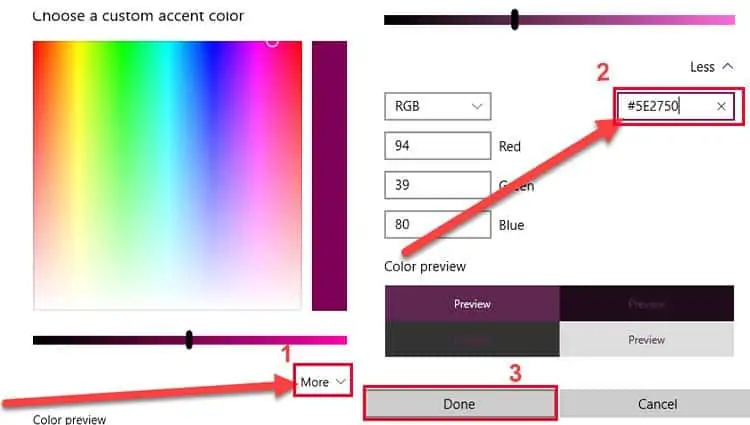
- Enter #5E2750 as the hex color code and select Done. This is the code for dominant color used in Ubuntu according to their official website.
Hide Desktop Icons
- Right-click on Desktop and Go to View.
- Under Expanded View, click on Show Desktop Icons to uncheck it.
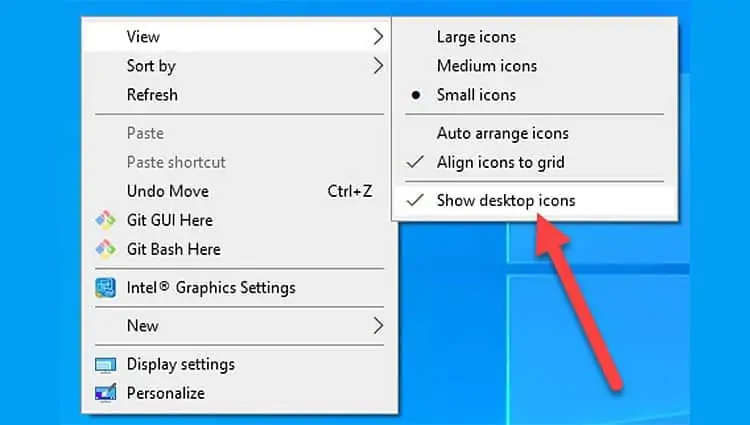
- The desktop icons should disappear. To get them back, repeat steps 1 and 2. You can also hide recycle bin only.
Hide the Taskbar
- Go and grab Taskbar Hider application. Windows 10 doesn’t have a built-in way of hiding the taskbar permanently so we’ll install this instead. Select 32 bit or 64 as needed.
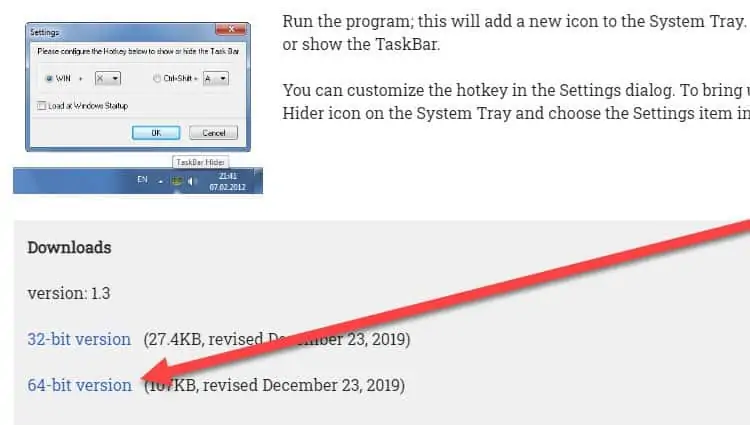
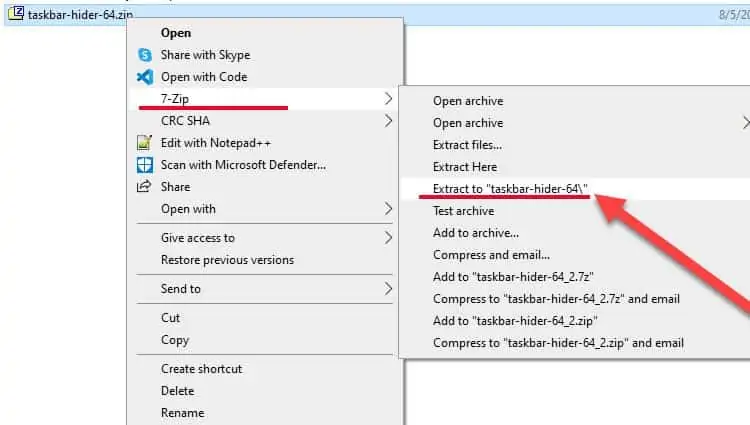
- Once downloaded, extract the application to the Downloads folder.
- Open Powershell or Command Prompt (Press Windows Key + X).
- Go to this location by typing
cd Downloads - Type
TaskBarHider.exe -hide -exit. This will hide the taskbar.
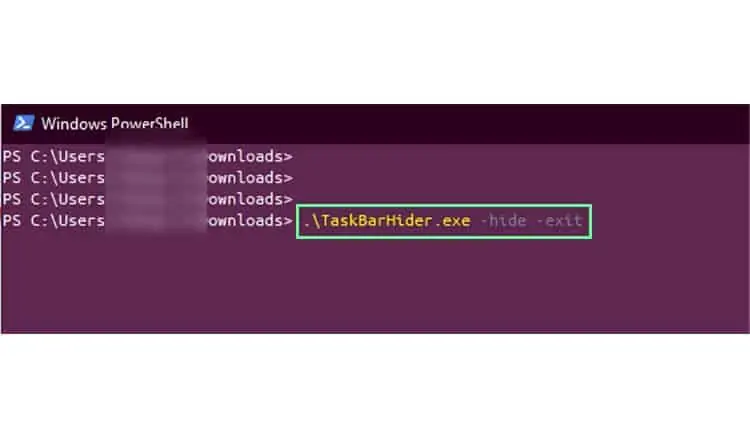
- If you need to get it back, type
TaskBarHider.exe -show -exit.
Change Powershell Font
- Download Ubuntu fonts.
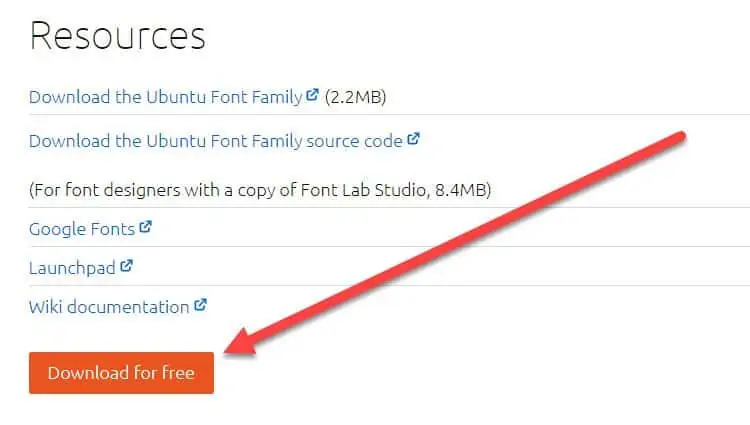
- Extract to Downloads folder.
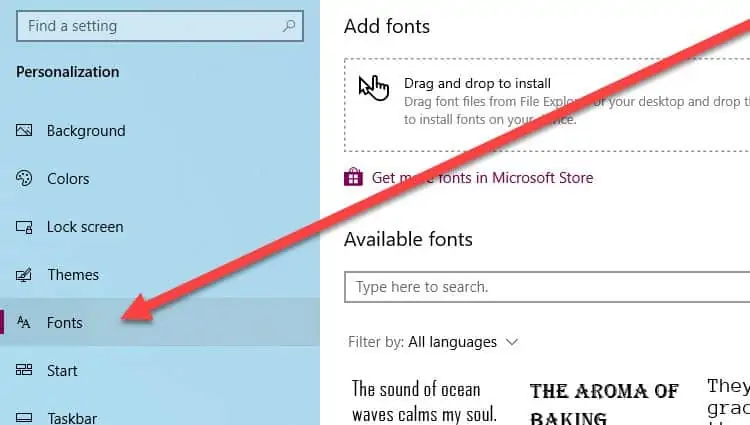
- Right-click on Desktop and select Personalize.
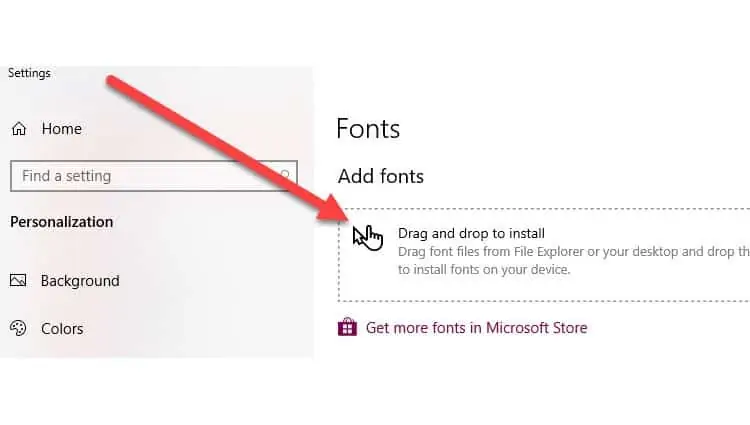
- Select Fonts from the left navigation pane.
- Open the folder you extracted from Step 2.
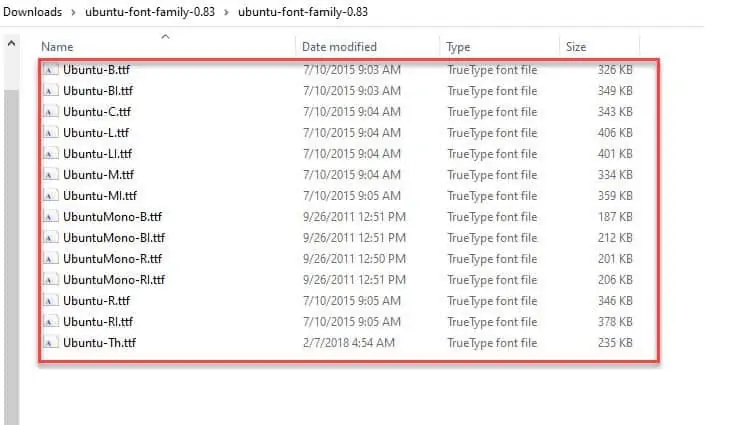
- Select all fonts and Drag and Drop them to the Fonts window. Wait until they finish installing.
- Open Powershell.
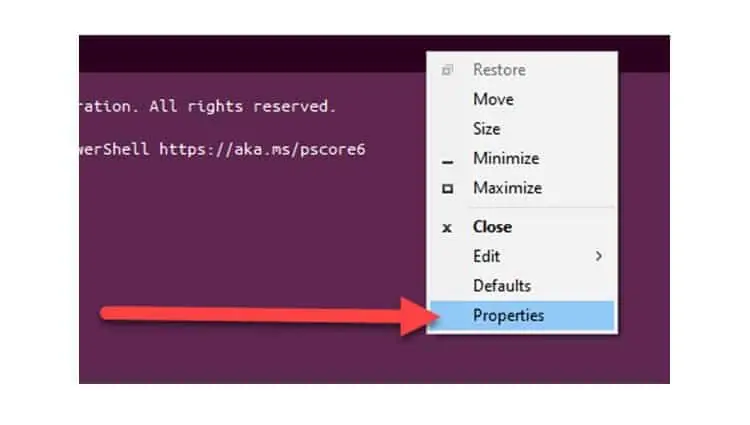
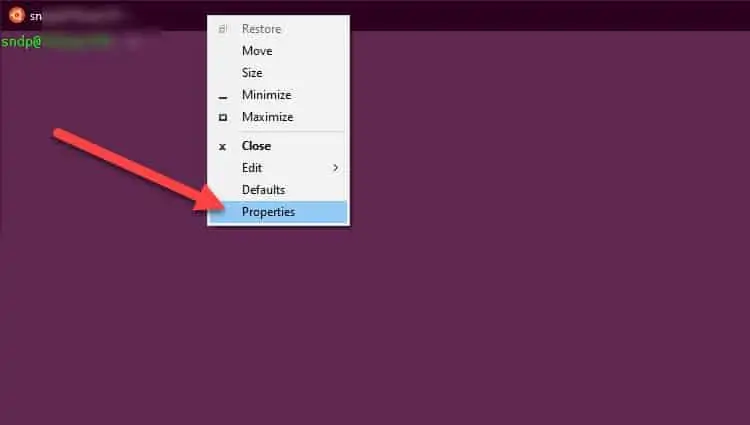
- Do a Right-click on the window bar and select Properties.
- Select Font tab.
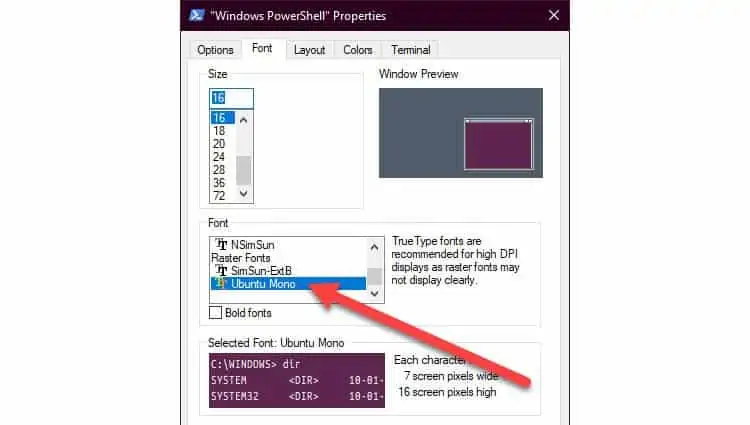
- Scroll and select Ubuntu Mono from the font list.
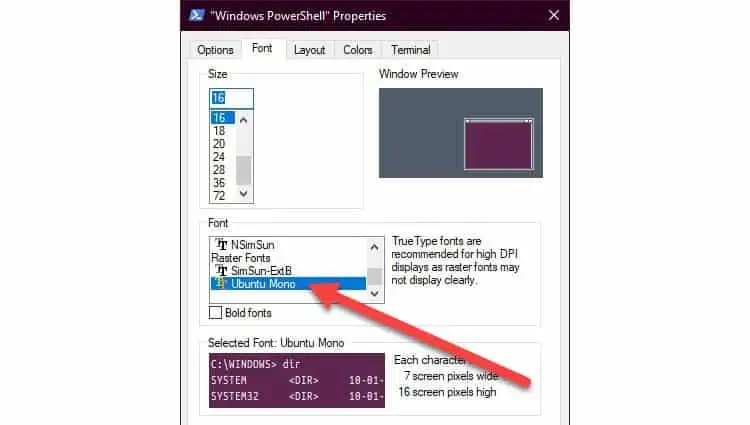
- Increase Size if needed.
- Click on OK.
Change Powershell Colors
- Open Powershell.
- Do a Right-click on the window bar and select Properties.
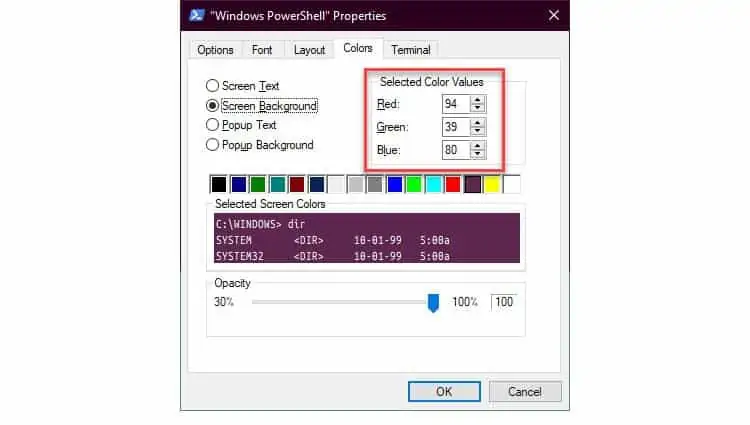
- Select Colors.
- Select Screen Text and click on the White palette.
- Select Screen Background.
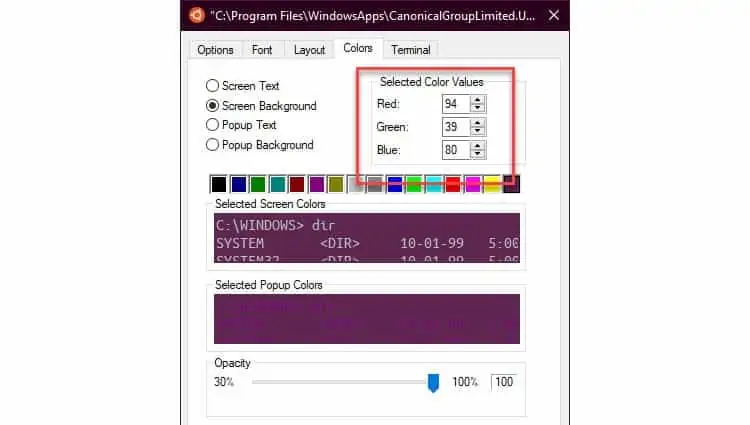
- Under the Red, Green and Blue values, enter 94, 39, and 80 respectively. This gives you the official color palette of Ubuntu.
- Click on OK.
Install Launcher
- Download Linkbar.
- Once complete, extract to the Downloads folder.
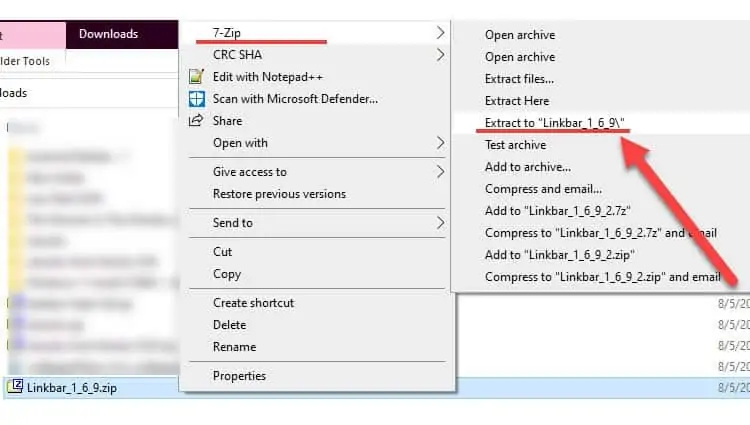
- Open the extracted folder and open LinkBar64.exe or LinkBar.exe(32bit).
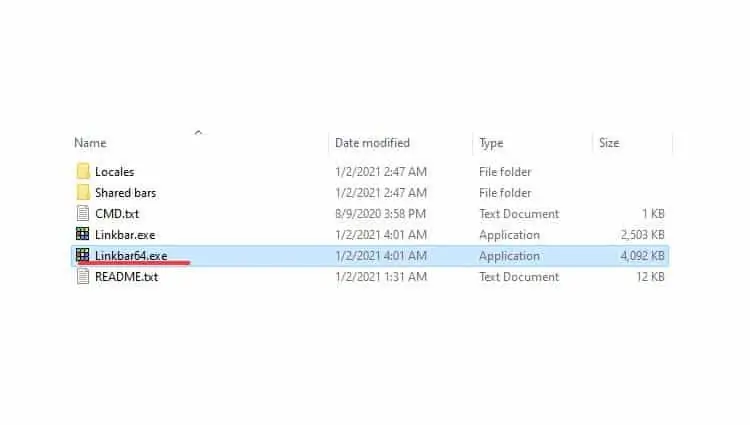
- Linkbar now appears on the left side of the screen. Right-click on it and select Settings.
- Make sure the Style is set to Accent to match the Windows color scheme.
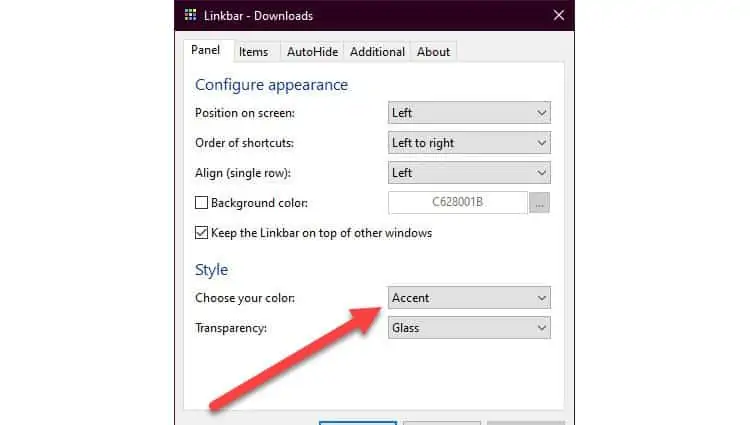
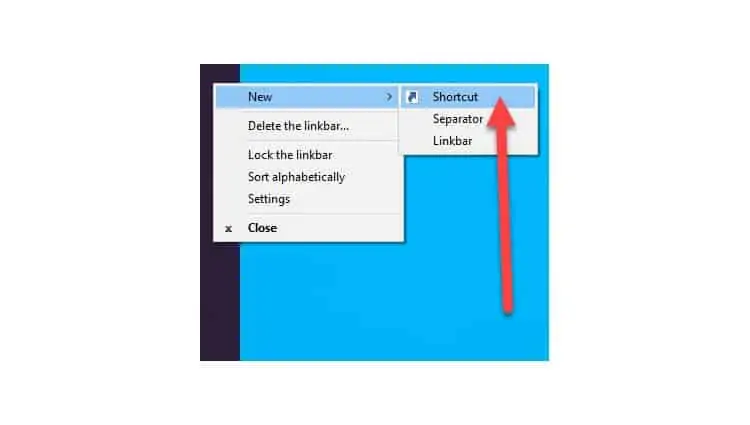
- To add a launcher, right-click on Linkbar again and select Shortcut from New.
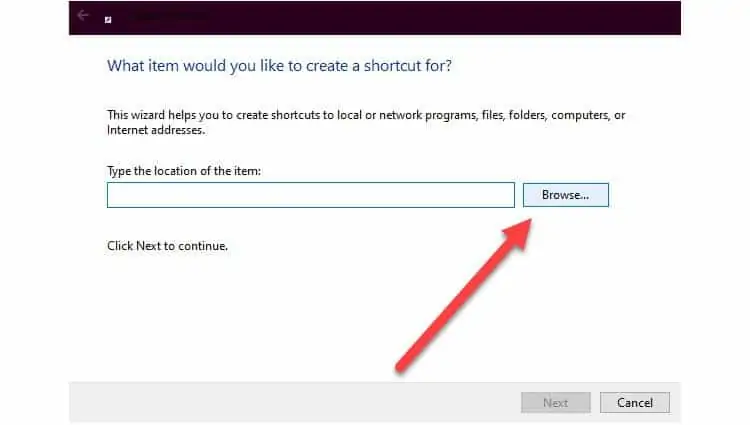
- Click on Browse.
- Open a Folder location or browse to the application you want.
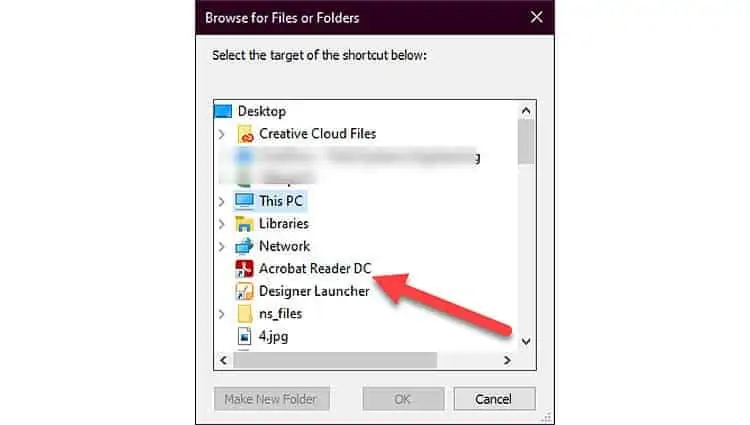
- Select OK.
- Click Next.
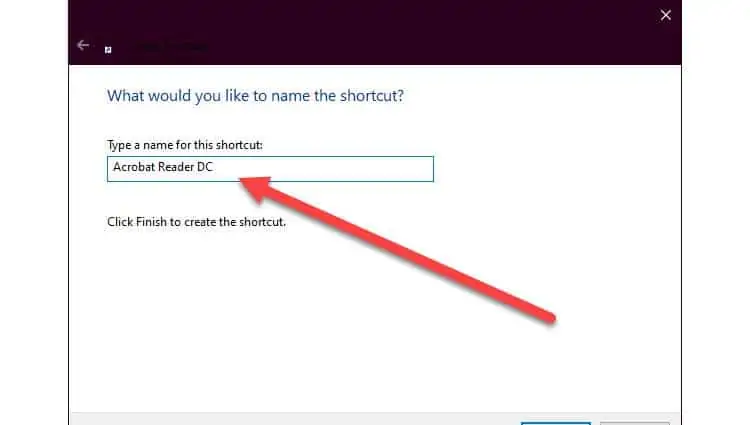
- Type name of new launcher and select Finish.
Download Wallpaper
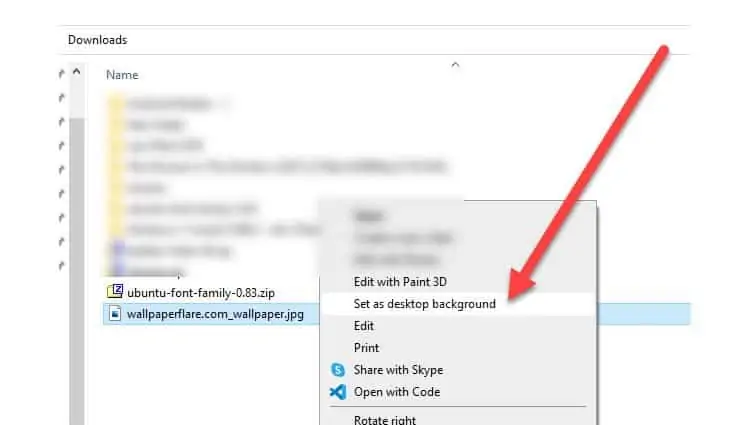
- Get a Ubuntu wallpaper.
- Go to the Downloads folder and do a right-click on it.
- Select Set As Desktop Background. Dark wallpapers might work well too.
Install WSL
- Open Powershell in Administrator Mode.
- Type
wsl --install. This can take some time to complete. - Go to the Windows App Store.
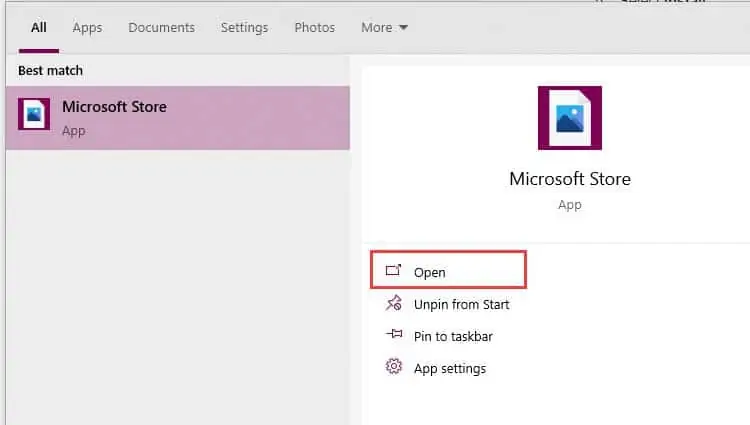
- Search for Ubuntu and open it.
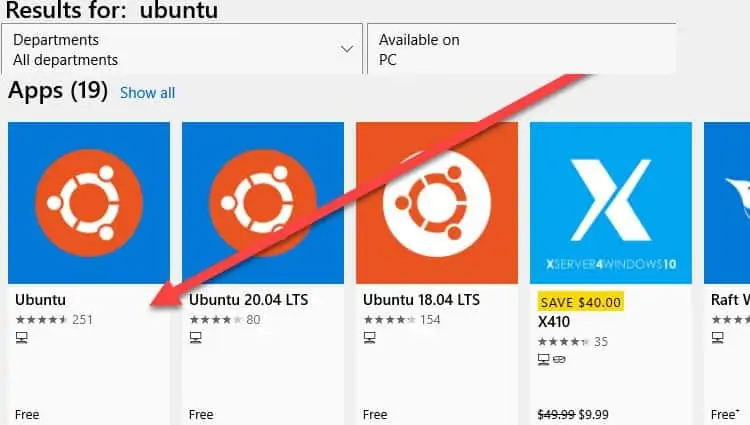
- Select Install.
- Once completed, you can launch Ubuntu from the Start Menu.
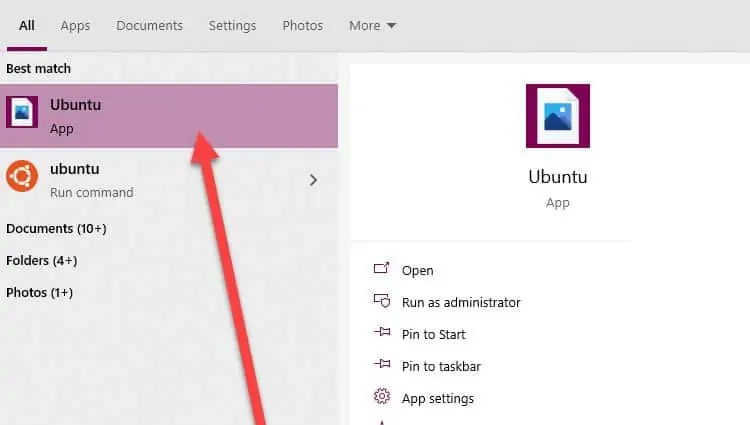
- A terminal window pops up that can be used to enter commands on Windows as if it was an Ubuntu machine.
WSL is one of the ambitious projects by Microsoft. WSL shows its commitment to empowering Linux. Microsoft plans to contribute more to WSL to make it powerful in the future. This means that Windows is going to feel more like Linux in new versions.
Change WSL Terminal Colors and Fonts
- Do a Right-click on the window bar of WSL and select Properties.
- Select Colors.
- Select Screen Text and click on the White palette.
- Select Screen Background.
- Under the Red Green and Blue values, enter 94, 39, and 80 respectively.
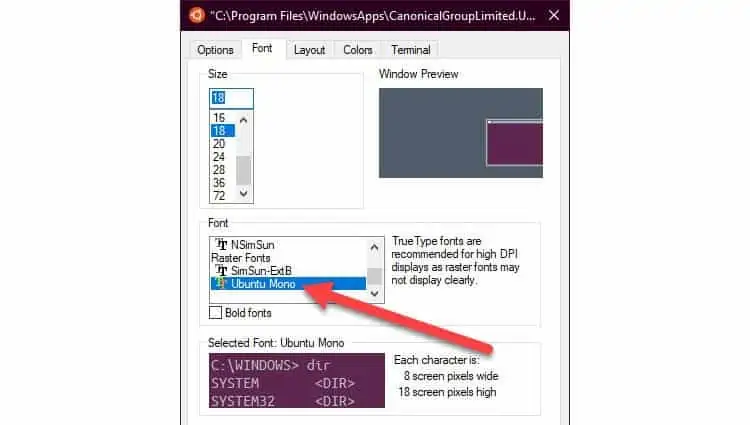
- Select Fonts.
- Select Ubuntu Mono.
- Click OK.
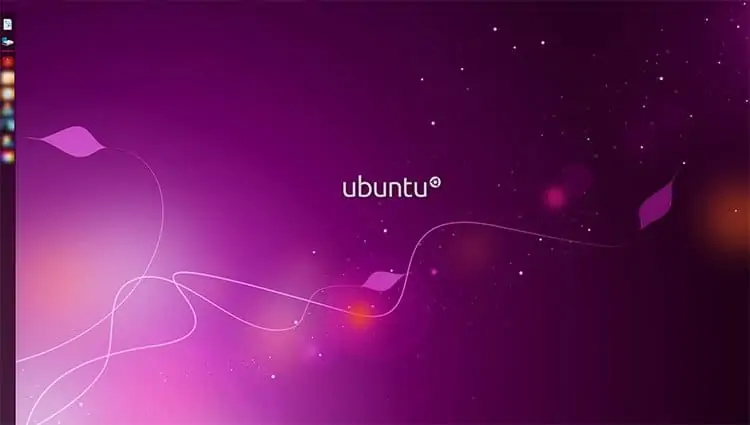
And there you go. The end result would be something like the following screenshots.
Frequently Asked Questions
Can I Make Linux Look Like Windows?
Unlike Windows, Linux comes with a lot of customization options. You can choose from a wide variety of themes, color combinations, and desktop apps. You can even find out-of-the-box solutions to Linux systems that look like Windows. A few ready-to-go solutions are available below.
LinuxFx
This is a Ubuntu-based Linux targeted at users who are making a switch from Windows. The interface looks as close to Windows as possible. You can choose to either run it as a virtual machine or a USB bootable drive. Or, you can also choose to install it on your PC.
ZorinOS
Zorin OS is designed for both Windows and macOS users who want to switch to Linux. The interface is very simple and intuitive. It also includes many applications by default.
UkUI
UkUI can be installed on default Ubuntu to give it easier customization options. You can choose from a ton of icons, fonts, and interface options to make Ubuntu look like Windows 10.

