You can map a network drive in Windows 11 using the Map Network Drive wizard or via the command line. As usual, the GUI method will be easier to follow for most users, but the command line method is more efficient if you know the necessary steps.
Using Map Network Drive Utility
The Map Network Drive utility in the file explorer has barely changed since Windows 7, and the way to use it remains mostly the same. Here are the steps to use this utility:
- Press Win + E and select This PC from the left pane.
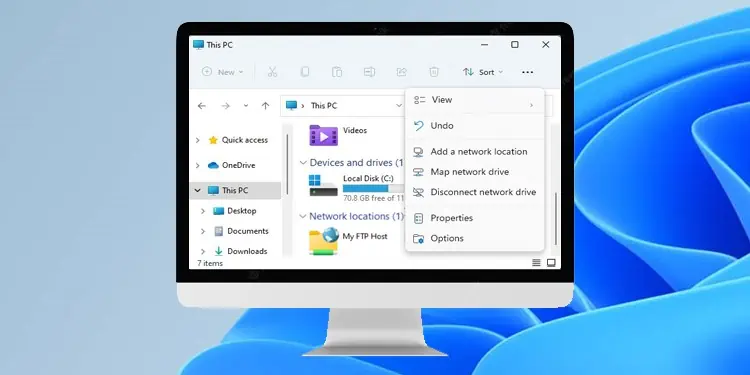
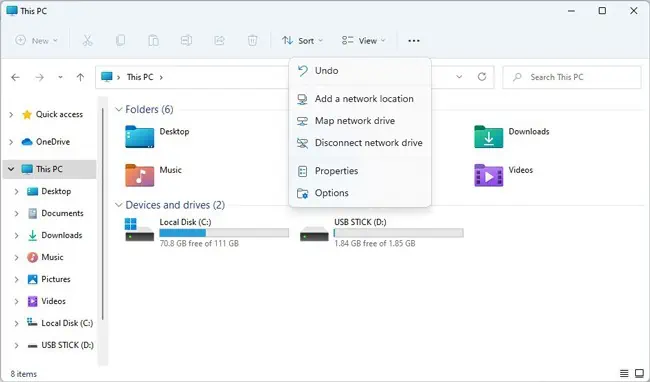
- Click on the triple-dot icon and select Map Network Drive.

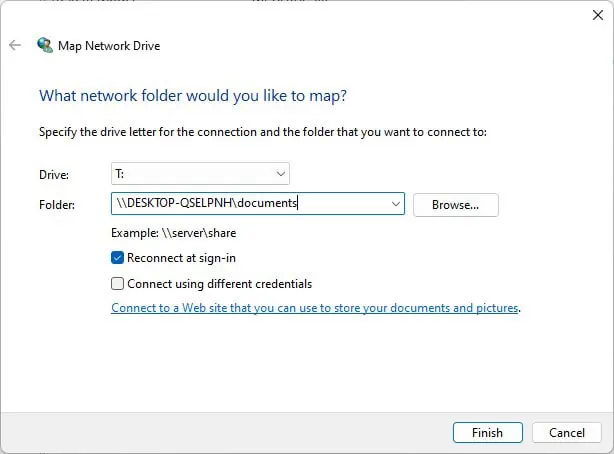
- Select a drive letter that’s not in use.
- In the Folder box, enter the name of the computer and the folder you’re trying to access. If you don’t remember the exact values, you can use the Browse option as well.

- Optional: You can enable the Reconnect at sign-in option to automatically connect every time you sign in. You can also enable the Connect using different credentials option to use network credentials not associated with your current account.
- Once you’re done, press Finish.
Using Command Prompt
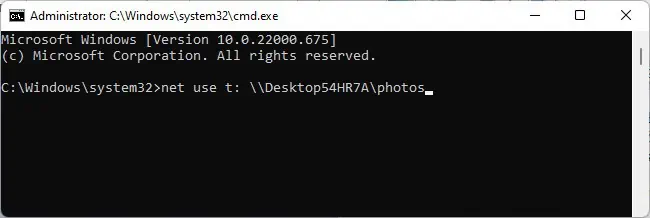
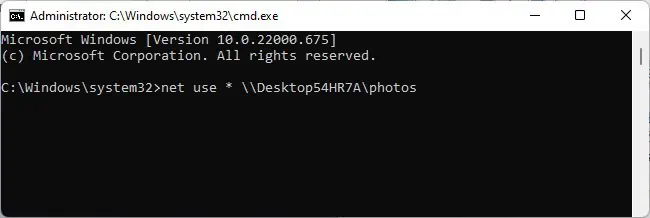
You can use the net use command to map a network drive via the command line. We’ve given examples of some common use cases in this article, but we recommend referring to the net use documentation for the complete list of parameters. With that said, here are the necessary steps:
- Press Win + R, type
cmd, and press CTRL + Shift + Enter. - Type the following command:
net use <DeviceName> "\\Computer Name\Share Name" - Replace Device, Computer, and Share names with the appropriate values and execute the command.

- You can use an asterisk to automatically assign an available device name as such:
net use * "\\Computer Name\Share Name"
- You can use the
/useroption to establish a connection with a different username.
- You can also use the
/persistentoption to keep a network drive mapped after rebooting.
Troubleshooting Network Drive Mapping Issues
If you’re having issues mapping a network drive in Windows 11, we recommend first restarting your PC and making sure that the remote computer is powered ON. Additionally, you should also follow the troubleshooting steps listed below on both PCs:
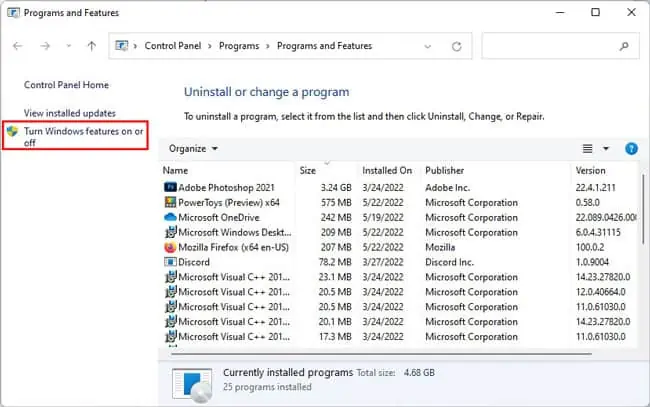
- Press Win + R, type
appwiz.cpl, and press Enter. - Click on Turn Windows features on or off.

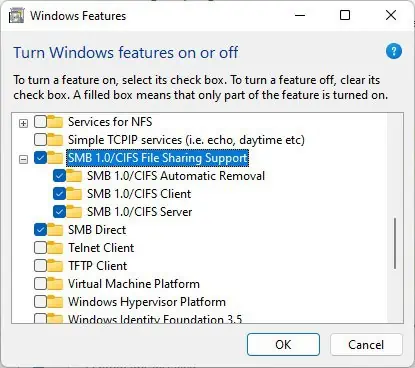
- Enable the SMB 1.0/CIFS File Sharing Support checkbox and press OK.

- After the changes are applied, press the Restart now button.
- If that didn’t help, launch the Control Panel once more.
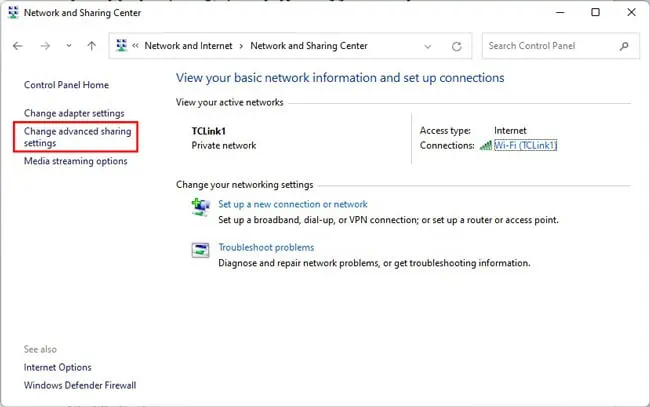
- Navigate to Network and Internet > Network and Sharing Center > Change advanced sharing settings.

- Turn on Network Discovery and File Sharing, turn off Password protected sharing, and save the changes.

- If you’re still unable to connect, we recommend contacting your network admin.
How to Unmap a Network Drive in Windows 11?
You can unmap a network drive in Windows 11 via the File Explorer or via CMD. You can choose your preferred method as both are very simple to perform.
Via File Explorer
Here are the steps to disconnect a mapped network drive via the File Explorer:
- Press Win + E and select This PC from the left pane.
- Click on the Triple-dot icon and select Disconnect network drive.

- Select the drive you want to unmap and press OK.
- Alternatively, you can also simply right-click the network drive in Explorer and select Disconnect network drive.
Via Command Prompt
You can use the /delete option with the net use command to disconnect from a mapped network drive. If you want to unmap all the network drives at once, you can use an asterisk (*)instead of a specific device name.

How to Map a Network Drive in Windows 11 for All Users?
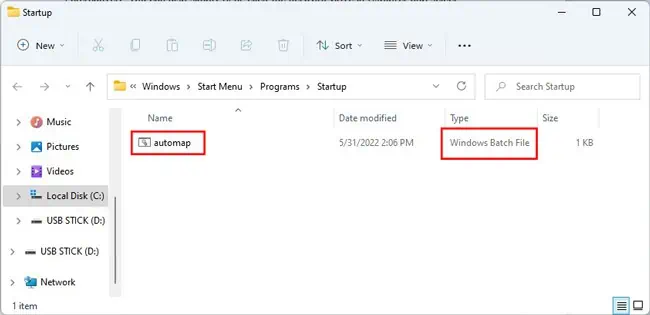
Using the net use command, you can create a simple script that maps a network drive automatically at startup for all users. Here are the steps to do so:
- Open Notepad and paste the following code into it:
net use * "\\computername\sharename" /p:yes - Replace computername and sharename with the appropriate values and save the file as
Automap.bat. - Copy the
Automap.batfile. - Press Win + R, type
shell:common startup, and press Enter. - Paste the BAT file from Step 3 into the Startup folder and restart your PC.


