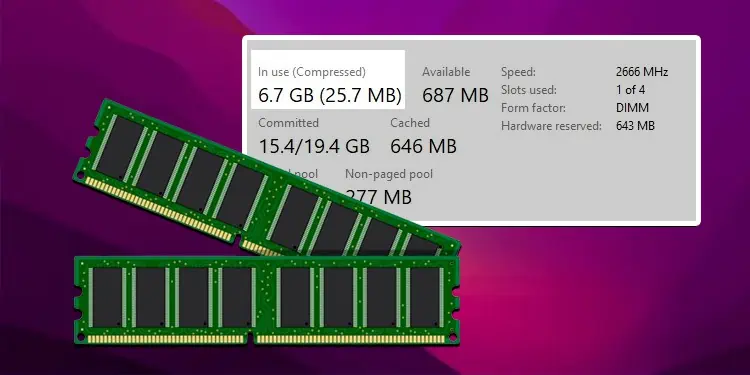
Memory Management is one of the major functions of an Operating system that controls and maintains the memory allocation for each system process. With the introduction of Windows 10 version 1507, Microsoft added Memory compression as the latest addition to its existing Windows Memory Management process.
This memory management technique works by reducing memory usage by compressing some information stored in RAM. Although this feature comes enabled by default in Windows 10 and 11 systems, users have the option to disable it anytime.
If you are curious about this feature and wondering whether you should leave it enabled or turn it off, this article can help you decide on that.
What is Memory Compression?
Before we dive into what Memory compression really is, we must have a bit idea about “Paging”. This is a memory management process that uses the secondary memory or the storage drives to reduce the RAM’s workload. When the system detects that the RAM memory is running low, it transfers some sections of system processes, known as Pages, to the hard disk.
These pages are located in the system volume of Windows (C: drive on most computers) as a file named pagefile.sys. This file contains information on the processes that are rarely used by the system. The system only retrieves that information from the file when needed. The paging process in this manner saves memory space.
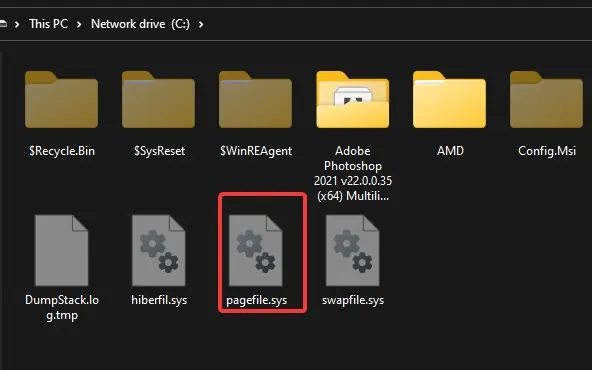
The drawback of paging is that the continuous read-and-write process in the hard drive takes time and causes system slowdowns.
Memory Compression addresses this drawback of paging by compressing the infrequently used pages rather than writing them on the disk. This decreases the frequency of reads and writes over the disk and also significantly improves the response time.
Memory compression offers more space for the system processes to be kept in the RAM and allows more tasks to run simultaneously.
How Does Memory Compression Work in Windows?
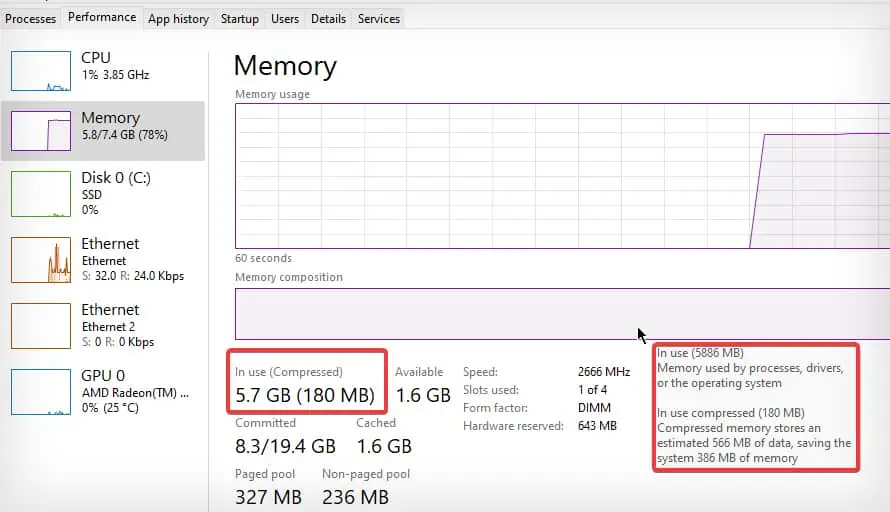
Microsoft introduced memory compression from Windows 10 version 1507. From Version 1607, memory compression is no longer displayed as a “system and compressed memory” process in Windows and is located under Memory details on the Performance tab.
The general concept behind memory compression is to compress the memory pages that are not currently being used by any system processes or application in order to free up the main memory that can be used by other processes.
This reduces the need for the system to swap memory pages between physical memory and pagefile on disk, which can be a slow and resource-intensive process.
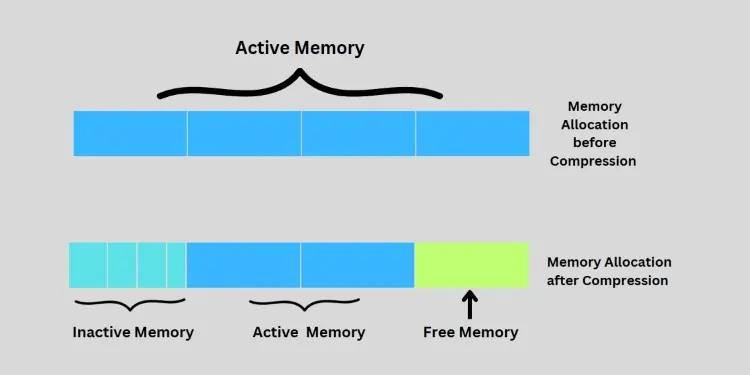
Since accessing the memory is faster than accessing the drives, memory compression can contribute to memory space without significantly reducing the performance. When a page requires to be swapped, it can be first compressed and stored in the memory.
When needed again, the same page is decompressed and returned back. This overall process is way faster than swapping pages to the drives, although a bit slower than accessing the real memory as decompression is required.
When compared with the previous version of Windows that did not feature memory compression, Windows 10 and later versions write to the disk only 50% of the time.
Windows also performs a large number of data compressions in parallel to reading data by making use of the CPU cores. This can increase CPU usage by a certain amount, which can be checked in the task manager.
Should You Enable or Disable Memory Compression?
Memory Compressions can provide significant performance benefits such as lower access time and reduced memory usage. This can be a great deal for those systems with a limited amount of physical memory. However, it can also exhibit additional system overhead as the compression and decompression of memory pages sometimes require a high amount of CPU resources.
Although most experts do not recommend disabling the Memory compression on Windows, it all depends on the system resources and the user’s preference. If you are running an older system with limited Physical memory available, Memory compression can give you additional room for running more applications and processes, but it may depend upon the CPU you have.
A newer generation CPU is likely to handle the compression/decompression process efficiently. However, if you are experiencing high CPU resources being consumed by this Memory management process, you may choose to disable it.
If your Windows device already has enough RAM, but the memory compression is triggering some performance issues on the device, you may choose to disable it in that case as well. On some systems, you may see no difference in performance whatsoever, whether the feature is enabled or disabled.
How to Enable or Disable Memory Compression on Windows?
As discussed earlier, Windows 10 & 11 have the Windows compression turned on by default. However, there are options for the users to enable or disable it at any time. Here’s how to do it.
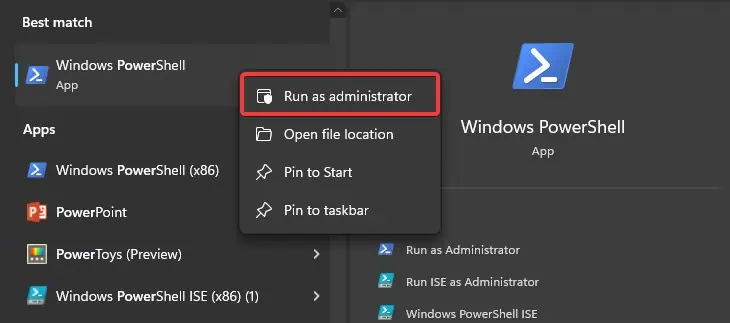
- Open
PowerShellwith administrative privileges.
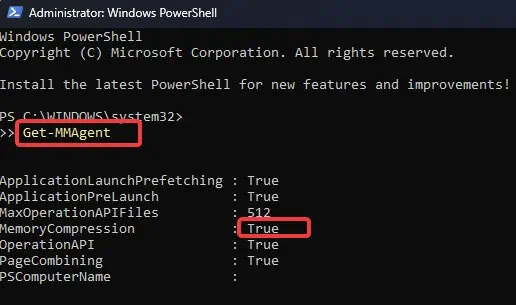
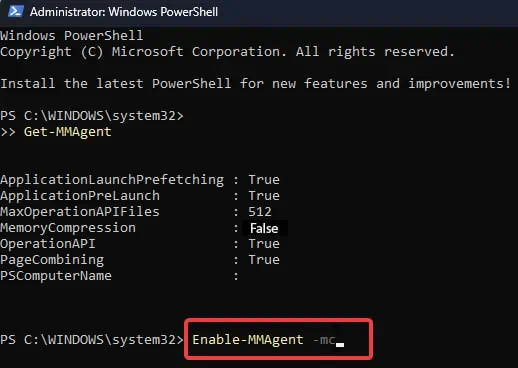
- To check the status of the Memory Compression on your device execute this command.
Get-MMAgent
- Check the MemoryCompression field. If the value is “True”, the feature is already enabled.
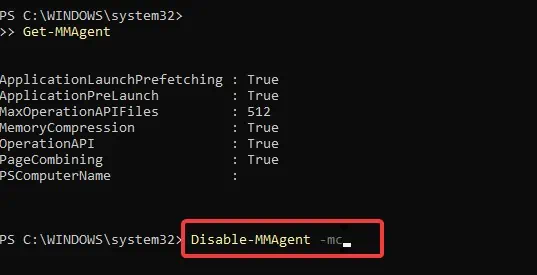
- To disable it, use the following command.
Disable-MMAgent -mc
- To enable Memory compression, execute this command.
Enable-MMAgent -mc

