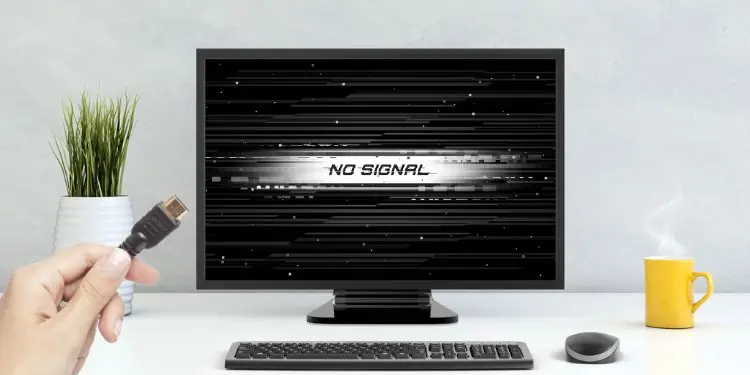
Most of us use HDMI cables instead of VGA and DVI as they support higher refresh rates and resolutions. Although these are ideal for connecting primary or secondary monitors, one of these displays may sometimes not detect the HDMI signal.
This can be due to poor HDMI connection or cable breakage. Furthermore, there can also be driver and graphics card-related issues.
Well, you might see a black screen or a message saying ‘No Signal!’ despite connecting your monitor to an HDMI cable. But you do not need to worry. In this article, we will explain why you’re experiencing this issue and its possible fixes.
Why is My Monitor Not Detecting HDMI?
If the monitor light is on, but you’re still unable to see anything on the screen, it’s because the display isn’t getting the signal. Or, even if it is receiving the signal, you might have configured the wrong settings.
- Loose connection
- The HDMI cable is broken
- A defective RAM
- You’ve chosen the wrong display mode
- Use of wrong HDMI port
- Use of wrong projection option
- Outdated graphics card or driver
- Major hardware issues with your monitor
How to Fix Monitor Not Detecting HDMI
HDMI cables carry both video and audio signals using up to 8 audio channels ensuring high-quality sound and pictures. So, it’s pretty obvious that most of us rely on HDMI to connect our monitor or extend the display.
However, slight errors might prevent a monitor from detecting the HDMI signal. In such a case, you can try the fixes mentioned below.
Check HDMI Cable & Make the Connection Tight
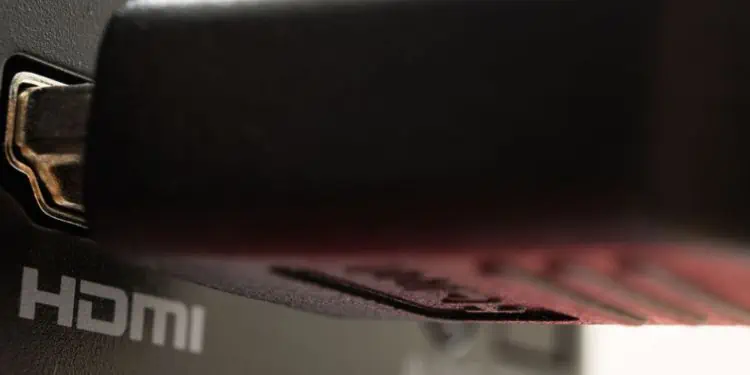
Sometimes, we make silly mistakes by not securing the cable connection. So, the first method is to check whether your HDMI is correctly plugged into the HDMI port of your CPU and monitor.
If making the connection tight doesn’t resolve your problem, check if any part of the HDMI cable is worn out. In that case, you’ll have to replace the cable or use electrical tape to temporarily fix the fraying part. Then, connect your HDMI cable again and see if this works.
Furthermore, if you’re running dual monitors with a single HDMI port, check its connection too.
Try Switching HDMI Cable & Port
Indeed, it’s impossible to determine the prime reason why our monitor isn’t displaying the content. So, it’s important to check what’s causing the issue – your HDMI cable, port, or the monitor itself.
To do so, first, unplug the cable from your monitor’s HDMI port and place it on to another port. If this resolves your problem, there’s an issue with the previous port. So, mark and ensure not to use it the next time.
Also, if you have an extra HDMI cable, try using this to find out if there’s a problem with the previous adapter. Moreover, you can also connect your PC to a TV to see if there are any underlying issues within the monitor itself.
Use the Correct Display Input
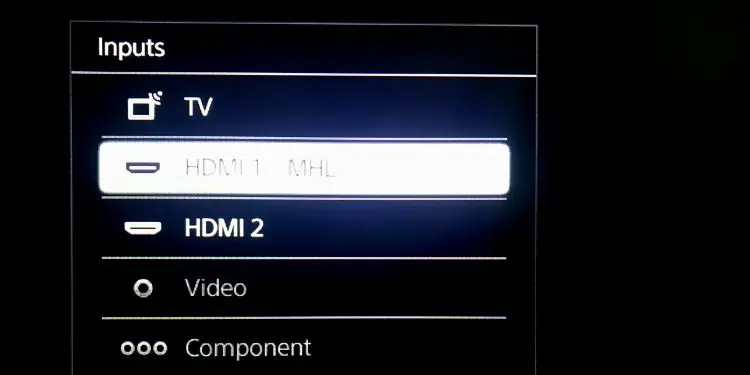
In some monitors, there are multiple HDMI ports. So, for each port, a dedicated input can be accessed from the menu button.
Thus, if you connect the HDMI cable to one port and check the input of another port, it’s obvious that your monitor displays a black screen. Here’s how you can avoid this:
- Firstly, check the port where you have connected the cable.
- Then, press the menu button that switches the display input.
- A small menu opens up where you can select the source. Choose the right input source.

Physically Remove and Reinstall Your RAM
Basically, if your RAM stick is not properly inserted in its slot, your PC won’t display anything on the screen. Thus, even if your connection is tight and the cable, port, or monitor has no issue, your RAM might stop your display from detecting HDMI.
Furthermore, dust and dirt may hinder the connection, and your RAM might not be detected. Hence, it’s important to clean the slot and the RAM stick.
Moreover, using corrupted RAM can affect your display. In fact, if your CPU can’t access it, you may hear a continuous beeping sound.
So, if you had recently set up your desktop and didn’t install the RAM stick properly or if it has been corrupted, here’s how you can remove and reinstall it:
- First of all, carefully remove the CPU cover plate.
- Now, navigate towards your motherboard and locate your RAM.
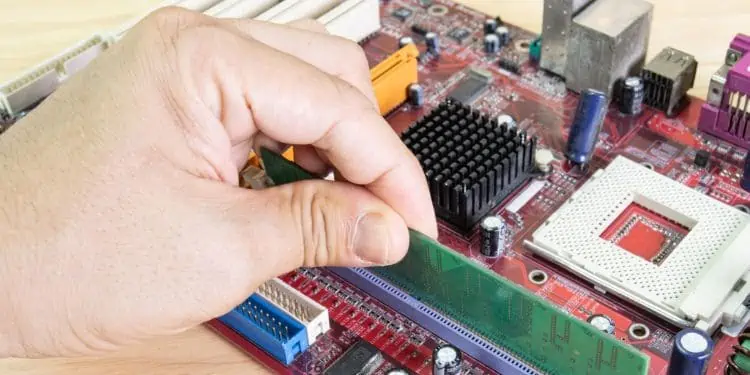
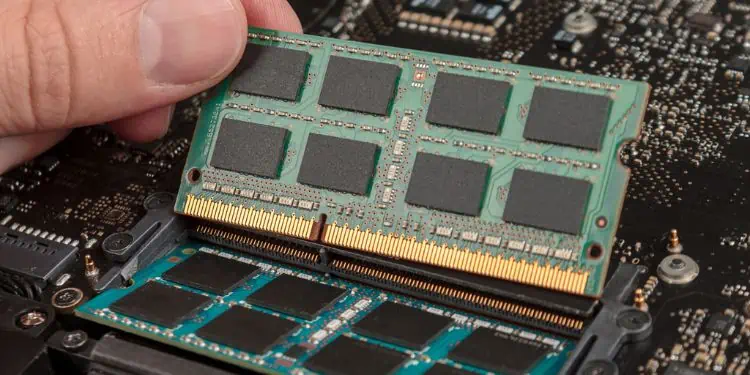
- Next, press down the clip from the top of the RAM slot. You’ll likely hear a click sound indicating that it is now detached from its slot.

- Then, apply a little pressure and pull it upwards.
- Once you’ve removed the RAM stick, clean dust from the ports and the stick. This ensures no debris is stuck, making the connection poor.
- Now, place the memory stick back to its slot, ensuring that the RAM notch aligns well with the motherboard. You should hear a click sound, and the clip also gets attached back, securing the stick.

- Finally, place the CPU cover plate back and check if your monitor now detects HDMI.
Use the HDMI Port on Your Dedicated Graphics Card
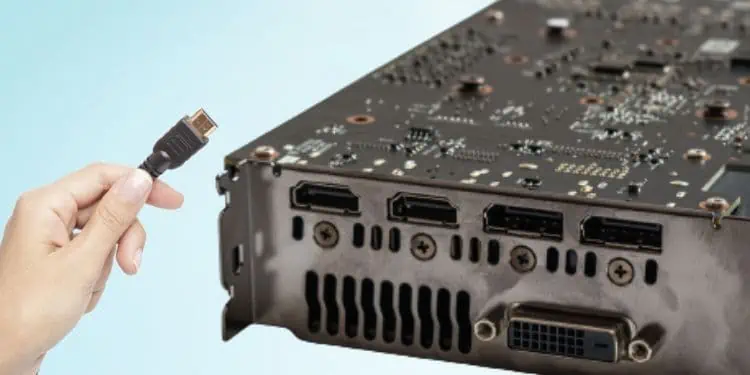
Unlike integrated graphics, dedicated graphics cards come with a separate slot consisting of all the necessary ports. So, if you’ve been plugging the HDMI cable into the motherboard’s port, you need to switch it to the GPU’s port.
In some computers with dedicated graphics, you must insert all your cables, including HDMI, into its dedicated port. This is because the dedicated GPU will override the integrated GPU and the ports in the motherboard become useless.
However, this is not the case on every PC. In some, the ports on your dedicated GPU and motherboard are both supported. So, we highly recommend reading the user manual to check this for yourself.
Use the Right Projection Option
If you’re using a dual monitor setup and one of them isn’t detecting HDMI, it’s probably because you haven’t selected the right projection option.
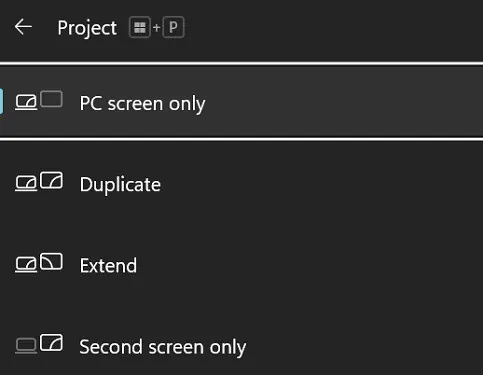
Generally, Windows provides users with four different projection options – PC Screen Only, Duplicate, Extend, and Second Screen Only. So, if you have selected the first choice, your secondary monitor will go black. Thus, you’ll need to tweak this setting using the following steps:
- Press Windows + P keys on your primary monitor to launch the Project screen.
- Then, choose either Duplicate or Extend as per your choice.

This is because selecting Second Screen Only will turn off the primary monitor, which you’re probably trying to avoid. - Now, wait until the screen is either duplicated or extended.
Force Detect the Display
If your secondary monitor isn’t being deleted, use the primary one to force detect it. This way, even the older displays get connected to the PC. Here’s how to do this on Windows 11:
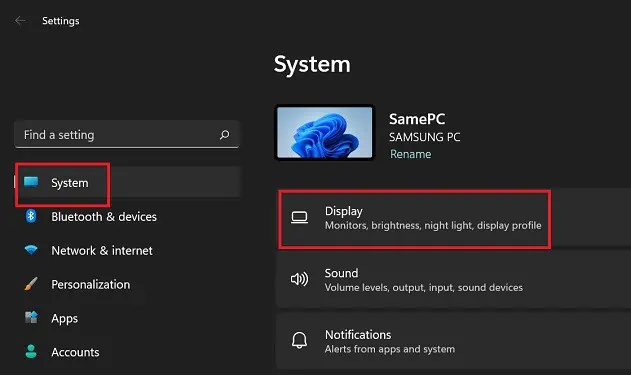
- Navigate to the Start Menu and go to Settings.
- Then, from the System panel, choose Display.
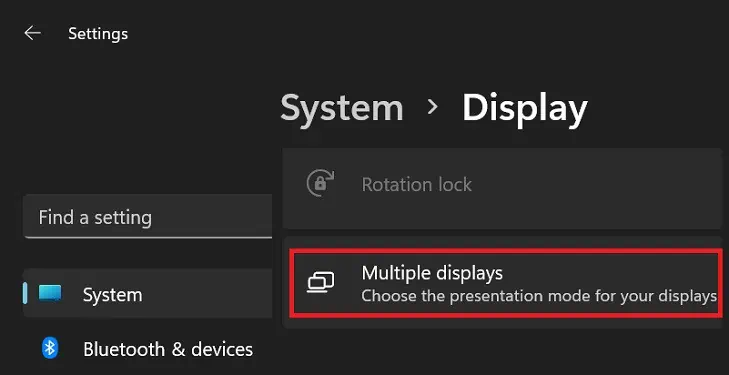
- From Scale & Layout, pick Multiple Displays.

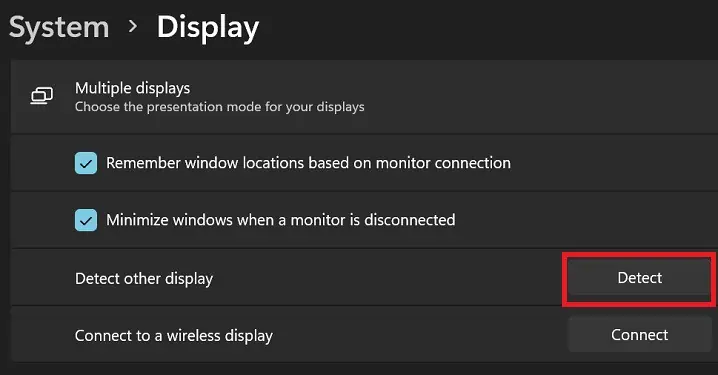
- Once the drop-down expands, click on the Detect button beside Detect other display.

- Now, if there’s a display connected, you’ll get a similar message. However, you may get a message saying, “We didn’t find another display.” This means that your display hasn’t been connected.
Make sure you connect the secondary monitor and click on the button again. This time, your PC should detect the external display.
Try Changing Refresh Rate
The secondary display will likely go black if you’ve overclocked your monitor’s refresh rate. Generally, the display shouldn’t lose the HDMI signal for too long.
But if you have overclocked excessively, a voltage problem may arise, and you may not get back to the window. In such a case, we recommend changing the refresh rate back to what it supports. Follow the below guideline to achieve this:
- Firstly, check your monitor manual to know the maximum refresh rate supported by the monitor.
- Next, press Windows + I on your primary monitor to launch Settings.
- Go to System and choose Display.

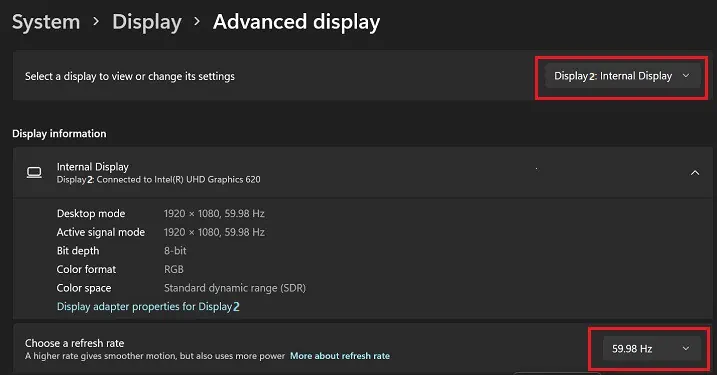
- From Related Settings, navigate to Advanced Display.
- Expand the Select a display to view or change its settings drop-down, and select your secondary display.
- Then, under Display information, find Choose a refresh rate and expand its drop-down. Select the maximum refresh rate it supports.

- Finally, click on Keep Changes, which should bring your display back to life. If not, restart your PC, and that should do the trick.
Update Your Display Adapter
If none of the above options helped to make your secondary monitor work again, you need to update your display adapter from the primary monitor. This should fix any issues related to the graphics card driver. Follow the below steps to complete this update on Windows 11:
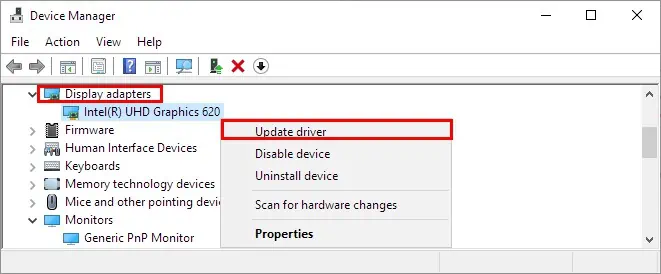
- Press Windows + X and choose Device Manager from the list to open it.
- Now, expand the Display Adapters, and you will find your graphics card adapter.
- Right-click on it and choose Update driver.

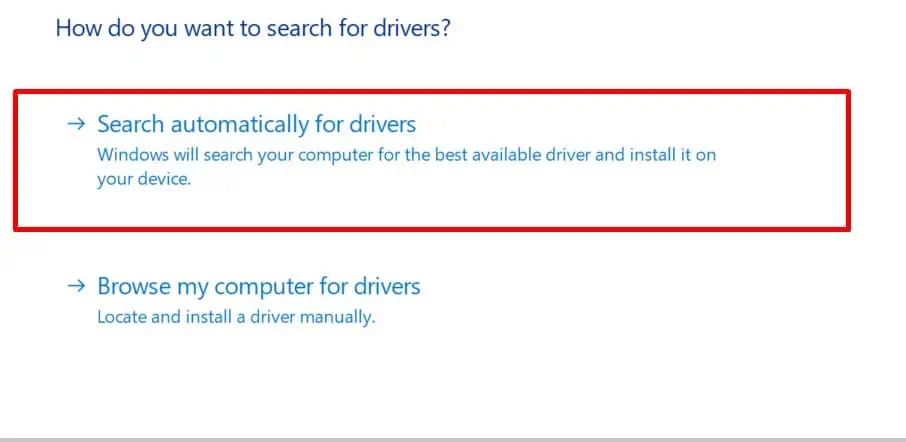
- Next, select either Search automatically for drivers or Browse my computer for drivers.

- The first choice will update your driver automatically. But if you choose the latter one, click the Browse button and find the driver on your PC.
- Choose Next and wait for the installation to complete.
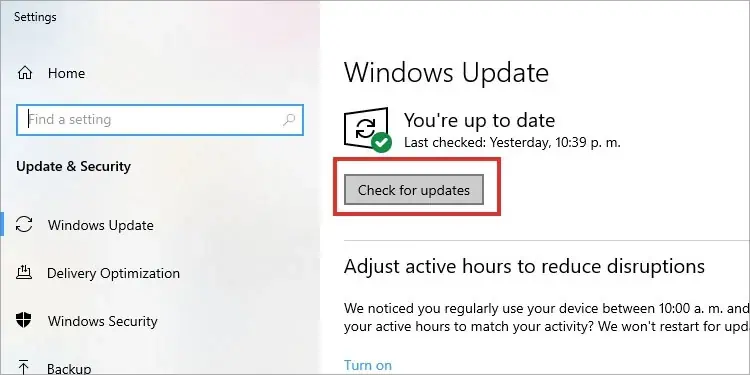
- If the best driver was already installed, pick Search for updated drivers on Windows update.
- Once the Windows Update settings pop up, press the Check for updates button.

- Now, wait until the installation is complete.
- Finally, restart your PC and reinsert the HDMI cable on your secondary monitor. Then, check if the problem is now solved.
Rollback the Display Driver
If your secondary monitor worked fine just before you updated your display adapter, you could roll back to the previous version to fix the issue. Basically, rolling back NVIDIA, INTEL, or AMD drivers can be done easily on Windows 11. Go through the below guide to learn how to do this:
- Navigate to Device Manager > Display adapters.
- Right-click on your graphics adapter and choose Properties.
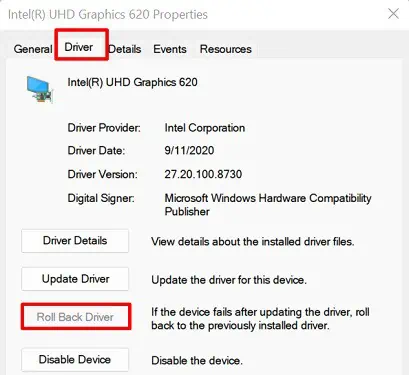
- Next, navigate to the Driver tab and select Roll Back Driver.

- Finally, restart your PC and check if the secondary monitor is now detecting HDMI.
Reinstall Your Display Driver
Well, the final option is to reinstall the display driver. To do so, you’ll have to delete it first and restart your computer that installs a new driver with default settings. Here’s what you need to do on the primary monitor:
- Open Device Manager and go to Display adapters.
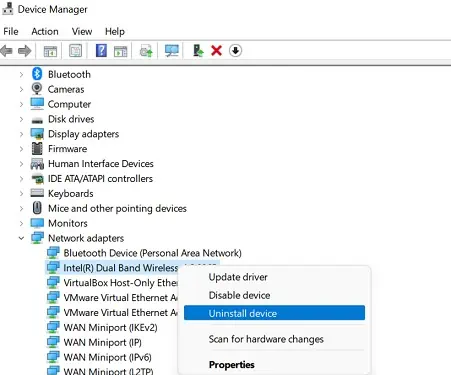
- Right-click on the correct driver and select Uninstall device.

- Then, check the Attempt to remove the driver for this device.
- Finally, choose Uninstall and restart your computer.
- Now, connect your secondary monitor again. This time, the display should detect the HDMI signal.

