If your mouse is moving on its own, you should address the problem right away. Some of the issues causing the motion can get even worse with time if left unattended.
How Mouse Movement Works
Most modern mice use a light or laser that touches the surface below. The light bounces back up, and a sensor interprets its movement.
If your mouse is moving on its own, that light might be triggered by something, like damage or a mouse that’s too dirty to perform appropriately. However, the computer might also have a setting that’s incorrect and causing the input to appear to move on its own.
Why the Mouse is Moving On Its Own
There are a few reasons that the mouse might be moving on its own.
- Dirt or debris on or in the mouse can affect how it works.
- The surface you’re using it on can create an issue.
- Problems with mouse settings on the computer can prevent the mouse from working correctly.
- The mouse may need to be replaced.
Figuring out which problem is causing your issues is primarily a matter of trial and error. I always start troubleshooting by cleaning components when it can be done quickly. That way, even if it doesn’t work, I can do something useful that benefits my setup.
How to Fix Mouse is Moving On Its Own
When your mouse is moving on its own, fix a few potential problems and check all your settings. You’re likely to resolve the issue in this way.
Mouse maintenance
Do a few things before you start troubleshooting.
- Restart the computer, especially if the problem has just occurred for the first time. Sometimes a restart makes everything better with minimal effort.
- Unplug your mouse, remove your batteries, remove any USB connections between the mouse and computer. Wait five minutes, insert fresh batteries, and plug everything back in.
- Plug the mouse directly into the computer instead of using a hub to see if it resolves the issue.
- Try a different USB port to see whether it fixes the mouse.
If none of these fixes work, you can try some more complex fixes.
Clean the Mouse
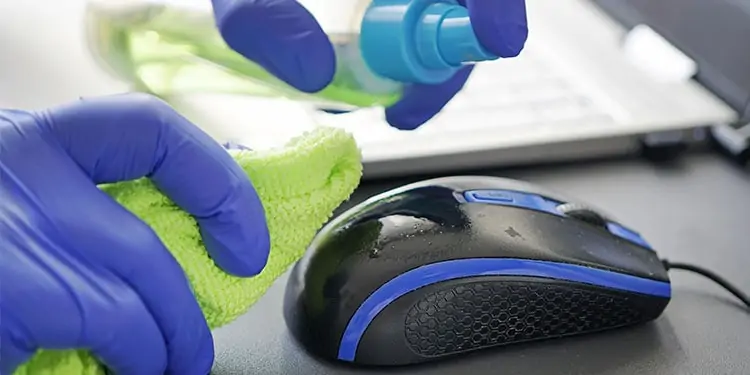
The way you take your mouse apart will vary depending on what type you have. Some mice have removable sides or bases. They can feature different grips or button setups that you can remove and clean separately.
Check your manual if you aren’t sure which parts of your mouse can be removed.
- Take your mouse apart. Don’t try to remove any screws or non-removable parts at this stage. Just remove any parts that are meant to be removed, unplug the mouse, and take out any batteries. If it has an on/off switch, turn the mouse off.
- Take an electronics cleaning brush and run it over the exposed surfaces of the mouse, focusing on the bottom. Sometimes the bottom has dirt on it that prevents a smooth transition over your mouse pad. Make sure to scrub off any build-up that you see.
- Dampen a cotton swab with 99 percent pure isopropyl alcohol. Run it between the buttons on the mouse. Focus on the indentions between buttons. Slide it around any raised or uneven surfaces on the bottom of the mouse.
- Dampen a cloth with 99 percent pure isopropyl alcohol. Ensure you wring it out once it’s wet so that it isn’t dripping. You don’t want any of the liquid to get into the inner parts of the mouse.
- Run the cloth over the surfaces you scrubbed.
- Repeat these steps on any mouse parts you removed before you started cleaning.
- Wait four hours for the mouse to dry. You can wait less time if you were careful not to let liquid drip into the mouse, but it’s better to take your time and be sure it’s dry rather than damage your mouse.
- Reassemble the mouse.
It might seem intuitive to start using it right away. However, you should also clean or replace your mousepad while the mouse is drying.
Cleaning Your Mousepad
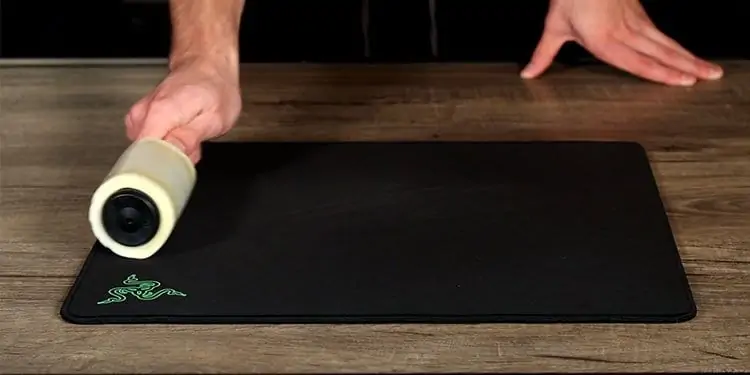
Before cleaning your mousepad, decide whether it’s worth the effort. Cloth mousepads especially get snagged and uneven over time. This can affect how well your mouse performs and might be contributing to the mouse moving on its own.
If you have a hard mousepad, check whether the surface is smooth and even. If it is, wash it down with a cloth dampened with isopropyl alcohol. Let it dry before you use the mouse on it again.
Also, you should make sure nothing is under the mousepad. You want a flat, even surface for the best possible performance.
Change Your Sensitivity
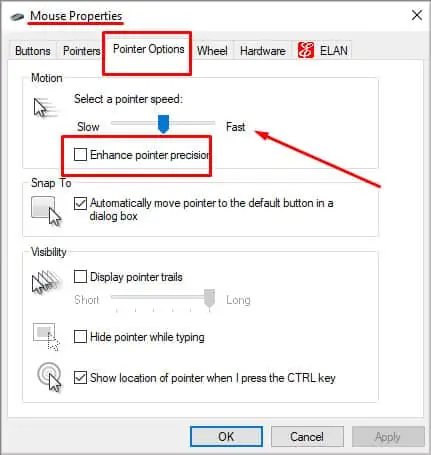
Sometimes the sensitivity is much higher than it should be, and even a light push can make the mouse move wildly – so that it appears to be moving on its own. Check your settings to make sure everything is set up right so that the mouse works.
- Press the Windows key.
- Type Mouse and choose Mouse Settings from the list of apps.
- Click Additional Mouse Options.
- Click the Pointer Options tab.
- Reduce the pointer speed. Uncheck Enhance Pointer Precision.

- Click Apply.
- Click OK.
Try your mouse out for a little while and see whether or not it seems to be working. You can adjust your settings to make them comfortable for you and continue trying the mouse out until you’re on the proper settings.
If you’re having trouble with the speed of your mouse, you can also adjust the DPI on Windows or in third-party programs.
Troubleshoot Your Hardware
There isn’t a mouse troubleshooter available, but you can still use the hardware troubleshooter to find, diagnose, and fix problems. An unknown error could be the cause of your mouse moving on its own.
- Press Windows Key + X.
- Choose Windows Power Shell (Admin).
- Click Yes.
- Type “msdt.exe -id DeviceDiagnostic” without quotes.

- Press Enter.
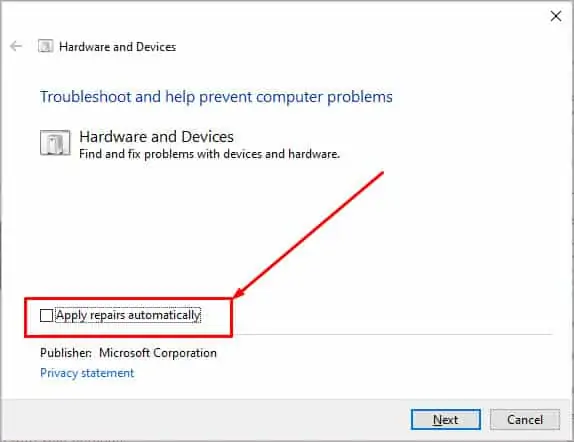
- Click Advanced.
- Uncheck Apply Repairs Automatically, if desired.

- Click Next.
- Wait while Windows searches for problems with your settings.
- Choose a solution to apply, if desired. You may find other minor problems with your system that you also want to fix.
- Click Next.
- Continue following the prompts to fix the issues. Be sure to read each step to know what fix it’s applying in case it’s not something you want.
Sometimes a fix won’t even appear to be mouse-related. For example, you could have a driver or a USB port problem. Trying to fix these might fix the issues with your mouse without directly saying that it’s a mouse issue.
Update or Uninstall Drivers
If your drivers are out-of-date or incorrect, your mouse might experience issues with movement. Try to update your drivers first in case that solves the problem. If that doesn’t work, remove the driver and see whether a freshly installed driver makes it work correctly.
- Press Windows key + X.
- Choose Device Manager.
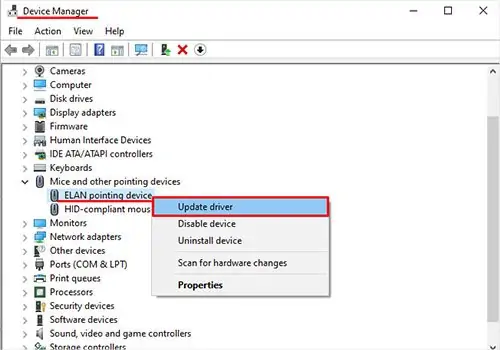
- Expand the Mice and Other Pointing Devices category.
- Right-click on the listing for your mouse.
- Click Update Driver.

- Choose Search Automatically for Drivers.
- Follow the prompts to install your drivers.
If that doesn’t work, delete your mouse driver and let Windows reinstall it. It should detect that new hardware was plugged in and find the correct drivers.
- Right-click on the listing for your mouse in Device Manager.
- Click Uninstall Device.

- Remove the mouse from your computer.
- Restart the machine.
- Plug the mouse in.
- Wait for Windows to detect your mouse and install the necessary drivers.
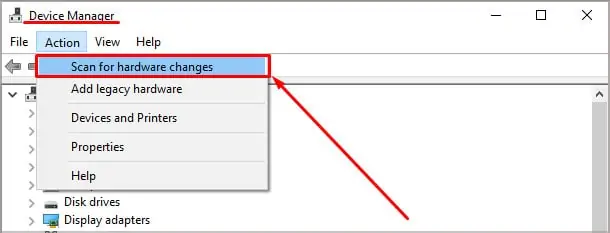
- If Windows doesn’t install the drivers, click the Action button in Device Manager.
- Choose Scan for Hardware Changes.

- Let Windows find the correct drivers for your mouse.
You can also find the drivers from your mouse’s manufacturer. Save them on your computer. Install them by doing the same process to update the driver but choose to browse your computer for drivers.
Remove Conflicting Devices
If you power down your computer, remove all the peripheral devices that aren’t necessary, and then try to use your mouse. Put the other devices back in one at a time after seeing that the mouse works. You might be able to pinpoint which is creating the issue.
Consider removing:
- Game controllers
- Joysticks
- Other mice
- External hard drives
Any extra device attached to your computer can cause conflicts. Removing them will help reduce the chances of this.
Disable the Touchpad
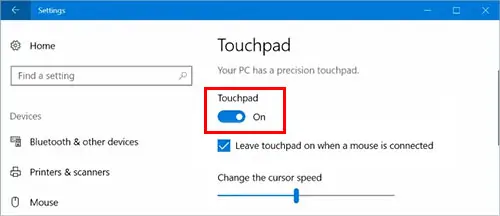
If you’re using a laptop with an external mouse with issues, try disabling the touchpad. Sometimes touching that part of the laptop will move whatever the mouse is controlling and make it seem the mouse is moving when it isn’t.
Run a Virus Scan
If nothing else has worked, scan your computer for viruses to see whether malware is the root of your problem.
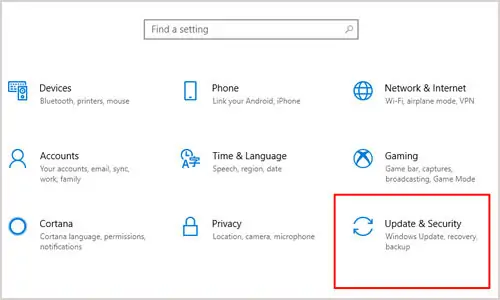
- Click the Windows key and choose the Settings gear.
- Click Update & Security.

- Choose Windows Security in the left side panel.
- Click open Windows Security.
- Click Virus & Threat Protection.
- Click Quick Scan.

- Follow the prompts to complete the scan.
Even if the virus scan finds nothing, you might want to have your computer checked by a professional. It’s essential to be sure that your operating system is stable and that the computer isn’t being targeted by some kind of scam, like someone accessing it remotely.
Remember, if you suspect anyone is accessing your computer remotely and using the mouse movement to keep it from falling asleep, address it immediately. You need to back up your data, wipe your hard drive, and install a fresh copy of your operating system.
Finally, one of the simplest ways to see whether your mouse or computer is causing the problem is to plug in a different mouse with the same type of connection. If the issue disappears and reappears when you reinstall the last mouse, you probably have a mouse issue.
