Some MSI BIOS update methods like Live Update, are notorious for causing failed updates. If you’re in a similar spot and are worried that you’ve bricked your motherboard, your next step should be to attempt BIOS recovery.
Most boards in MSI’s current lineup have a BIOS Flashback port that lets you reflash the BIOS even if the system doesn’t boot. Some boards also come with two BIOS chips (Dual BIOS). In this case, you can use the backup BIOS to recover your main chip.
Besides these, there are some niche methods like using BIOS reprogrammer chips or ones applicable to older systems like replacing the BIOS chip. I’ll cover all such methods to help you recover your MSI BIOS with this article.
Try Clearing the CMOS
If your boot issues are related to BIOS settings like overclocks rather than a failed update, simply resetting the BIOS configs to default should get your system working again. You can clear the CMOS (which stores the BIOS settings) to do this.
Shut down your system and unplug the power cable. Press the power button for a few seconds to drain the capacitors. Then, use your preferred method to clear the CMOS.
Clear CMOS Button
High-end MSI boards provide a Clear CMOS button for conveniently resetting the BIOS. Assuming your board supports it, look for the Clear CMOS button on your motherboard. It’s usually located on the I/O Panel. If you can’t find it, you can check your user manual.
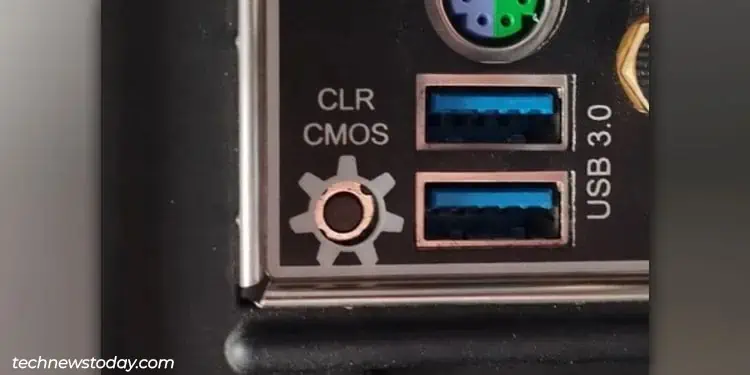
After you find it, ensure you’ve powered off your system as instructed above. Then, press this button, wait for a minute or so, and turn on your PC.
Remove CMOS Battery
The classic way to clear the CMOS is by removing its power supply, i.e., the CMOS battery.
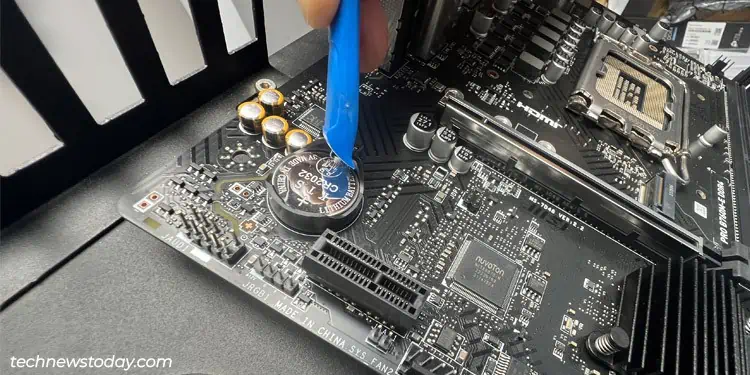
Ensure your system is powered off as instructed earlier. Then, press the lock on the CMOS battery slot to pop out the battery. Some boards may use a detachable cable instead that you can disconnect to remove the battery.
Wait for a few minutes, then reinsert the battery. Reconnect everything else as well, and try to power on your PC.
Use CLR_CMOS Pins
Your board should also have pins that you can short to clear the CMOS. These will be named along the lines of CLR, CLEARCMOS, JBAT1, BIOS CONFIG, and so on. Make sure to check your manual and identify the correct pins to short, as you could damage your board altogether by shorting random pins.
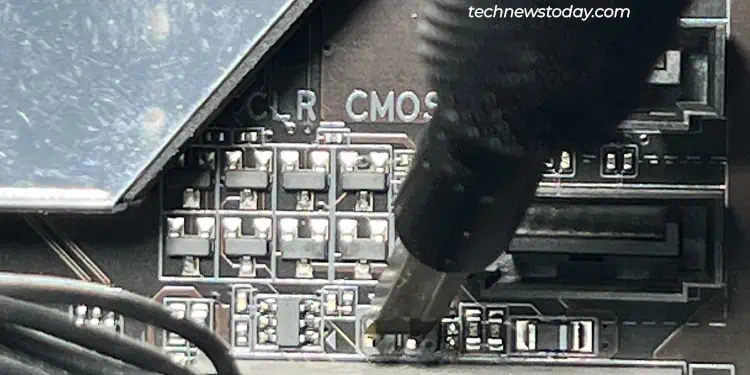
After you’ve located the pins on the motherboard, use a metal object like a screwdriver to connect the pins for a few seconds.
Use USB BIOS Flashback
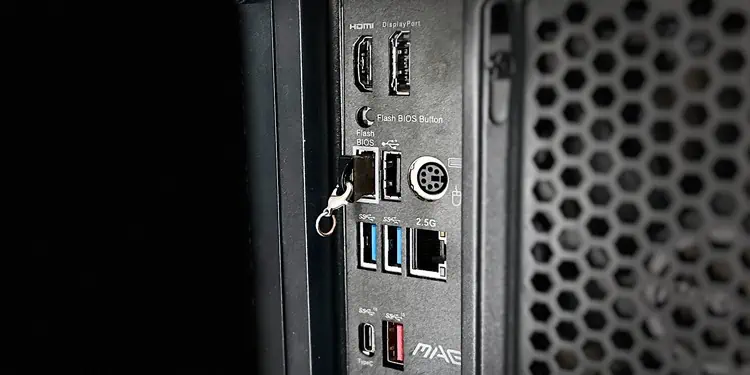
BIOS Flashback is the standard BIOS failsafe feature on most modern motherboards, and this is true for MSI boards as well. You need to be aware of a few things when using BIOS Flashback:
- There can be some minor differences between boards (e.g., some boards may support BIOS Flashback without a CPU while others may need it). So, you should check your user manual to verify all such requirements beforehand.
- Make sure the BIOS update doesn’t get interrupted (use a UPS, don’t shut down the system or remove the USB during the update, etc.).
Now, you can follow the steps listed below to use BIOS Flashback:
- On another system, download a BIOS update file from your MSI board’s support page. Make sure you download a suitable file (exact board version and revision; you shouldn’t need to flash older versions before upgrading to this one, and so on).
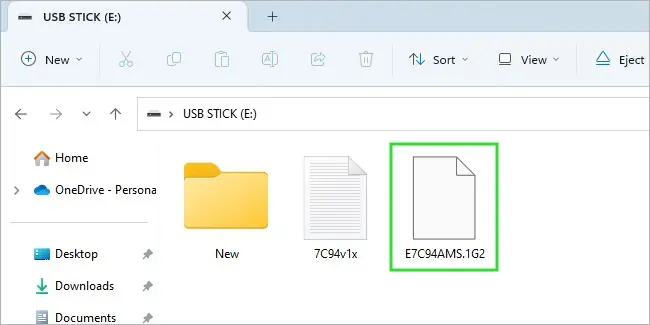
- Format a USB drive to FAT32 and move the BIOS file to this drive.

- Rename this file (including the extension) to
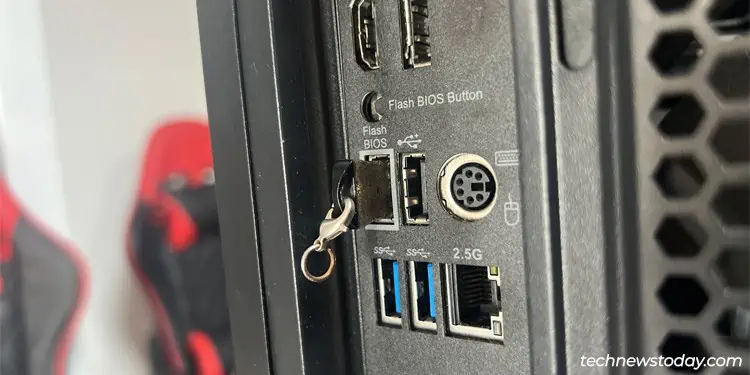
MSI.ROM. - Connect the USB drive to the BIOS Flashback port on your MSI board’s I/O panel.
- Press the Flash BIOS button. After a few seconds, the LED should start flashing to indicate that the recovery process has begun.

- The BIOS reflash usually completes in under 5 minutes. The LED will stop flashing to indicate this.
- After it completes, reconnect everything (if required) and turn on your PC.
Manual Recovery with Dual BIOS
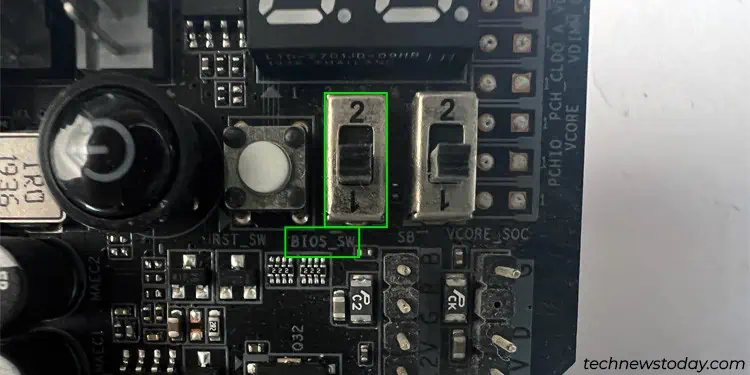
If you have a Dual BIOS board, your backup BIOS should automatically kick in when something goes wrong with the main BIOS. In case this doesn’t happen, you can use the following steps to manually recover your BIOS using the backup chip:
- Shut down your system and unplug the power cable.
- Toggle the BIOS lever to switch to the functional BIOS chip.

- Use another system to download a BIOS update file. Move it to a FAT32 USB drive, as explained in the previous section.
- Connect the USB drive to your MSI system.
- Press the power button and repeatedly hit Del to get to the MSI BIOS.
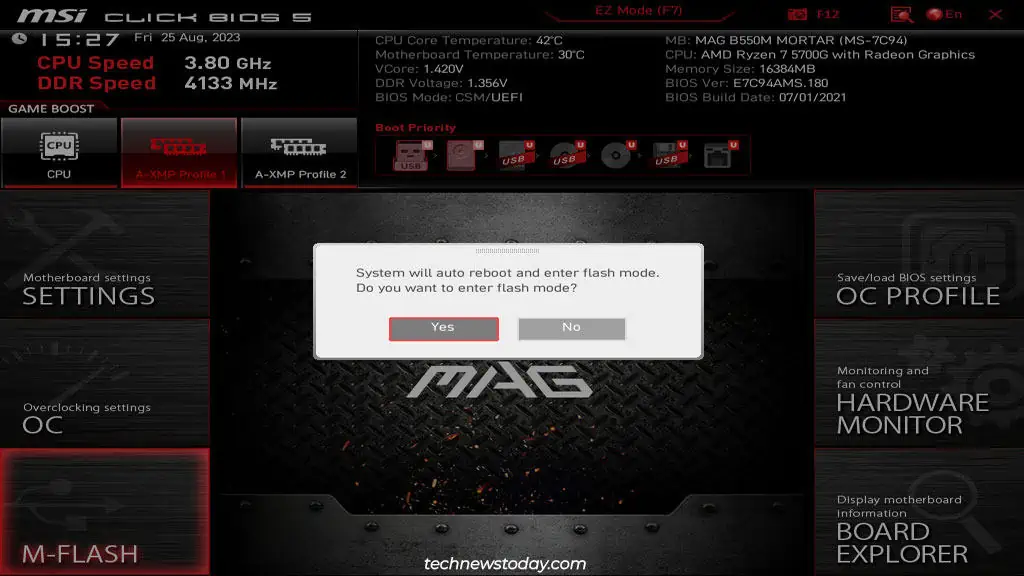
- Select M-FLASH and restart to enter Flash Mode.

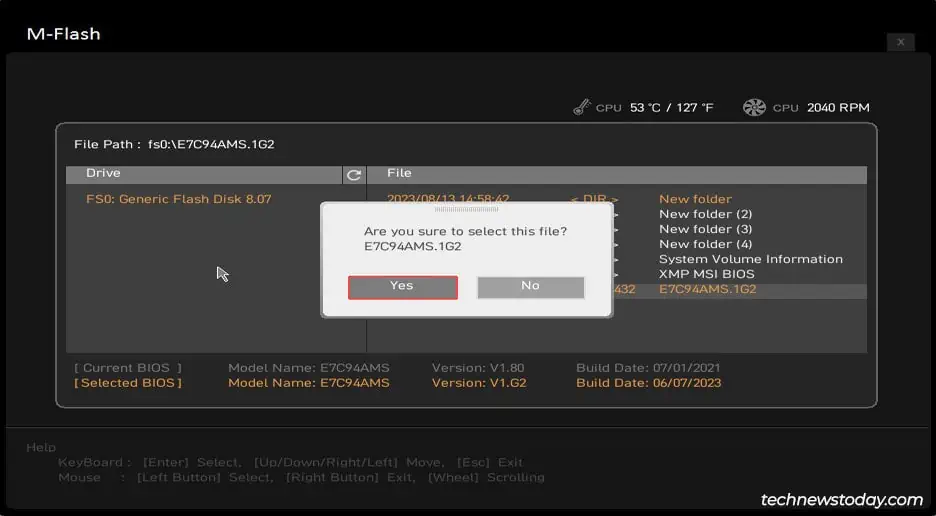
- Select the BIOS update file from the USB here but don’t press Yes just yet.

- Flip the BIOS dial again to switch back to the faulty BIOS chip.
- Select Yes to start reflashing the main BIOS chip. Your PC should automatically restart once this process completes.
What If You Couldn’t Recover the BIOS
The recovery methods covered so far won’t always work, but that doesn’t necessarily mean your board is gone for good. If you’re up for it, you can try some advanced methods to reflash the BIOS chip or replace it entirely.
Keep in mind that these methods aren’t worth the hassle for most people. You’ll probably be better off contacting your system manufacturer or a local repair professional for support. But if you want to take up the challenge, here we go.
Use a BIOS Reprogrammer
You can use a tool like the popular CH341A Mini Programmer with compatible software to read and write to the BIOS chip (meaning you can reflash it). Since there are a lot of variables, I’ll explain the general process, which goes something like this:
- Start by downloading the BIOS update file from the official MSI source on another system. Name this file
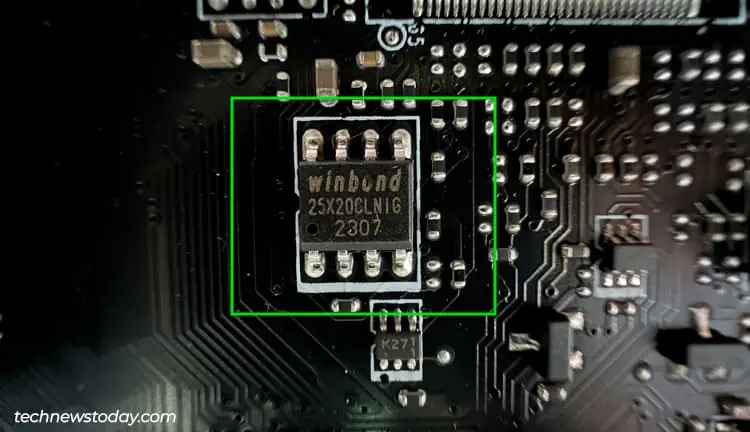
MSI.ROM. - Identify the BIOS chip on the motherboard. Some boards make this very easy, while the chip may not be marked on others. You can individually check the 8-pin chips near the CMOS battery in the latter case.

- Remove all components except the CPU and disconnect the power cables from the motherboard.
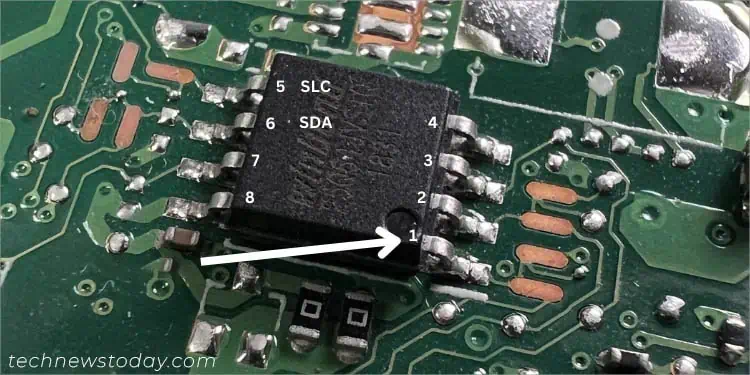
- Locate the dot on the chip to identify the SPI pin 1. This pin must match the red wire on the clip when connecting the clamp.

- On the other end, ensure the red wire matches pin 1 on the programmer when inserting the clip.
- Connect the programmer to your working PC.
- Now, use a program like AS Programmer to open the BIOS file. Write this file using the Erase, Program, or similar option to flash the BIOS.
Replace the Components
If you don’t want to reprogram the BIOS, the second option is to replace the chip itself. Some older boards used to have the BIOS chip installed in a socket, which made replacing it very easy.
But these days, almost all BIOS chips are soldered directly to the board. So, you’ll probably need to desolder the chip and replace it with a new compatible one on your board. If this doesn’t seem worth your time, you can contact a professional for help or replace the motherboard entirely.

