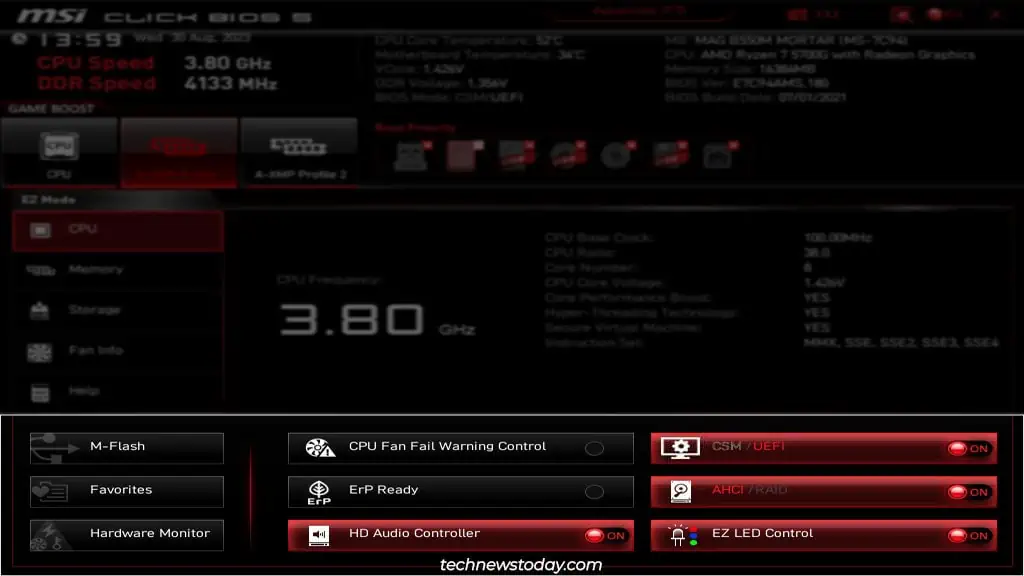
The BIOS/UEFI is the firmware interface of your MSI system. If you ever need to configure any hardware-related settings, the BIOS is where you’ll want to look.
When working with a newly built system, you should check some features like XMP or the Boot Order right away. In the long term, you’ll likely need to fiddle with things like the Boot Mode or BIOS updates as well.
And these are only the tip of the iceberg. If you’ve explored the MSI BIOS before, you probably know the feeling of being overwhelmed by the sheer number of available options.
I’ve been there myself. So, I’ve written this article to help people in a similar spot. By following this guide, you’ll be able to customize the MSI BIOS to your exact needs.
Entering the MSI BIOS
You’ll need to get to the MSI BIOS setup utility before anything else. To do this, press the BIOS key (Del/F2) when turning on your PC.

You can also quickly access some other utilities from the POST screen:
- F11 – Bring up the Boot Menu and quickly select the device to boot from.
- Ctrl+F5 – Activate the M-Flash utility for BIOS updates.
MSI BIOS EZ Mode
The MSI BIOS loads to EZ Mode by default. ‘Easy’ mode provides access to basic system info and commonly used settings from a single location. For smooth navigation, you should first learn about the BIOS shortcuts.
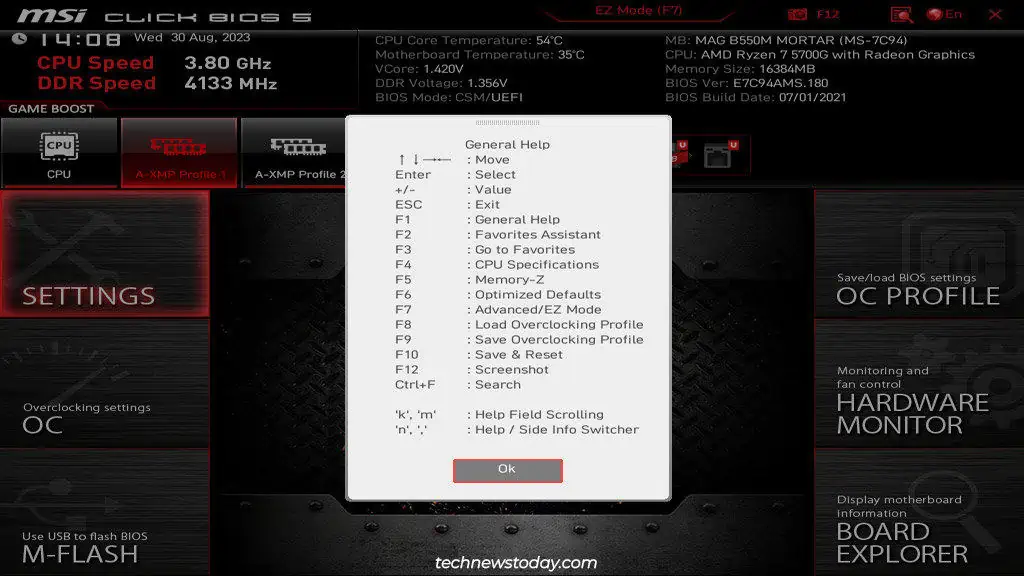
Press F1 to bring up the General Help list. Remember F7 and F10 for now, as those are the ones you’ll mostly use.
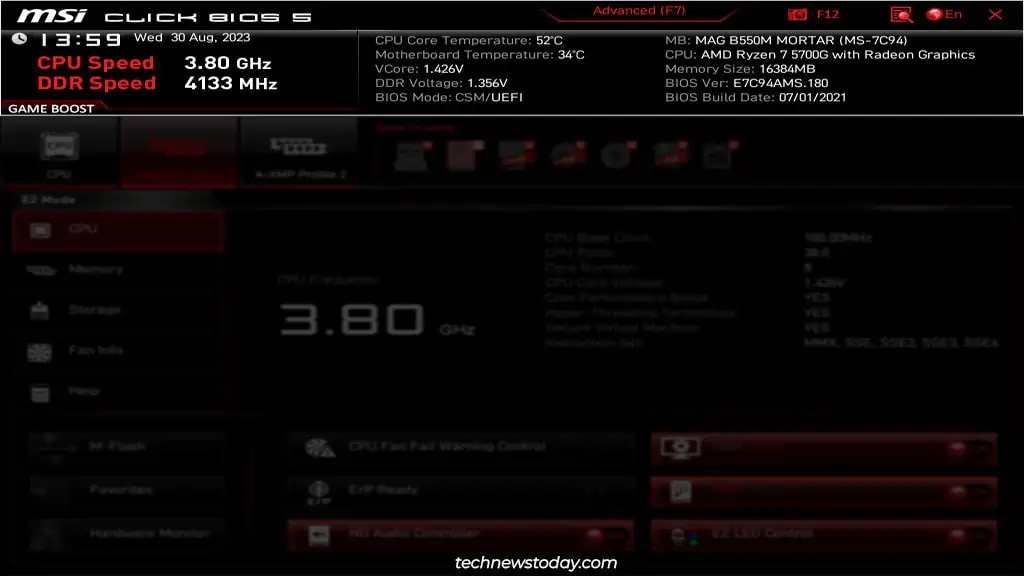
Now, let’s go over the EZ Mode interface:
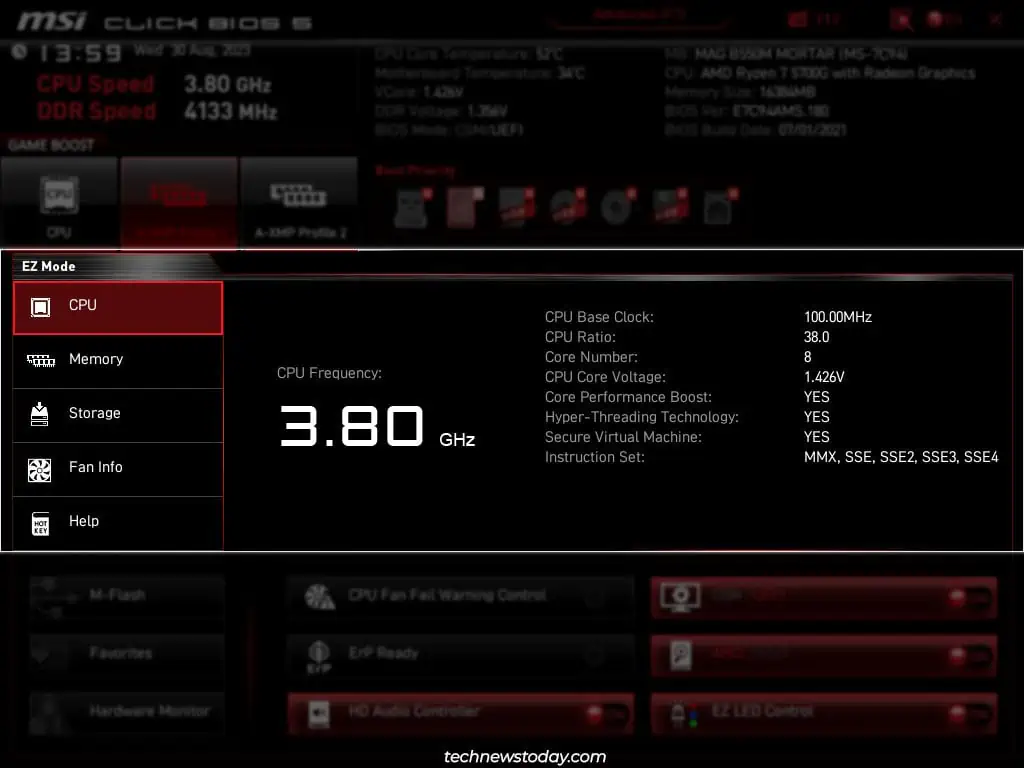
- Starting from the top-left, you can quickly find system data like the CPU/RAM speeds. Towards the right, you’ve got the motherboard/CPU model, voltage info, BIOS version, etc.

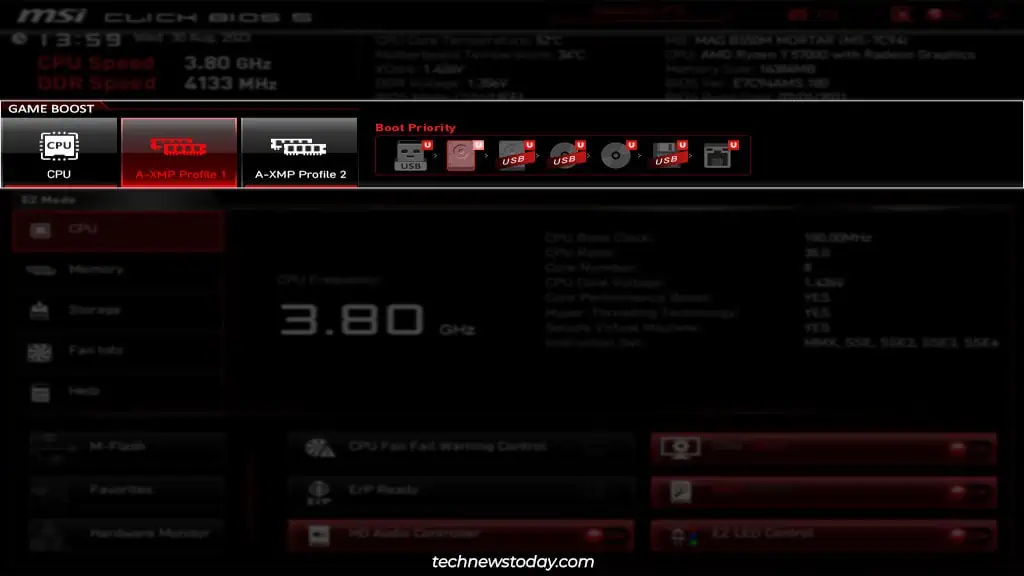
- In the next row, you can enable Game Boost or select XMP profiles from the left. And you can change the Boot Order from the right.

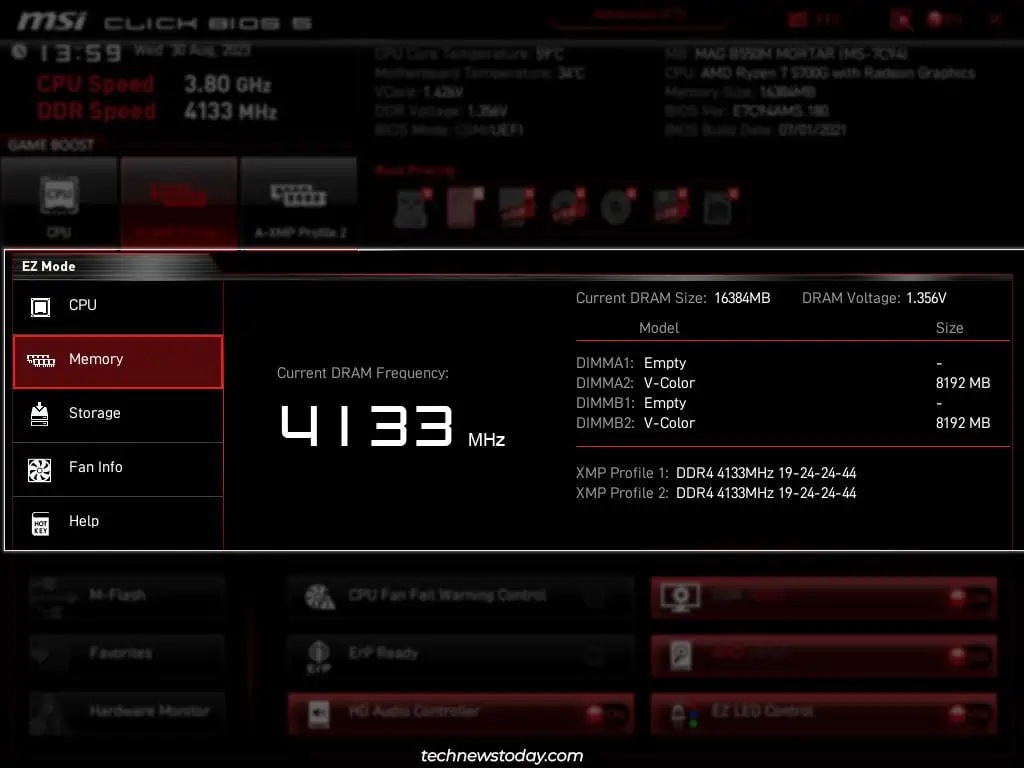
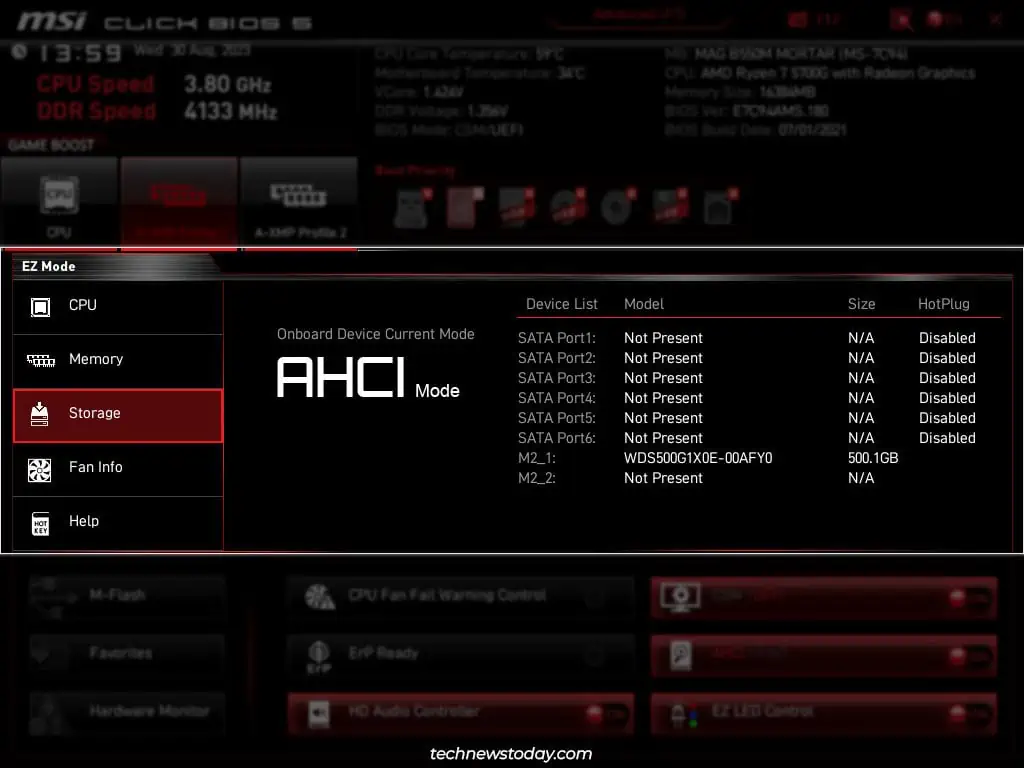
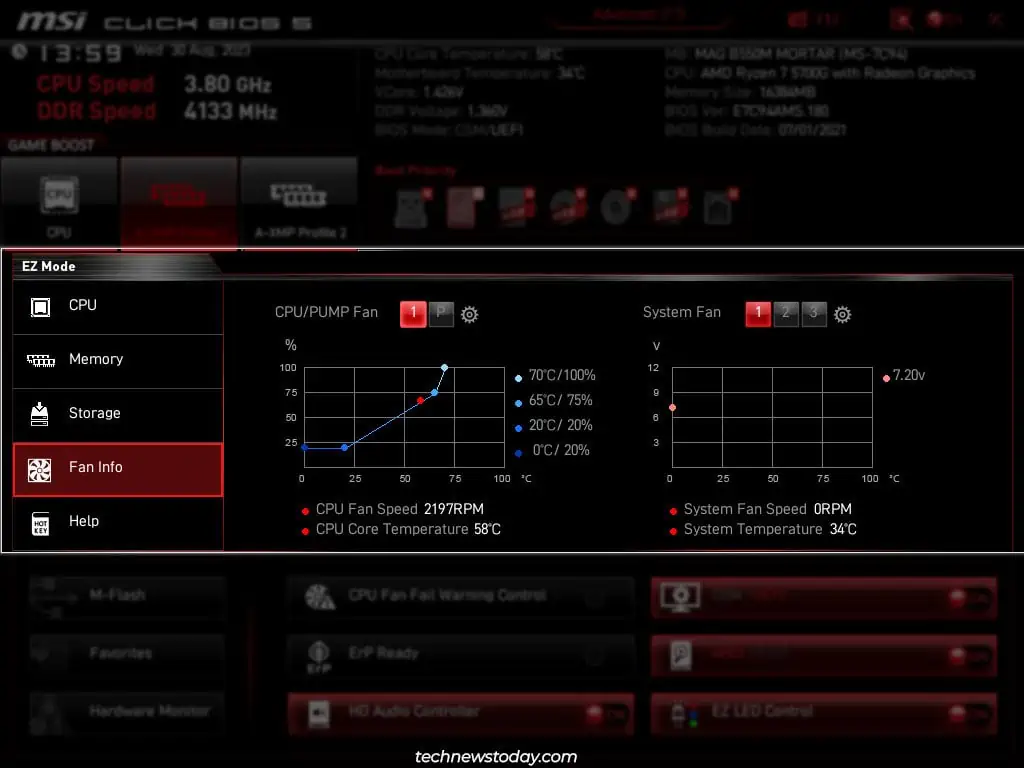
- The middle portion gives detailed info on the selected system component.
This includes- CPU – CPU Frequency, Core Number, Voltage, Supported Features, etc.

- Memory – DRAM Frequency, Size, Voltage, Used Slots, XMP Profile Configs, etc.

- Storage – Storage Controller Mode, Device List, Model, Size, etc.

- Fan Info – CPU or Case Fan Speed, CPU Temperature, System Temp, etc.

- CPU – CPU Frequency, Core Number, Voltage, Supported Features, etc.
- At the bottom-left, you’ve got quick access to the M-Flash, Favorites, and Hardware Monitor features.

- Finally, you’ve got misc settings at the bottom right. Depending on the board, there will be things like LED Control, TPM, storage mode, BIOS mode, etc.
I’ll take you through the advanced configuration of all these features in the rest of the article.
Switching to Advanced Mode
As mentioned above, you can press F7 to switch to Advanced Mode.
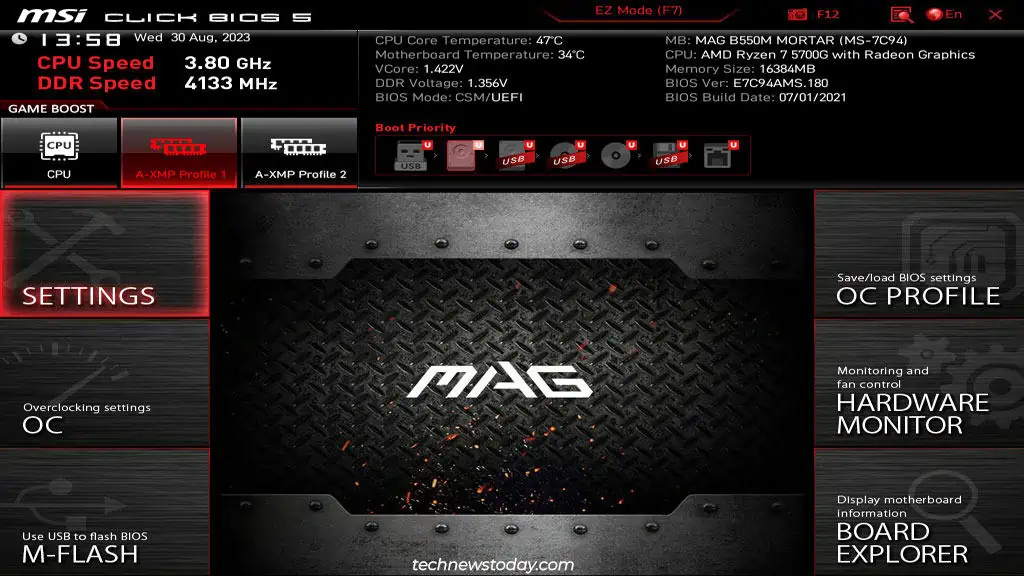
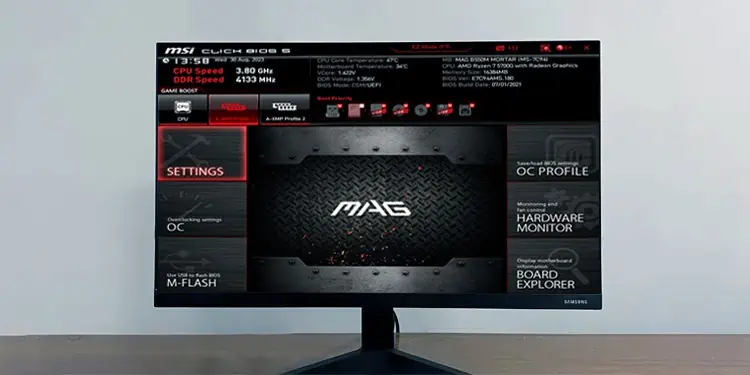
You’ll have access to the following new sections from this interface:
- SETTINGS – Manage chipset and boot settings like the PCIe settings, boot mode, boot order, secure boot, etc.
- OC – Manual/automatic RAM and CPU overclocking.
- M-FLASH – BIOS update utility.
- OC PROFILE – Manage overclocking profiles.
- HARDWARE MONITOR – Control fan speed and monitor system temperature and voltage.
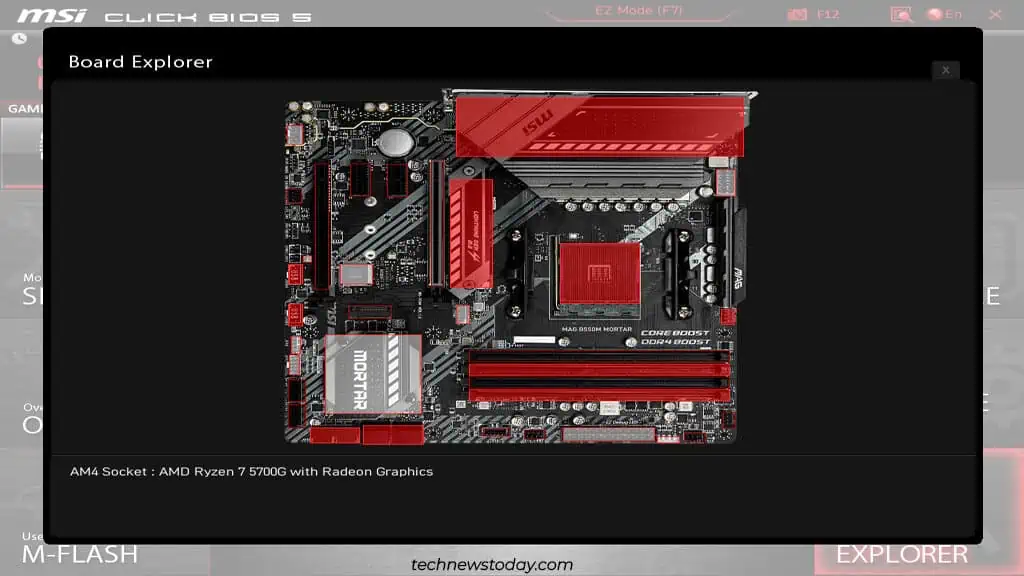
- BOARD EXPLORER – Interactive tool to identify installed components on your board.
Now, we’ll go over the options available in each section in detail. If some of the settings (e.g., overclocking) feel irrelevant to you, feel free to skip them. Also, keep in mind that the location of some of the settings may differ depending on the board and BIOS version.
Checking the System Status
Let’s start with the Settings > System Status tab. You can set the BIOS date and time here. If your system doesn’t have an online time server to sync to, this is the date/time it’ll use.
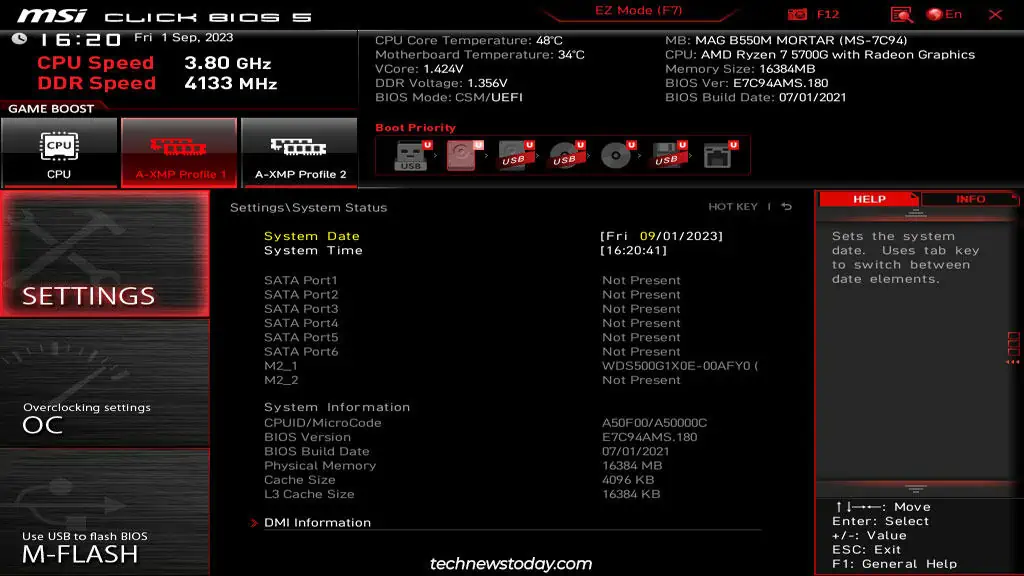
Besides that, you’ll also find system info like the connected SATA or M.2 devices, BIOS version and build date, total installed memory, etc., from this tab.
Exploring the Advanced Tab
Go to Settings > Advanced. We’ll go over all the important settings in chronological order.
PCIe Subsystem Settings
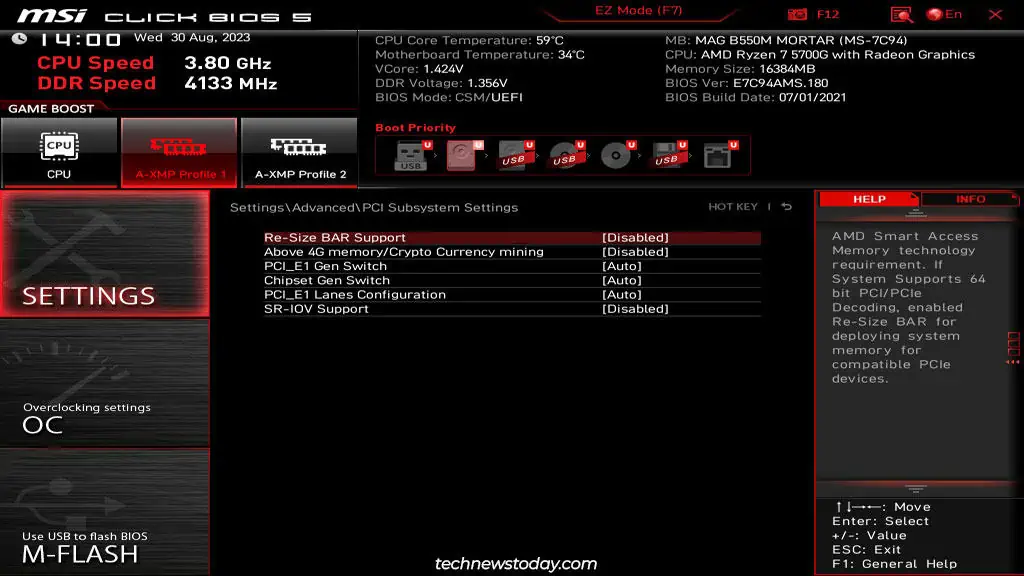
Starting in the PCIe Subsystem Settings tab, you can manage things like:
- PCIe Lanes Configuration – Split PCIe lanes (e.g., x16 to x8x4x4). This is useful for things like a multi-drive M.2 expansion card or dual GPUs.
- Re-Size BAR Support – Make the entire GPU frame buffer accessible at once to the CPU. This can significantly improve GPU performance.
- Above 4G Memory – Allow memory address configuration space above 4 GB. You can combine this with Resizable Bar to improve GPU performance.
Integrated Peripherals
If you want to set up a SATA FakeRAID array, you can change the SATA Mode to RAID here. Similarly, you can enable SATA hot-plugging to connect SATA devices without shutting down the system.
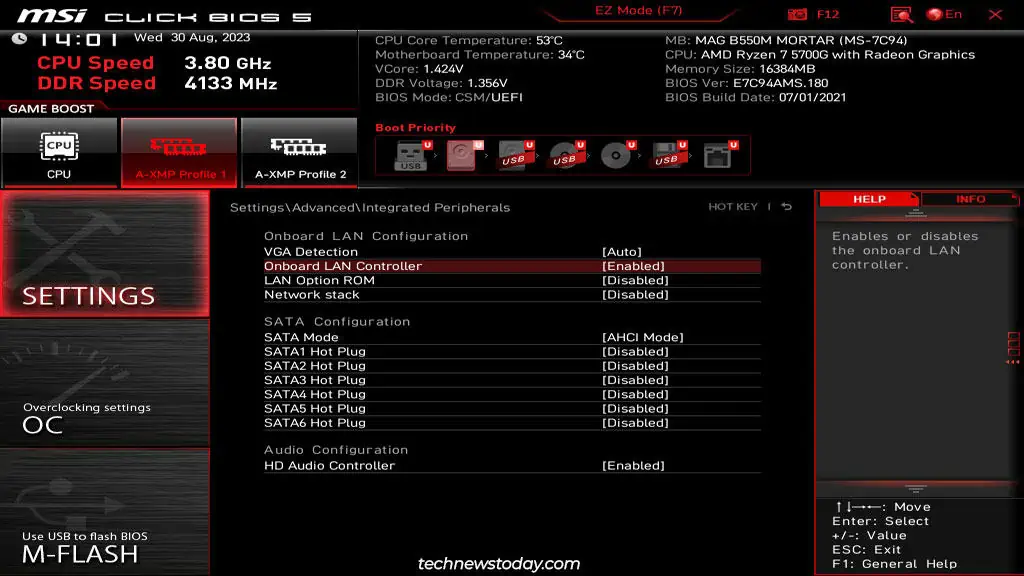
You can also disable the onboard LAN controller or HD Audio Controller from here if you’ve installed external ones yourself.
Integrated Graphics Configuration
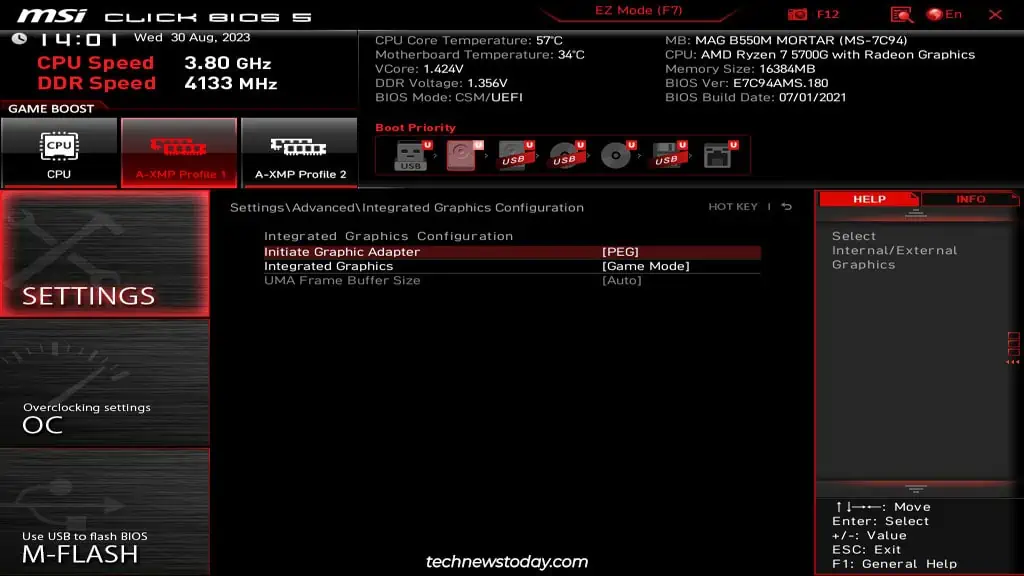
This tab is for configuring the integrated graphics processor (iGPU). If you’ve got an external graphics card, you can disable the iGPU from here. If you don’t have a dedicated graphics card, it’s best to leave the settings here to default.
Windows OS Configuration
This tab contains two important settings: the BIOS Mode and Secure Boot.
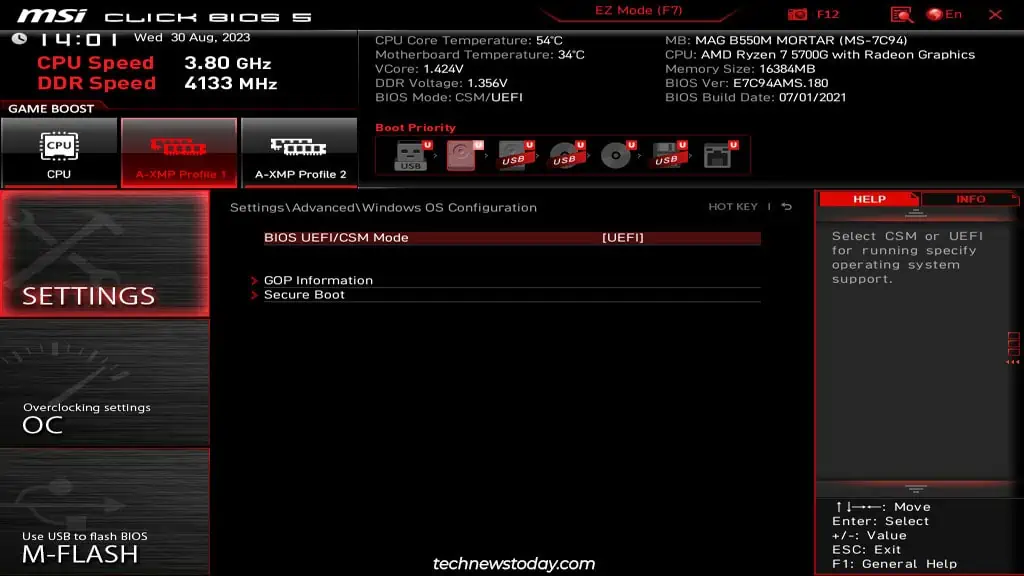
Regarding the boot mode,
- Modern storage drives are formatted using the GPT partition flavor. To boot with such drives, your BIOS must be set to UEFI mode.
- Old drives used to be formatted with the MBR partition style. To boot with such legacy drives, you must change the BIOS mode to CSM. Compatibility Support Module (CSM) is a UEFI backward-compatibility feature.
Secure Boot is also a UEFI feature (meaning it won’t work properly in CSM mode). It improves security by only letting the system boot with a trusted configuration.
This means the boot device, OS, drivers, etc., must have a valid digital signature. At present, most people either enable it for the security benefits, or for certain games like Valorant.
Wake-Up Event Setup
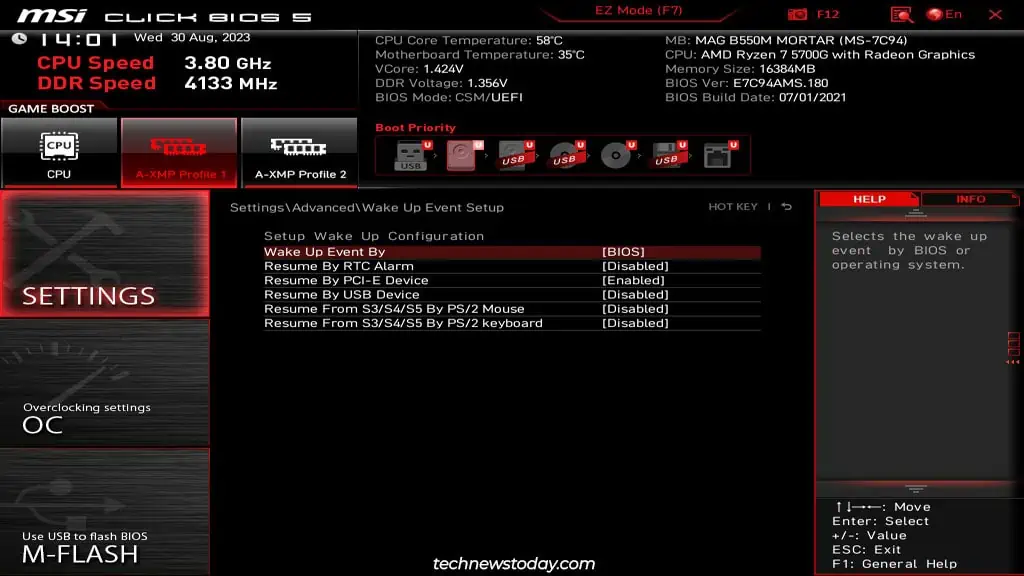
Wake Events are convenience features that let you turn on your system using different means like clock alarms, network adapters, peripherals, etc. I personally use the Resume By RTC Alarm and Resume by PCI-E Device features on different systems.
The first one automatically turns on my main work PC at 9 AM every day. There’s a second system that I only use sometimes. When I need it, I use Wake-on-LAN to send a magic packet and power on this PC from my phone.
Managing Boot Options
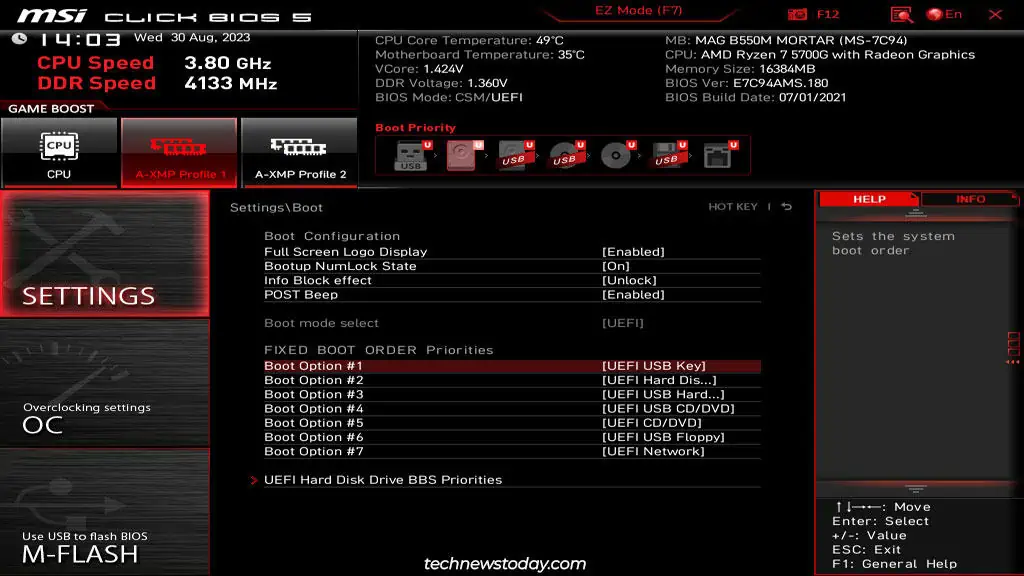
You can manage the Boot Order Priority from the Settings > Boot tab. As long as you give your boot drive the highest priority, you’ll be fine. But if you get confused when configuring the entire list, you can take my boot order as an example:
USB Drive > Hard Disk > USB Hard Disk > USB CD/DVD > CD/DVD > USB Floppy > Network BootThe BBS Priorities can also be situationally useful. If you’ve got multiple drives of the same type, or you’ve got a dual-boot setup like me, you can pick the exact device/OS to boot with using this feature.
Finally, on supported boards, you can enable or disable Fast Boot from this same tab. I had some mixed results when I tested boot time improvements with Fast Boot and MSI Fast Boot. So, I encourage you to test Fast Boot on your own system to verify that it’s actually worth enabling.
Beefing Up the System Security
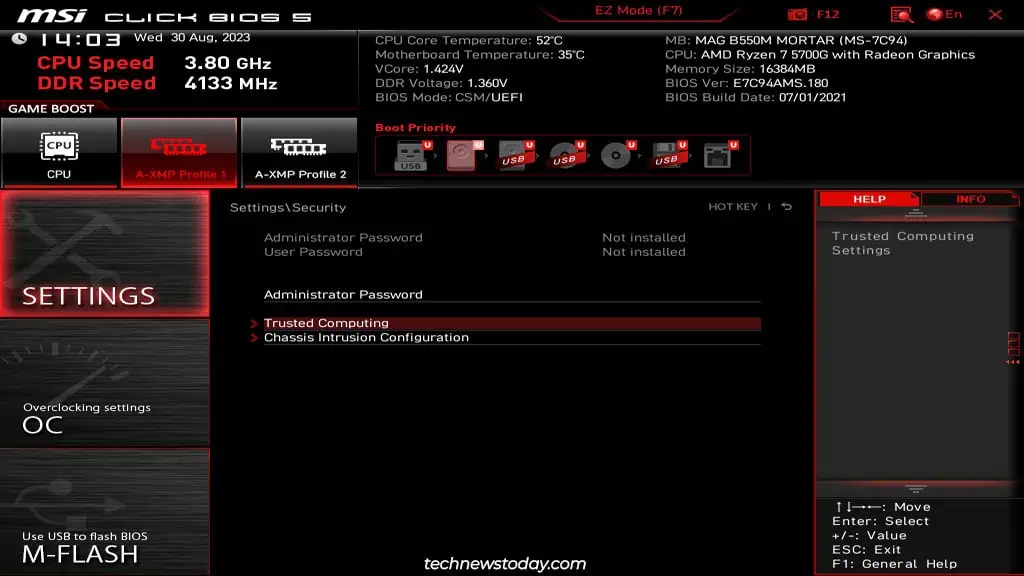
In the Settings > Security tab, you can start with the Administrator Password option. This feature lets you set an admin and user password. It’s intended for systems that multiple people may use, like an office PC.
If enabled, users will need to enter the user password when logging into an OS like Windows. Similarly, if you enter the MSI BIOS in user mode, you’ll only be able to change certain settings. You’ll need to log in with the admin password to have complete access.
TPM is another feature that makes security mechanisms like BitLocker Encryption or Windows Hello even more secure. You can access it from the Trusted Computing section.
You must also enable TPM 2.0 to install Windows 11 with the official method. So, besides the security benefits, this is another popular reason to enable TPM.
Saving/Resetting the BIOS Settings
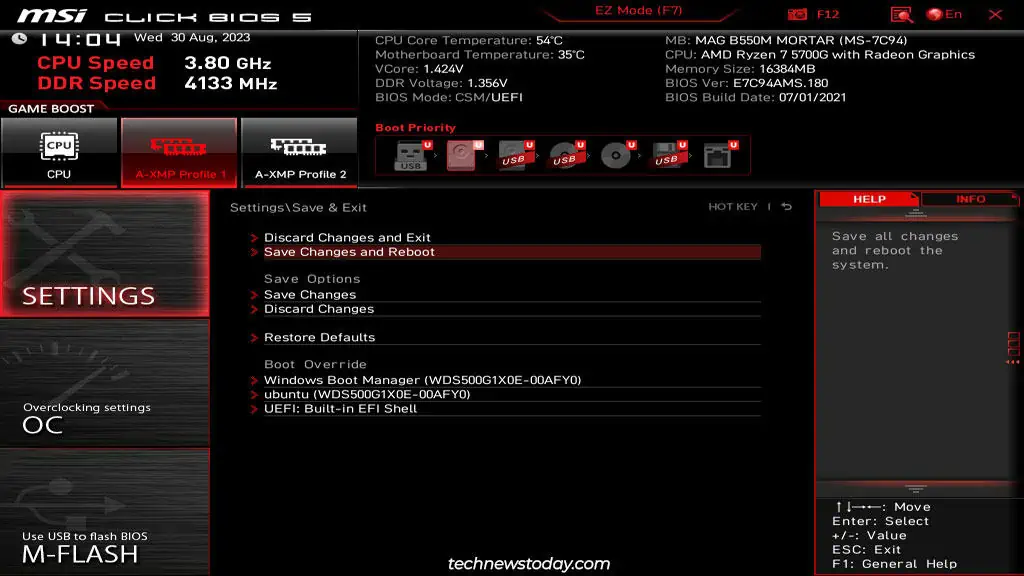
You’ve probably changed a bunch of settings so far. At this point, you should go to the Settings > Save & Exit tab. The options here are self-explanatory:
- Discard Changes and Exit – Discard all changes made in the current session and exit the BIOS.
- Save Changes and Reboot – Save the changes made in the current session and exit the BIOS. You can also use the F10 shortcut for this.
- Save Changes – Save the changes without rebooting.
- Discard Changes – Discard the changes without rebooting.
- Restore Defaults – Reset the BIOS settings to factory defaults. You can also use the F6 shortcut for this.
Besides these, you can also use the Boot Override feature from this page. It basically gives you the Boot Menu (F11) functionality from within the BIOS Setup utility. This means you can the OS or device (e.g., a USB drive) to use for the next boot.
Overclocking Your MSI System
I’ve always liked the idea of getting more out of less. When it comes to PCs, overclocking embodies this concept best.
If you want to get the best possible performance from your system, you’ll need to find the sweet spot between the component speeds, voltage, and temperature. Fine-tuning these metrics takes some time and effort, but most enthusiasts agree that the results are worth it.
If these seem like a hassle, you can check out auto-overclocking instead. These are designed with convenience in mind and provide substantial performance improvements at the click of a button.
You’ll find both manual and auto-overclocking features in the OC tab.
XMP Profiles
The one overclocking feature you must use is Extreme Memory Profile (XMP). All RAM modules run at JEDEC standards by default. This means the sweet 3600MHz RGB sticks you bought are probably running at a low frequency, like 2133MHz.
The easiest way to run the modules at the advertised speeds is by enabling XMP. This sets manufacturer-tested frequencies and timings for the RAM.
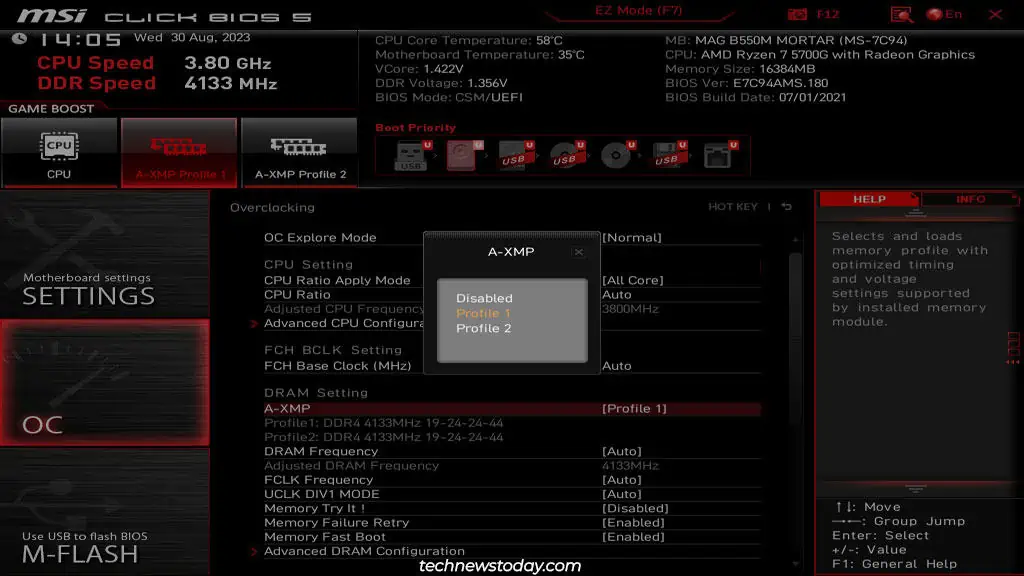
MSI boards with the latest AM5 socket use DDR5 sticks. Thanks to this, they support EXPO in addition to XMP.
User reception of EXPO is mixed, but a lot of people have been able to run their RAM modules at higher frequencies compared to XMP. So, if your system supports EXPO, it’s worth trying it out.
MSI also has a proprietary XMP clone called Memory Try It. User reception is mixed with this one as well. You have access to a lot more profiles thanks to this feature, but they’re not as stable.
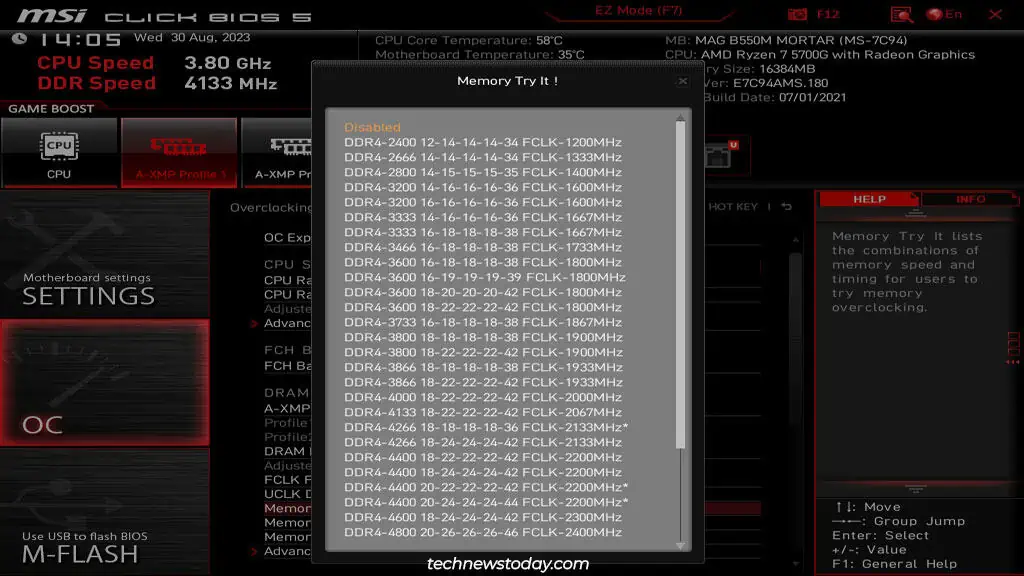
I recommend trying out XMP/EXPO first. If those don’t work for you, then you can give Memory Try It! a shot.
CPU Overclocking
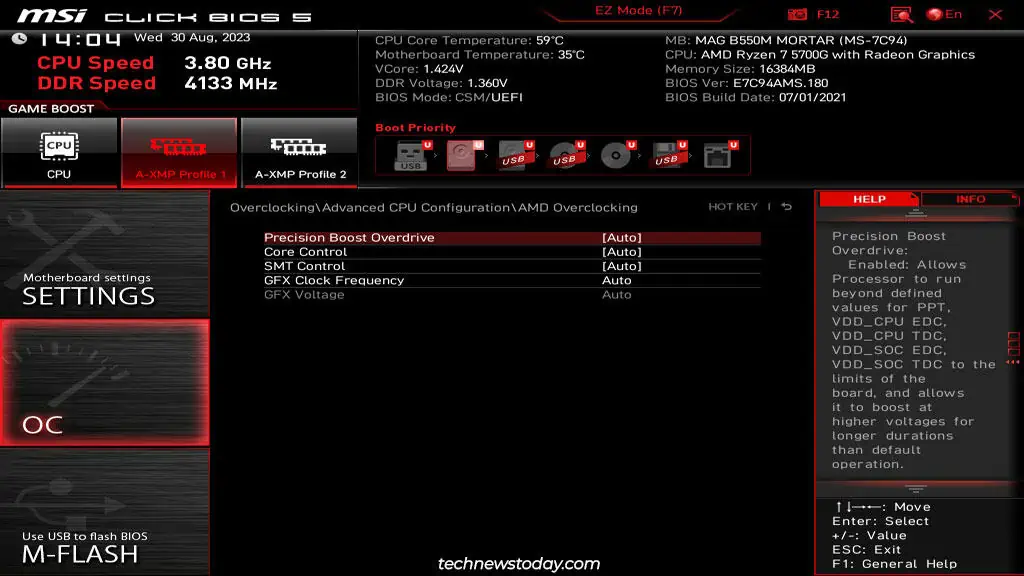
For CPU overclocking, Intel provides Intel Turbo Boost Technology, while AMD processors use Precision Boost. These features are enabled by default, so your processor is probably already running at a boosted frequency.
You can verify that the following features are enabled to confirm this:
- Intel: Advanced CPU Configuration > Intel Turbo Boost
- AMD: Advanced CPU Configuration > AMD CBS > Core Performance Boost
- AMD: Advanced CPU Configuration > AMD Overclocking > Precision Boost Overdrive
Manual Overclocking
The auto-overclocking tools covered so far are better suited for most users as they’re very low-maintenance. But if you want to squeeze out every last bit of performance, manual overclocking is the way to go.
It’s basically a balancing act where you try to find the highest possible frequency/timings at the lowest stable voltage (don’t go above 1.4V). It’s important to change values in small amounts only. And you should also have a decent cooling setup so that your system doesn’t overheat. Thermal throttling would negate the point of overclocking.
While this is a general idea, there are a lot of intricacies to overclocking that I can’t cover in this article. So, if you’re looking to overclock your MSI system manually, I recommend checking out our detailed guides on overclocking the RAM and CPU.
Enabling Hardware Virtualization
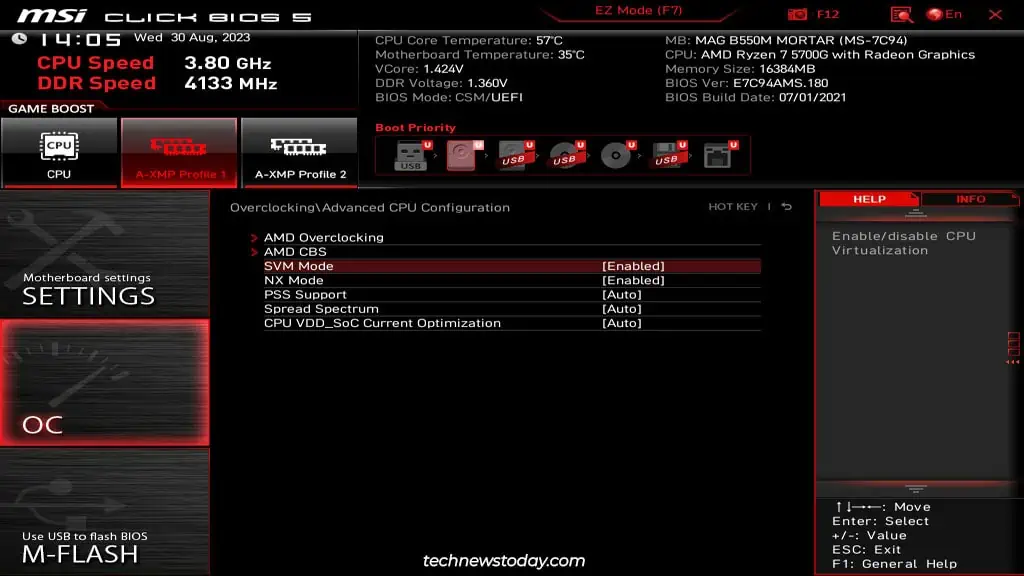
If you work with virtualization, it’s important to enable hardware-assisted virtualization in the BIOS. Without it, you’ll be limited to low-spec virtual machines. In some cases, the VMs may not work at all due to errors like AMD-V Is Disabled In The BIOS.
Intel’s virtualization tech is called VT-x, while AMD calls theirs SVM. You can enable these features from the following locations:
- AMD: Advanced CPU Configuration > SVM Mode
- Intel: CPU Features > Intel Virtualization Tech (VT-x)
Besides these, there are other optional virtualization features like PCIe passthrough and PAE/NX. I recommend checking out my guide on enabling virtualization on MSI boards if you want to configure these as well.
Saving and Loading BIOS Profiles
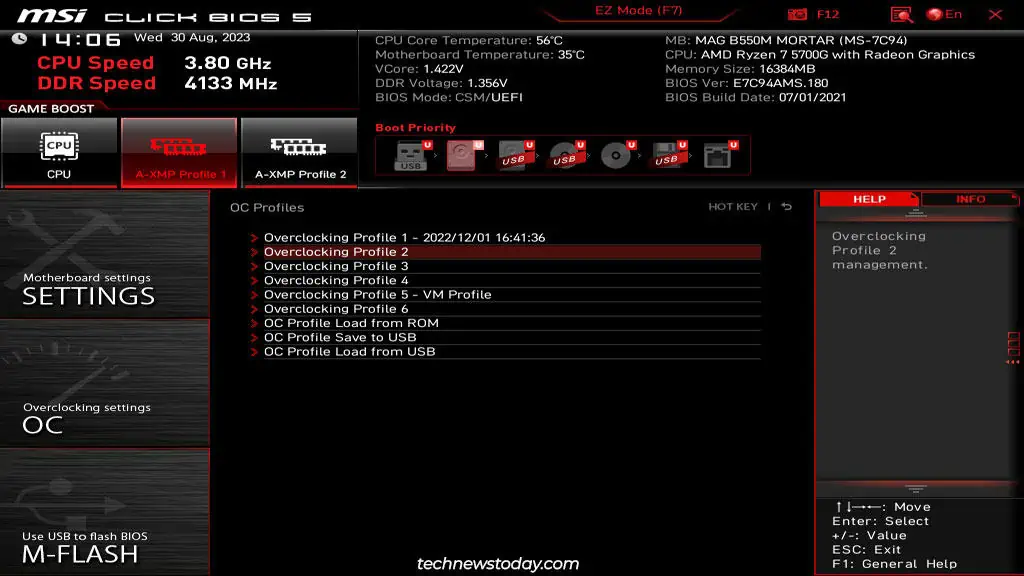
Manual overclocking requires a lot of trial and error. Sometimes, you may also need to make slight adjustments to the auto-overclock configs. For instance, I had to increase the RAM timings slightly when my MSI system became unstable with the default XMP profile.
The easiest way to keep track of such changes is by using the OC Profile Menu. You can use the F8 and F9 shortcuts to load and save the OC profiles respectively.
You can even save or load the profiles from a USB drive (FAT/FAT32). I’ve lost my overclock configs in the past when my CMOS battery died, so this can be useful in such scenarios.
Using the Hardware Monitor
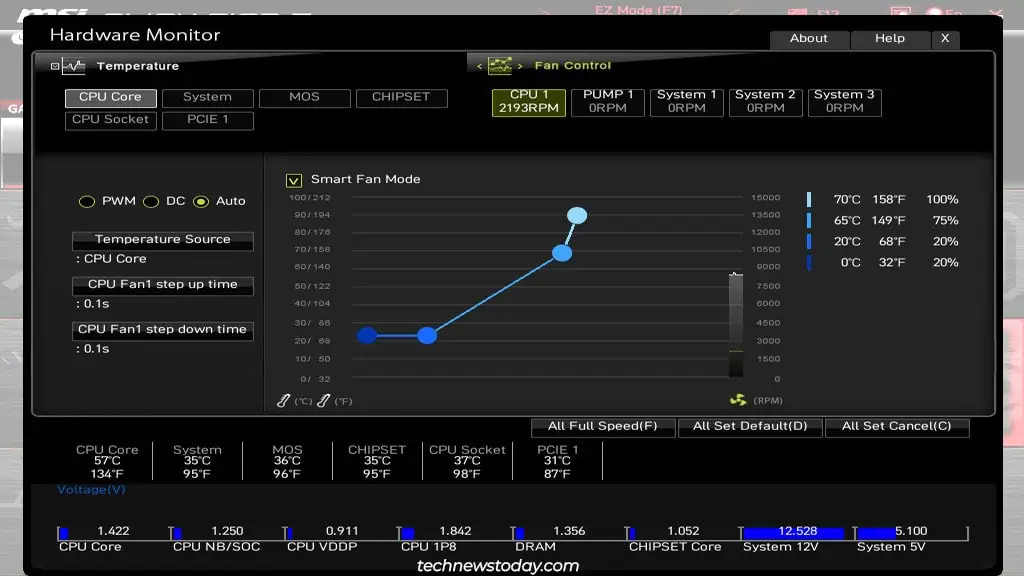
As the name implies, the Hardware Monitor lets you monitor the CPU/system voltage and temperatures. But that’s not all. This menu also lets you control the fan speed.
For instance, if you’re overclocking, you may want to set all the fans to full speed. Or you can use Smart Fan Mode to plot a custom fan curve that’s tailored to your exact usage habits.
Updating the MSI BIOS
When building a new system, it is important to consider things like processor compatibility with your board. Often, you’ll need to update the BIOS for the CPU to work. It’s also commonly done to patch security vulnerabilities or firmware bugs.
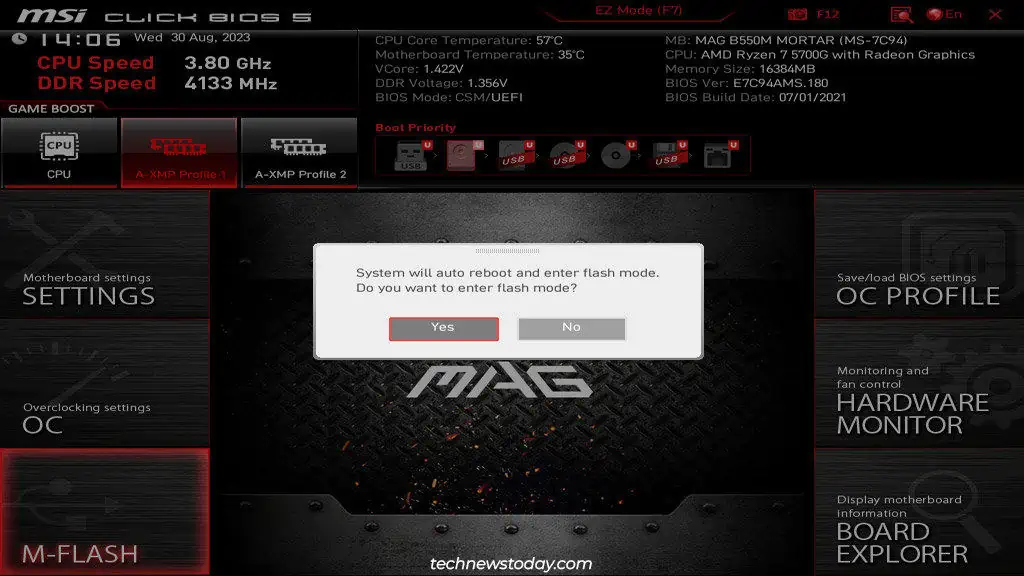
If a new BIOS version for your board seems worth upgrading to, you can do so using the M-Flash utility. Simply select M-Flash and restart to launch the utility. Then, select the BIOS update file from a USB drive to flash the new BIOS.
Locating Components with Board Explorer
Finally, for a bit of fun, you can use the interactive Board Explorer utility to identify various components installed on your MSI board.
