Most MSI boards support motherboard RAID through the IRST (Intel) or RAIDXpert2 (AMD) technologies. You might’ve also seen such RAID arrays go by names like onboard RAID, BIOS RAID, or FakeRAID.
To create an onboard RAID array, you must first set the storage controller to RAID mode in the MSI BIOS. Then, you can select the disks and RAID level to use and configure the array to your liking. Finally, after loading the RAID drivers, the volume becomes recognizable by Windows.
It’s a simple process overall, but the steps may vary slightly depending on your exact setup. So, I’ll guide you through each step of setting up SATA and NVMe RAID arrays on MSI motherboards.
Setting RAID Mode in MSI BIOS
If you haven’t already done so, you should install the NVMe/SATA drives at this point. Make sure you’re using identical drives (size and speed) to prevent any bottlenecks. Also, backup any files elsewhere as these drives will be formatted when you create the array.
- Turn on or restart your system and repeatedly press Del to get to the MSI BIOS.
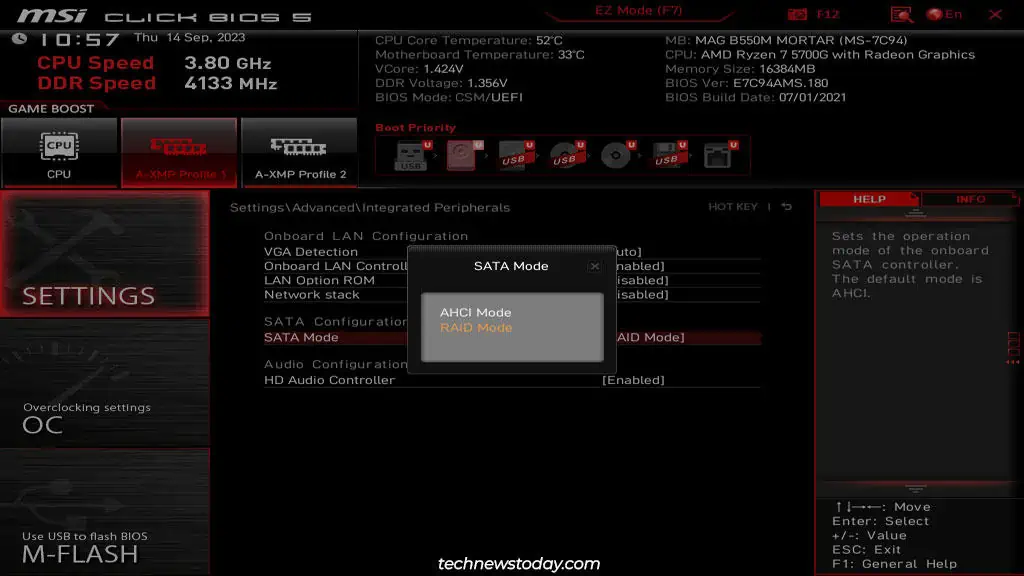
- Press F7 to change to Advanced Mode if required. Go to Settings > Advanced > Integrated Peripherals.
- In AMD’s case, set SATA Mode to RAID Mode. Although not obvious from the name, this setting will enable NVMe RAID as well.

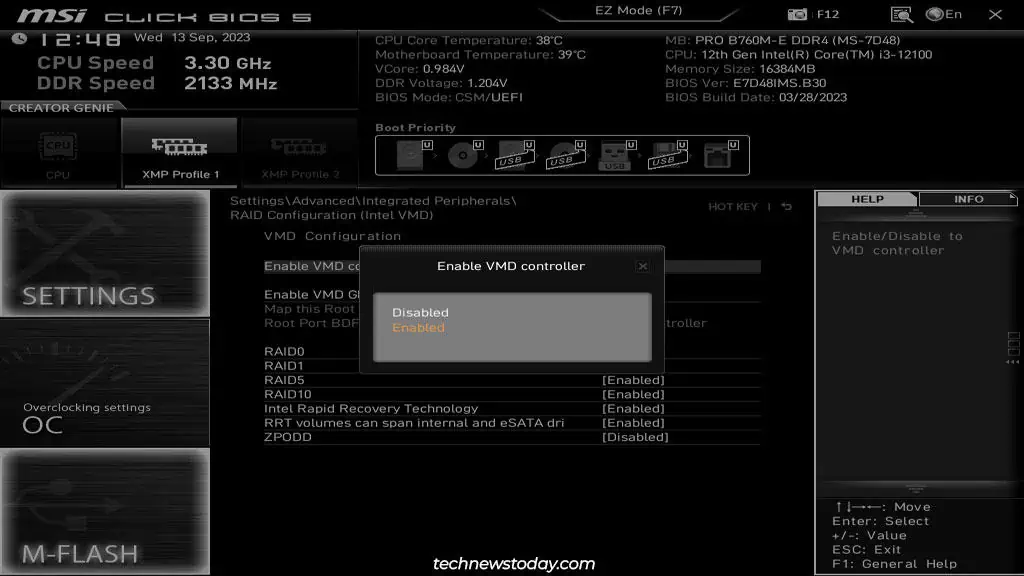
- The process varies for Intel boards depending on the BIOS interface. Try the following steps:

- Set SATA Mode to RAID/Optane Mode.
- Set M.2/Optane Genie to Enabled.
- Go to RAID Configuration (Intel VMD). Enable the VMD Controller and the required RAID levels here.
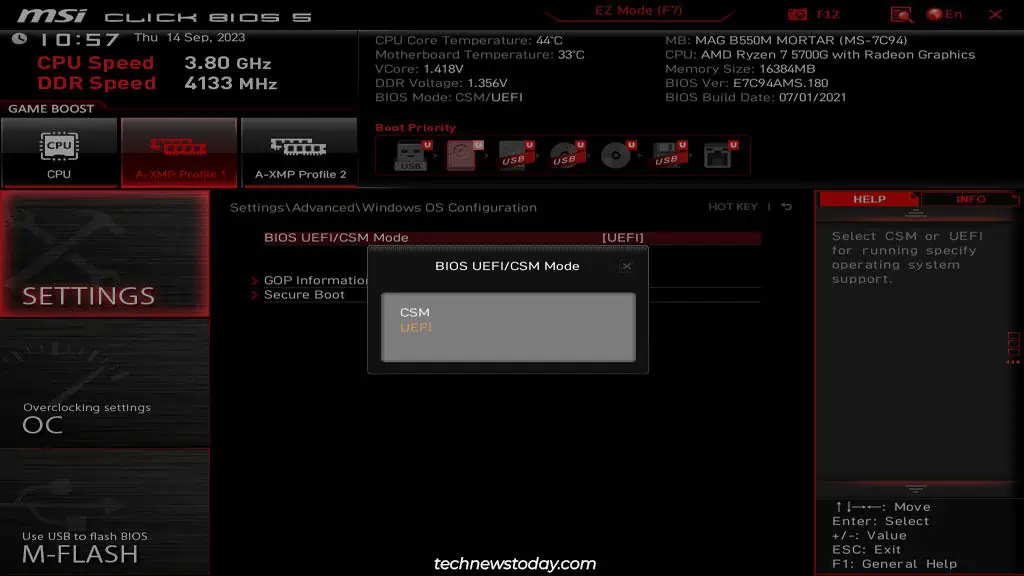
- Now, go to Settings > Advanced. Ensure the BIOS Mode is set to UEFI. This setting may also be inside the Windows OS Configuration tab.

- Finally, press F10 to save the changes and exit the BIOS.
Note: If you have an expansion card with multiple M.2 drives, you should connect it to a PCIex8 or x16 slot. Then, split the PCIe lanes to x4x4x4x4 or a similar split according to the number of drives used. If you don’t do this, some drives won’t be detected.
Creating the RAID Array
Now that your MSI BIOS is configured properly, you can use the steps from the RAIDXpert2 or IRST section to create the RAID array.
Using RAIDXpert2 (AMD)
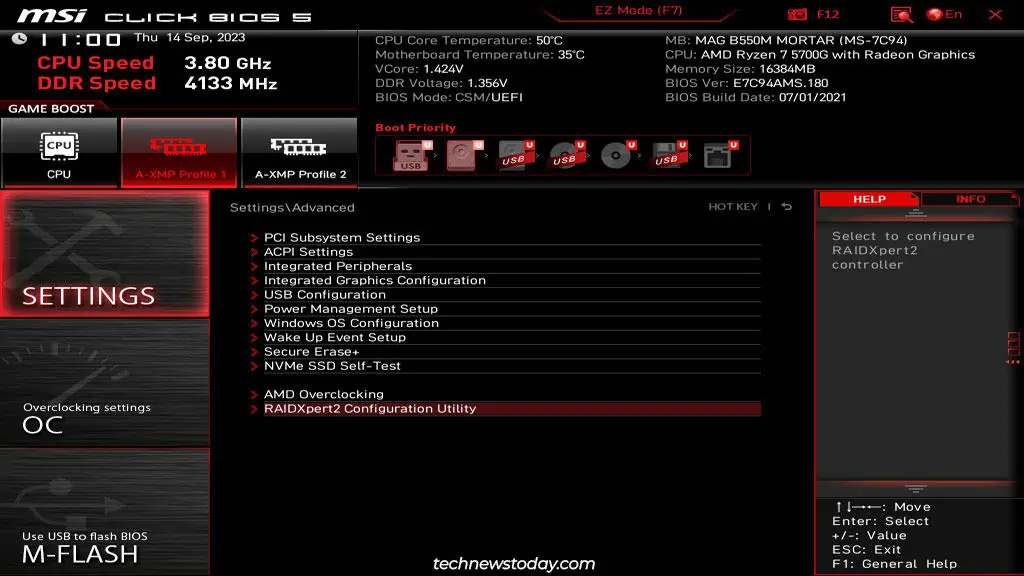
- Enter the MSI BIOS again and go to Settings > Advanced. The RAIDXpert2 Configuration Utility should be accessible now.

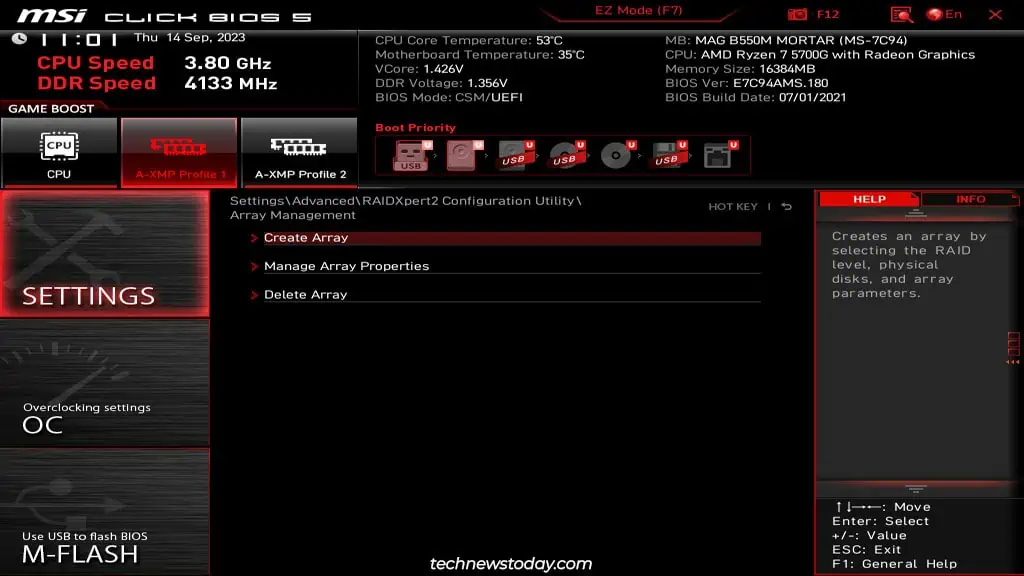
- Click on Array Management > Create Array here.

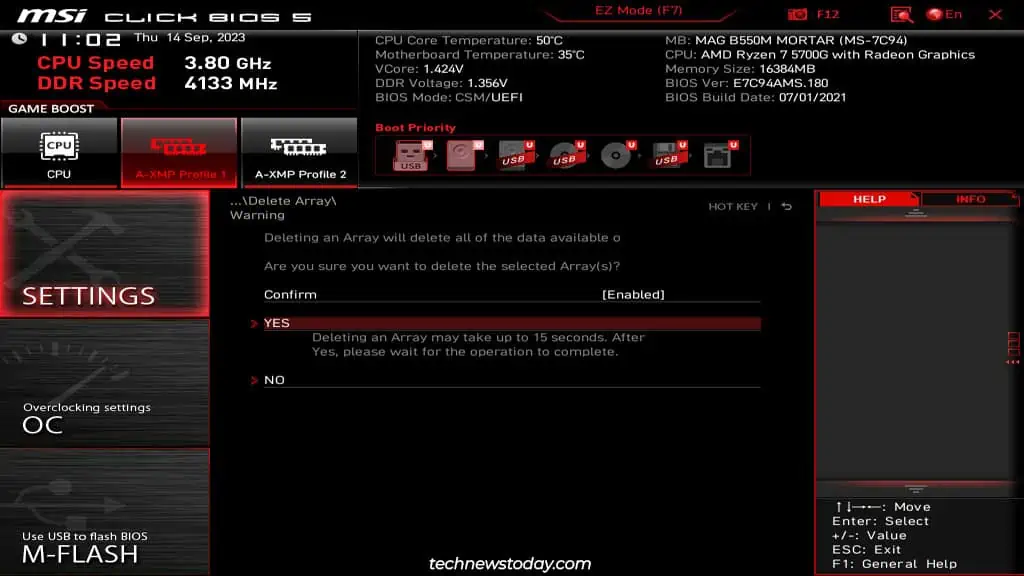
- If Create Array is inaccessible, that means there’s already a RAID array in place. In that case, you can go to Delete Array and wipe the current arrays.

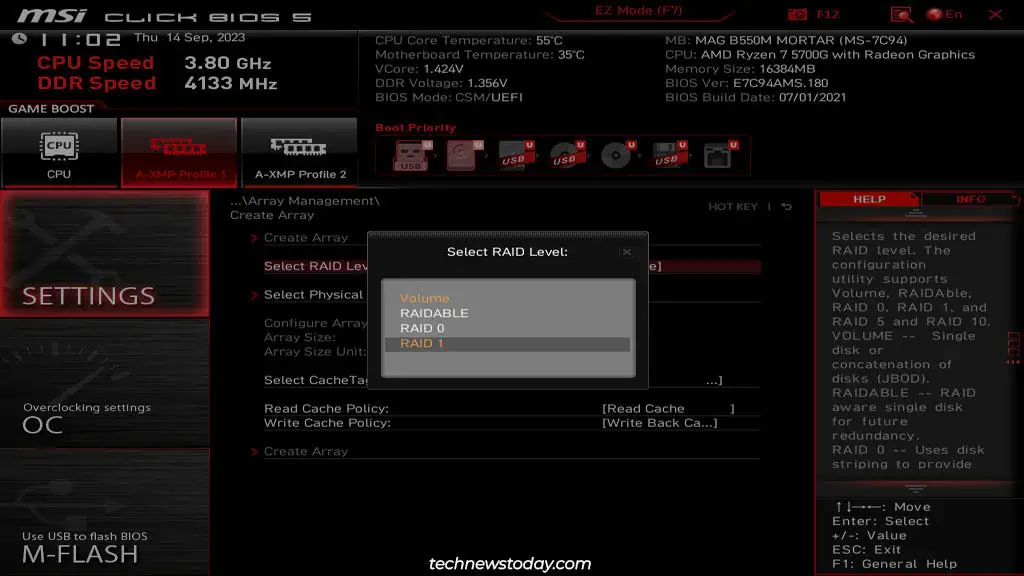
- Select the RAID level now.

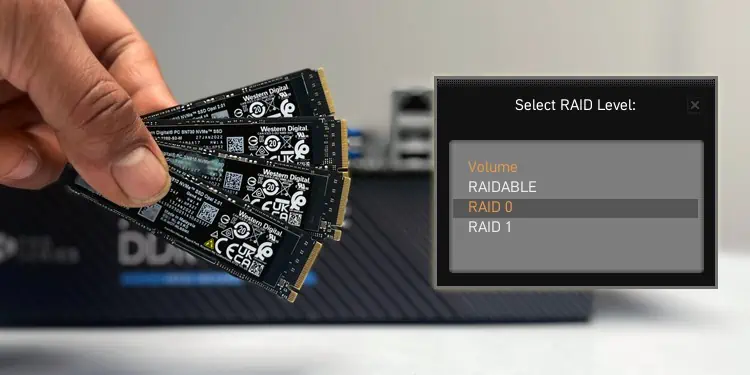
You’ll have access to different options depending on the number of drives used and the levels supported by your board. The possible levels on AMD boards include:- Volume – Just a bunch of disks (JBOD). This lets you pool multiple disks to create one logical volume.
- RAIDABLE – Marks disks as RAIDABLE. You can use these disks to recover degraded arrays or convert them to RAID 0 or 1.
- RAID 0 – Uses two or more disks. The data is striped, meaning you get higher storage capacity and improved R/W speeds. But there’s no redundancy leading to a higher risk of data loss. This shouldn’t be used to store important files.
- RAID 1 – Uses two or more disks to mirror data from one drive onto the other. This is the opposite of RAID 0 as it provides redundancy instead of storage or R/W benefits.
- RAID 5 – Uses three or more disks to stripe data along with parity. This means it provides both redundancy (can handle one failed drive) and performance improvements.
- RAID 10 – Uses four or more disks to combine striping (RAID 0) and mirroring (RAID 1). This means it can tolerate 1-2 drive failures while also providing performance improvements.
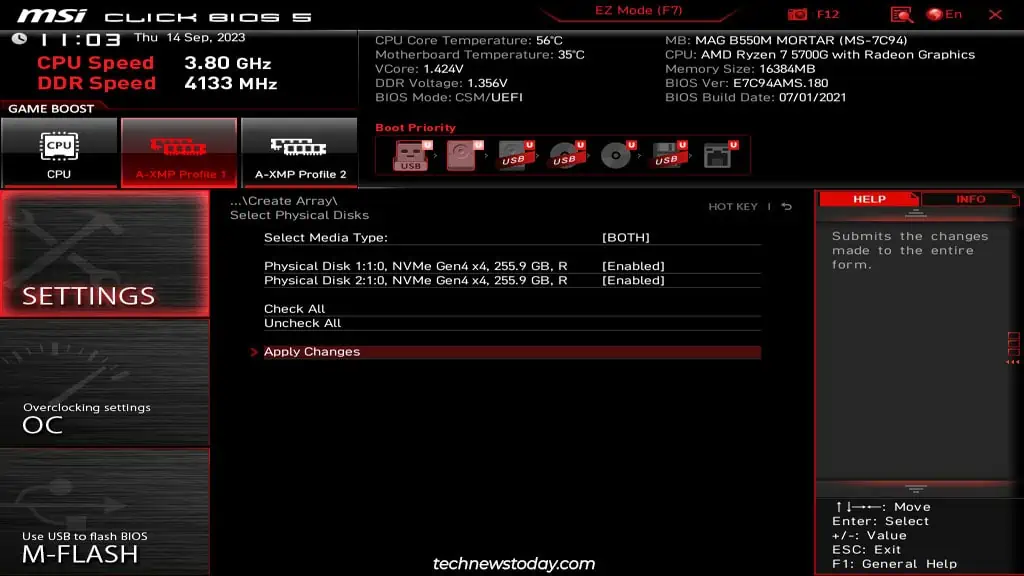
- Next, go to Select Physical Disks. Enable the drives to use for the array here and click on Apply Changes.

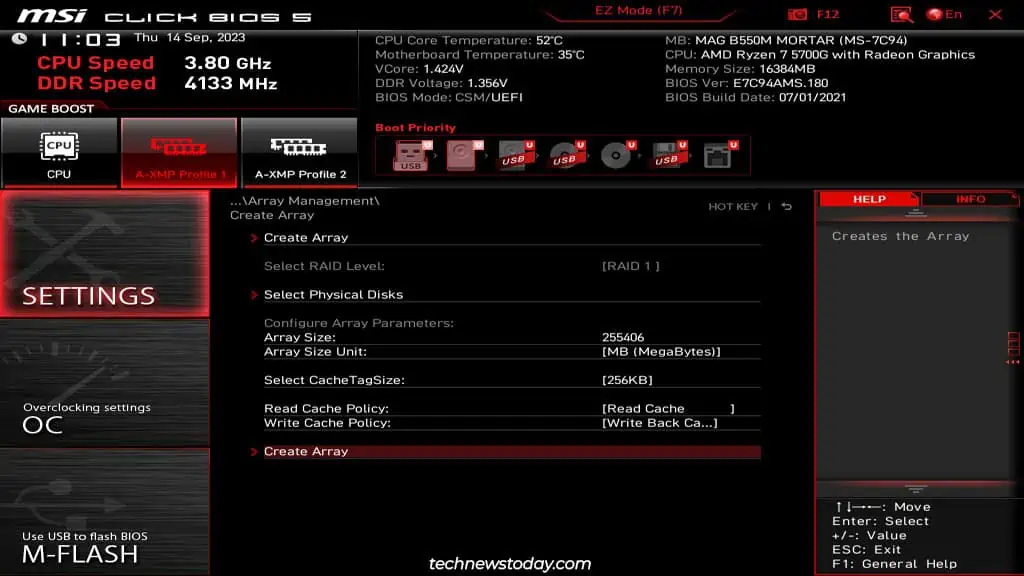
- You can alter the array parameters such as the CacheTagSize (stripe size) if you want, but the default values will work well for most people. When you’ve finalized everything, select Create Array to set up the array.

- Finally, press F10 to save and reboot. After exiting the BIOS, you should boot your system using the OS installation media. Continue with the steps from the Installing Drivers section to do this.
Using IRST (Intel)
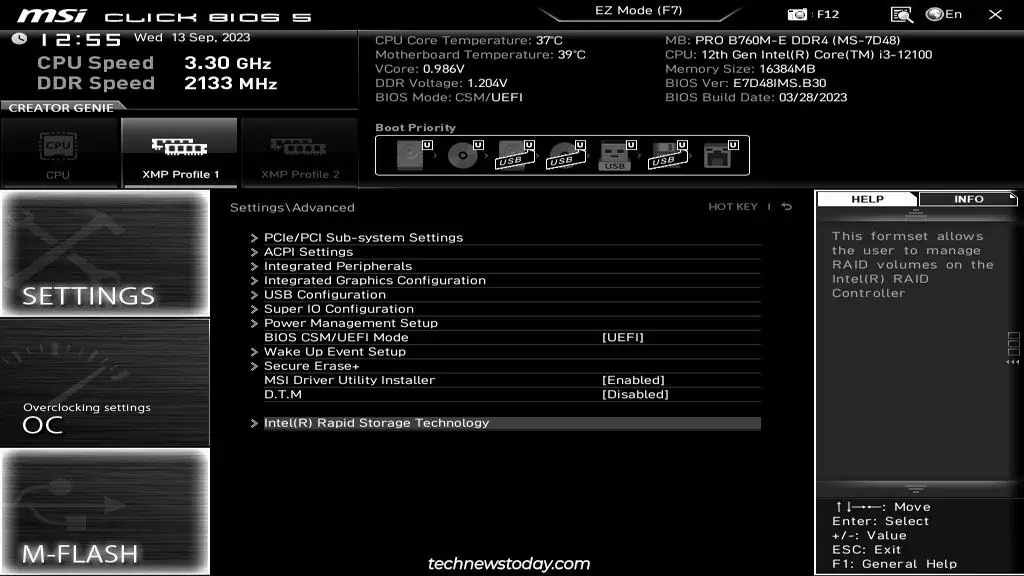
- Enter the MSI BIOS and go to Settings > Advanced. Open the Intel(R) Rapid Storage Technology utility from here.

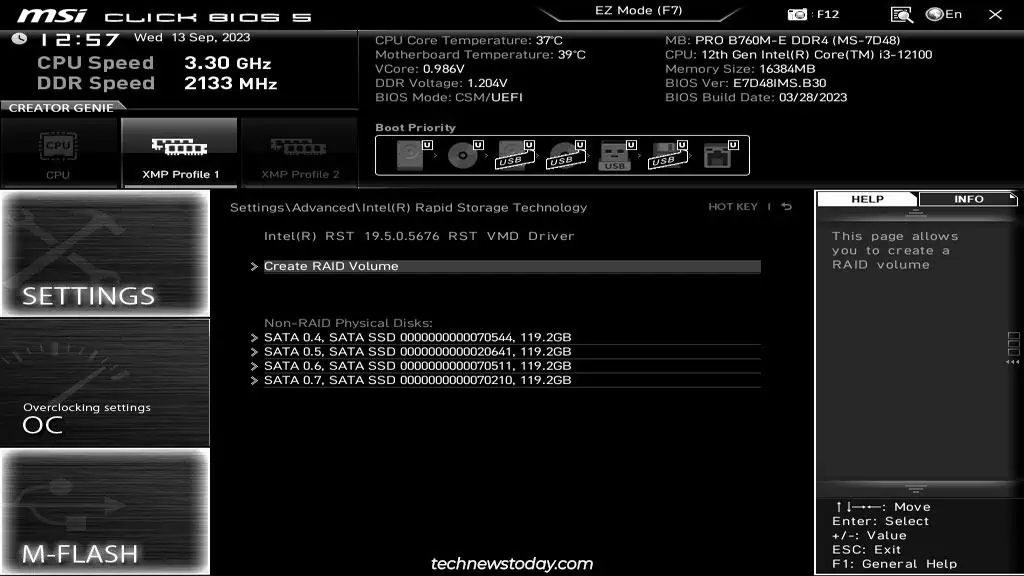
- Select Create RAID Volume.

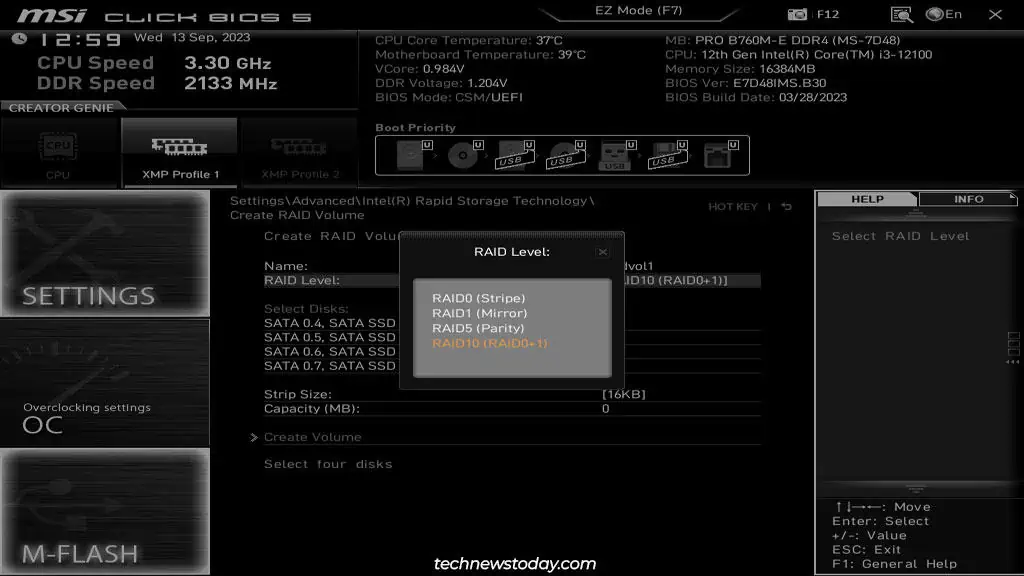
- Here’s the most important part. Select the RAID level appropriate for your needs.

The available levels on MSI’s Intel boards include:- RAID 0 – Uses two or more disks. The data is striped meaning you get higher storage capacity and improved R/W speeds. But there’s no redundancy leading to a higher risk of data loss. This shouldn’t be used to store important files.
- RAID 1 – Uses two or more disks to mirror data from one drive onto the other. This is the opposite of RAID 0 as it provides redundancy but no storage or R/W benefits.
- RAID 5 – Uses three or more disks to stripe data along with parity. This means it provides both redundancy (can handle one failed drive) and performance improvements.
- RAID 10 – Uses four or more disks to combine striping (RAID 0) and mirroring (RAID 1). This means it can tolerate 1-2 drive failures while also providing performance improvements.
- Recovery – Use this to restore a RAID 1 or 5 array by replacing one disk.
- Matrix RAID – This lets you create two RAID volumes on a single RAID array.
- RAID-Ready – Set up a RAID-Ready system with a single SATA drive. This lets you upgrade the system to RAID 0, 1, or 5 at a later point without losing data.
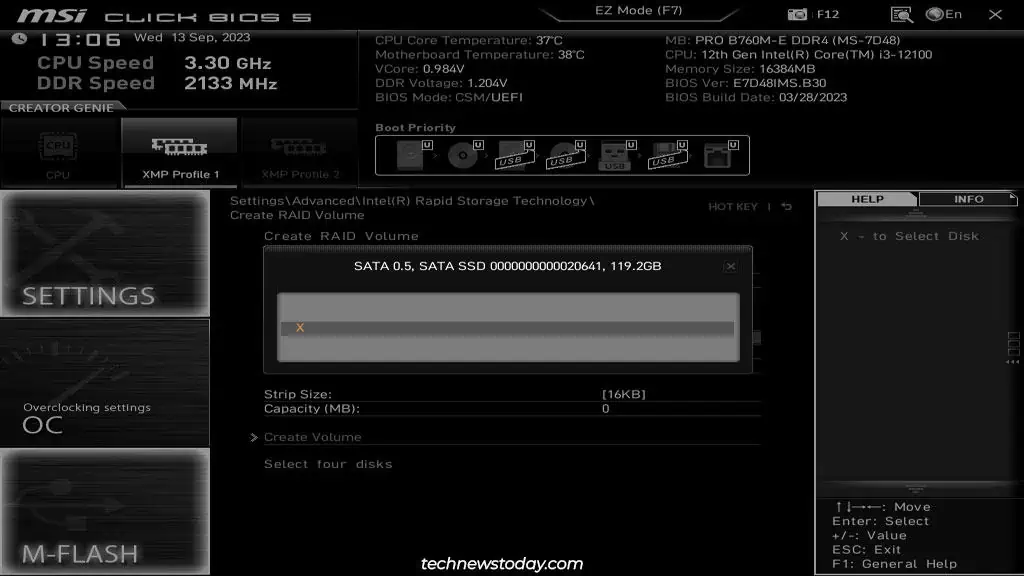
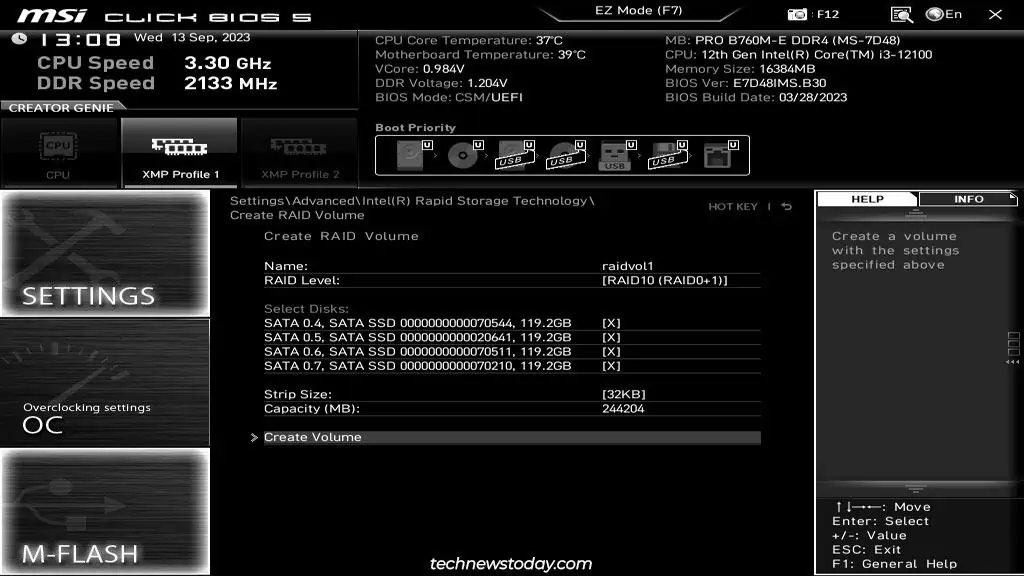
- Enable the disks for the array by marking them with X.

- You can alter parameters like the Strip Size if you want. Afterward, click on Create Volume to set up the array.

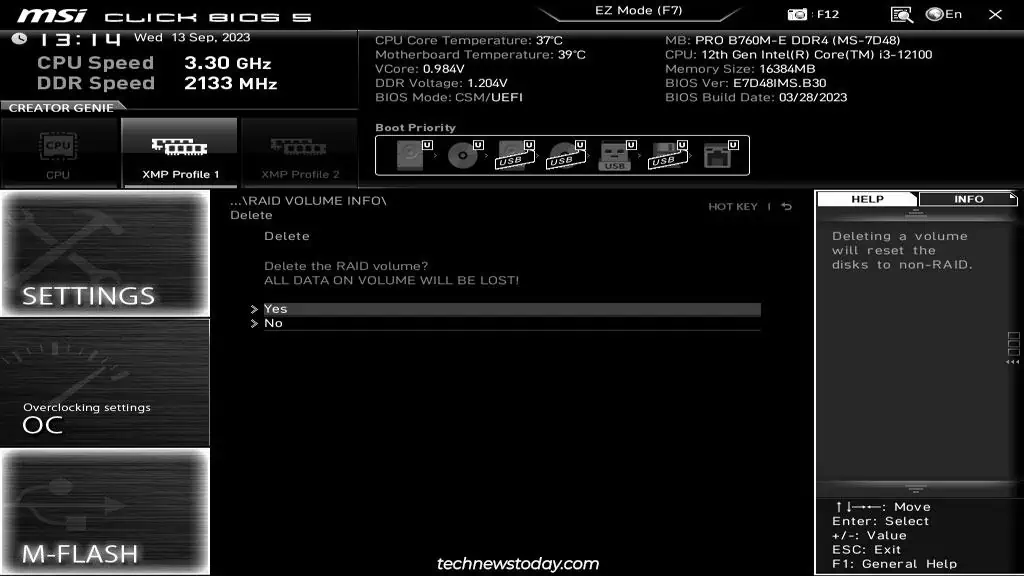
- After creating the array, you’ll have access to actions like deleting the volume or resetting a disk to non-RAID status. The former wipes the entire array, while the latter removes the RAID structure and degrades the array. In this case, the array can be rebuilt by replacing the failed disk.

- When you’re done checking everything, press F10 to save and reboot.
Installing the RAID Drivers
Once you create the RAID array, the next step is to install the OS onto it and boot with it. The process goes something like this:
- Use Rufus or your preferred utility to create a bootable USB.
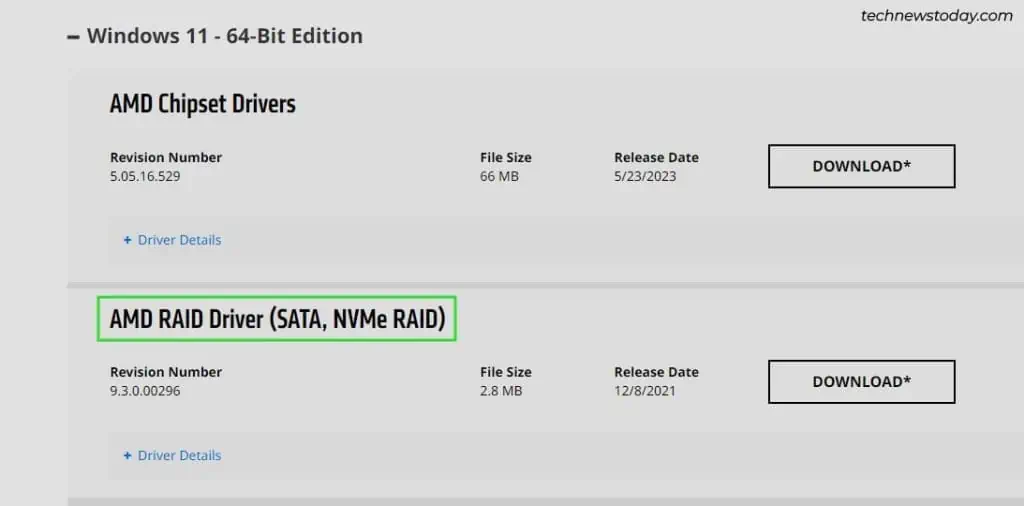
- Download the RAID drivers and move them to this USB. The drivers will differ depending on variables like the CPU, chipset version, OS version, SATA or NVMe RAID, etc. The linked guide will help you get the correct RAID driver for your system as it covers this topic in detail.

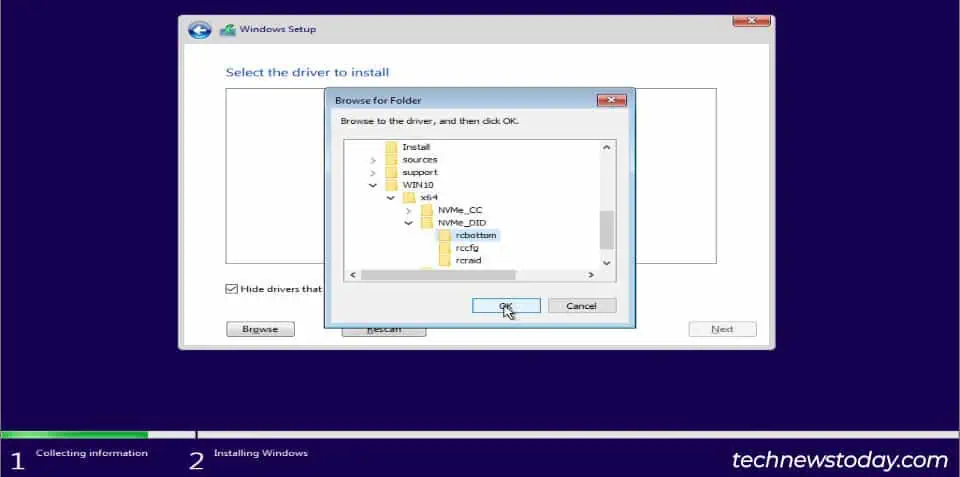
- After preparing the USB with the drivers, boot from it to launch the Windows Install wizard. Load the drivers here to make the RAID volume accessible.

After Setting Up RAID
RAID was designed to provide storage and performance benefits and ensure your system doesn’t go down because of a failed disk. Although commonly misunderstood, it is not the same thing as a backup.
You could still lose your data due to various reasons ranging from multiple disk failures to malware or simple human error. So, it’s very important that you set up a separate backup of any critical data elsewhere.

