If you ever want to install a new OS or use a recovery drive, you’ll need to boot from a USB drive instead of your default boot disk.
On MSI boards, you can use the Boot Menu to quickly select the USB drive. Or, you can enter the MSI BIOS and change the Boot Order in EZ or Advanced Modes. It’s a quick and easy process most of the time.
But when setting up new systems for our writers at TNT, I’ve seen a few cases where the USB wasn’t detected or wasn’t bootable. I know that this is a common problem that affects a lot of people.
So, in this article, I’ll cover the steps to boot from a USB on MSI boards and what you can do if you encounter any problems.
Use the Boot Device Menu
As USB booting is generally a one-time thing rather than a permanent change, the Boot Device menu tends to be the best way to boot from a USB.
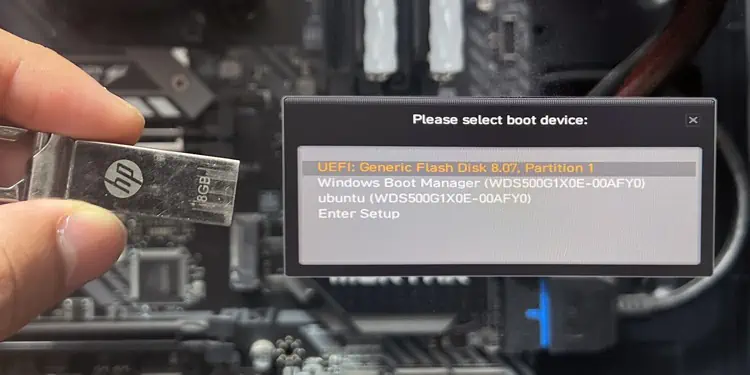
Connect the USB, power on the PC, and repeatedly press F11 on the POST screen. You’ll be prompted to select the boot device.
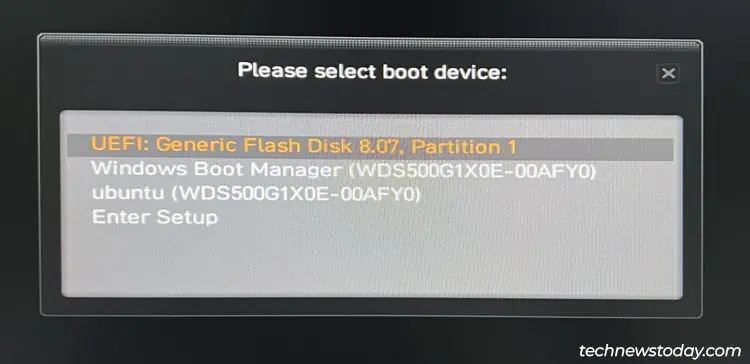
Select the USB drive here and press Enter to boot with the USB.
Configure Boot Order In BIOS
The Boot Order list in the BIOS lets you permanently set USB drives to the highest priority. This is how I’ve set up my own system.
When I connect a bootable USB, my system automatically boots from said USB. When no USBs are connected, my system boots from the second boot entry instead, which is my SSD.
To configure your boot order in a similar manner, power on the PC and repeatedly press Del/F2. You’ll now enter the MSI BIOS.
EZ Mode
The MSI BIOS loads to EZ Mode by default. Drag the USB to the first position in the Boot Priority section.
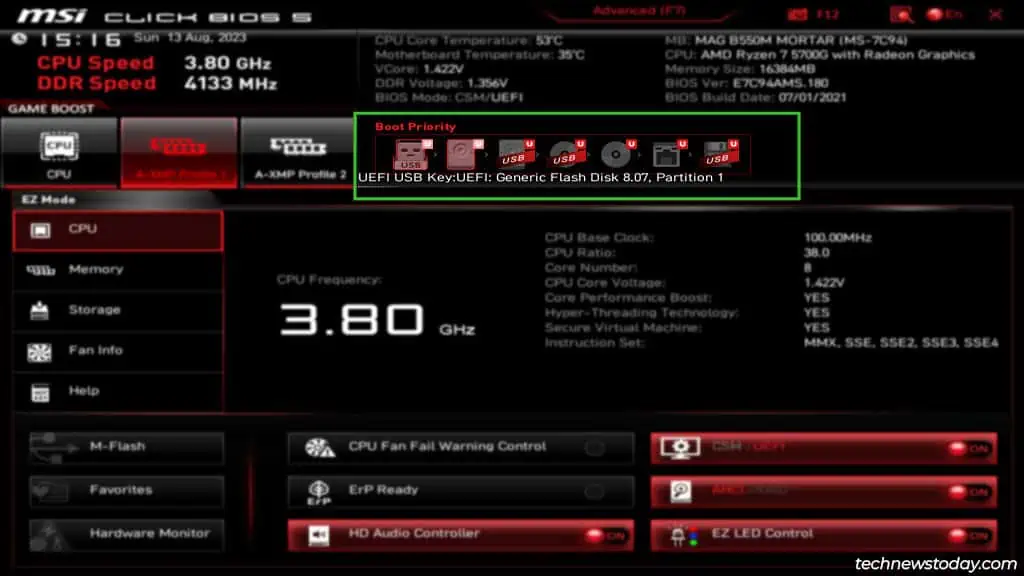
Arrange any additional boot options as desired. Then, press F10 to save the changes and exit the BIOS.
Advanced Mode
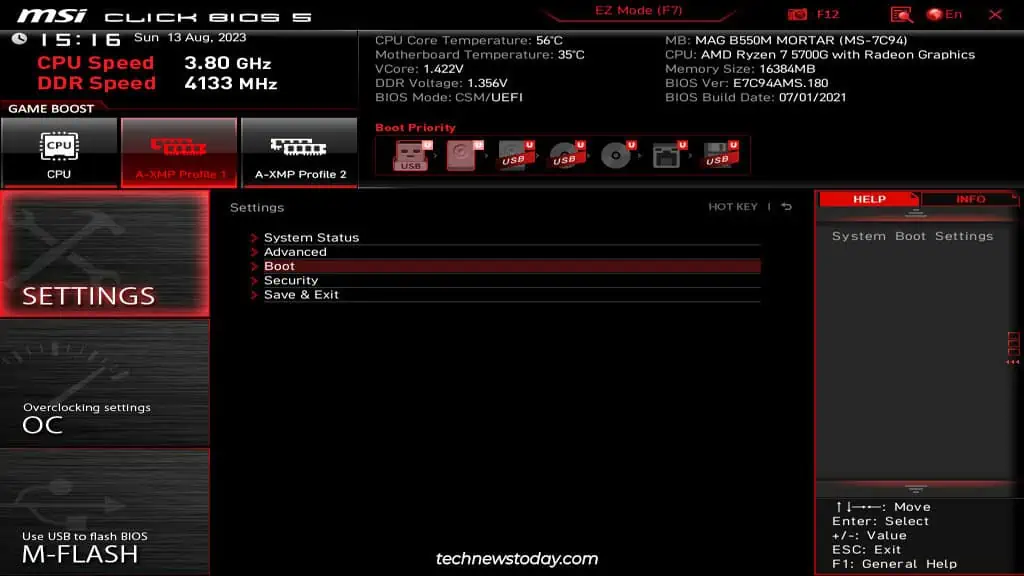
You can also press F7 to switch to the Advanced Mode interface.
- Here, select Settings > Boot.

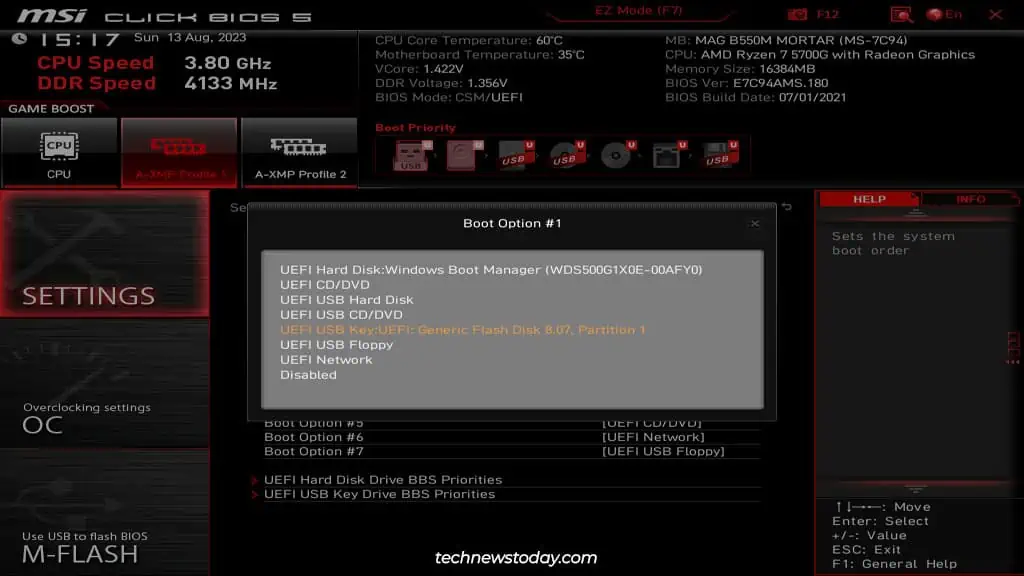
- Click on Boot Option #1 and select the USB drive.

- Configure the other boot options if required. Then, press F10 to save the changes and exit the BIOS.
USB Boot from WinRE
Although rarely done, it’s also possible to boot using a USB drive from the Windows Recovery Environment (WinRE). As this is a UEFI feature, it only works on Windows systems running in UEFI or CSM modes (Legacy is not supported).
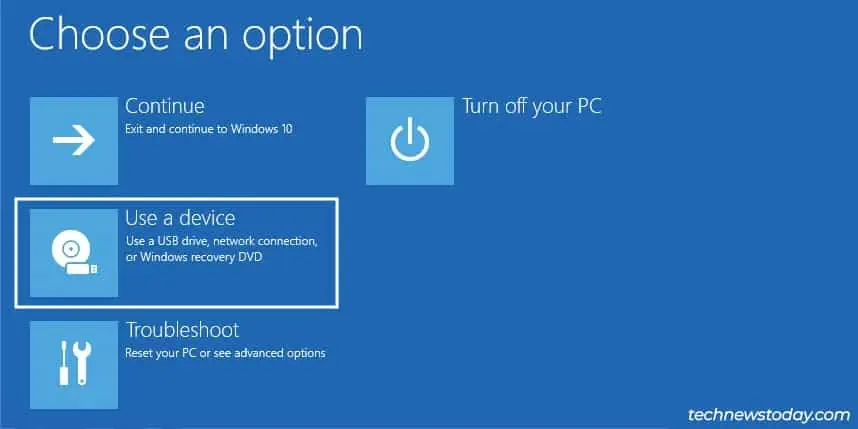
- Use the restart button on the case to reboot your PC 3 times in a row. This’ll boot you to WinRE.
- Select See advanced repair options > Use a device and pick the USB drive here.

Troubleshooting USB Boot Issues on MSI
As stated earlier, it’s fairly common that a bootable USB doesn’t get detected or doesn’t work. Start by figuring out why the BIOS isn’t detecting it:
- First, get any hardware problems like damaged USB ports or dead USB drives out of the way. To do this, try the USB on each port. If it doesn’t work, test it on a different system to make sure it’s not dead.
- If it worked on the other system, ensure you tried all three methods from this article. Sometimes, one of the methods works while the others don’t.
- Next, disable Fast Boot. It can disable removable devices until Windows loads, so this could prevent the USB from being detected.
- Check if you have enabled secure boot. If yes, temporarily disable Secure Boot as it can also prevent you from booting using unverified devices.
- The USB’s target system (Legacy/CSM/UEFI) and partition flavor (MBR/GPT) must match your current system configs. Most modern systems run in UEFI or CSM mode. You must create the bootable USB with the same matching configs.
- When creating the USB, try using a different tool this time.
- Finally, if you’re using an old BIOS version, I recommend updating the BIOS as a last resort, as I’ve seen this fix a lot of similar hardware compatibility problems.

