We use a network bridge when joining two different networks to make them work as a single one. But if you haven’t configured the settings well, this feature might not work for you.
When we use a virtual machine, it creates a new network adapter for itself. However, for some reason, you may lose internet access on your VM if the network bridge setting isn’t done right.
If you want to fix this issue, you’re at the right place. Here, we have discussed what a network bridge is and why it is so important. Also, this article gives an insight on how to resolve the problem within the virtual box settings.
What is Network Bridge?
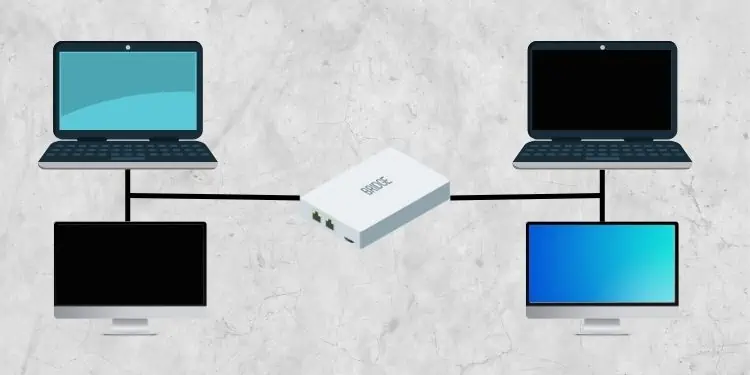
Before diving into the main topic, let’s first understand what a Bridge is. Basically, it is a networking device that connects two or more networks into one. This way, you can extend your LAN to a slightly larger area.
Let’s suppose you have set up two different networks at your home or office. But, you want one computer (connected to the first network) to communicate with another computer (connected to the second network).
To do this, you can connect the two networks to a Bridge. This way, you’ll have a single LAN network with two segments working on different collision domains.
But, if you’re running a virtual machine, you require at least two network adapters. Then, configuring simple Windows settings can help you bridge these connections.
Should You Bridge Two or More Networks?
Well, there are many advantages if you bridge two or more networks. Here’s a list that includes why you should bridge network:
- Firstly, bridging two or more networks can reduce network collisions.
- Since the network bridge is mainly used to create segmentation, we can notice that the network traffic is significantly reduced.
- Well, network bridging can help create separate collision domains for each segment. This means it can provide enough bandwidth to those computers connected to the network.
- Also, if you’re looking to connect two distinct network segments, a network bridge is probably one of the best options.
- Lastly, you may bridge two or more networks when you don’t have any more ports available on your router, and the Wi-Fi connection isn’t that reliable.
How to Fix Network Bridge Not Working in Virtual Machines
Most of us have faced network bridge issues while using virtual machines. Whether you use VMWare or Oracle VirtualBox, you can easily configure bridged network settings on them. Below are some general fixes you can try if the network bridge is not working in your VM.
Select Bridged Option From Network Adapter Settings
The first thing to check is whether you have chosen the right Network Connection. Well, you must select the Bridged option in Virtual Machine Settings for the network bridge to work fine.
Basically, you’ll find other options too – NAT, Host-Only, Generic, etc. But we can’t achieve a bridged network if any of these is chosen.
On VMWare Workstation 16 Player
Follow these general steps on VMWare Workstation to check whether your Network Connection is set to Bridged or not:
- After launching VMWare, choose your desired OS from the left panel, so the settings get saved for it.
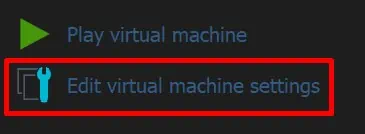
- Move to the right panel and click on Edit virtual machine settings.

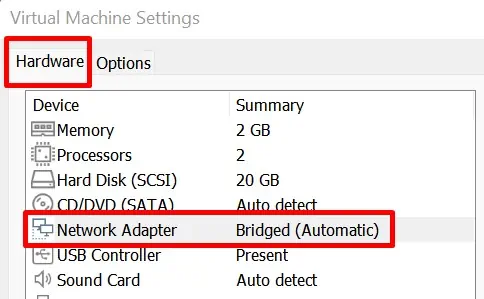
- Once a new window pops up, go to the Hardware tab.
- Next, choose the Network Adapter option.

- Then, move to the right panel and click on the radio button for Bridged.

- Finally, click on Ok.
- You may have to restart your PC if it doesn’t resolve the issue immediately.
On Oracle VM VirtualBox Manager
Similar to VMWare, you can choose the Bridged option on Oracle VM VirtualBox Manager using the following process:
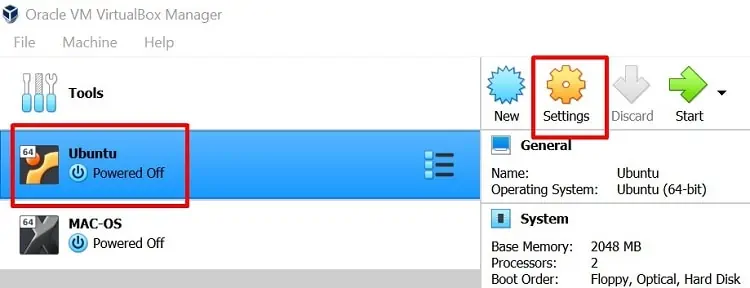
- Launch the VirtualBox and choose your desired OS from the left panel.
- From the right panel, click on the Settings icon.

- Next, choose the Network tab from the left side of the window.
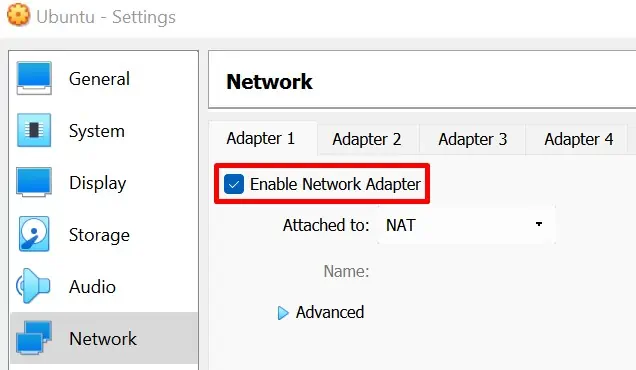
- Now, select an adapter you wish to make changes for. To enable the adapter, simply tick the Enable Network Adapter option.

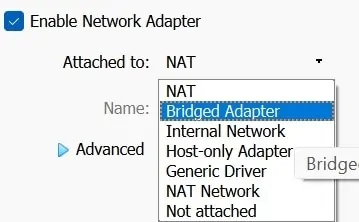
- Expand the Attached to drop-down and choose Bridged Adapter.

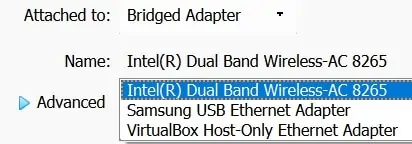
- Then, check the Name field. Make sure you select the correct network adapter that provides internet access.

- Finally, tap on the Ok button, and check if your problem has been resolved.
Make VMnet0 Auto-Bridge to Manual In Virtual Network Editor
If your Network Connection is set to Bridged, but your network bridge is still not working, you can try choosing the VMnet0 option. By default, VMnet0 is set to Auto-Bridge. Now, we must bridge it to the network adapter connecting us to the internet.
Well, it’s best to apply these changes using the vmnetcfg application. However, this .exe file is only available in the VMWare Workstation Pro. So, here’s how you can do it:
- Navigate to Desktop and double-click on This PC.
- Then, go to Local Disk (C:).
- Next, choose Program Files (x86) or the folder where your program files are generally stored.
- Choose VMWare and go to VMWare Workstation.
- Now, find and launch the vmnetcfg application with administrative privileges. If you don’t see it, it’s probably because you’re not using the pro version.
- Once the Virtual Network Editor opens, choose Vmnet0.

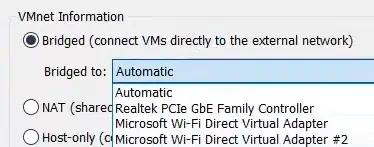
- Then, under VMNet Information, expand the Bridged to field and select your desired network adapter.

- Finally, press Ok and start the VMWare program. You may even have to restart your PC to make these changes.
Use a New Network Adapter
If neither of the two techniques works for you, it might be because of the corrupted network adapters on your virtual machine. Thus, this section guides you on how to create a new adapter on both VMWare and VirtualBox.
On VMWare
For demonstration, we have used VMWare Workstation 16 Player:
- Launch the application and choose the OS from the left side of the window.
- Next, choose Edit virtual machine settings.
- In the Hardware section, select Network Adapter.
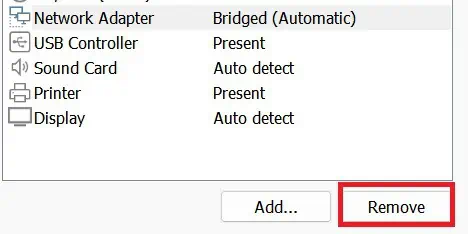
- Move down and choose Remove. This will delete the Network Adapter wizard from the panel.

- Then, click on Add…
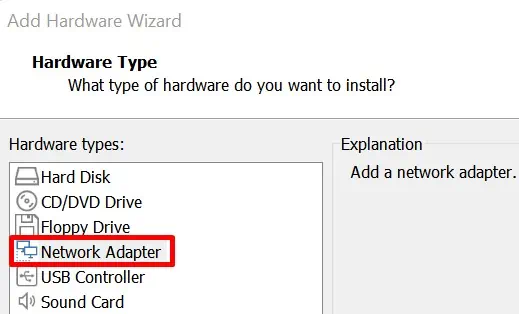
- Under Hardware types, choose Network Adapter and press the Finish button.

- Once the new adapter is added, the Summary is set to NAT by default. So, simply choose Bridged from the Network connection section.
- Lastly, choose Ok and see if this has fixed your problem.
On VirtualBox
Unlike on VMWare, you can temporarily disable a certain adapter on VirtualBox and reenable it with a single click:
- Launch the Oracle VM VirtualBox Manager and choose your desired OS.
- Next, click on Settings.
- Then, go to the Network tab and navigate to your adapter.
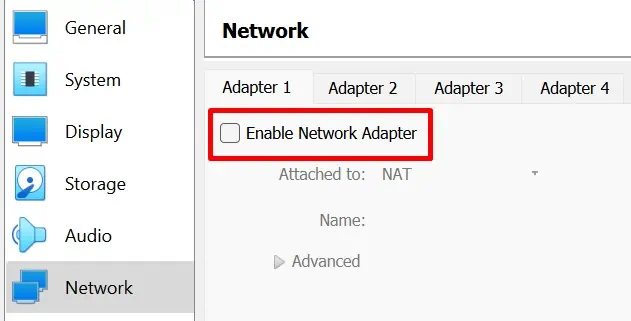
- Now, untick the Enable Network Adapter option and choose Ok.

- Visit Settings > Network > [Your Network tab] again.
- This time, tick the Enable Network Adapter option and press Ok.
Otherwise, you can choose a new adapter instead of the one you used earlier.
Reinstall Your Virtual Machine
Now, the final option is to reinstall your virtual machine. To do so, you can uninstall the program from the Control Panel:
- Search for Control Panel on the Search Menu and launch it.
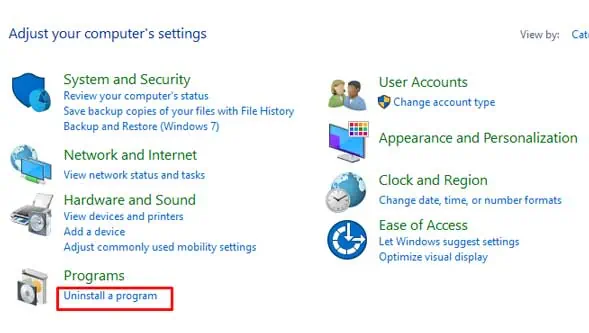
- Under Program, click on the Uninstall a program option.

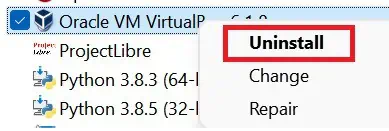
- Scroll down and find VMWare or VirtualBox, whatever you’re using. Right-click on it and choose Uninstall.

- Next, follow the necessary steps to finalize the uninstalling process.
After removing the application from your PC, download the latest virtual machine version. Then, make sure you choose the Bridged option as we discussed above.
How to Fix Network Bridge Not Working on Windows 11 Host PC
Some PCs might lose internet connection after the bridging is complete. Moreover, you can also notice this on the Network Bridge, where it shows ‘Unidentified Network’. If you face this issue, go through the following steps to resolve it:
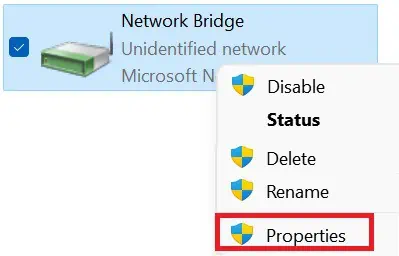
- Right-click on the Network Bridge and choose Properties.

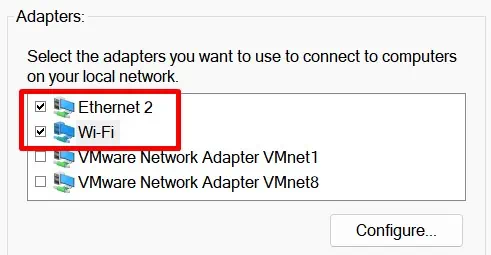
- In the Adapters section, make sure the adapters you chose are ticked.

- Next, navigate to the This Internet uses the following items: section. Here, tick and select the Internet Protocol Version 4 (TCP/IPV4) option.
- Then, press the Properties button.

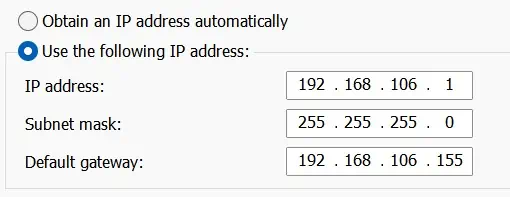
- Next, mark the radio button for Use the following IP address.
- Now, in the IP address, enter your valid IPv4 address. For demonstration, we’ve used
192.168.106.1. - Then, press Tab, and the Subnet mask is filled in automatically.
- In the Default Gateway field, you must use your router’s default gateway. For demonstration, we have used
192.168.106.155.
- Again, in the Use the following DNS Server addresses section, enter an IP on the Preferred DNS server field. Let’s say
192.168.106.155.
- Also, you can add another IP in the Alternate DNS Server field or simply skip this step.
- Finally, click on Ok and close the Network Bridge Properties.
- Wait for several seconds until the Network Bridge identifies your network. If it consumes a lot of time, disable and reenable it.

Related Questions
How Can I Manually Bridge Connections on Windows 11?
Well, Windows provides a feature that helps to bridge connections on Windows in just a few minutes. This section covers the manual method of creating a Network Bridge by bridging two different network adapters and fixing the internet connectivity issue.
Follow these general steps to get an idea of how to bridge two or more connections on Windows 11 manually:
- First of all, make sure you have two network adapters active. For example, you can take one wireless network adapter and another ethernet network adapter.
- If you’re connected to the internet via WiFi, right-click on the WiFi icon on your taskbar. Then, choose Network and Internet Settings.

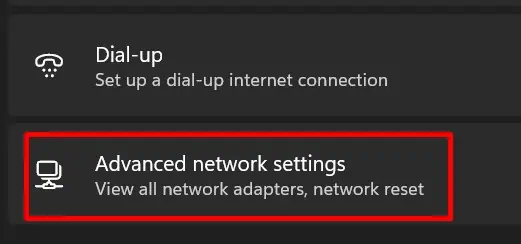
- Scroll down and select Advanced network settings.

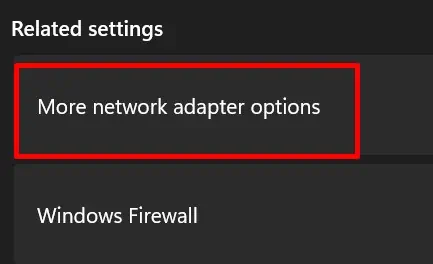
- Under Related settings, tap on the More network adapter options.

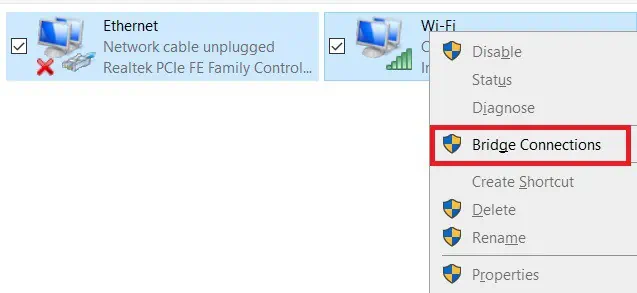
- Here, you’ll see all the network adapters on your PC. Select your desired adapters (two or more as per your choice).
- Right-click on any one of them and click on Bridge connections.

- Wait for a few seconds until the bridging is complete. The bridge is created and visible in the Network Connections window upon completion.


