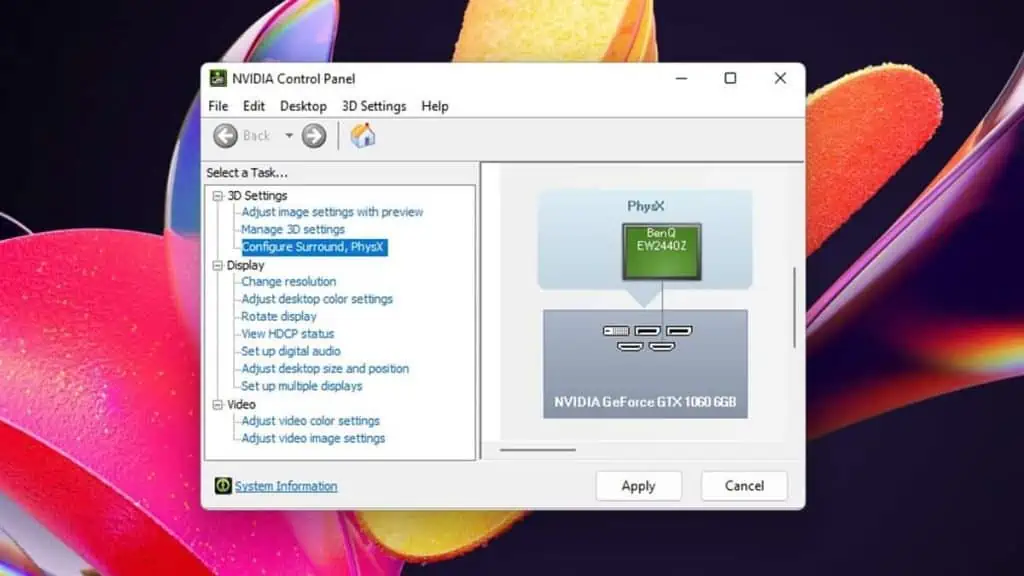
Normally, you can use the context (right-click) menu or search results to load the NVIDIA Control Panel. However, you may not be able to run it in some situations.
If your NVIDIA Control Panel is not opening, it’s because of issues with the NVIDIA processes, services or drivers. To resolve this problem, restart the relevant processes and services or reinstall the NVIDIA driver.
You can also make the NVIDIA Control Panel’s executable file available on the Desktop and run it as a workaround.
End or Restart NVIDIA Processes
Your system won’t open the NVIDIA Control Panel if is think’s the process is already running. In such cases, close all NVIDIA-related processes from the Task Manager.
Your system will automatically reopen necessary background processes like NVDisplay.Container. Then, you can safely try to load the NVIDIA Control Panel.
To end the NVIDIA processes,
- Press Ctrl + Shift + Esc to open the Task Manager.
- Go to the Details tab Look for processes with NVIDIA’s logo.
- Right-click on all of them and select End Process tree > End process tree.

If simply refreshing the NVIDIA processes doesn’t help, restart your computer to take care of all other minor issues and try again.
Start or Restart the NVIDIA Service
To open the NVIDIA Control Panel, the NVDisplay.Container.exe and nvcontainer.exe processes must be running on your system. And to run them, your system uses the NVIDIA Display Container LS service.
So make sure such services are running properly. If they are already running, restart them. For that,
- Open Run by pressing Windows + R.
- Type
services.mscand press Enter. - Look for services that start with NVIDIA.

- Double-click on each service.
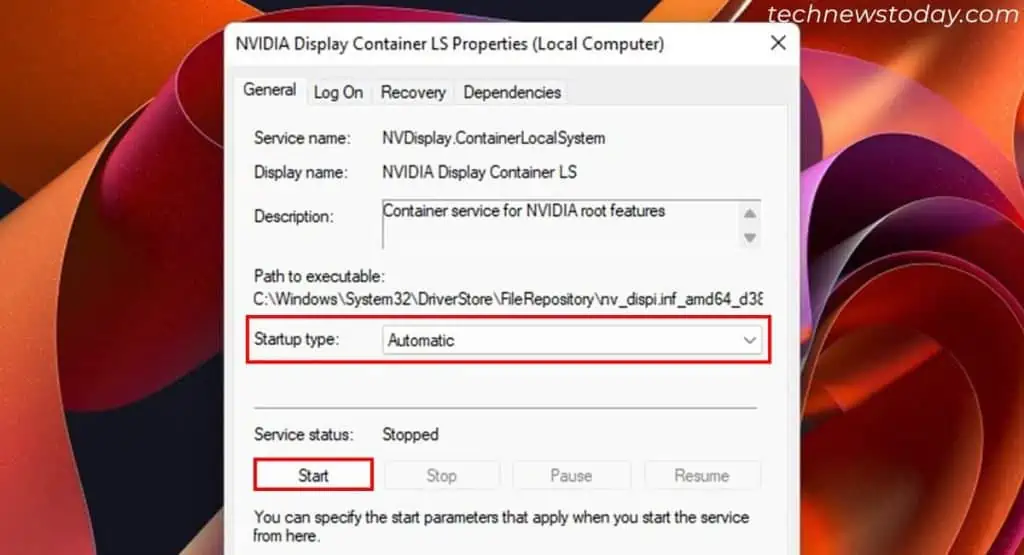
- Make sure that the Startup type does not say Disabled. If so, set it to Automatic and click Apply.
- If the Service status says Stopped, click Start. If it is running, click Stop and then Start.

You might also need to end the NVIDIA processes afterward.
Reinstall NVIDIA Driver using DDU
NVIDIA Control Panel comes as a part of the NVIDIA Display Driver. If the above solutions don’t help, it’s likely that the driver itself has some errors.
In such cases, first uninstall it using the Display Driver Uninstaller (DDU) to cleanly remove all NVIDIA components. Then, install the latest driver afresh from official sources.
- Go to the NVIDIA driver downloads webpage.
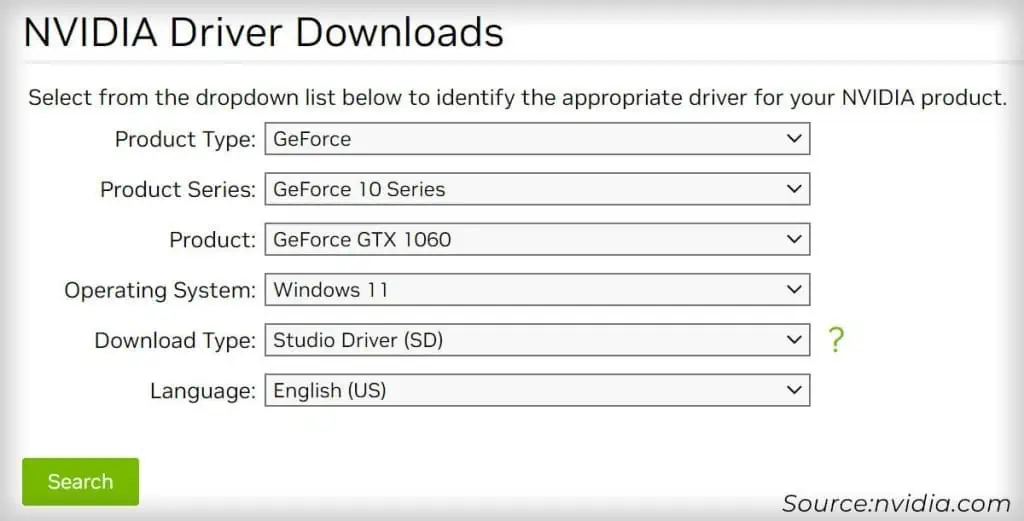
- Specify the graphics card and OS options. Click on Search.

- Click Download under the latest driver version. Confirm with Download again.
- After that, download the latest version of the Display Driver Uninstaller (DDU) from its forum.
- Disconnect any internet connections and extract the DDU files.
- Go to the extracted contents and open Display Driver Uninstaller.
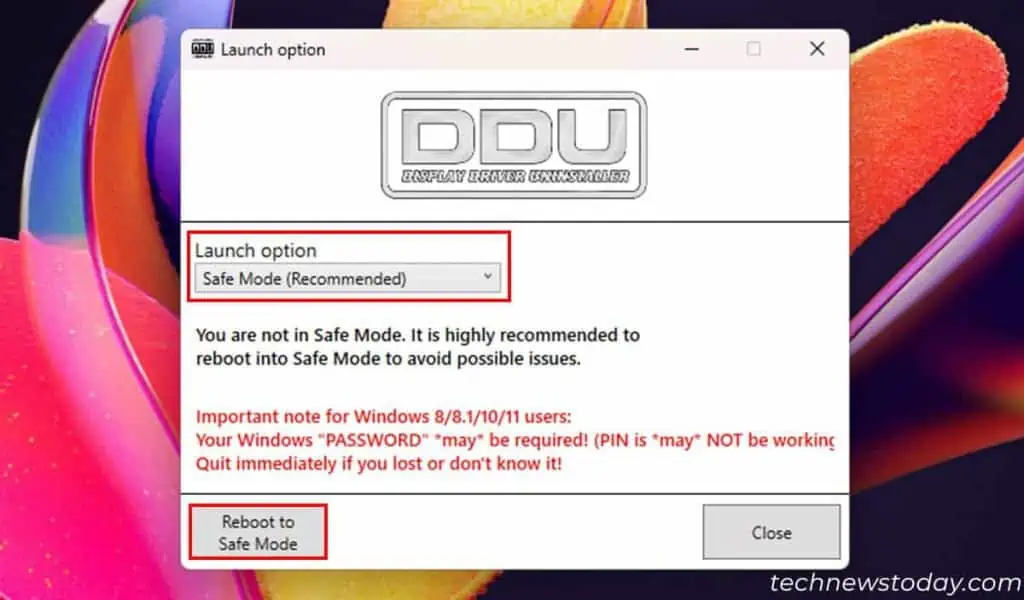
- Set the Launch option to Safe Mode and click Reboot to Safe Mode.

- If such prompts don’t appear, click on Options and check the Enable Safe Mode dialog. Restart DDU and the prompt should appear.
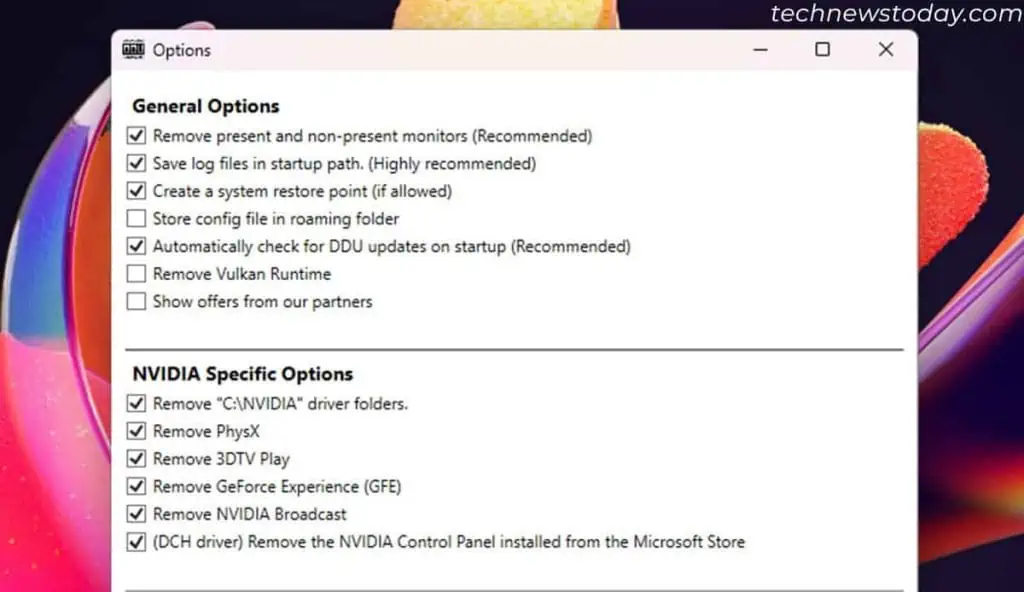
- After rebooting in safe mode and opening DDU, click Options.
- Disable all Intel and AMD options.
- Under General Options, check Create a system restore point along with all recommended options.
- Check everything under NVIDIA Specific Options and click Close.

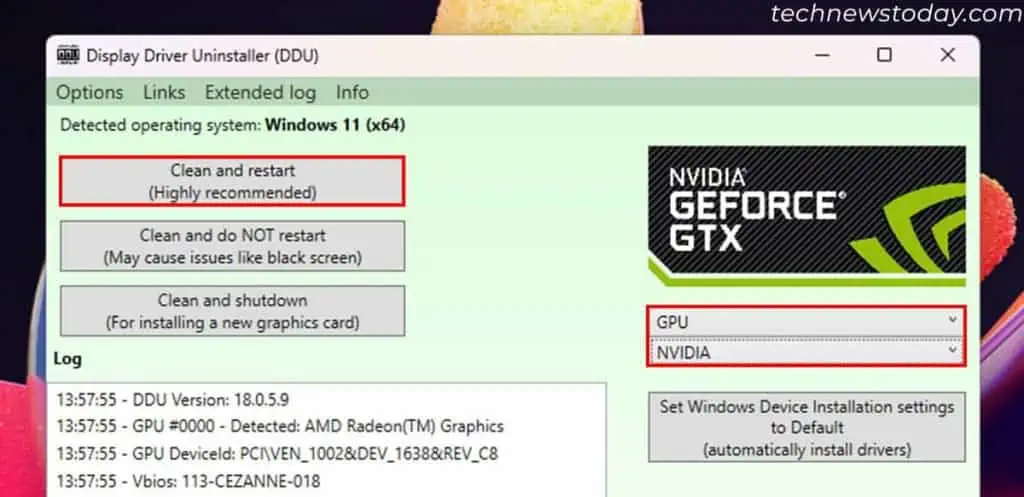
- Set Select device type to GPU and Select device to NVIDIA.
- Hit Clean and restart.

- After the restart, run the driver installer you downloaded from the official NVIDIA website. Follow the on-screen instructions to install it.
Copy the NVIDIA Control Panel Folder to the Desktop
It is more of a workaround, but you can copy the NVIDIA Control Panel folder to Desktop and run the app through its original executable file.
This process bypasses all methods used in opening the file from the context menu or the shortcut, so it may prove useful.
The NVIDIA Control Panel is stored as a Universal Windows Platform (UWP) app and you can’t normally access it through the File Explorer. Use the PowerShell command-line interface to copy the folder.
Here’s the entire process:
- Open Run by pressing Windows + R.
- Type
powershelland press Ctrl + Shift + Enter to open the Elevated Windows PowerShell. - Type the following command and press Enter to copy the NVIDIA Control Panel’s folder to Desktop:
Get-AppxPackage 'NVIDIACorp.NVIDIAControlPanel' | % { Copy-Item -LiteralPath $_.InstallLocation -Destination $Env:USERPROFILE\Desktop -Recurse -Force; Invoke-Item "$Env:USERPROFILE\Desktop\NVIDIACorp.NVIDIAControlPanel_*\nvcplui.exe" }
- It will create a NVIDIACorp.NVIDIAControlPanel… folder in the Desktop. Open it and run
nvcplui.exewhenever you wish to load the NVIDIA Control Panel.
