If you use an NVIDIA graphics card, you may be familiar with the process of installing its driver. You will need to download the executable driver file and install it separately. If the installation is successful, the PC will automatically use the graphics card to display.
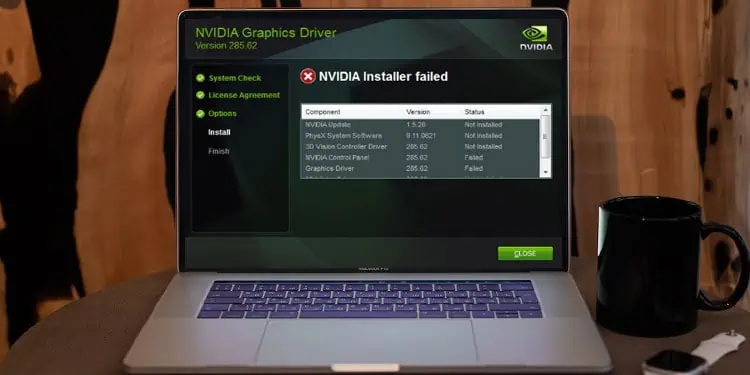
However, the installation process may interrupt, giving you an NVIDIA installer Failed error. The interruption could occur due to various reasons. It could be because of a corrupted driver file or another driver conflicting with the NVIDIA driver. Besides this, a process interruption from another application could also be causing the error message to pop up.
No matter the reason, this error will halt the setup process saying the graphics driver could not find compatible hardware. Depending on what caused the issue, there are several solutions to it. A straightforward solution would be to uninstall any previous graphics driver and install the NVIDIA graphics driver again.
If that does not work, we have discussed all the possible solutions to fix the NVIDIA installer failed error.
What Causes NVIDIA Installer Failed Error?
Most common reason the driver fails to install is due to previously installed graphics drivers. When this happens, both drivers are programmed to use the same resources, resulting in conflicts.
- Firewall or antivirus stopping the installation process
- System unable to verify the driver’s signature
- A process from another application caused the issue
How to Fix NVIDIA Installer Failed Error?
Before we get into the solutions, make sure you restart your PC and try installing the NVIDIA graphics driver. When you restart a PC, it releases any resources that are in use. So if the installer has issues with conflicted resource usage, the installation process could stop.
Therefore make sure you install the application once you reboot your system. If that does not work, here are some solutions you can follow.
Uninstall Display Driver using DDU
As previously said, any conflicts with previously installed graphics drivers could cause trouble when installing a new display driver. To make sure that this does not happen, we recommend that you uninstall all your graphics drivers first.
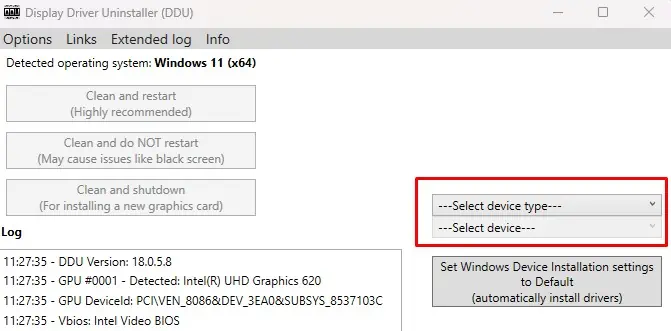
- Download Display Driver Uninstaller.
- Run the PC in safe mode
- Once the PC starts in safe mode, run the application.
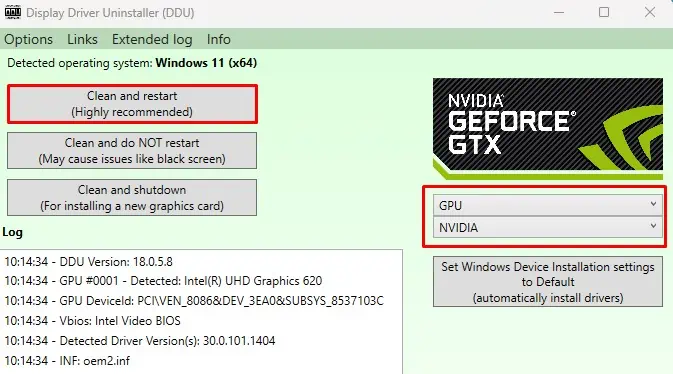
- Select Device type as GPU and Device as NVIDIA.

- Click on Clean and restart and wait for the process to complete.

- Now boot your system in normal mode and install the NVIDIA graphics card driver.
Perform Clean Installation
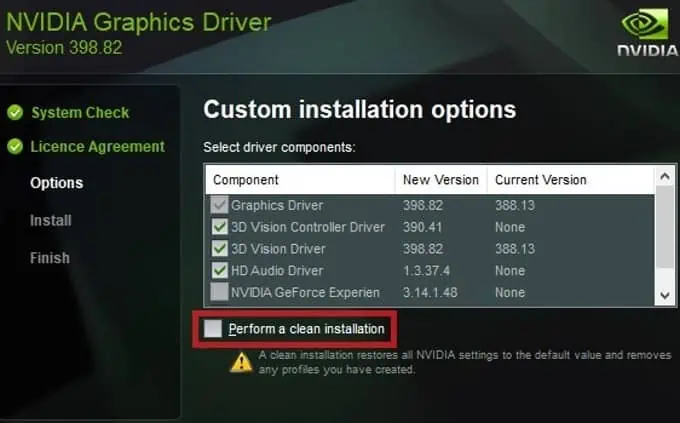
Alternatively, you can also perform a clean install when setting up the graphics driver. When you perform a clean install, the installation process restores all NVIDIA settings to their default state. Furthermore, it also removes any user-specific profile.
To perform a clean install,
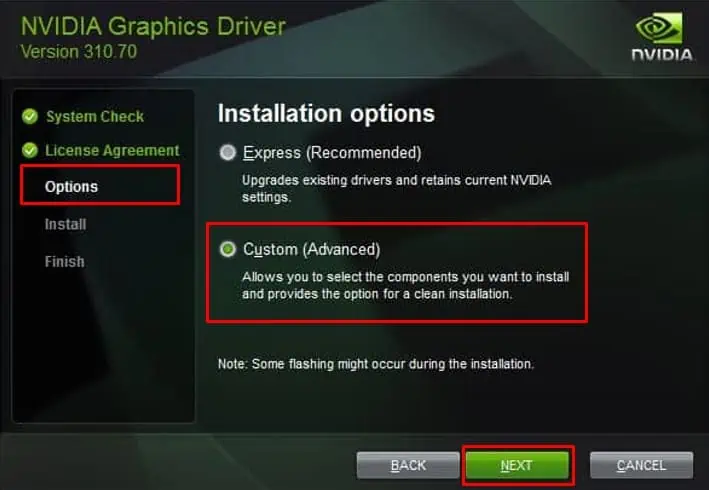
- Run the NVIDIA graphics driver file and follow the installation process until you get to Options.
- Here, select Custom (Advanced) and choose Next.

- Now, check Perform a clean installation and click Next.

- Follow the rest of the installation process.
End NVIDIA-Related Process
When installing a new NVIDIA driver, it is ideal that you remove other NVIDIA processes that run in the background. These processes constantly run in the background, taking some physical and graphical memory.
Installing a new NVIDIA driver on top of that could cause memory management issues stopping the process entirely. To make sure that this does not happen, we recommend that you end any NVIDIA background process first.
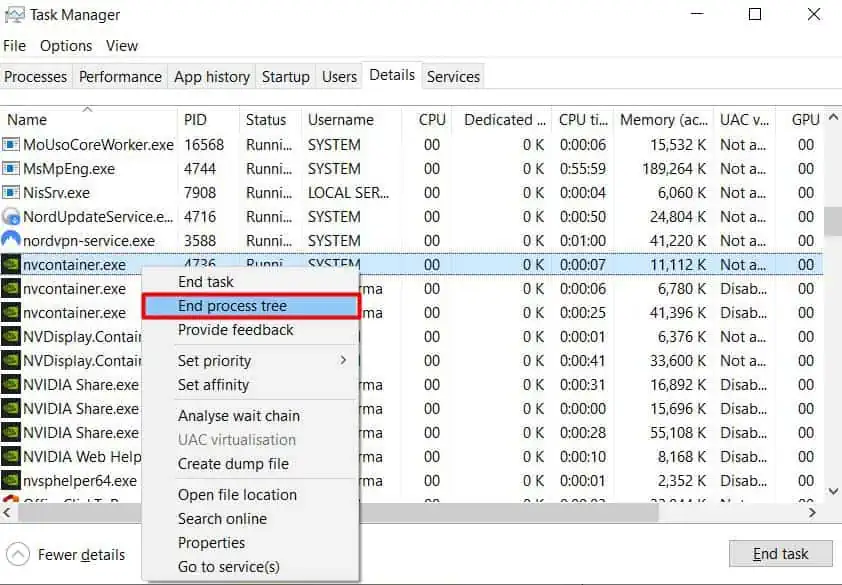
- Press the Ctrl + Shift + Esc to open the Task Manager.
- Go to the Details tab.
- Right-click on the process named nvcontainer and select End Process Tree.

- Repeat the same steps for the remaining NVIDIA Process.
Disable Driver Signature Enforcement
Microsoft has implemented a security feature named Driver Signature Enforcement, enabling the OS to only install digitally signed drivers into your system. If you have downloaded the NVIDIA driver that is not officially signed, the OS may block it from being installed.
Make sure that you have downloaded the graphics driver file from the official NVIDIA website. If you have the NVIDIA installation failed error even when you download them officially, you can disable driver signature enforcement and install the driver.
To disable driver signature enforcement,
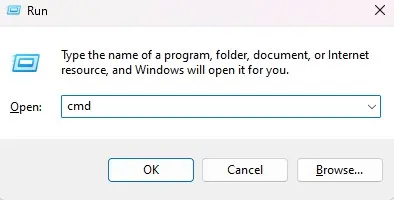
- Press the Windows + R key to open Run.
- Type
cmdand press Ctrl + Shift + Enter to open Command Prompt as Admin.
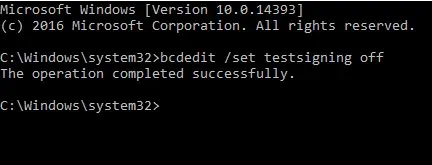
- Type
bcdedit /set testsigning offand press Enter.
- Once disabled, try installing the NVIDIA graphics driver.
- After installation, make sure you enable driver signature enforcement by running
bcdedit /set test signing oncommand in Command Prompt as admin.
Download Graphics Driver File
Another reason you get an NVIDIA installer failed error could be due to outdated or corrupted driver installation files. If that’s the case, you will need to download a new driver file from NVIDIA’s official driver download center.
When downloading, make sure that the process is not interrupted by a weak internet connection.
Disable Virus and Threat Protection
Windows Virus and threat protection stops any malicious application from running. It performs a thorough scan of the file and detects any suspicious activity. If the OS detects any threat from an application, it blocks such files.
To disable Virus and Threat protection,
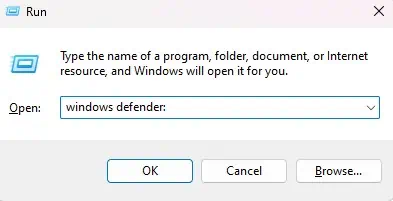
- Press Windows + R key to open Run.
- Type
windows defender:and press Enter to open Windows Security.
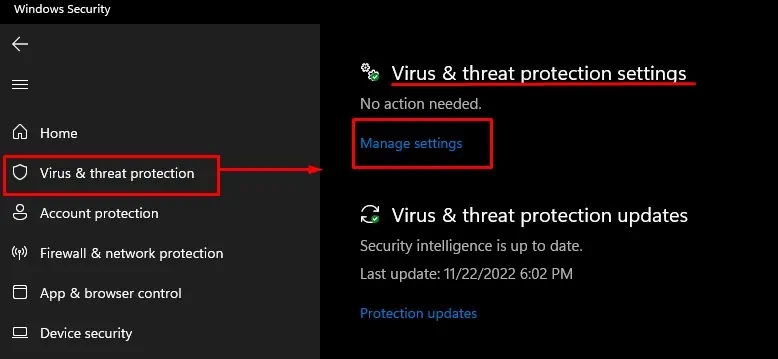
- Click on Virus and threat Protection.
- Under Virus & threat protection settings, click on Manage settings.

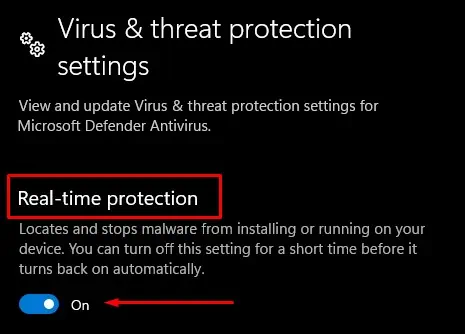
- Disable Real-time protection.

- Install the NVIDIA driver and make sure you enable Real-time protection.
Perform Clean Boot
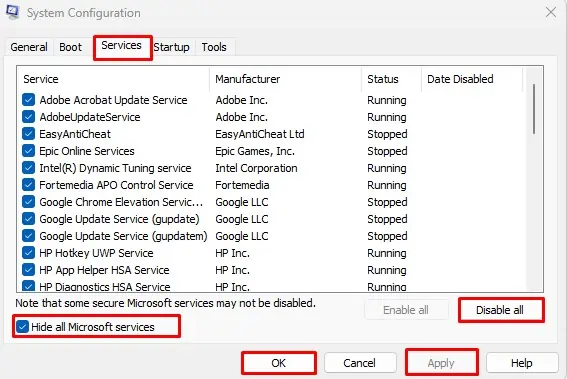
Similar to other NVIDIA drivers causing resource management issues, a service from another application may cause conflict with NVIDIA graphics drivers. To make sure that this isn’t the case, try performing a clean boot.
When you clean boot the system, the OS only runs necessary Microsoft services and disables unnecessary application services.
- Press the Windows + R key to open Run.
- Type
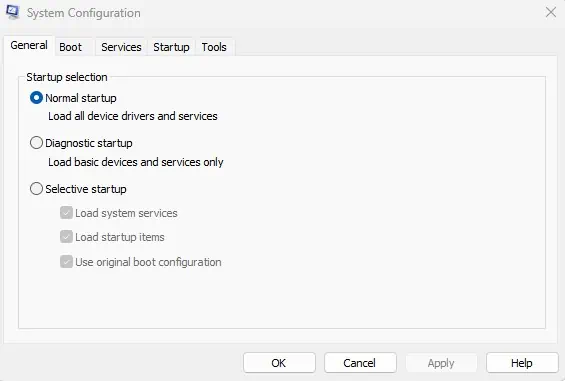
msconfigand press Enter to open System Configuration.
- Go to the Services tab.
- Check Hide all Microsoft services and click Disable all.
- Click Apply, and then OK.

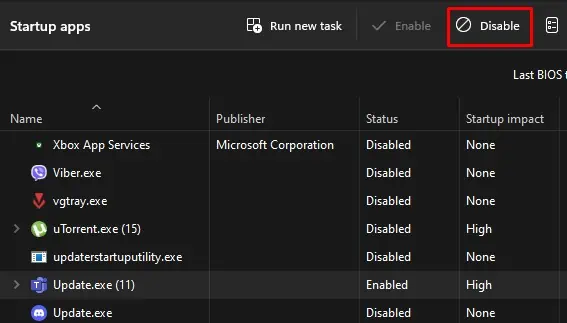
- Now, go to the Startup tab and click on Open Task Manager.
- Here, disable applications from running during startup.


