In some instances, when trying to start a recording in OBS, you might encounter the Failed to Start Recording- Starting the Output failed error. Usually, this error pops up when you have incorrect OBS settings, the wrong graphics source, or if multiple background apps are overlaying with the application.
But, regardless of the reason, fixing the failed recording issue on your OBS application is quite an easy process.
So, in this comprehensive guide, let’s learn more about the potential causes and the effective fixes you can apply to solve the OBS not recording issue.
Why is OBS Showing Failed to Start Recording Error?
Here are some of the main reasons why your OBS application might not be able to record videos on your device.
- Out-of-date device drivers
- Multiple Heavy Apps running on the Background
- Incorrect Graphics Settings Configuratione
- Outdated or Corrupt OBS Application
- OBS Settings
How To Fix OBS Failed to Start Recording Error?
Before we dive into the technical fixes of this article, you might want to try out luck with restarting your device. In some instances, rebooting has proven to fix minor problems occurring on apps as it clears all the temporary files and refreshes the system.
Also, please make sure that the Eye icon next to Display Capture is turned on.
But, if the issue persists, you can head over and follow the below-mentioned fixes.
Change Graphics Settings
If you have a multi-GPU system on your Windows device, then there might be instances where your device chooses the wrong graphics card for applications such as OBS. So, a quick fix to this issue is to select the right graphics card manually.
For Windows 10 and newer versions
- Click on the Windows icon from the bottom-left corner.
- Type in Graphics Settings on the search bar and hit enter.
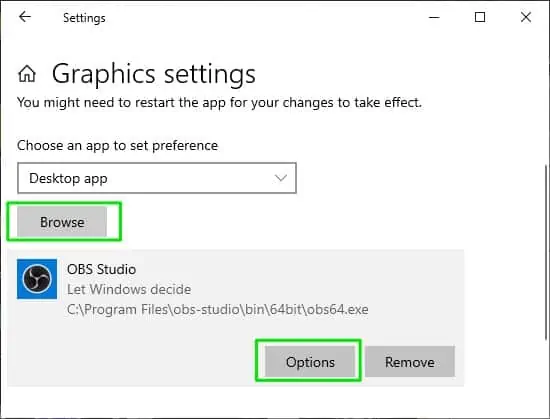
- From the drop-down menu, click on the Desktop app option.
- Click on the Browse button and search for the OBS application.
- Find your executable file by following this path.
Local Disk C > Program Files > obs-studio > Bin > 64bit - After adding the file, click on the Options button.

- If you’re trying to use the Game Capture, we advise you to select the High Performace option. But, if you’re using the Display Capture, choose Power Saving and hit Save.
Run in Compatability Mode
Sometimes, OBS might fail to record videos if it faces compatibility issues on your current Windows. So, a quick fix to resolve this issue is to revert to the earlier Windows version compatible with the application.
Additionally, you can also give admin privileges. It allows the application to get prioritized and receive the maximum resources like GPU memory allocation and physical memory.
- Right-click on the OBS shortcut icon.
- Select the Properties option.
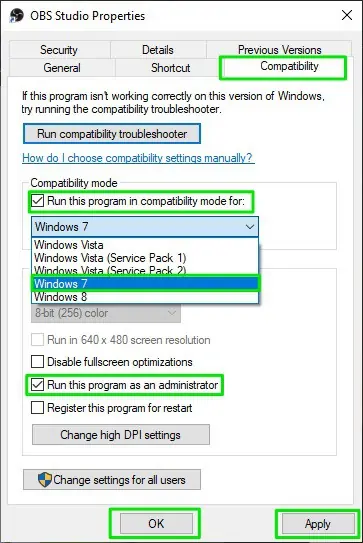
- Now, switch to the Compatibility tab.
- Check the box for Run this Program in Compatibility mode.
- Switch back to your previous Windows version from the drop-down menu.
- Additionally, check the box for Run as Administrator.
- Hit Apply > OK.

Exit out of Background Applications
If you have multiple background apps running in the background, they might hog up your RAM storage. Additionally, there might be certain applications that might be using the screen recording feature. So, we suggest that you exit out of these applications. To do so,
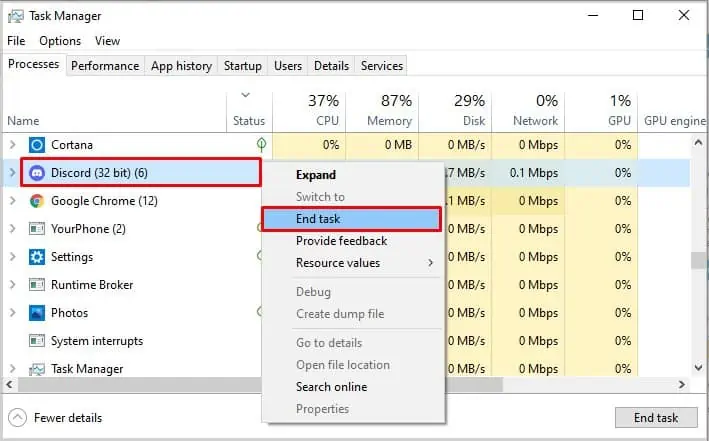
- Use the shortcut Ctrl + Shift + Esc to open up the Task Manager.
- Under the Processes tab, select the applications.
- Right-click on them and choose the End Task option.

Update Device Drivers
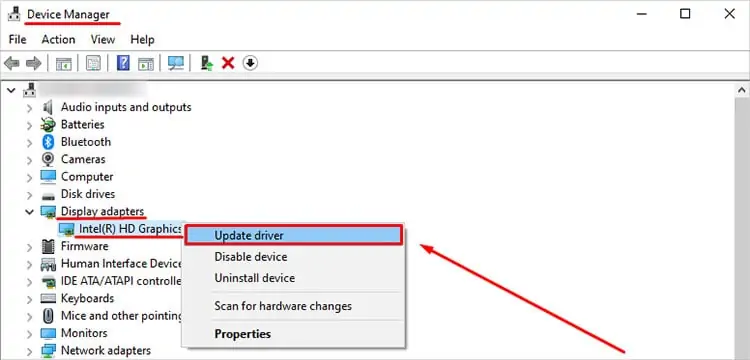
An outdated device driver might be the biggest culprit behind OBS failing to record your videos on your Windows device. Here is how you can update your device drivers.
- Use the Windows + R shortcut to open the Run dialog box.
- In the run dialog box, enter devmgmt. msc and click on the OK button to open up the Device Manager.
- Scroll down through the Device Manager section, and click on the arrow button next to Display Adapters.
- Click on your Graphics card and right-click on it.
- Select Update Driver.

- Select the Search Automatically for Drivers option.
Alternatively, you can also manually check for driver updates by going through your manufacturer’s website page.
Scan for Malware
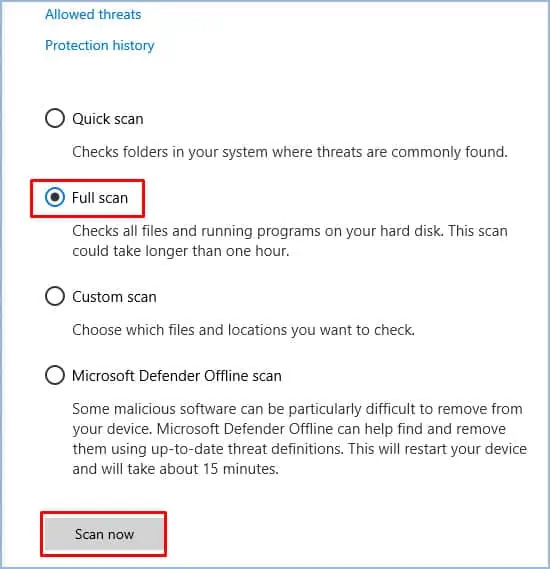
In some instances, your application might get infected with viruses and malware. To be on the safe end, we suggest that you do a full scan of your device.
Here is how you can do it through Windows Firewall Defender.
- Go to the start icon and click on Settings.
- From the left panel, click on Privacy and Security.
- Click on Windows Security.
- Now, click on Virus and threat Protection.

- Click on the Scan options link.
- Check the option for Full Scan.
- Finally, click on the Scan Now button.

Check for Updates
Usually, an outdated OBS application might cause video errors and other system dysfunctions. So, we suggest that you regularly update OBS to avoid such issues.
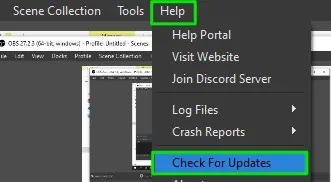
Here is how you can check for updates.
- Navigate to the menu bar and click on Help.
- Now, select the Check For Updates option.

- Click on the Update Now button if any updates are available.
If the issue is still recurring, we recommend you uninstall and reinstall the app again. There might be bugs and system errors on your existing version that may cause the video error to pop up.
Configure Encoder Settings
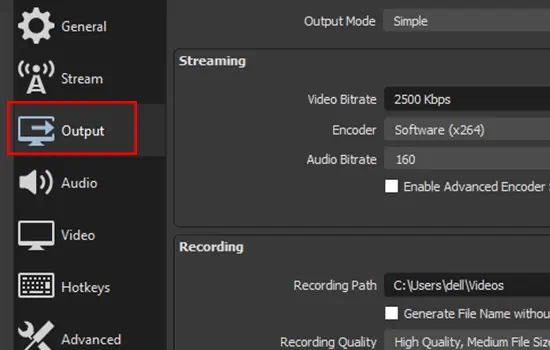
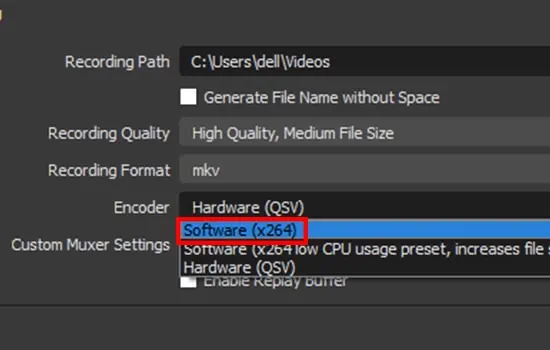
If you have an outdated or a bug-filled device encoder, then we might have a workaround method for you to try. This method allows you to configure OBS to use the software encoder of your system. As a result, it can help you bypass the video recording issue.
Here is a step-by-step guide on the workaround on how you can do it.
- Launch your OBS Application.
- Head over to the Settings option.
- From the left panel, select Output.

- Under Recording, go to the Encoder section.
- From the drop-down menu, select the Software (x264) option.

- Hit on the Apply button.
- Now, click on the Start Recording button again to see if it works.
Related Questions
How to Fix OBS not Recording on Mac?
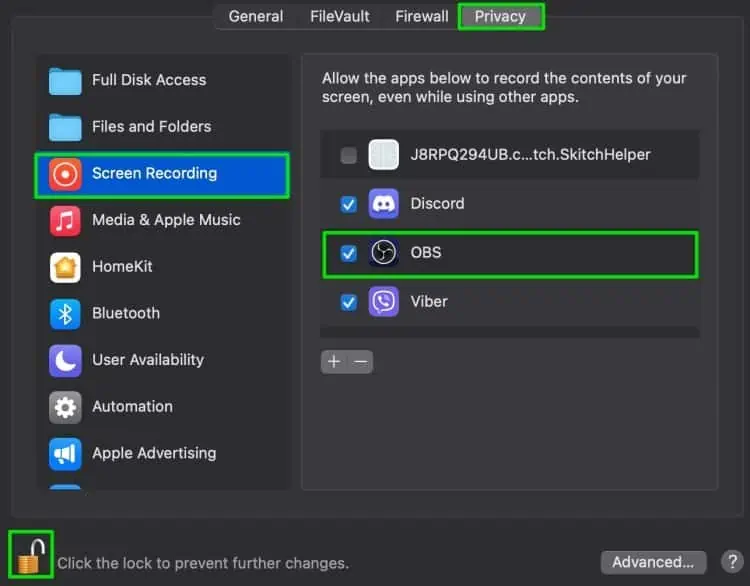
If you’re on a Mac device, you suggest you first check if you have allowed OBS to give screen recording access.
Here is a step-by-step guide on how you can do it.
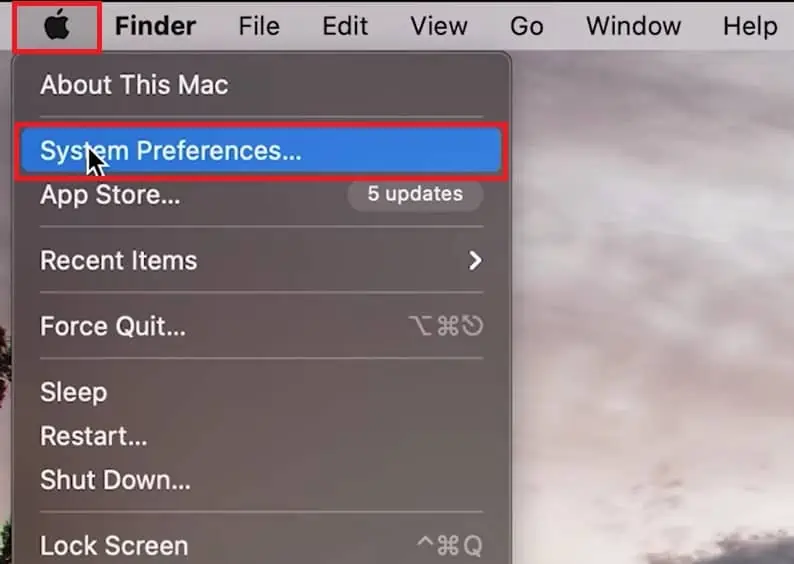
- Head over to the Apple Logo and click on System Preferences.

- Select the Security and Privacy option.
- From the left panel, scroll and select Screen Recording.
- To allow access, click on the Lock icon on the bottom-left corner.
- Enter your password to change the Permission settings.
- Now, tick the option for OBS.

If this issue does not work out for you, you might want to uninstall and reinstall the OBS application.
Can I Record my Screen and Web Camera Simultaneously?
Yes. The OBS application allows you to record your screen and web camera simultaneously. To do so, hover over to the plus icon. Under the Source option, select the Display Capture and start recording.

