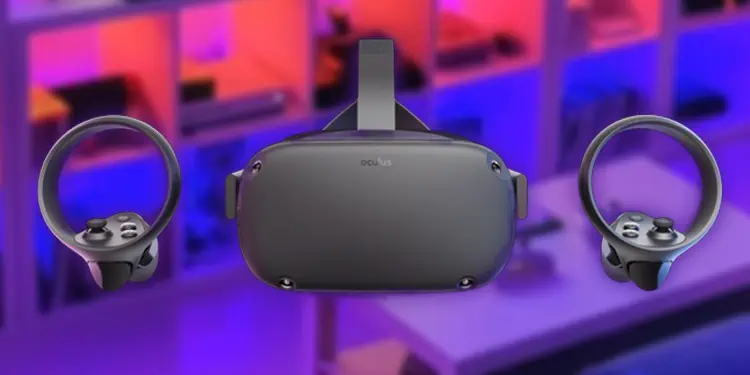
While many VR players are happy to use a setup with cables, sometimes it’s rewarding to have the freedom that wireless technology provides. For many users, that’s the appeal of the Oculus Quest VR system by Meta. Many games are self-contained on the headset, leaving you unencumbered by wires. However, you must get Oculus Air Link to function correctly if you want to connect to your computer without a wire.
Why Won’t Air Link Work?
There are a lot of directions to go in when you’re investigating a problem with the Oculus Air Link. It’s not that Air Link is a flawed system. The issue is a lot is going on, and many factors to consider when trying to track down what’s causing it to stop working. Also, many problems can occur, and some troubleshooting steps only apply to specific issues, not others.
- Sometimes the device settings won’t be on the suitable options. When you don’t have your Oculus Quest setup correctly, it probably won’t make the connection without a few changes.
- You might have a conflict between two competing devices or programs. Your Oculus uses the same internet as the rest of your home in most cases. If your channels are too full, it might not have enough bandwidth to complete the connection. Some also recommend a different router setup for Air Link.
- Certain drivers might need an update. Having old drivers when newer ones are available is often the cause of issues with any computer-connected hardware.
- AirLink connects but doesn’t work well or looks like it has many artifacts. If that’s the case, it’s probably a settings adjustment that needs to be made. This is one case where following the recommended device setup matters quite a bit.
The thing about the Air Link is that it isn’t an easy program to run. It’s heavy on your PC resources and on your internet connection. That’s one reason why so many PCVR enthusiasts recommend having a second, unshared router setup for the Oculus headset. However, that isn’t necessary for everyone, and other, simpler solutions may be your ticket to diving back into VR games.
How to Fix the Oculus Air Link?
To fix Air Link, try finding a series of steps from the solutions below that you believe might address your issue. Since such a wide variety of problems can occur, you may need to try more than one before landing on the one that makes Air Link work.
Update Your Drivers and Operating System
There are three critical things to consider when preparing your computer to run on Air Link:
- Operating system
- GPU drivers
- Other hardware drivers
Each of these should be up-to-date, so you have the best experience running the program and connecting to your Oculus.
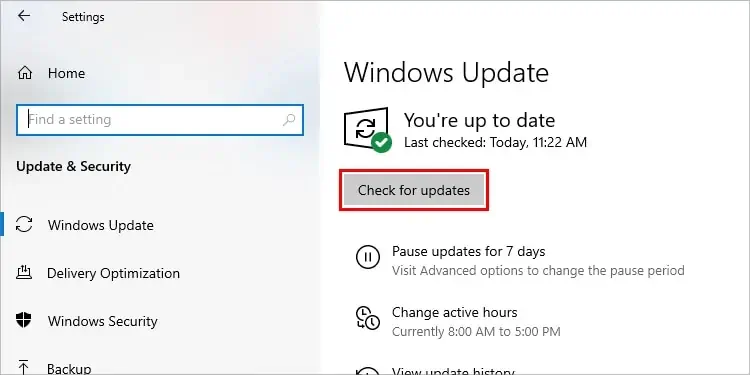
- Click the Windows start button and then click the Settings icon.
- Choose Update and Security.
- Click Check for Updates. If this doesn’t appear, it could be because you already have updates detected and ready to install.

- Follow the prompts to install any updates Windows recommends for your system. For most users, it’s OK to go with Windows’ recommendations of what updates you need. You may have to restart your computer once the updates are complete, or Windows may do it for you.
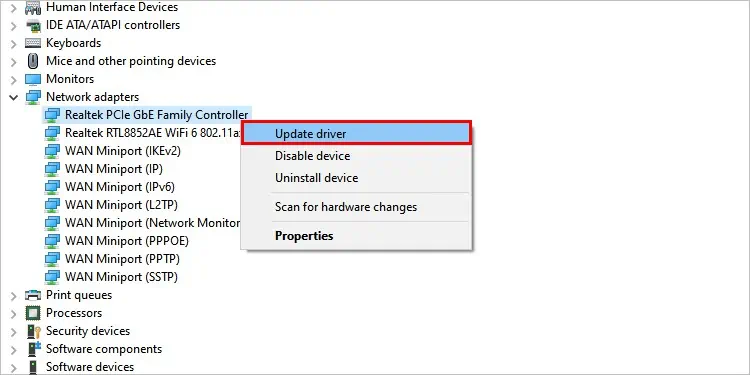
- Click the Windows key and type “Device Manager” without quotes. Then click the corresponding app that appears on the list to open the Device Manager.
- Unfurl the categories to access each device. Check your network adapters, displays, audio, and video devices for driver updates. For example, unfurl the Audio Inputs category and right-click on your microphone.
- Choose Update Drivers.

- Choose to Search Automatically for Drivers.
- Follow the prompts to complete the installation before checking another device. While you can search for updates for your GPU here, it’s better to swap to the GPU suite software you use to update there.
- Open your GPU software and look for a Drivers tab or an area for Settings.
- Choose to search for new driver updates.
- Follow the prompts to install the drivers.
Once you’re done, restart your computer and your Oculus headset. Try to connect to Air Link again to see whether updating your system worked.
Make Sure Air Link is Enabled
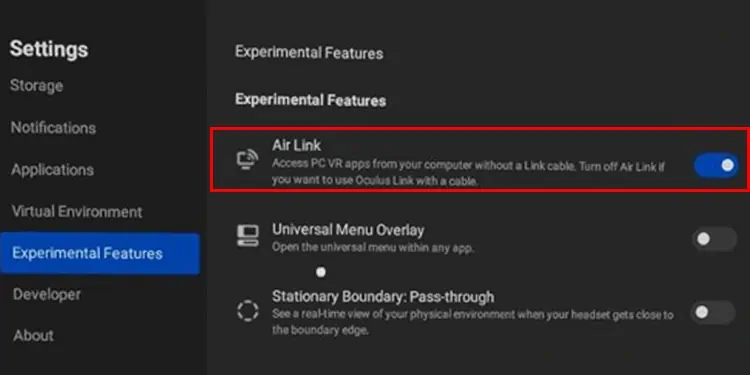
Air Link isn’t always enabled automatically. For many users, it’s considered an experimental feature that you must turn on within the headset itself.
- Click the Oculus Button and then click the Quick Settings tab.
- Choose the Settings icon at the top right.
- Choose Experimental Settings.
- Toggle on Air Link.

Once you’ve done that, try connecting again. If it wasn’t enabled before, there wasn’t a way for it to work. Now it should be able to.
Close Other Programs
The Air Link connection isn’t a light program for most computers and needs to be the priority. If you have other programs running, try closing them while you start Air Link. Make it so that anything you don’t need isn’t open.
Even if you’re using Discord to communicate with friends, it might be better to patch it in from your phone or find another way to have that connection. Leaving your internet browser open with multiple tabs is another way many people slow down their system and make their connection with Air Link worse.
Once you’ve closed unnecessary programs, try reconnecting Air Link to see whether it’s working better.
Reset Your Connection
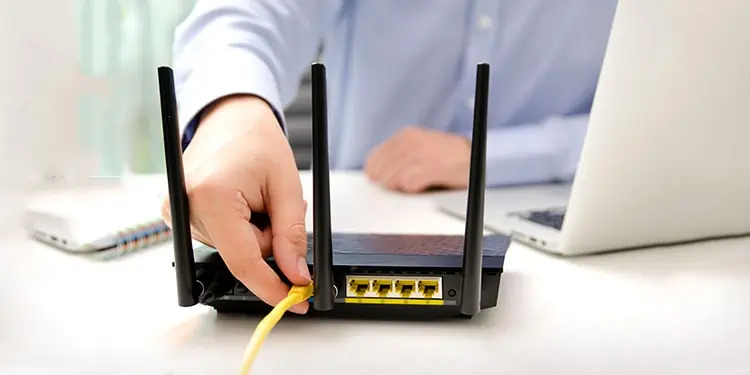
Using Air Link requires a lot of bandwidth, and VR users routinely say you need a clear Wi-Fi channel for the headset and a direct connection to your PC. Here are a few ways to set up your network connections to improve Air Link connections and quality.
Use a separate channel for the headset. For example, our router has two 5GHz and one 2.4 GHz network. We have a channel specifically for when we’re using the Oculus headsets; they are the only thing to connect on that 5GHz channel.
You can also consider a secondary router for your Oculus when using Air Link, which many enthusiasts recommend. You connect it to your regular router and only use the channel the new router creates for the Oculus. It can help clear up congestion and make the connection stronger, making it have less latency and hopefully look better.
It’s also imperative to plug the computer hosting Air Link directly into an ethernet port on a router or modem. While the positioning isn’t always easy or possible, doing so will give you a significant impact on how well it functions. Many players say it was the most important improvement to their Air Link setups.
It’s not always feasible to redo your entire networking setup to accommodate for Air Link on the Oculus. However, if you want it to work and work well, it might be worth the time and expense.
Check the Oculus Debug Tool
The Oculus Debug tool is a utility that comes along with the Oculus software you install on your computer. As long as you’ve installed everything required, you already have it. If you haven’t installed the software on your computer yet, do so now. You need it to make Air Link work at all.
- Open the Support folder in your Oculus installation.
- Open the Oculus-Diagnostics folder.
- Run the OculusDebugTool application.
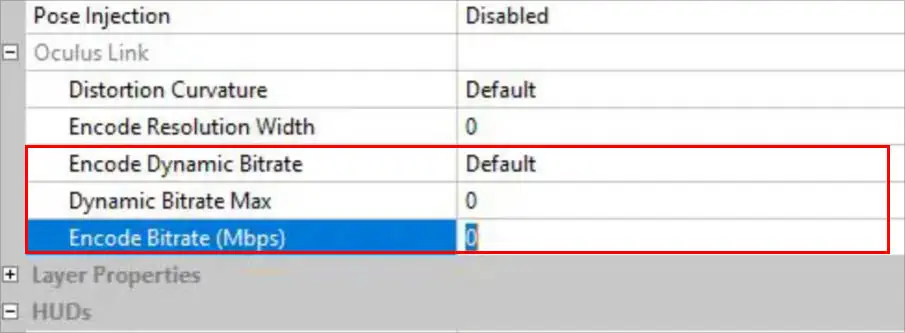
- Click the Oculus Link category to see its settings.

- Check Encode Dynamic Bitrate. Choose default if that isn’t its current setting.
- Check Encode Bitrate (Mbps) and set it to 0 if that isn’t the current setting.
- Restart your computer and your Oculus to see whether Air Link works now.
If it doesn’t work, there are still other things you can try. However, if it isn’t connecting at all, something faulty in your computer or device may be preventing the connection.
Reinstall the Link software
The driver is also included in the Oculus software pack you download from Meta. If you’re struggling with connecting the Oculus to the computer, reinstalling it might help fix the problem.
- Open the Oculus-Drivers folder in your PC Oculus files.
- Run
oculus-driver.exe. - Follow the prompts to complete the installation. It should reinstall your Oculus drivers.
If damaged or corrupt drivers cause your problem, these steps should help fix the issue.
Change Your Audio Inputs
Some people have issues with Oculus Air Link because they can’t get their audio to work. Since the audio is coming through the computer, the problem might be the input and output. If they’re set to your standard devices, the Oculus may not be able to send or receive sound until you reset it.
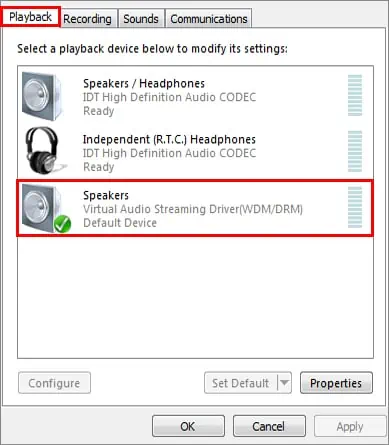
- Right-click on the volume icon on your taskbar.
- Choose Sounds.
- Click the Playback tab.
- Right-click the Virtual Desktop Audio device.

- Click Enable.
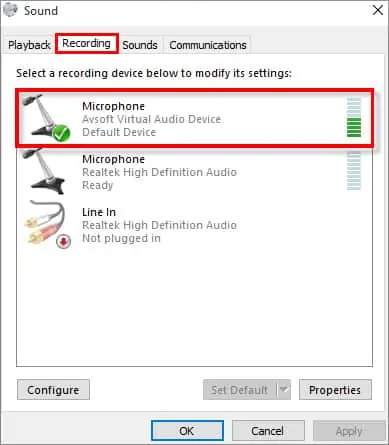
- Switch to the Recording tab.
- Right-click the Virtual Desktop Audio microphone.

- Click Enable.
- Click OK.
Now your audio should work when you’re connected to Air Link.
Reset Your Graphics Preferences
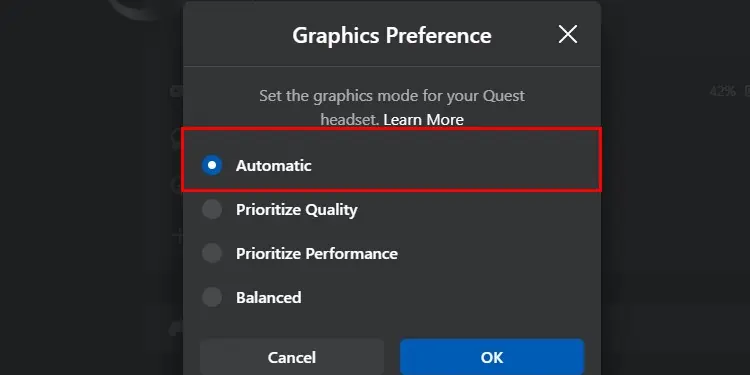
You can also reset your graphics preferences in the Oculus desktop app. If you’ve changed them before, returning to the recommended settings may fix any problems you’re having.
- Open the Oculus desktop app.
- Click Devices.
- Click the Oculus device you’re currently using.
- Choose Graphics preferences.
- Click the Automatic (Recommended) slider to set it active.

- Click OK.
Try restarting your Oculus app and the headset itself before trying Air Link again.
Try Changing the Air Link Resolution
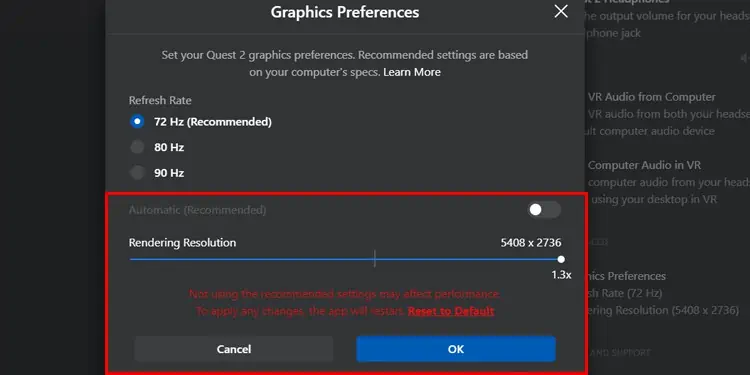
Sometimes not using the recommended options is better, depending on your computer. If you have a robust connection and a solid build, and your issue is that Air Link looks choppy, try increasing the resolution with the Oculus desktop app.
- Launch the Oculus desktop app.
- Click Devices
- Choose the Oculus device you’re using.
- Choose Graphics Preferences.
- Drag the slider at the bottom up until it says 1.3 or higher.

- Click OK.
- Try Air Link again.
If this increase in render resolution improves the quality, leave it set as such. If it doesn’t, you may want to return to the recommended settings and try changing your internet connection setup to include a hard line to your computer. Air Link works best on a high-range computer with a strong CPU and GPU.
