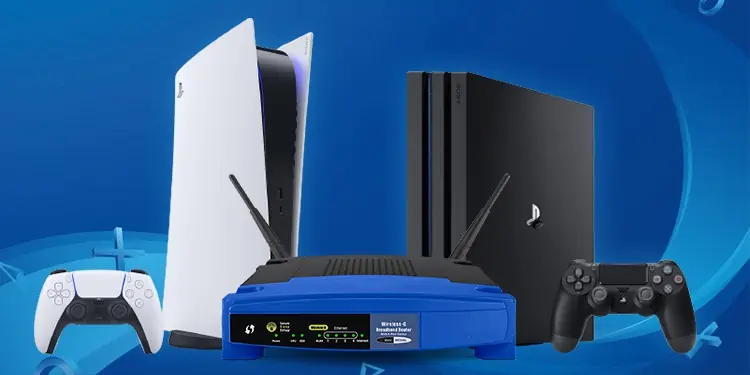
If you have to ask how to open ports for PS4 or PS5, it means one thing. You can’t play online, or your multiplayer sessions are problematic and limited.
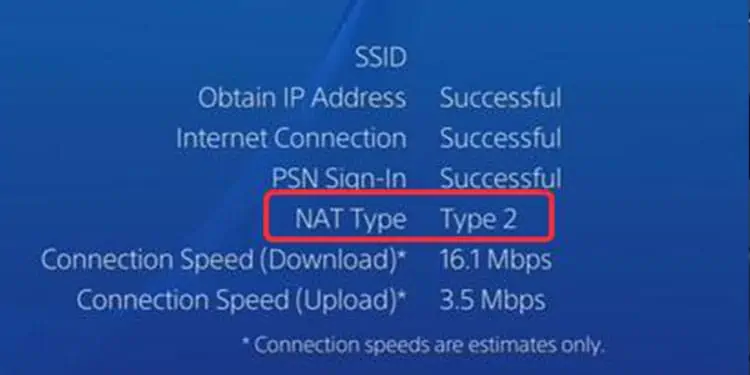
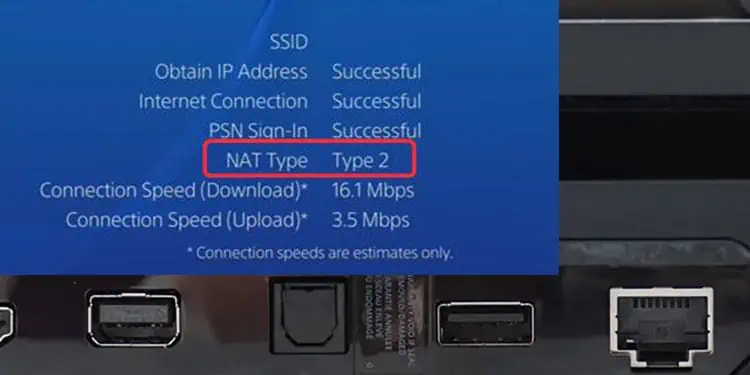
In particular, when you test your internet connection on PS4 or PS5, you see your NAT Type, and it’s either Strict or Moderate. Other gamers have various router brands, and router settings can vary per user.
So, your NAT configuration may be limiting your ability to play online or play with your friends. It may also limit other online functions, such as voice chats and streaming.
Luckily, opening the ports on PlayStation is the same on either console. The difficult part is changing the specific settings on your router, but we’re guiding you in detail.
Now, if you came looking for answers as an Xbox One or Xbox Series user, here’s the guide you need.
What Does “NAT Type” Mean?
NAT (Network Address Translation) is a security protocol that comes in-built with your router. It determines the online features devices on a WiFi or ethernet network can use.
In gaming, when you join multiplayer sessions, you create the lobby (host) or join a lobby (server). Your Nat Type influences your ability to join or to create lobbies.
There’re three NAT Types:
- Type 1 – Open: You can connect to any lobby and create any lobby.
- Type 2 – Moderate: You can create and join lobbies if the users have either Open or Moderate Nat types. Type 2 is good enough.
- Type 3 – Strict: You can’t create lobbies and can only join players with Open Nat types. Also, it will limit voice chat, updates, downloads, online gaming, and similar.
[table id=412 /]
Can You Change the NAT Type on PS4 and PS5?
You can change your router’s NAT configuration, affecting your console’s NAT configuration.
Doing so requires opening the ports for PS4 and PS5. Another term for the process is port forwarding the PlayStation.
What is Port Forwarding?
Before we begin, let me explain what port forwarding means. It’s forcing your device, which works on a private network, to connect to the internet while using specific public or private services.
Then, a port is a number that identifies a connection endpoint capable of directing data to specific services.
Overall, port forwarding means telling your devices -in this case, your PS4 or PS5- to work while using Sony’s ports. As a result, your private connection will work on private ports, opening its ports by default.
How to Open Ports for PS4 or PS5?
The process of opening ports on PS4 and PS5 seems difficult, but you can complete it in about 5 minutes. It can be easier if you’re tech-savvy; if you’re not, you can follow our step-by-step instructions.
In summary, here’re the steps:
- Check your PlayStation’s NAT Type. If it’s Open, you don’t need to change anything.
- Assign a static IP to your console, and write it down! Then, adding a manual DNS also helps.
- Go to your router’s admin page on your web browser.
- Enable UPnP (Universal Plug and Play) from the page.
- Open the ports for PS4 and PS5.
We’re delivering detailed instructions for each step. You can follow it literally. However, router pages differ per brand. We’ll have to give more general instructions when we reach this part.
Check the NAT Type on Your PS4 and PS5
The first step is checking if you need to change anything. Here’re the steps to check that.
On PS4
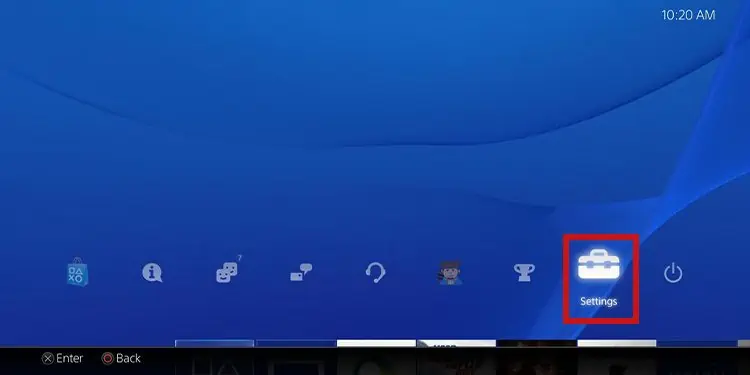
- Go to Settings.

- Select Network.

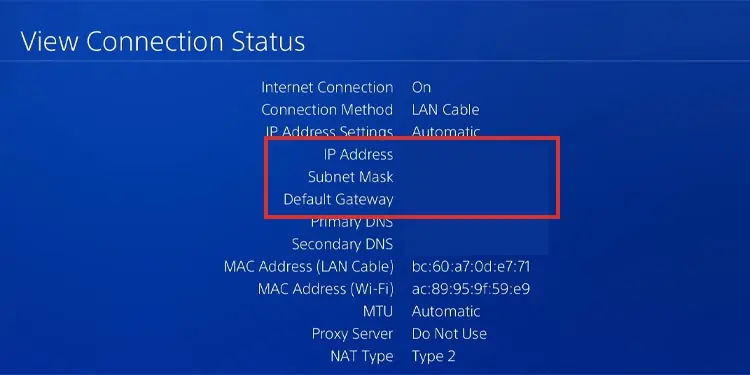
- Select Connection Status.
- Check the NAT Type at the bottom. If you see Type 3 (Strict), continue the tutorial.

On PS5
- Go to Settings.

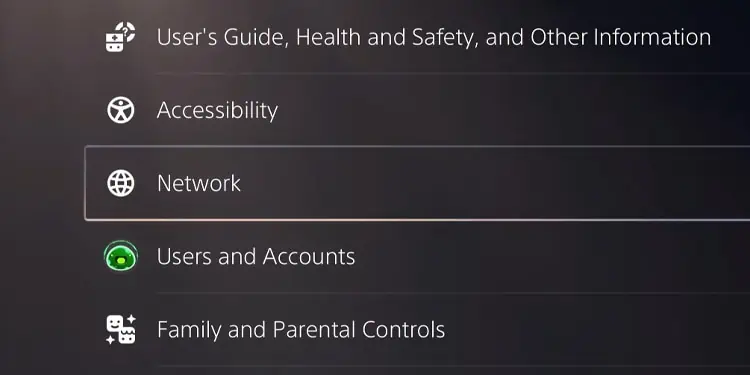
- Select Network.

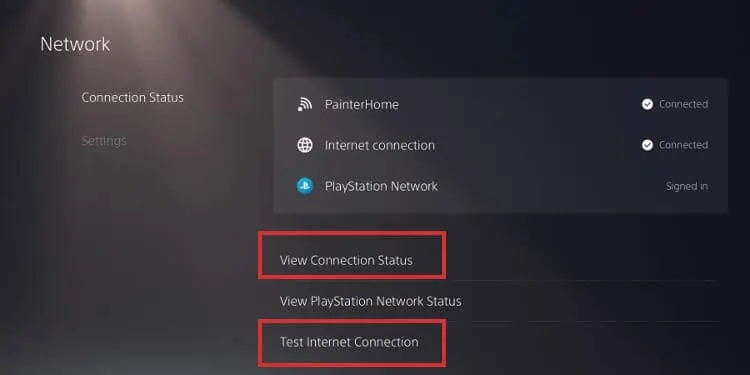
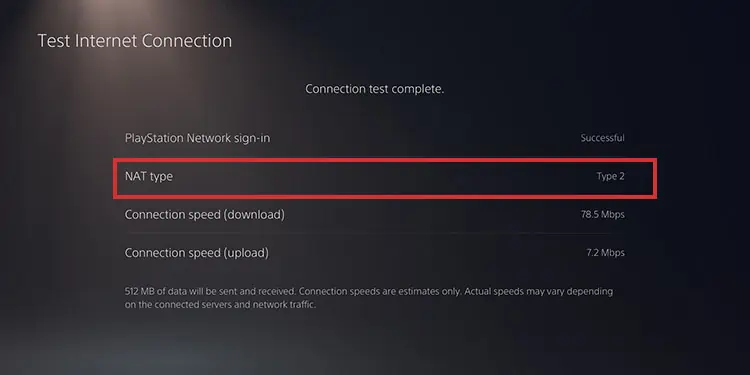
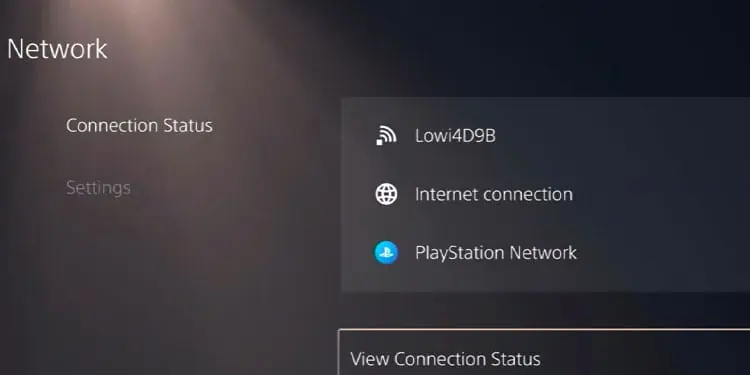
- Select View Connection Status or Test Internet Connection.

- Check your NAT. Again, if it’s Type 3, continue with the tutorial.

Assign a Static IP to Your PS4 or PS5
Routers and gateways assign a dynamic IP address to the devices. An IP address is like the DNA devices use when they connect to the internet, and dynamic addresses are momentary: it changes on every log-in.
A static IP is a set number you customize. It becomes a permanent “DNA,” which benefits devices by making the connection more stable and faster.
A static IP and a dynamic IP address still share most of their numbers. The only thing that changes is the last digits.
Let’s say, for example, that your PS5’s IP address is 192.168.0.02. Then, “192.168.0” is a number that doesn’t change because it’s your router’s address.
The “02” is the number that changes, and the router’s job is to give every device on the network a different number by changing the last digit to avoid repetition.
Your job is to change these last digits and add up a number that would never happen randomly—in easier terms, giving the last digits a +50 or a +100 sum.
As for “public DNS,” we’re referring to Domain Name Systems offered by large companies for free, such as Google and Cloudflare. DNS is what connects your web browser to specific web addresses.
On PS4
Here’s how you can change PS4 static IP address:
- Go to Settings.
- Select Network.
- Go to View Connection Status.
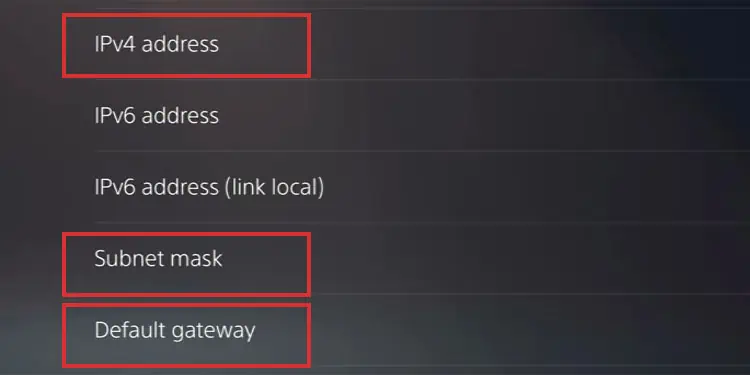
- Write down IP Address, Subnet Mask, and Default Gateway. You’re going to use these numbers later on.

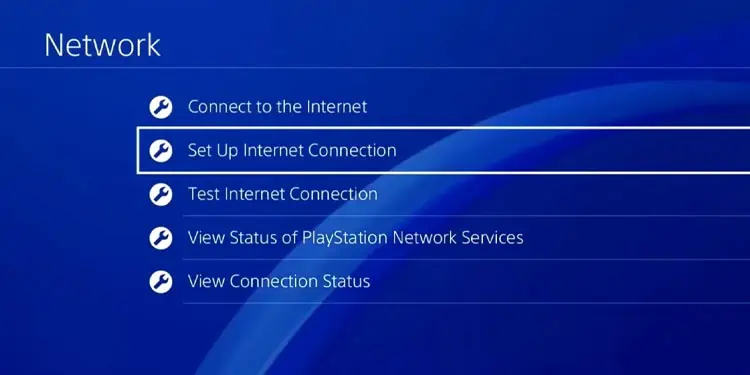
- Go to Set Up Internet Connection.

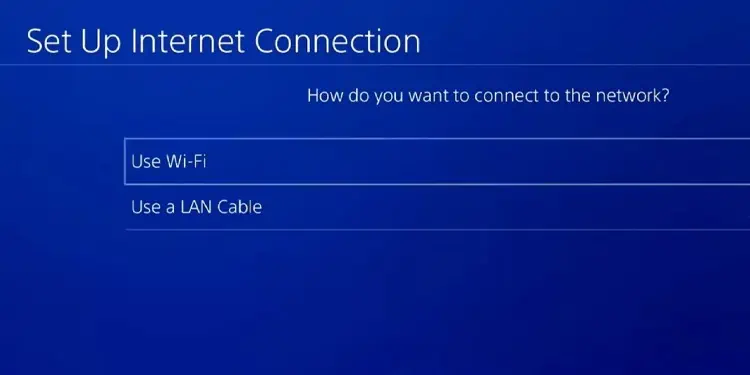
- Select WiFi or LAN Cable.

- Select your WiFi network if you’re using WiFi, and type your password.
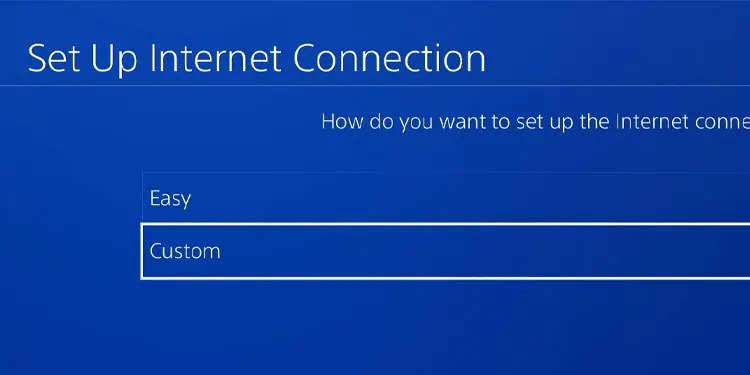
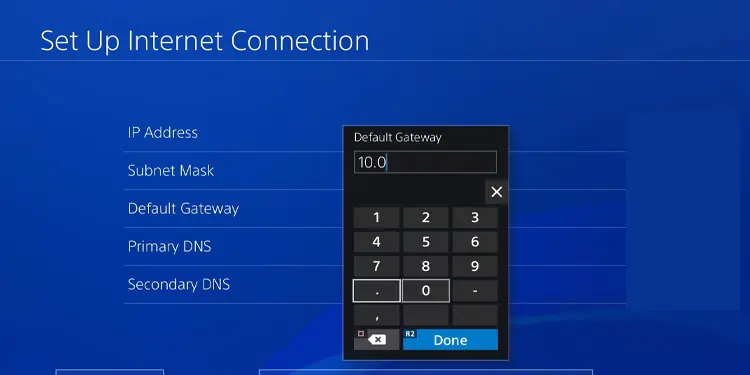
- Choose Custom on “How you want to set up internet connection.”

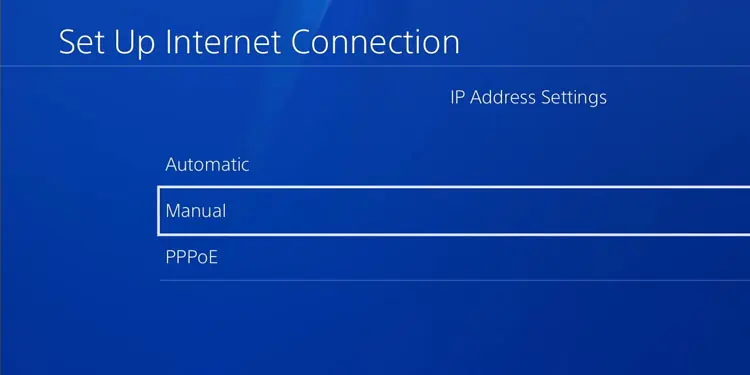
- Select Manual on IP Settings.

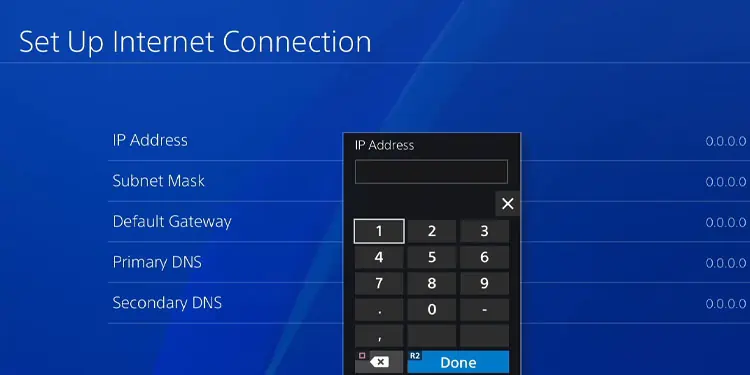
- Do the trick, and add 50 or 100 to the last digit of the original number. So, if your IP is “192.168.0.01,” make it “”192.168.0.101”

- Add the same Subnet Mask number as before.
- Add the same Default Gateway number as before.

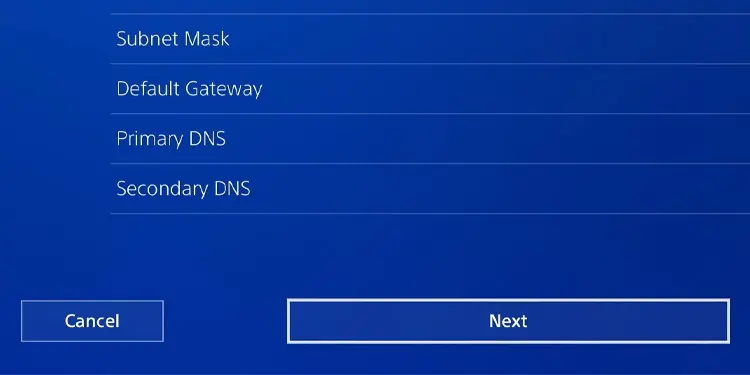
- Add a public DNS address on Primary DNS and Secondary DNS. The best for PlayStation is Primary – 1.1.1.1 / Secondary – 1.0.0.1. Otherwise, both DNS numbers can be the same as you type on Default Gateway.

- Select Next.

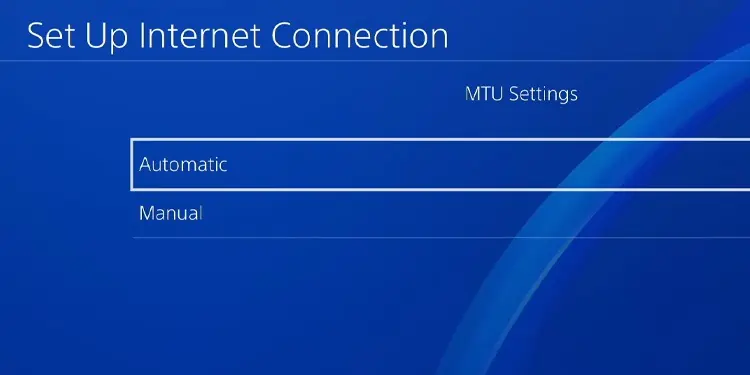
- Select Automatic on MTU.

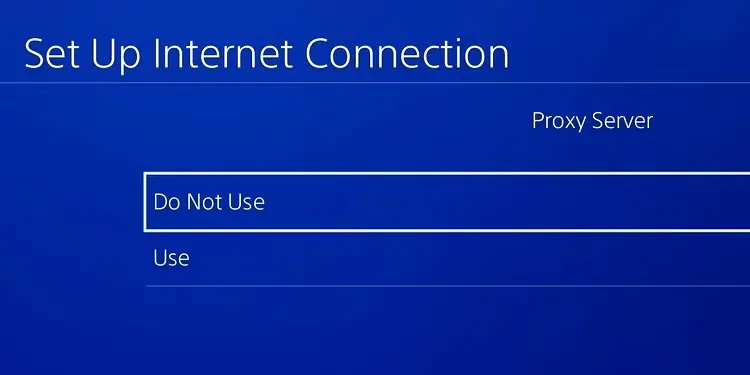
- Select Do Not Use on Proxy Server.

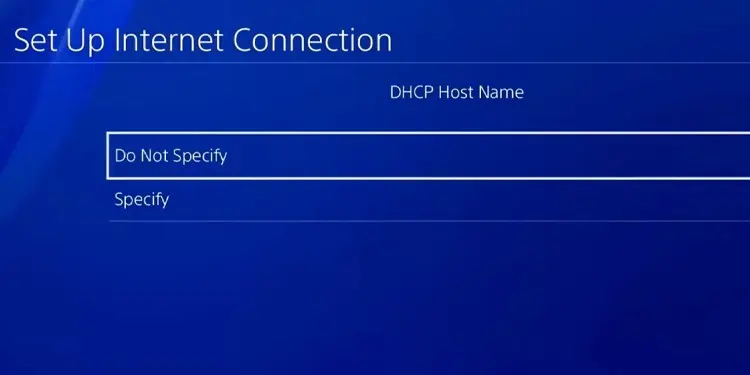
- Select Do Not Specify on DHC.

Afterward, test your internet connection. If it doesn’t work, add 200 to the last digits of your IP address, as your router may be reserving 200 spots for dynamic solutions.
If you can’t make it work, you can set the IP back to automatic and then try again.
On PS5
Here’re the steps for PS5 users:
- Go to Settings.

- Select Network.

- Select View Connection Status.

- Write down the following data: IPv4 address, Subnet mask, and Default gateway.

- Go back to Network.
- Select Settings.
- Select Set Up Internet Connection.

- Select your WiFi or Lan network. Add the password if you have to.
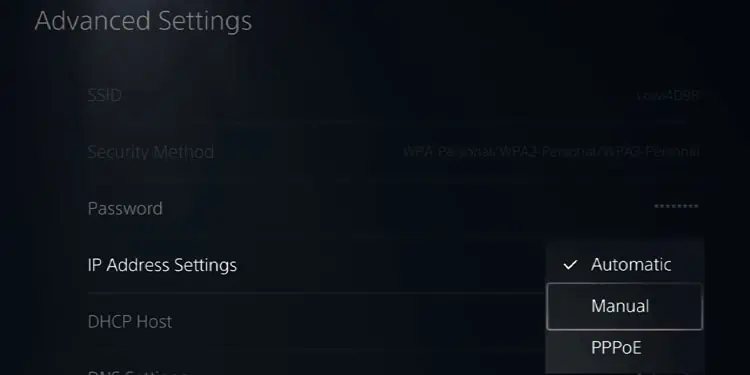
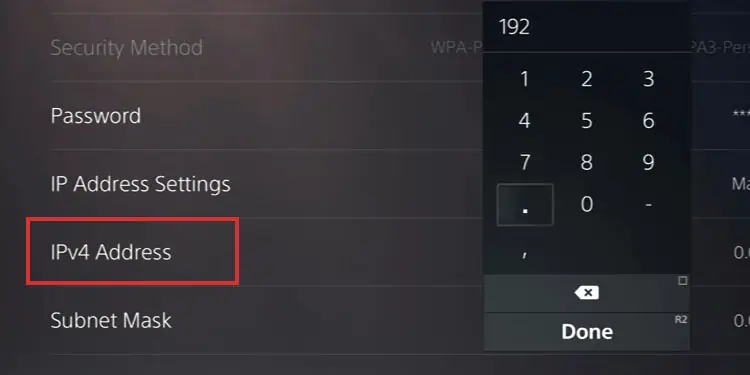
- On IP Address Settings, select Manual.

- On IPv4, do the trick. This time around, add 200 to the last digit of the original IPv4 address.

- Add the same number of Subnet mask as before.
- Add the same number on Default gateway as before.
- Add a public Primary DNS and Secondary DNS. A good option for PS5 is:
- Primary: 8.8.8.8
- Secondary: 8.8.4.4

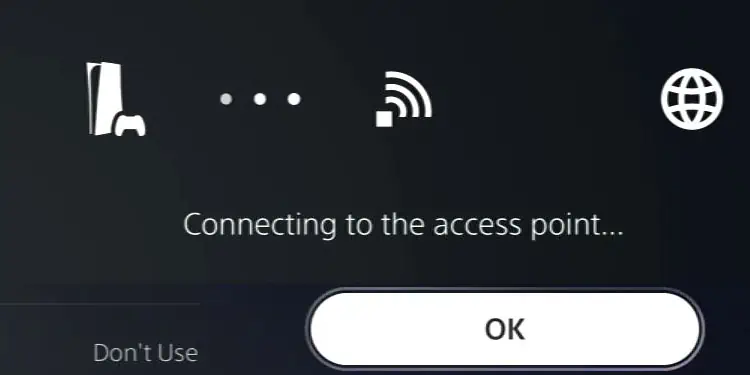
- Select OK. The PS5 will test the connection. If it doesn’t work, try again by adding 50, 100, or 300 to the last digit of your IPv4 address.

If it doesn’t work, try using another Ip address, this time adding 100 or 50 to the last number. You can set the IP address to automatic and try again if it doesn’t work.
Before going to the next step, write or type down the static IP address number you’re using. We need it to open ports for PS4 and PS5.
Go to Your Router’s Admin Page
The next step is going to the administration panel of your router or gateway. You must first type the router’s specific URL access (IPv4 address) on your web browser to open the page.
There’re various ways to find the address you need. Anyhow, open your web browser, and proceed with the following steps:
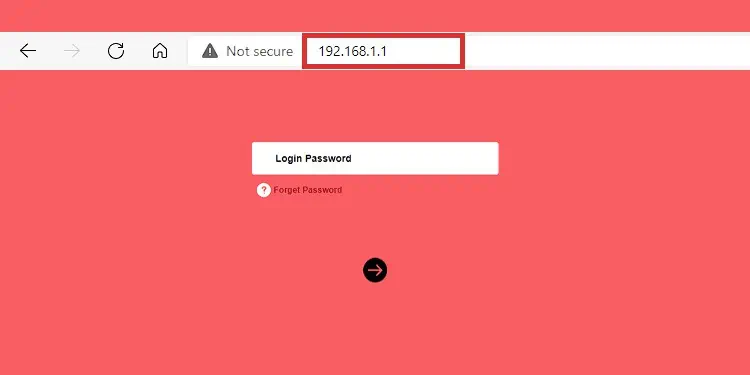
- Type 192.168.1.1. and press Enter. It’s a common address most router brand use, so it will probably work.
- If it doesn’t work, it delivers an error, type 192.168.0.1 and press Enter.
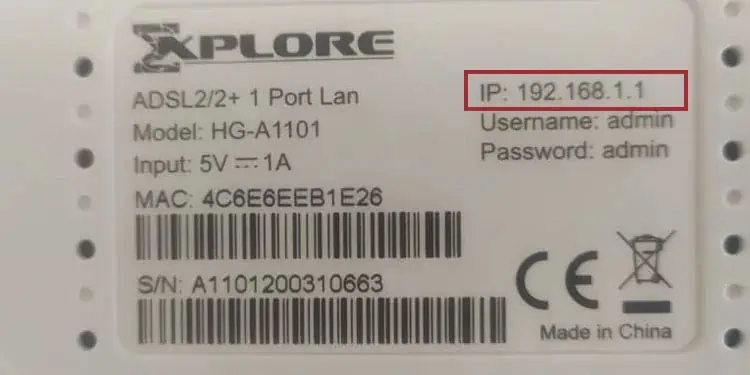
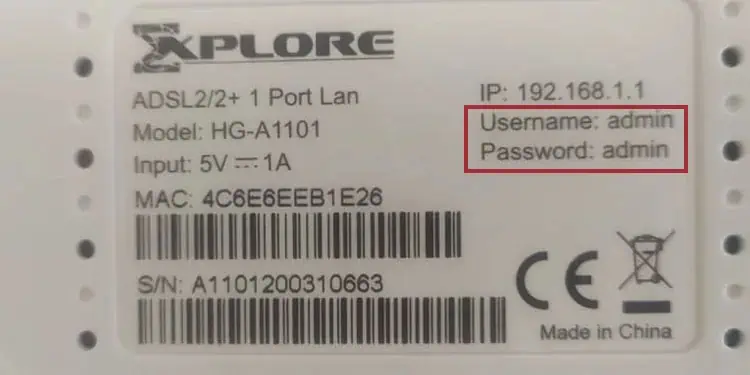
- Check the back of your router (if you’re using a router and modem) or the back of your gateway. On its label, you can find the address as “IPv4 Default Address,” “IP,” “IP Address,” “Admin page,” or similar.

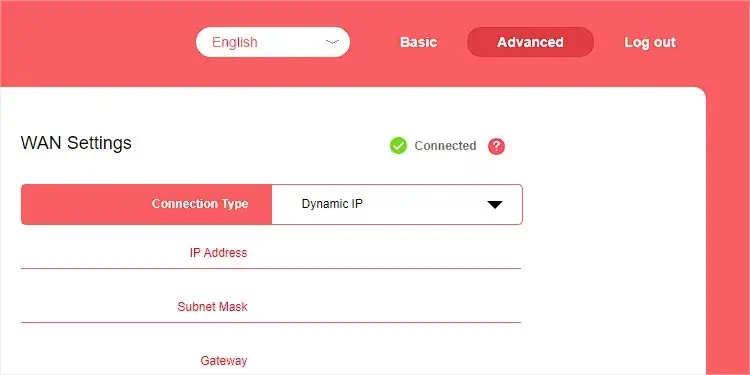
- Log in as the administrator. The admin page looks like this:

- If you have never done this, the password and username are on the back of the router or gateway.

- In any case, it’s typically:
- Username: admin
- Password: admin
If you or someone else did it before, you’d have to type your username and password or ask the person who did it. Alternatively, reset your router and then log in with the default credentials.
Lastly, try searching the answer on Google if you can’t find your router’s URL, password, and username with these methods. Perhaps your router has more specific steps -for instance, the information is on the box or the manual.
Enable UPnP
Now, we have reached the part where we can’t be specific. Different router brands com o with different admin interfaces. So, if you need further help, you can find specific answers for your router model.
UPnP might be on different menus on the interface you’re using. Commonly, though, you can find it within or nearby:
- Advanced
- Advanced Users
- Advanced Settings
- Administration
- Administration Setting
- Advanced Configurations
- Media
- Media Settings
- Media Configurations
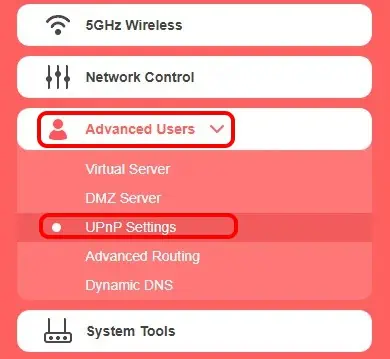
In my Mercusys router, here’s what I do:
- Select the Advanced tab at the top right.

- Go to Advanced users on the left.
- Select UPnP.

- Toggle the feature on.

You’d find UPnP as a button, toggle, switch, or checkbox. Turn it on once you find it. If it’s off, the port forwarding won’t work. It can also cause several connectivity issues on Xbox and PlayStation.
If you’re wondering, it’s a security option that allows devices on a router to discover each other and devices on other networks.
Open the Ports for PS4 and PS5
The last step is adding the port forwarding rules. You can find this section near the UPnP, which may have a different name on your interfaces.
For example, you may find it as:
- Applications
- Advanced Applications
- Apps & Gaming
- NAT Forwarding
- NAT Triggering
- NAT Rules
- Port Range Forwarding
- Port Triggering
- Virtual Servers
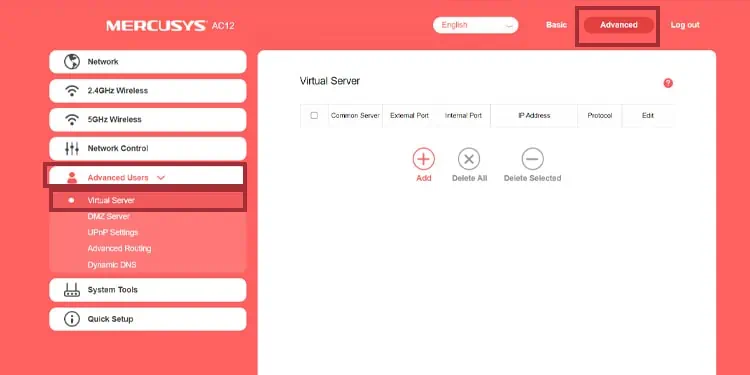
In my case (Mercusys router), here’s what you can do:
- Go to the Advanced tab.

- Select Advanced Users.
- Select Virtual Servers.

- Click “Add Virtual Server.” Regardless of how you find the option, you will see a similar “Add” option, such as “Add Port” or “Add Rule.”
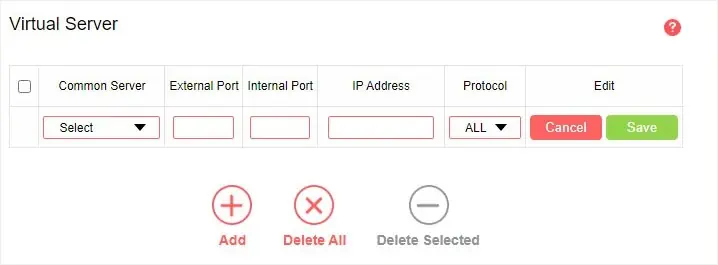
- Finally, need to fill out a chart of data. The chart looks like this,

Let me explain; based on my example -you will see a similar chart.
- Common Server: It’s a drop-down list with common servers to add to the rules. We’re not using it, so you can leave it as it is.
- External Port & Internal Port: These two are the docking stations for your PS4 or PS5. They should be the same, and we should use the ones Sony recommends.
- IP Address: Here’s where you put the static IP address you create in the steps above.
- Protocol: It should match the external and internal ports you’re using. Just use “ALL” from the drop-down menu to make it easy. You may also see it as “Both.” Otherwise, match the selection with the ports you’re using (TCP or UDP).
These are the ports Sony recommends. You can choose any of these, but both Internal and External Ports should be the same number.
- TCP: 80, 443, 3478, 3479, 3480
- UDP: 3478, 3479
All in all, you can fill the table like this:
| Common Server | External Port | Internal Port | IP Address | Protocol |
| Don’t select anything | 3478 | 3478 | The static IP address of your PS4 or PS5. You wrote it down, right? | All / Both |
Remember to click the Save button to confirm the changes.
What’s Next?
Afterward, reboot your router and your console. And to verify the change is correct, you can test your internet connection on your PS4 or PS5 and see if the NAT Type changed from Type 3 to Type 2 or Type 1.

