Problems with the Origin launcher not working can come from something as simple as a bad internet connection or as complicated as a missing Windows file.
Unfortunately, it’s a complex problem to diagnose without first taking steps to fix it. Only after you’ve found the solution will the problem with the Origin launcher be evident in most scenarios.
Issues With the Origin Launcher
Many players have found that issues with the Origin launcher aren’t necessarily easy to solve. In some cases, people who have been unable to get it to work any other way have had to resort to resetting Windows and then reinstalling Origin once the operating system is running a fresh copy.
However, you shouldn’t resort to something so drastic until you’ve tried the other options, even if it means having to tackle the problem a few different ways.
Origin
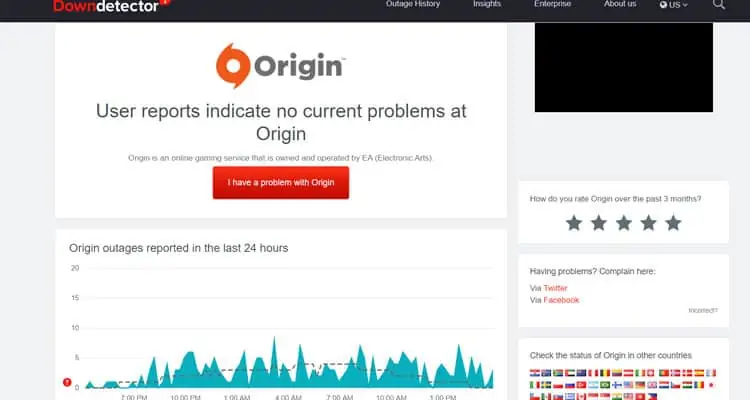
Sometimes Origin itself will have problems. Check out the status page on Down Detector to see whether other people are reporting problems.
Internet Problems
Sometimes the issue is simply that your internet connection isn’t working correctly, and Origin cannot communicate with the launcher program. Resetting your internet and flushing your DNS should take care of any lingering internet issues.
Make sure to check your ping, speed, and connection to other websites and programs before beginning to ensure your ISP isn’t experiencing issues either.
Reset the Internet
While you could just turn your internet on and off, it’s better to take some extra time between steps to ensure that it’s wholly cycled.
- Unplug your router and modem.
- Wait five minutes. During this time, you should shut down your computer.
- Plug the modem back in and wait for all the lights to appear as they should when the device is fully connected to the internet.
- Plug the router back in.
- Wait for three minutes for it to grab a signal and start working correctly.
- Turn your computer back on.
- Wait for everything to load before you try to start the Origin launcher again.
If the launcher still isn’t working, you should try to flush your DNS.
DNS Flush
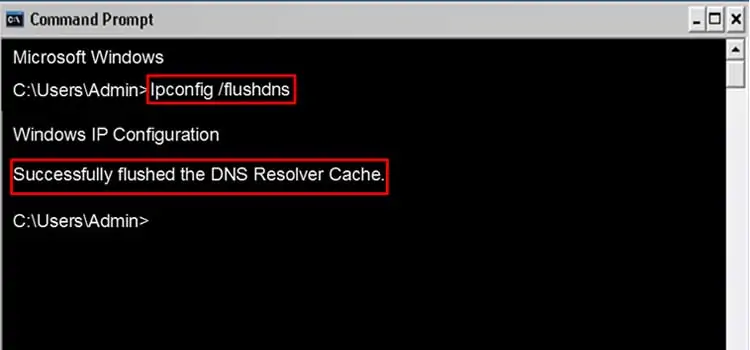
Flushing your DNS takes care of any issues with your connections that might be due to old errors. When you run the commands, make sure to give them time to finish before typing in the next one. Your computer might seem to lag a bit while working, so just wait and watch for the cursor to be ready for your following input.
- Open an elevated command prompt window.
- Type “ipconfig/flushdns” after <
C:\Windows\system32>. Be sure not to use quotation marks with your input.
- Press Enter.
Once the DNS cache is flushed, you can add a few more commands to complete the reset and make sure that you’re clearing out any issues. Type the following commands in the elevated command prompt window. After each one, hit Enter and wait for the process to finish before entering the next.
- ipconfig /registerdns
- ipconfig /release
- ipconfig /renew
- netsh winsock reset
When the last command is done, restart your computer. Try to open and use the Origin launcher before using any other programs you have to launch manually.
Make Repairs
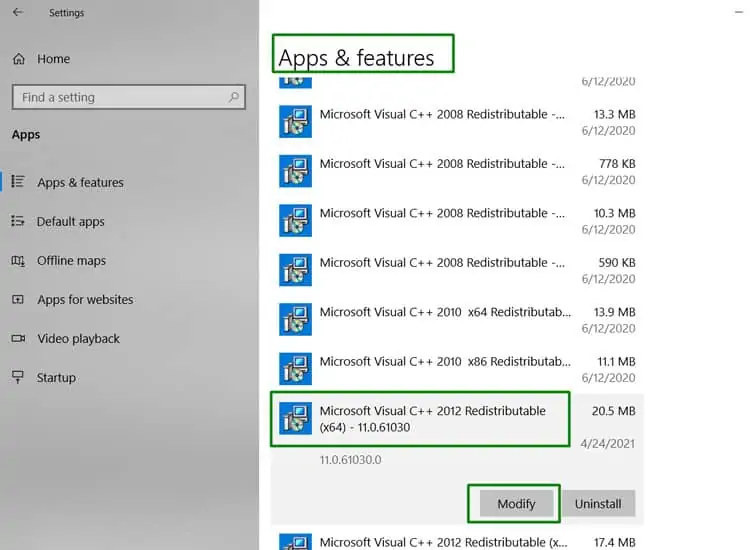
If an error in Visual Basic is to blame, you can repair it right from the Apps & features menu in Windows. When Origin wasn’t working for some, they found that fixing this file made the launcher open again immediately afterward. Make sure to close any instance of the Origin launcher before beginning.
- Type “Apps” into the Windows search bar and open the Apps & features listing.
- Scroll down to Microsoft Visual C++ 2012 x64 entry.
- Click “Modify” and wait for the new window to open.

- Click “Repair.” Follow the prompts to finish repairing the entry.
When you’re done, restart your computer and try using the Origin launcher again.
Change Compatibility Settings
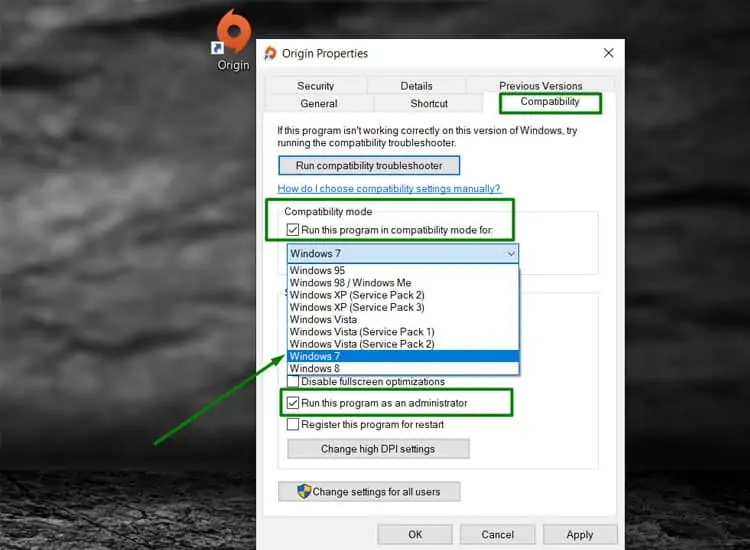
Some players have had luck changing their Origin launcher compatibility settings to Windows 7. It makes Origin run with the settings it would have used on a different version. While you’re changing the settings, also set it to run as Administrator to make sure Origin has all the admin rights it might need.
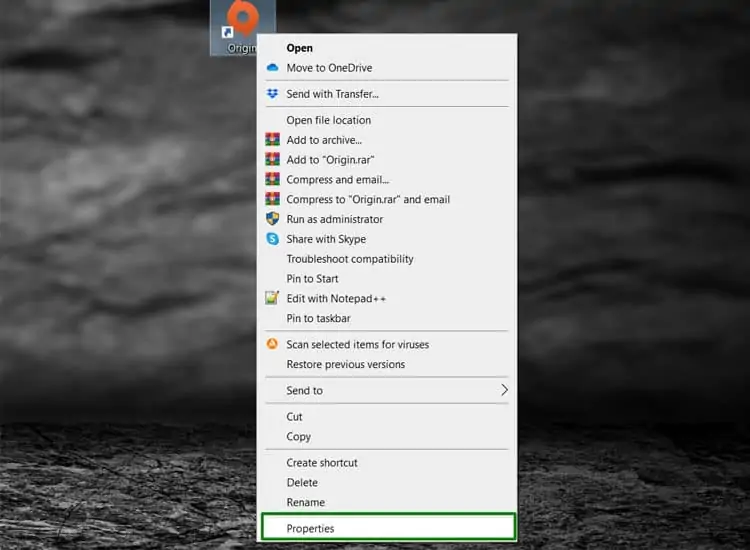
- Right-click on the Origin executable file and choose “Properties.”

- Click the “Compatibility tab.”
- Click “Run this program in compatibility mode for” and then choose Windows 7 from the menu.
- Click “Run this program as an administrator.”

- Click “OK.”
When the settings are changed, try rerunning the launcher.
Full Removal and Reinstallation
To entirely remove the Origin launcher from your computer, you must remove files from AppData, clean the registry, and completely uninstall the program. When you reinstall it after removing it, it’s best to do so with a clean boot so that no other programs hinder its installation or activation.
There are a few ways to clean your registry but be aware that you can damage your computer when deleting system files. Proceed with caution when doing so.
ProgramData and AppData files
The AppData and ProgramData files have settings for Origin that you want to remove before installing a fresh copy. You can always back them up to another location on your computer if you’re worried about losing your saved game files and other settings.
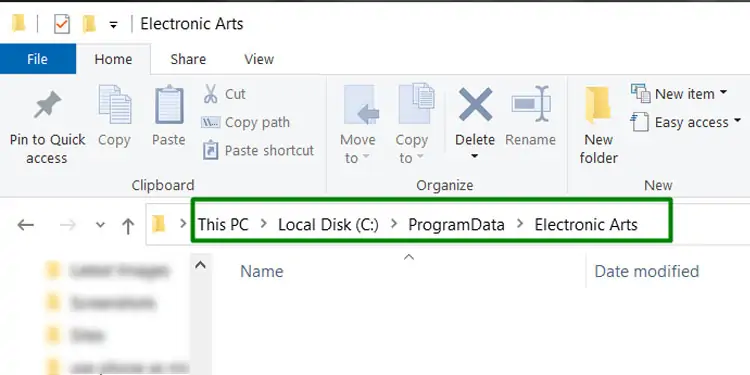
- Go to
C:\ProgramData\Electronic Arts\Origin.
- Back up any files you want to save.
- Select every file except the LocalContent file.
- Click “Delete.”
- Confirm that you want to delete the files.
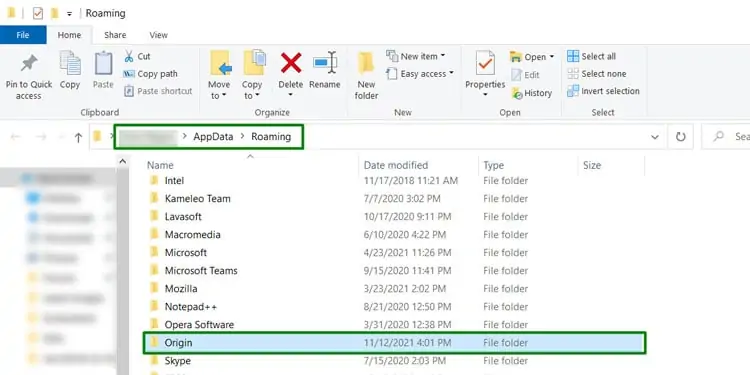
- Press Windows key + R.
- Type “
%appdata%” without quotes and then press Enter. - Open the Roaming folder and delete the Origin folder inside.

- Open the Local folder and delete the Origin folder inside.
Sometimes this step is sufficient, and Origin will work after it. If it doesn’t, uninstall the launcher, repeat these steps, and continue to clean the registry and reinstall the program.
Uninstall the launcher
The launcher can be uninstalled like any other program on your computer. Just go to Add/Remove programs, select the Origin launcher, and choose to uninstall it. You should do this before removing the AppData files or cleaning the registry.
Clean the registry
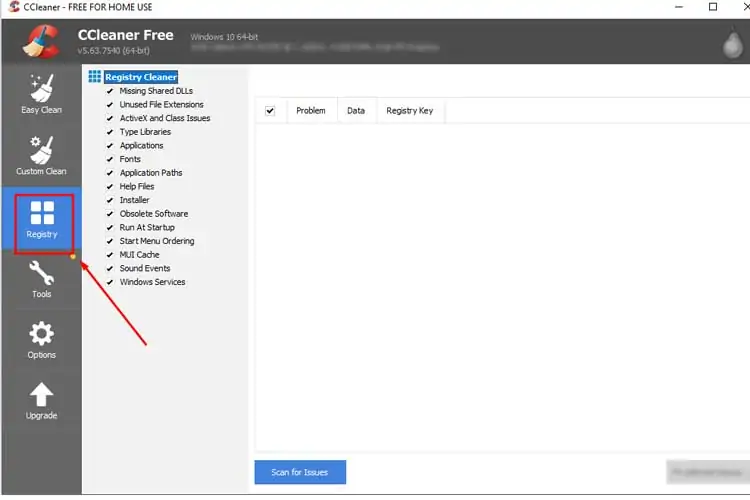
One of the best ways to clean the registry on your computer is to use CCleaner. With it, you can be sure that both the leftover Origin files and any other broken or missing files are removed. It can help fix issues with your computer, including with the origin launcher.
- Open CCleaner and click the “Registry” icon.

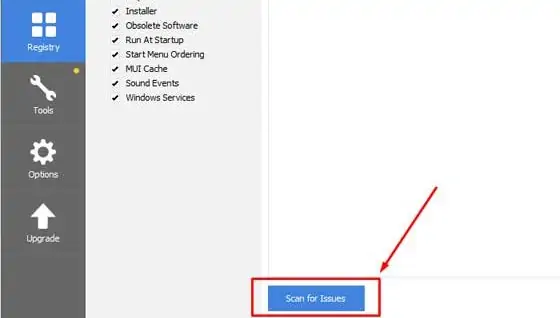
- Click “Scan for Issues” and let it run.

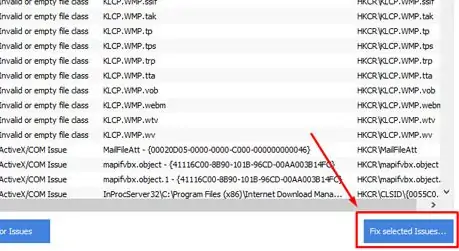
- Click “Fix Selected Issues.”

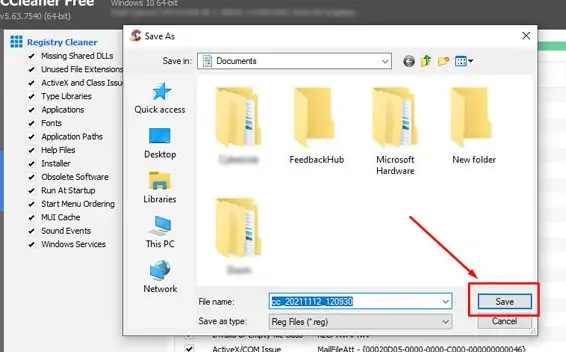
- Click “Yes” to back up the registry.
- Save the files to a location you’ll remember and choose “Save.”

- Follow the prompts to fix each issue individually or to fix them all as a group.
- Click “Close” when you’re done.
If you aren’t sure about an entry, consider leaving it rather than removing it. However, any Origin files that are found should be removed.
Change Your Startup Options
Remove any unnecessary programs from the startup menu so that they don’t interfere with the Origin launcher when you reinstall it.
- Press Ctrl+Alt+Del and choose “Task Manager.”
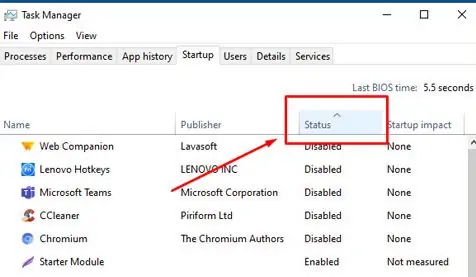
- Click the Startup tab.
- Click “Status” to sort by whether a program is enabled or disabled at startup.

- Right-click on each entry you want to remove and choose “Disable.”
Restart the computer when you’ve disabled all the options you don’t want to start up with your computer.
Reinstall the Launcher
Once you’ve cleared out all traces of your previous Origin installation, reinstall a fresh copy to see if it works. You can download a new copy from the Origin store for free. Simply click the downloaded file and follow the prompts to install it.
Reinstall Windows
Unfortunately, some users had to reinstall Windows completely to get the Origin launcher to work. It can be a long process, and you want to make sure you have your Windows key accessible, files backed up, and are ready to spend a bit of time reinstalling all of your programs.
If you get to the point where you are ready to reinstall Windows, consider reaching out to Origin Support for help. You may be able to get specialized support to help you access the program.


