Using a password to protect a file or a folder makes it secure against unwanted access. If you are using a shared device, it’s generally a good idea to have an encrypted folder to store your sensitive personal and work-related files and documents.
Windows has a built-in encryption feature called BitLocker, but it encrypts full volumes. Hence, it cannot protect against intentional or accidental snooping by somebody who has access to your shared device. Thus, if there are only a handful few files, folders, or documents that you’d like to keep private, you are better off encrypting them with the EFS utility instead.
If you are one of those people who need to encrypt (password protect) their files and folder, we have just the article for you. Hope you find this useful.
Reasons to Password Protect a Folder in Windows 11
There might be a few different reasons why you might want to encrypt your files and folders with a password. A few common reasons are:
- You want to protect your privacy.
- You don’t want people accessing sensitive documents intentionally or accidentally.
- You have a shared device.
Ways to Password Protect a Folder or File in Windows 11
You have two options if you want to password protect a folder or a file in Windows 11. You can use the built-in encryption function in Windows 11. You can also use various third-party software to password protect your files and folders.
Using Built-in Encryption Function in Windows 11
To use the built-in encryption function in Windows 11 (EFS) to protect your file or folder, first navigate to the location of that file or folder. Then please follow these steps below:
- Right-click on the file or the folder
- Click on Properties
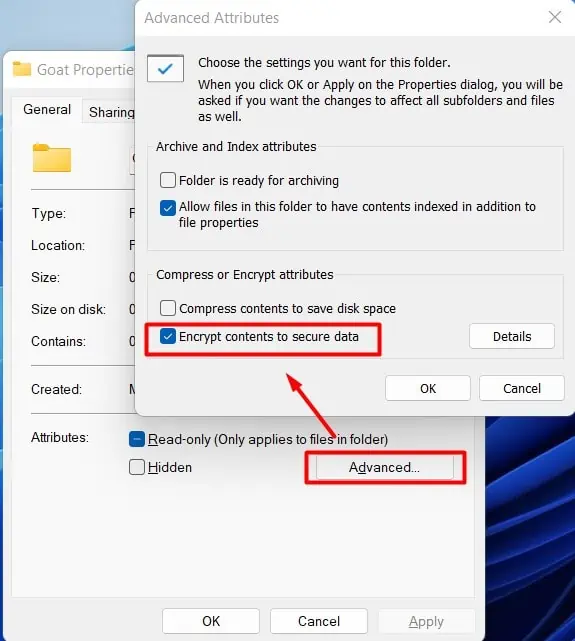
- Click Advanced
- Put a tick mark on “Encrypt contents to secure data” and click OK.

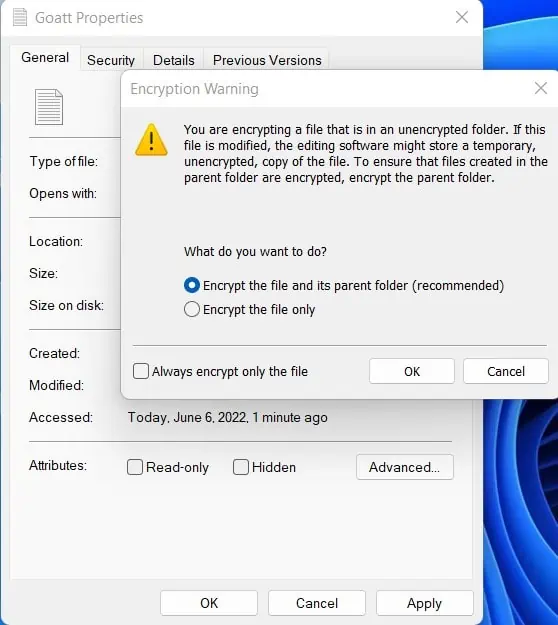
- If you are trying to password protect a file, you will see an encryption warning. We recommend selecting the radio button labeled “Encrypt the file and its parent folder” and clicking OK.

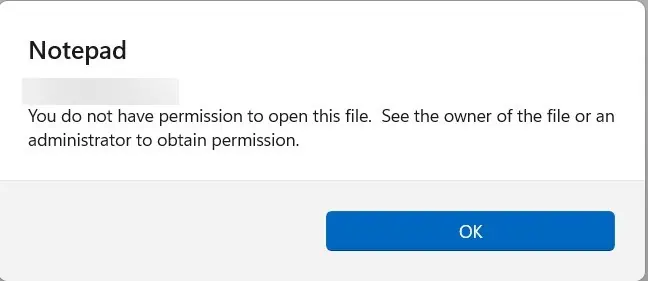
- Your file or folder is now encrypted with a password, and anybody who tries to access them from a different account will encounter a “You do not have permission to open this file” error.

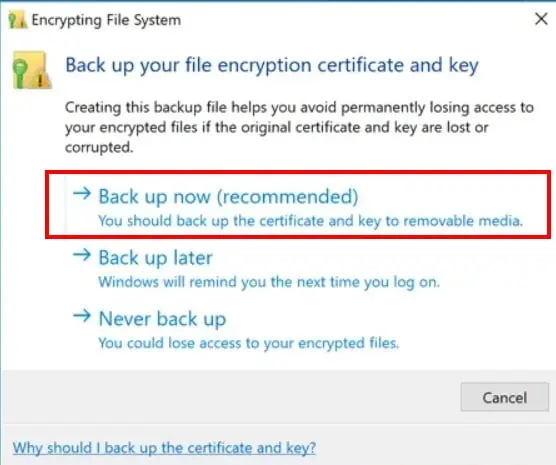
If it’s your first time using this feature, you will see a prompt to back up the encryption key.
- Click on Back up now and follow the on-screen prompts.

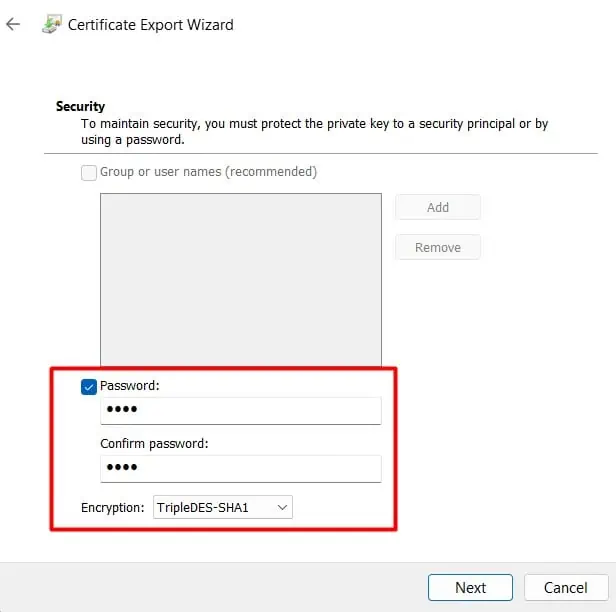
- Put a tick mark on the Password box in Certificate Export Wizard.
- Enter a unique password and confirm it.

- If you want, you might choose the type of encryption used or use the default type. Then click Next.
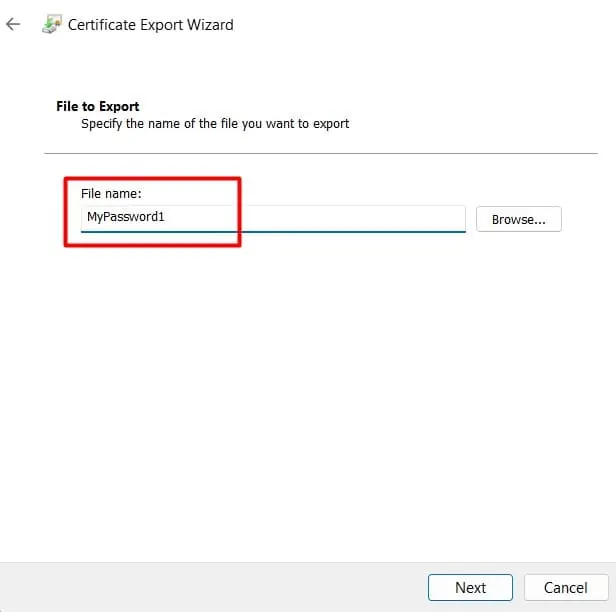
- Enter a name for the certificate.

You will use this certificate and password to recover the folder or file when needed in the future.
To remove encryption for the folder or file:
- Navigate to it’s location in explorer
- Right-click on it.
- Select Properties and click on Advanced.
- Uncheck “Encrypt contents to secure data”
Using Third-Party Software: WinRAR
Various third-party software available in the market lets you password protect your file or folder in Windows 11. The functionalities and methods of protecting a file or folder with a password might vary slightly depending on the application you use.
In the example below, we have used WinRAR, a popular file archiver utility, to password protect a folder. To follow this example, please download and install WinRAR if you have not done so already.
- Navigate to the location of your file or folder and right-click on it.
- Select WinRAR from the context menu, and click on Add to archive…
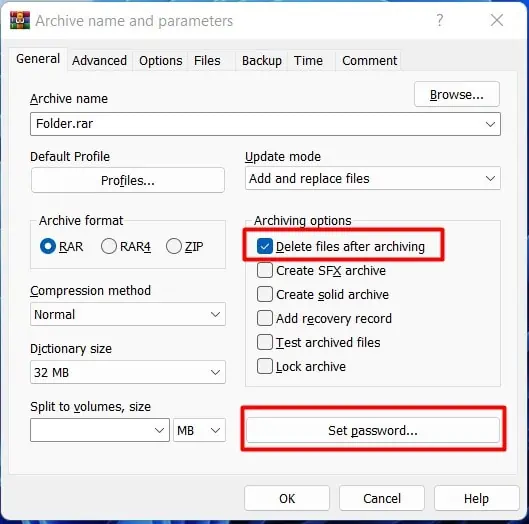
- On the General tab, put a tick mark on “Delete files after archiving.”
- Click on Set password.

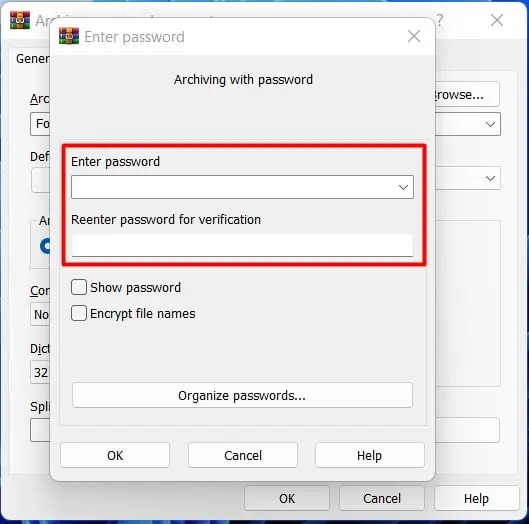
- Type the password in the box under “Enter password.” Also type in the exact same password in the box under “Reenter password for verification.”

- Click OK, then click OK again.
Now anybody who does not have a password to the archived file or folder will be unable to access your documents even if they share the same account.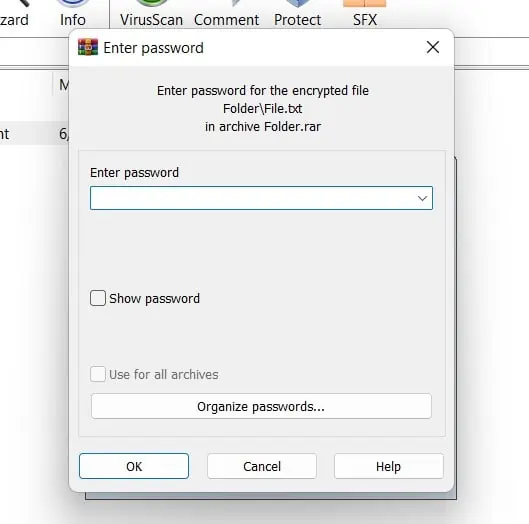
To remove the password from the file that you encrypted with WinRAR:
- Right-click on the archived file.
- Select WinRAR > Extract here.
- Enter the password when prompted, and click OK.
You may delete the archived file to eliminate redundancy.
Using Third-Party Software to Password Protect Your File or Folder: Easy File Locker
Easy File Locker is a popular freeware program that you can use to password protect any file or folder you want. If you want to use Easy File Locker, please download and install this program and follow the steps below:
- Launch Easy File Locker.
- Click on System > Set password.
- Input and confirm the password.
- Click on Files & Folder and click on Add Folder (Click on Add File if you want to encrypt a file instead).
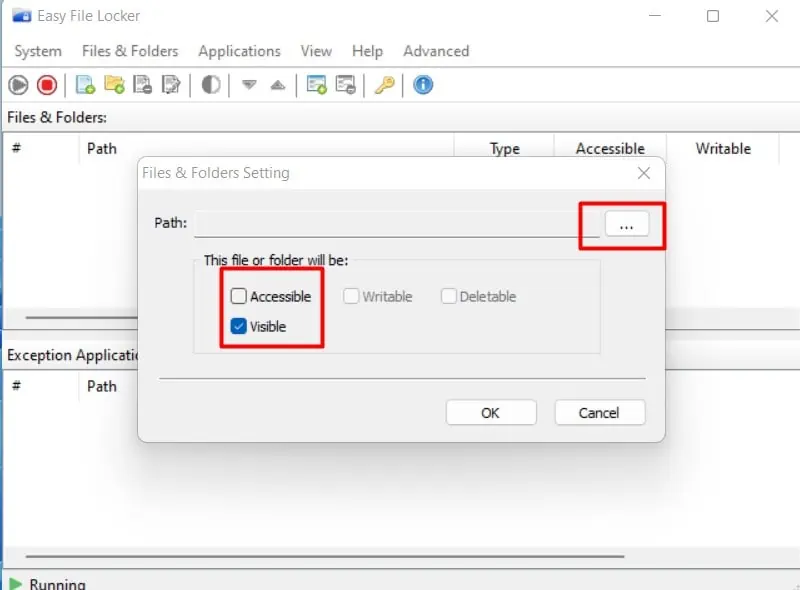
- Uncheck on Acccessible and check Visible
- Click on three dots and navigate to the folder you want to protect with the password.

- Select the folder and click OK
The folder will now be inaccessible. When you need to access the folder, double click on the folder from the list within Easy File Locker and check Accessible.
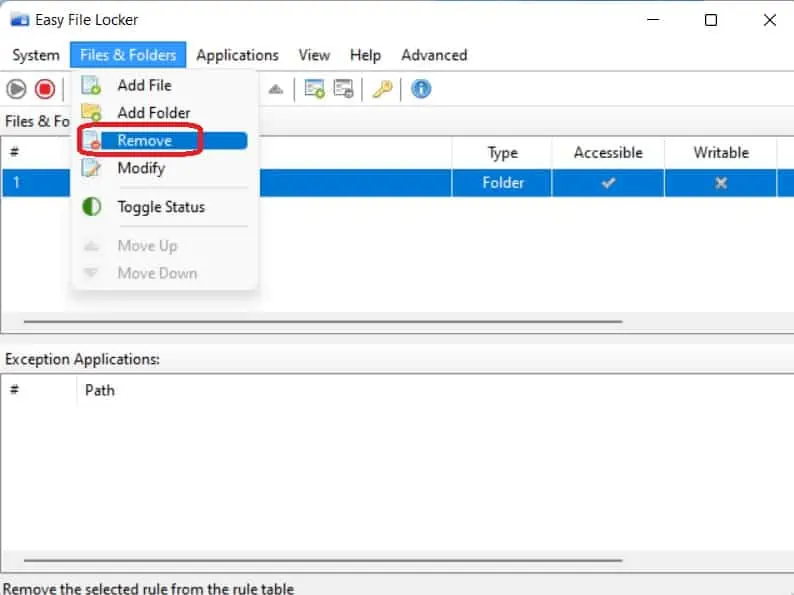
To remove a file or folder from Easy File Locker’s protection:
- Select the file or folder from the list.
- Click on Files & Folder > Remove.

- Click Yes.
Frequently Asked Questions
Why Can’t I Password Protect a Folder?
If you can’t password protect a folder, it could be that the folder is already encrypted and you do not have access to it without the password.
Does Windows 11 Have File Encryption?
Windows 11 supports file encryption. To find out whether device encryption has been enabled on your device, go to Settings > Privacy & security. The third entry on this screen should say Device encryption.
If, for some reason, you don’t see this option, that means your device does not support device encryption. Windows 11 Pro users can use BitLocker for volume encryption so as to secure their files, documents, and data.
Can I Use Bitlocker to Password Protect Files?
BitLocker is a specialized tool that has been designed for disk encryption. You can use it to protect entire hard drives or partitions of a hard drive. However, you cannot use BitLocker to encrypt individual files and folders. If you need to password protect individual files or folders, you should use the EFS too.
How Do I Get Bitlocker on Windows 11?
- To enable BitLocker on Windows 11, please follow these steps:
- Launch Settings (Win + I) > System > Storage
- Under Storage management, click Advanced storage settings
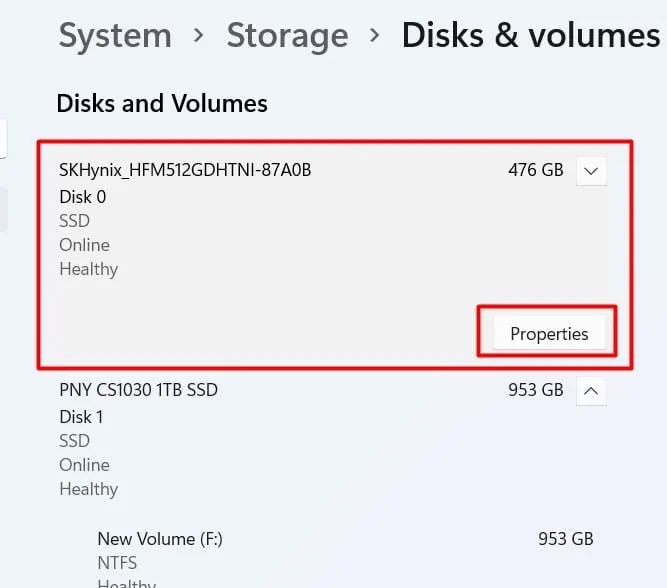
- Click on Disks and Volumes
- Select the drive or volume you want to enable BitLocker on and click on Properties.

- Click on Turn on BitLocker.
Alternatively,
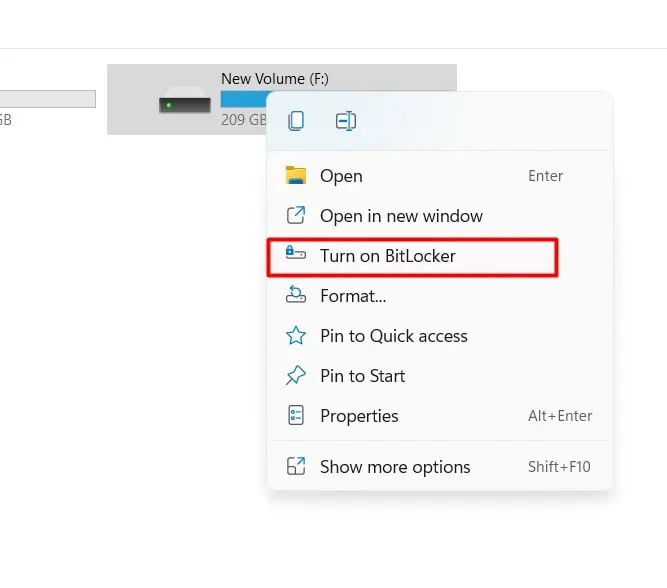
- Launch This PC
- Right-click on the drive and select Turn on Bitlocker

Now choose the method you’d like to use for unlocking the drive and follow the instructions.

