We primarily choose to game on a PC because of the added benefits like performance boost, and the range of user-control options. But at times it can be challenging, if your PC lacks certain features, or cannot fulfill certain game criteria.
Normally when gaming, your PC runs at its maximum performance therefore it needs all the resources it can. If something is preventing your PC from utilizing required resources or causing it to overheat, this can very well trigger problems like restarting and crashing.
Having your PC restart constantly can create problems like unsaved progress and many more. Let’s learn how you can prevent this from happening again.
Probable Causes of The Issue
Running a game properly on PC depends upon a lot of factors. Even a small change can cause your PC to restart and shut off playing games. Let’s look at some of the most common reasons why this happens.
- The game’s minimum requirements are not met.
- Overheating.
- Outdated graphics drivers.
- Possible malware attack.
- Insufficient power supplied by PSU.
- Improper overclocking.
How to Fix PC Restarting While Gaming?
By now we know that there are different reasons for PCs to restart when gaming. We will talk about fixes that you can apply to fix the issue and further prevent it from happening. But before doing that, try restarting the game and running it as administrator. This is not counted as a solid fix but can sometimes work.
Check the Minimum Requirements of the Game
Before you begin applying any of the fixes for yourself, the first step should always be verifying the game’s requirements. Most modern games require extensive amounts of system resources to run properly. If your PC does not meet the said requirements it can cause failures like restarting and such. Due to the complexity of modern titles, we advise you to at least have the recommended system requirements for proper gameplay.
Additionally, you can also try lowering the graphics settings for the game. This lowers the burden on your PC and can sometimes fix the problem.
Update Graphics Drivers
The GPU in your PC is undoubtedly the most important component for gaming. It is responsible for rendering the required frames needed to run the game. Therefore, your GPU must be running on the latest drivers to prevent any problems.
Let’s go over ways you can update the GPU drivers in your PC.
- Hit Windows key + X and choose Device Manager.
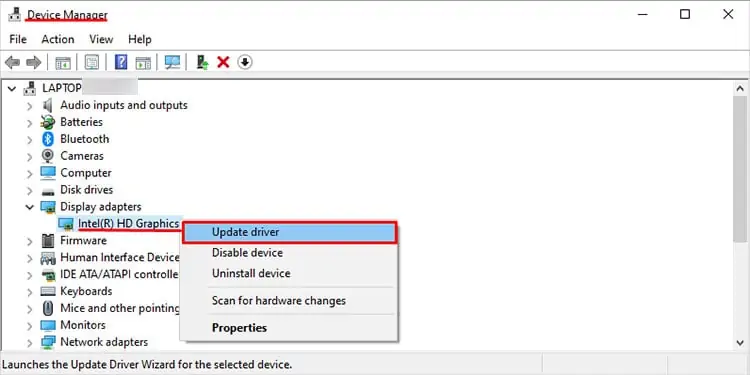
- Expand Display adapters, then right-click on it and select Update driver.

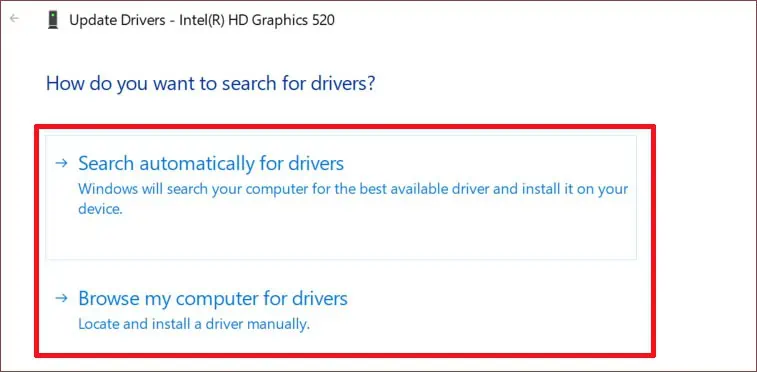
- You are met with two options: Search automatically for drivers which Windows searches for new drivers and install them automatically and Browse my computer for drivers where you can select from a list of drivers available on your PC.

- If you choose Browse my computer, either specify the drivers location or choose Let me Pick to get a list of available drivers on your PC for that device.

- Complete the remaining process and restart your PC.
Updating Third-party GPUs
If you are running an external GPU from NVIDIA or AMD, we suggest you download the drivers manually from their official site. To do so, you will need the graphic card’s model number, and series. You can find your specific GPU detail under Display adapters in the Device Manager.
Updating NVIDIA Graphics Driver
- Navigate to Nvidia’s official website and go to the Download drivers section.
- Fill in your graphics card’s specification and hit Search.
- Next, you will see a description of the latest available driver for that specific graphics card. Hit Download.

- Run the executable files and follow the steps accordingly to install the latest drivers.
Updating AMD Graphics Driver
- Head over to AMD’s official website and navigate to the Drivers and Support section.
- From the list, select your specific AMD card.
- On the next page, select the OS you are currently running and click on Download.

- Run the downloaded file and download the AMD Software.
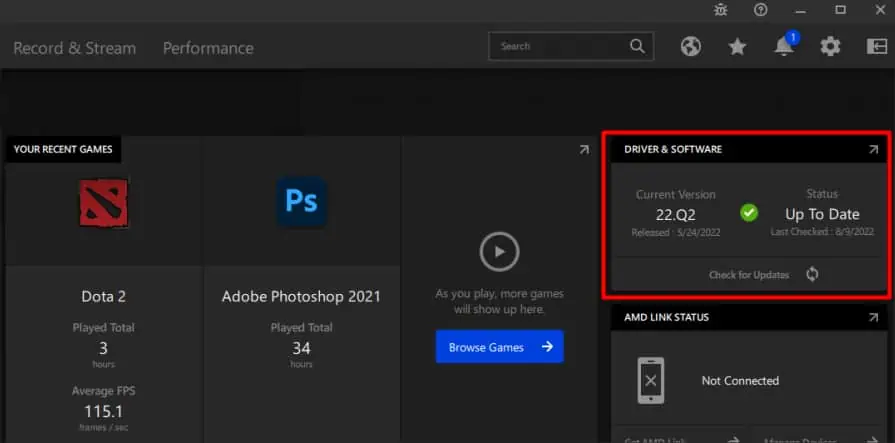
- Open the AMD Software Client.
- Under Drivers & Software, click on Check for Updates.

- If there are any updates available, the software proceeds to display them and asks for download permission.
Update Windows
Windows frequently releases new updates for its devices. These updates are released as a patch fix to previous releases and also may contain bonus features.. Make sure to update your Windows to the latest build to eliminate any chances of corrupted system files messing with your PC.
To Update Windows to the latest version, follow these steps:
- Press Windows Key + I
- Open Settings > Update & Security.
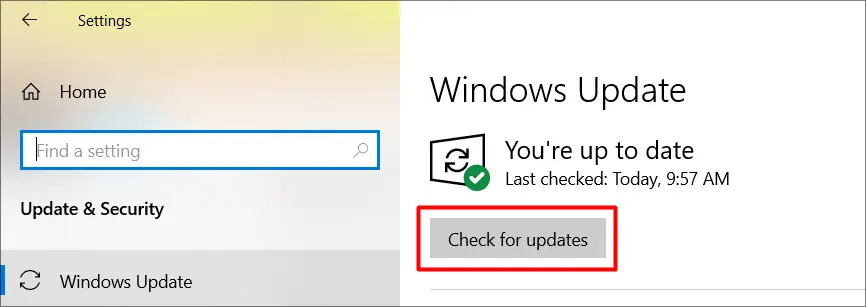
- Under Windows Update, click on Check for Updates.

- If there are any new updates available, Windows prompts you to download them.
Scan Your PC for Malware
While surfing the internet, your PC can be affected by many malicious files and software. These malware can prevent crucial system processes from working and cause your PC to crash constantly.
To scan your PC for possible malware, follow these steps:
- Press Windows Key + I to open Settings
- Click on Update & Security > Windows Security.
- Now click on Virus & threat protection and then Scan options.

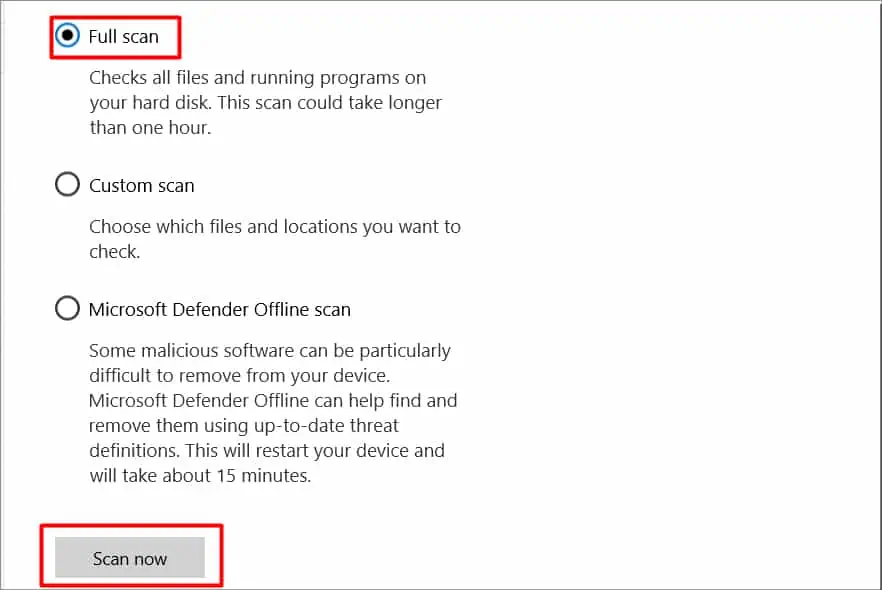
- Select Full scan and hit Scan now.
Disable the Automatic Windows Restart Feature
Windows PCs come with a feature that enables schedule restarts. It could be that the setting is enabled on your PC and is causing random restarts. So, make sure to disable the feature.
- Press Windows Key + R and type in
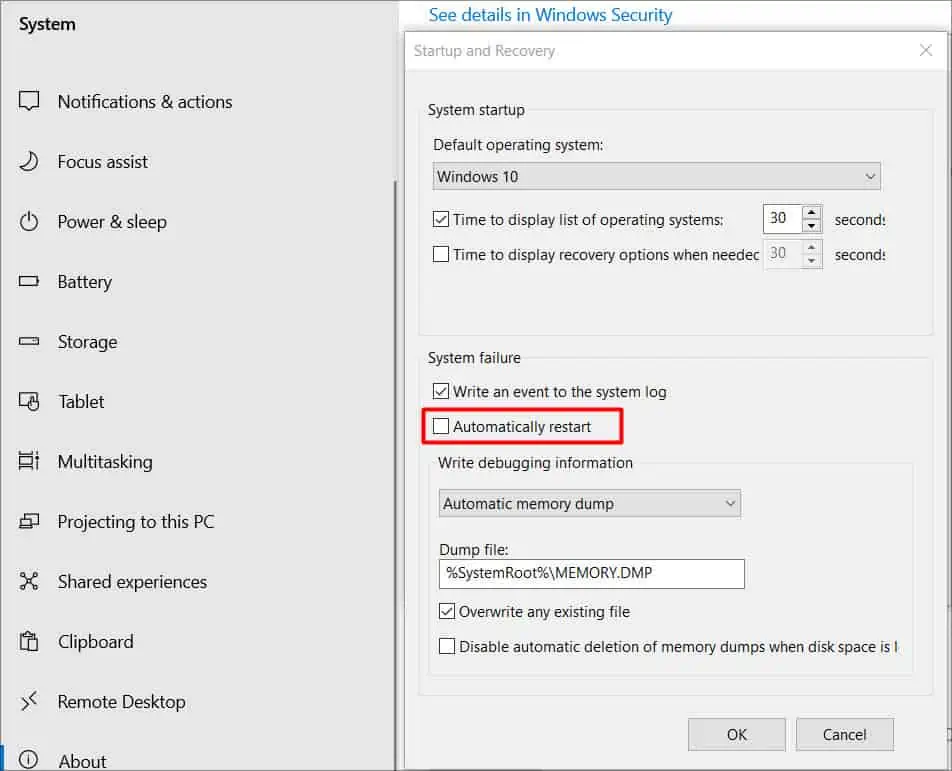
sysdm.cpl. - Under the Advanced tab, Startup and Recovery > Settings.

- Untick the box under Automatically restart and hit Ok.
Troubleshoot Your PSU
The Power Supply in your PC is in-charge of providing adequate power to all the other components. This means that the PSU needs to be capable enough, if there are any issues with the PSU like low wattage or any other type of damage, it can cause the PC to restart and crash.
First of all, try changing the computer’s power settings to a lower rate. This way there is less load on the PSU. To do so, follow these steps:
- Press Windows Key + R and type in
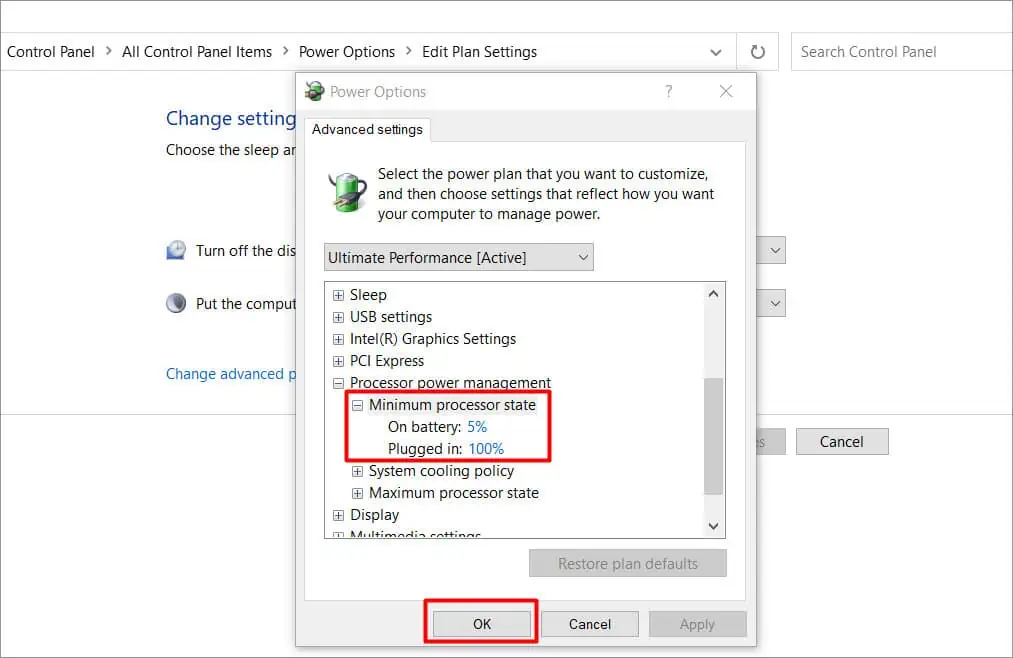
powercfg.cpl. - Select Change plan settings next to your preferred power plan and click on Change advanced power settings.
- Expand the Processor power management tab and Minimum processor state.

- It is recommended that you change the values to 5%(both On Battery and Plugged In).
If you are certain that there are no issues with the system settings, inspect the PSU physically. Look for any loose or disconnected cables. Don’t try this if you do not know what you are doing, rather take it to a PC repair specialist.
You can also do some further system diagnosing to look for the root of the cause. If any of the other components like RAM, or CPU are faulty, this can also cause system restarts. Go through our article which explains how you can diagnose the system further.
Troubleshoot Your PC For Overheating
If your PC starts to heat up rapidly it can cause system failure leading to problems like restarting. The components inside your PC require optimal cooling for running smoothly. When gaming your PC tends to use maximum system resources which puts a load on the components causing them to overheat.
In this situation, let your PC cool down. Make sure all the fans are running and have optimal airflow. Also, lower the power settings if required, this decreases the load which causes heating issues.
Regardless, if the heating issue still does not go away, try swapping the case fans and the heatsink with new ones.
Undo Overclocking
Careless overclocking can lead to a range of different problems. If your PC components like RAM, CPU & GPU are clocked at different speeds than what is supported by the PC, it will cause system failures and so on. You should undo any kind of overclocking done to your PC if you are getting issues like restarting.
If you have performed overclocking through any third-party applications, refer to the specific guidelines to undo it. If you overclocked with the help of BIOS settings you can reset it to undo. Refer to our article on How to reset BIOS safely.

