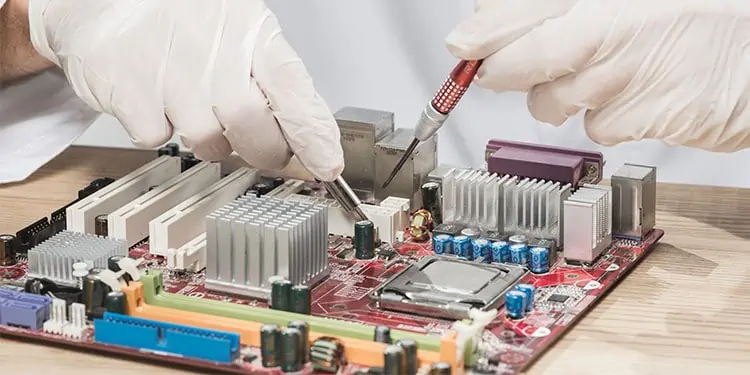
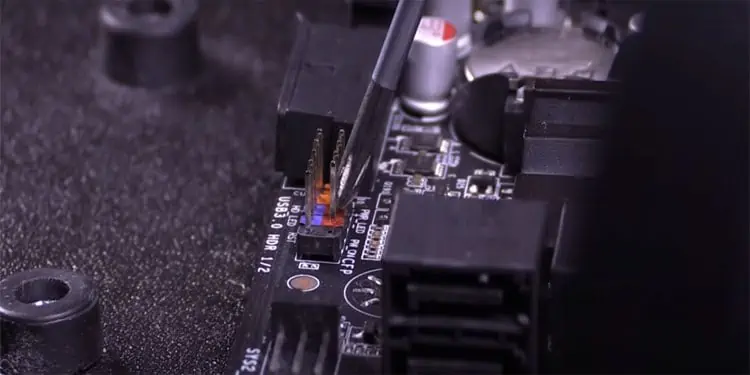
When building a PC, you might want to turn it on before inserting it into the case to check if everything function properly. But is that even possible? As it turns out using a flat screwdriver, you can easily turn on a computer without having it connected to a PC case.
So, without further delay, let’s get right into it.
Before You Begin
One thing that you need to turn on a computer from the motherboard without a case is a metal conductor. However, this does not mean you should try using any metal piece that you find lying around anywhere.
It is best that you use a flat screwdriver. The screwdriver has a handle, which, in our case, stops any current that might flow through your body.
Finally, make sure that you connect the 24-pin and the 8-pin power supply to the motherboard. These pins supply power to the motherboard and the processor. You cannot turn on the PC unless you have connected these two cables.
The other thing that you might require is a motherboard’s user manual. Depending on the motherboard, components that we need to jump-start a computer can be located anywhere. So, to find said component, it is recommended that you put your motherboard’s user manual nearby.
Turning on the Computer From Motherboard Without Case
To jump-start a motherboard, you need to short circuit the power switch using a screwdriver. Pretty simple right? Well, locating the power switch can be quite tricky and confusing for beginners and even amateur PC builders. Furthermore, short-circuiting the wrong headers can render your entire motherboard useless.
To avoid this exact situation, we have explained each step in detail to locate and short circuit the power switch.
Locate the Front Panel Header from Motherboard
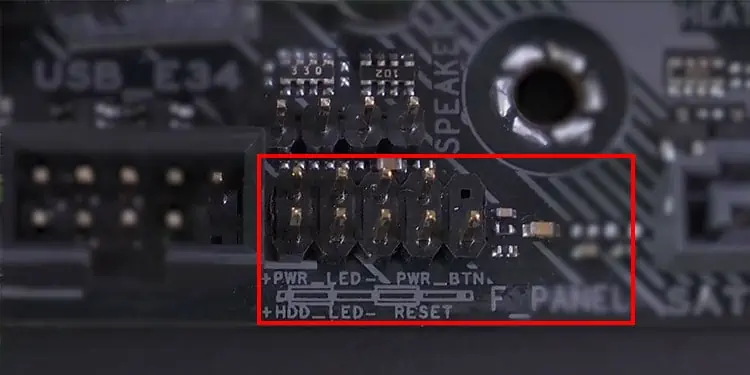
If you ever wonder how a motherboard connects to the CPU case, it is through the front panel connectors. The Front panel headers on the motherboard supply power to the case’s Hard drive LED, power LED, reset switch, and power switch using a single pin that supplies 5V DC.
The front panel headers have ten pins and are indicated by writings, such as F_PANEL, JFP1, or FP1 on the motherboard. These pins are usually located on the edge of your motherboard.
Most motherboards are equipped with a 10-pin front panel header. However, there are some motherboards that use a 20-pin front panel header.
If you cannot locate the front panel headers, please refer to the motherboard’s user manual to find them.
Locate Power Switch from Front Panel Header
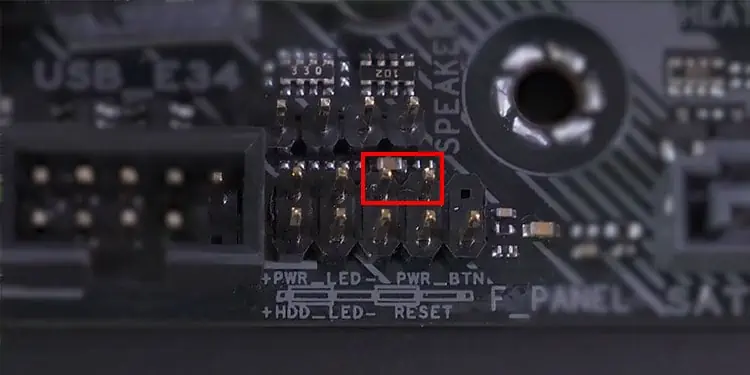
Once you have successfully located the front panel header on your motherboard, it is now time to locate its power switch pins. There are two pins that connect a CPU’s power switch. These two-pin connect the PC case’s power button to the motherboard, which turns on the computer.
These are the two pins that you need to short circuit.
Short circuit two wrong pins, and you might even have a dead motherboard. So locating the right power switches is crucial.
The location of the power switch depends on your front panel header, i.e., 10-pin or 20-pin.
Power Switches for 10-Pin Front Panel Header
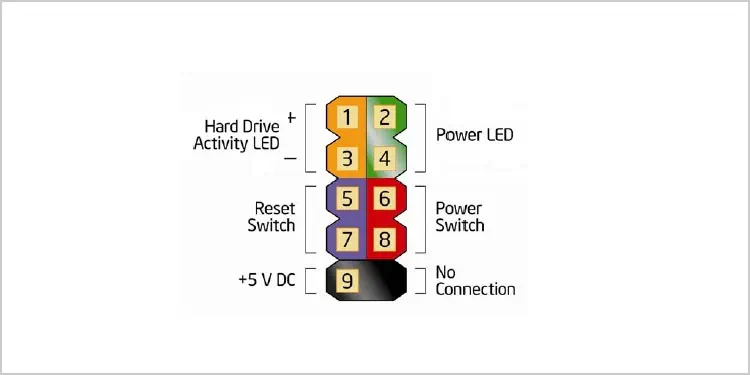
If you have the latest motherboard, it most likely has a 10-pin front panel header. Although it is a 10-pin header, you do not need to plug anything to the pin at the end. Some motherboards even have only 9 (10-1) pin motherboard headers.
For these headers, the power switch header is always located on pin numbers 6 and 8. These pins may even have numbers written on their side, as shown in the picture below.
Power Switches in a Motherboard With Over 10-pin Front Panel Header
Generally, older motherboards are equipped with a 20-pin front panel connector. The most common locations for the power switch for 20 pins front panel are briefly explained below.
- PINs 11 and 13 for 12 or (20-8) pin front panel header.
- PINs 6 and 8 for 13 or (20-7) pin front panel header.
- PINs 6 and 8 for 17 or (20-3) pin front panel header.
Depending on your motherboard and the pins’ orientation, the power switches can be any of those 20 pins. So, make sure that you use the motherboard’s user manual if you have a front panel header with over ten pins.
Short Circuit the Power Switch
After successfully figuring out the power switch header, it is now time to short circuit them.
- Gently connect these two pins using a screwdriver.

- After the PC turns on, remove the screwdriver.
- Ensure that you do not touch any other pins when connecting the power switches.
Related Questions
How to Turn Off a Computer Without Using a Power Button?
Without using a power button, you can simply short circuit the power switch again to turn off a computer. If you are unsure about short-circuiting and you do not have installed an Operating System, just turn off the power supply.
Will the Computer Turn on Without CPU And RAM?
When you turn on a computer, before loading the BIOS, it needs to get through the POST (Power-on Self-Test) process. POST is the first thing that a computer runs to check whether all components are connected.
Without RAM and CPU the computer will not get through POST process. Furthermore, the computer’s internal speaker will beep error code indicating that the RAM is missing.
The only thing you can determine without a CPU and RAM is whether the motherboard is dead or alive.
Will the Motherboard Turn on Without GPU?
A motherboard will turn on without a GPU. However, if you do not have a CPU with integrated GPU, your monitor will not display anything.

