When a printer is not printing, issues often lie on the computer rather than the printer side. My printer often starts acting up when the print queue gets clogged and crashes the spooler service.
Yet, there do exist some conditions when the printer actually runs into a problem and refuses to print. For instance, when it is running low on ink or encounters paper jams.
To fix a printer that is not printing, start by finding if it is a fault in the printer or your computer. Check for any error code or messages on the printer’s screen and sort them out. Then, clear the stuck print jobs and restart the spooler service. If all else fails, you need to reinstall the printer.
Rule Out the Faulty Device
If your printer is not printing, it does not necessarily mean that the printer is faulty. The device you are using to print might equally be culpable.
Unless you are using an old school printer, I am quite sure, it has a separate scanning assembly to scan and print the documents.
So what you should be doing is, insert a document in the scanner assembly and do its photocopy.
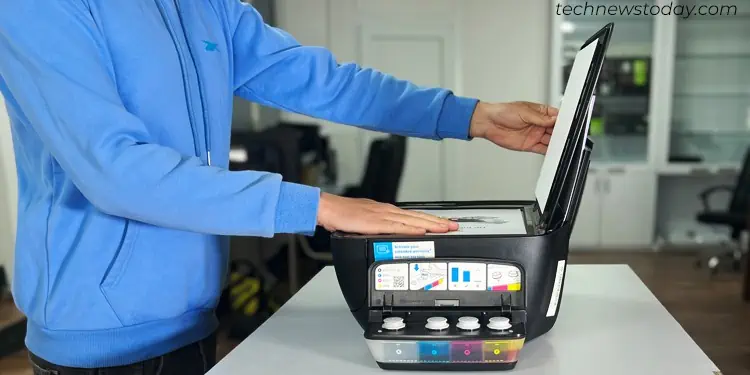
If the printer successfully copies the document, there’s nothing wrong with the printer.
This also shows that the printer has sufficient ink levels and is not going through any critical error like a paper jam.
It clearly exhibits that there is either a connection issue or some sort of printer configuration errors on your printing device.
We’ll discuss printer configuration later. For now, kindly check all the cables associated with the printer.
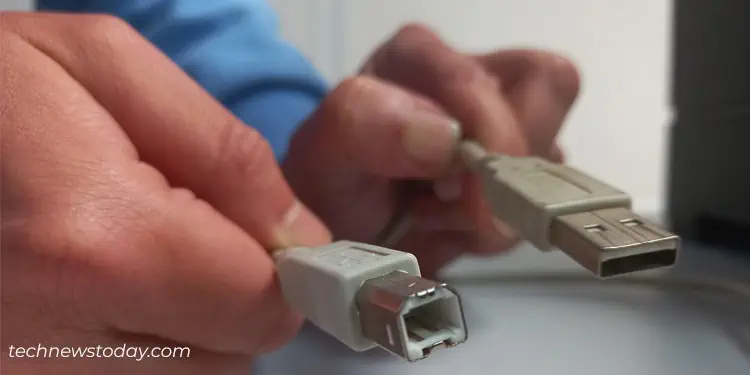
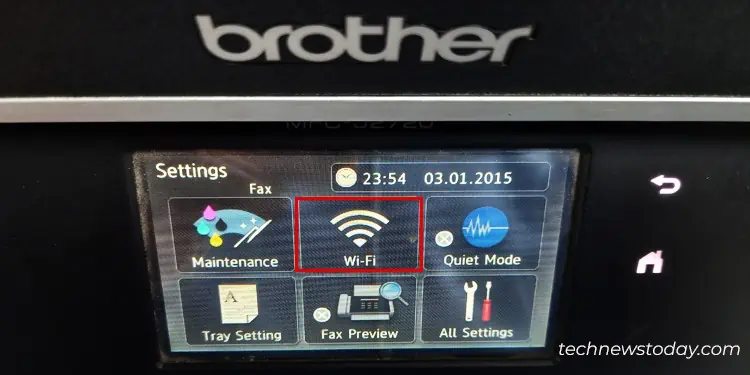
In the case of wireless printers, check Wi-Fi connection and make sure it’s all good.
Pay Attention to the Printer Sound
If you print frequently, I’m sure you are familiar with the “brrrh,” ”whirr” or “chugging” sound, whatever you call it.
This sound can actually tell you if the printer is working fine.
Just try to print a document and pay attention to the sound.
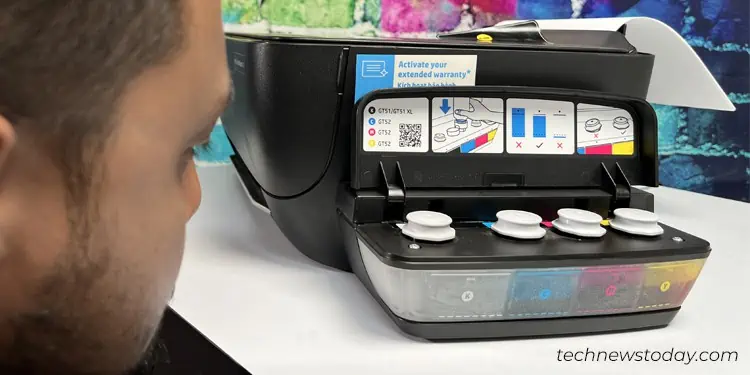
Should there be no sound, the printer is not receiving print commands from your device.
On the other hand, if you hear the sound but do not get a printout, a range of issues is possible.
For instance, your printer might be running low on ink, may have paper jams or misconfigured paper settings.
Check the Printer Screen
Most of the printers these days come equipped with a LCD control screen. In case the printers run into problems, you’ll also see error messages flashing there.
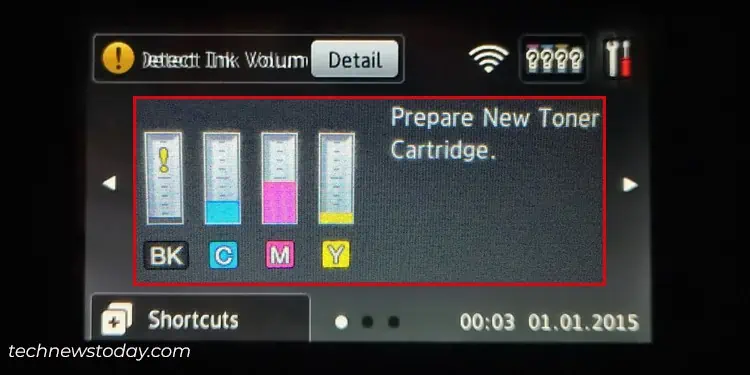
For instance, I have a HP printer that shows “E2” error, when there’s a paper size mismatch.
Some printers even flash the lights to indicate a problem.
You can, similarly, check your printer screen and seek fixes accordingly.
Check the Status of Your Printer
Even though your printer does not come with a screen, you can still verify if it has entered an erroneous state. Here’re the quick steps to help you.
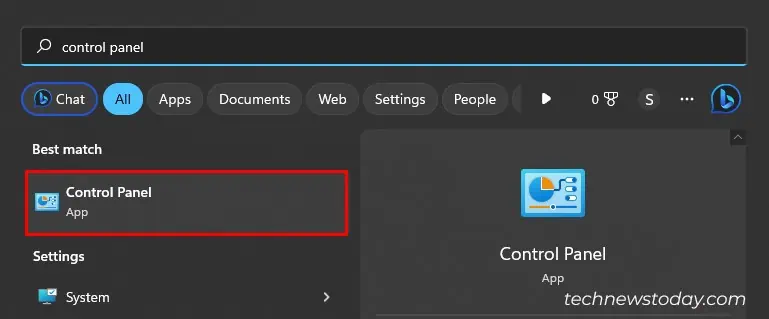
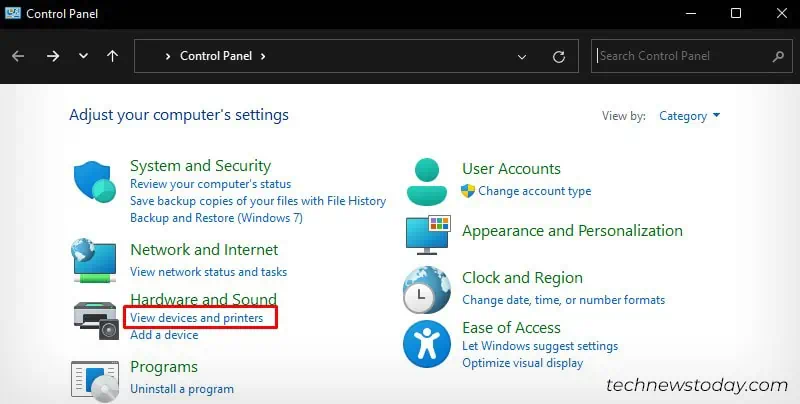
- Open Control Panel.

- Go to the highlighted menu, as shown below.

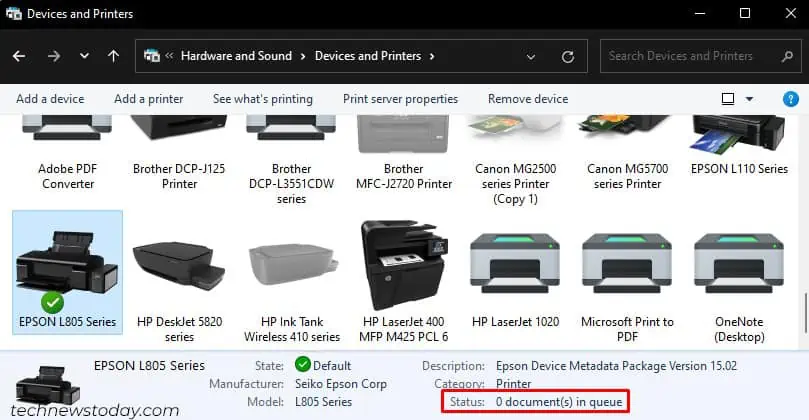
- Click your printer profile.
- See the status.

- You will generally see 0 document(s) in queue if the printer is ready to accept print requests.
If it mentions “Offline,” here’s how to fix the printer that keeps going offline.
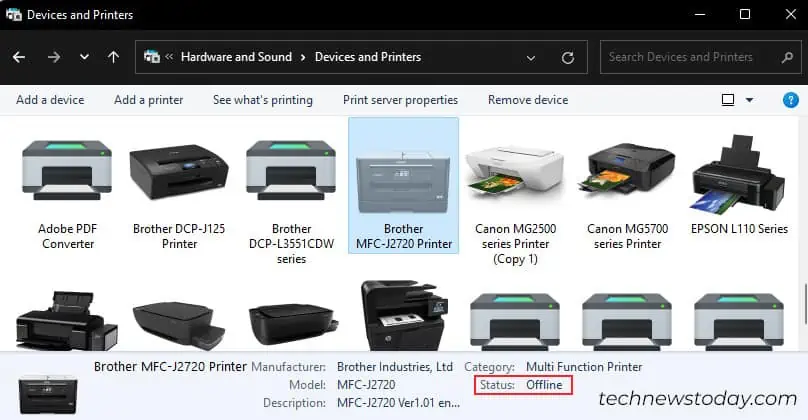
Likewise, if you see “Error,” you need to fix the printer in error state.
Sometimes, you may also see status like “Needs troubleshooting” or “Driver unavailable.”
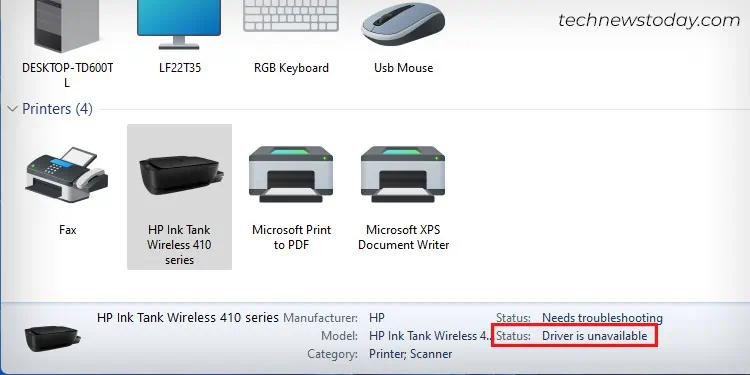
Kindly download the compatible driver from the official website of your printer manufacturer to start printing again.
Clear Pending Print Requests and Restart Spooler Service
It’s quite common to get annoyed when your printer won’t print.
I still remember when I first got a printer at home. Whenever the printer stopped printing, I used to give multiple print requests to the printer out of frustration.
Later, I realized that this makes the problem more complex than solving it.
If you end up like me, you should clear all those print requests and restart the print spooler service.
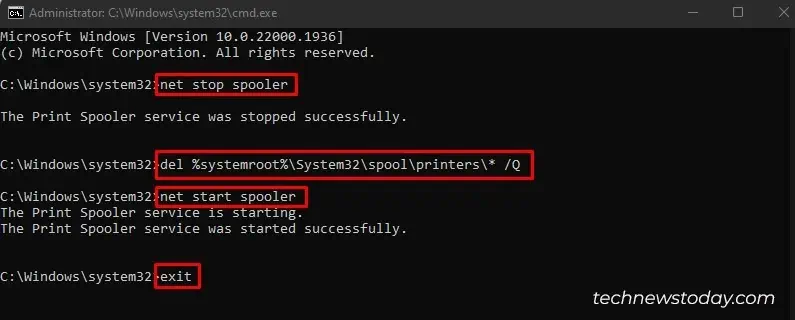
Restarting the spooler service is really magic. Trust me, I have fixed a range of printer problems just by restarting it. Here’s how to do it.
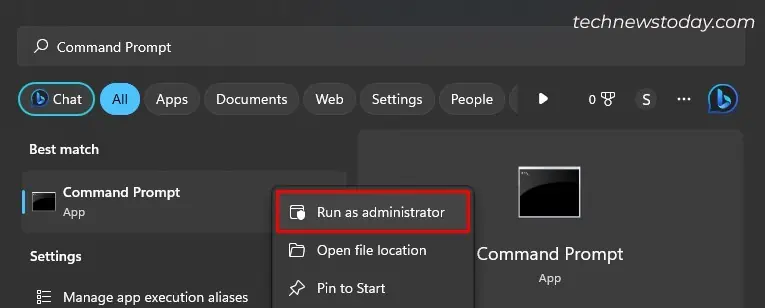
- On your Windows computer, launch CMD with admin privileges.

- Copy-paste these commands there.
net stop spoolerdel %systemroot%\System32\spool\printers\* /Qnet start spoolerexit
Set Default Printer
You can easily choose your desired printer to print documents after initiating a print. So, there’s no point in setting a default printer.
But yes, it is helpful if there are multiple printers installed on your device.
Sometimes, you may be in a rush and end up giving the print command to the wrong printer. As such, you might misinterpret your working printer as a faulty one.
I advise you to choose the printer correctly while printing or set a default one.
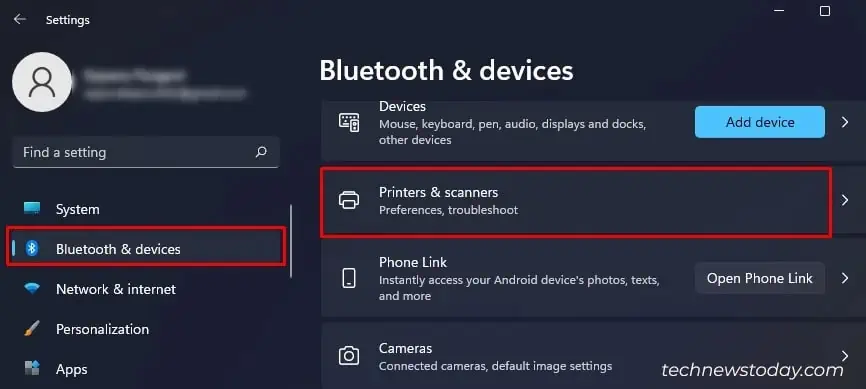
- Open Settings and then go to Bluetooth & devices > Printers & scanners.

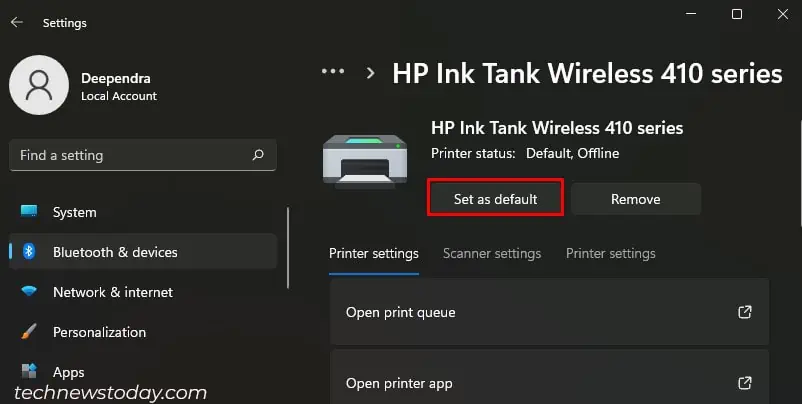
- Choose your preferred printer.
- Click Set as default.

Remove and Re-add the Printer
If anything does not seem to work, I suggest you remove and re-add the printer.
We will also fix port mismatch issues on the go that are possible due to installation of multiple printers.
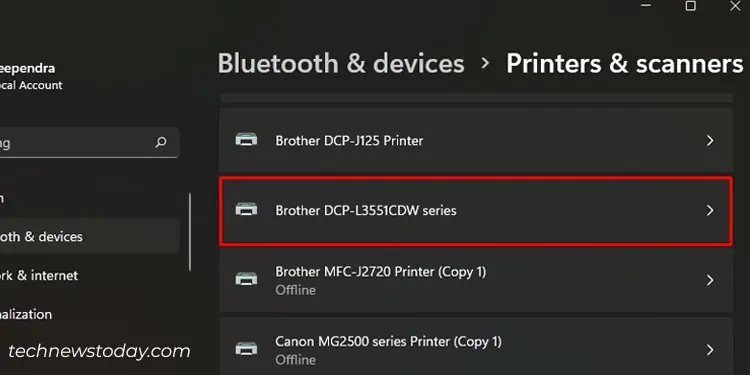
- Go to Settings and open the Printers menu.

- Choose your printer.

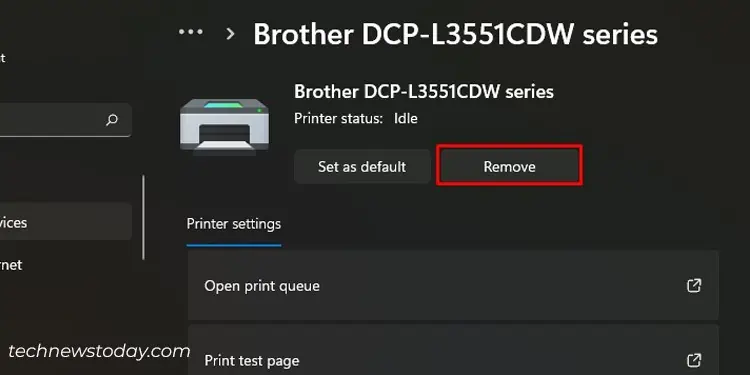
- Click Remove > Yes.

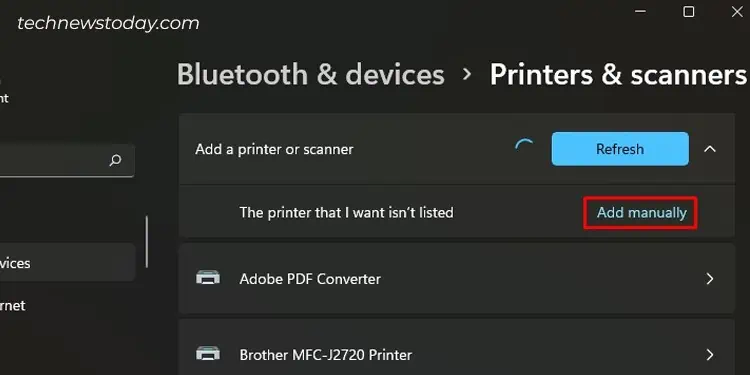
- Click Add device and then Add manually.

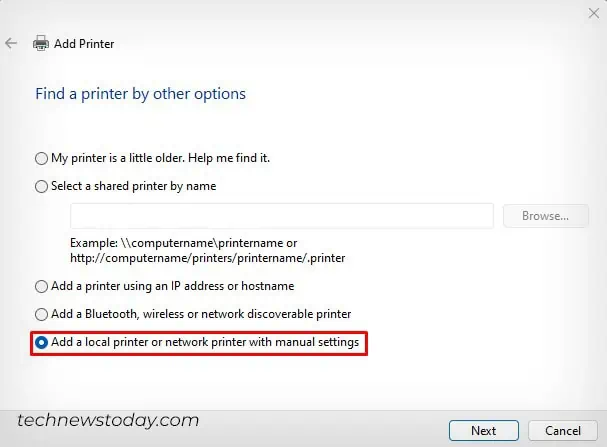
- Choose the last option that reads like this.

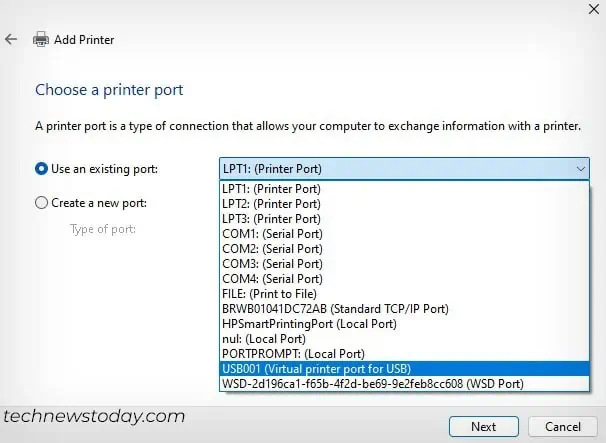
- Choose the correct port—USB001 for USB printers, or, WSD or Standard TCP/IP depending upon the wireless connection mode.

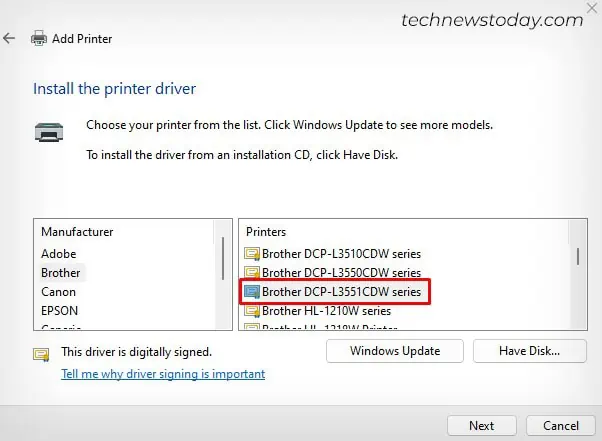
- Choose the relevant printer driver and proceed.

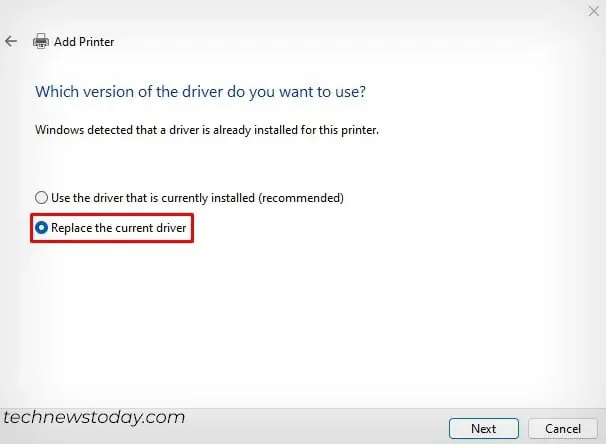
- Choose this option and follow-on screen instructions to complete the installation.

If this too does not work, here’s a sureshot—install your printer from scratch.

