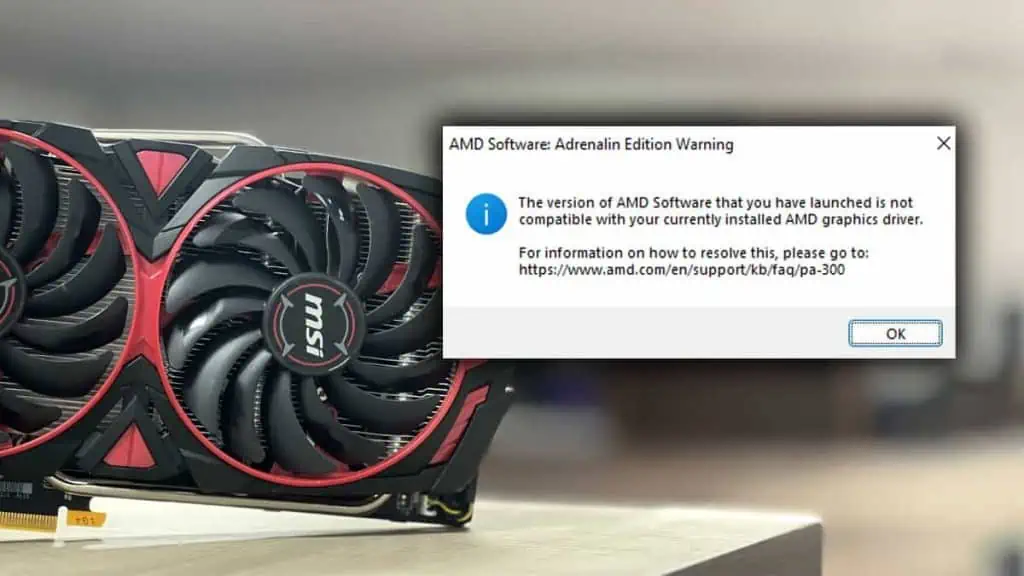
When the Radeon software and driver don’t match, you need to install the GPU driver that is compatible with your AMD Software.
This conflict usually happens when Windows mistakenly installs an older GPU driver. Rolling it back usually fixes the issue.
To make sure that Windows update does not auto-download the wrong driver, it’s best that you disable automatic driver update.
You can also change the software setting from Registry Editor to allow the app to keep using the current driver version.
If that does not work, completely uninstall all the GPU drivers and fresh install them.
Roll Back Display Adapter Driver
Automatic driver updates from Windows could sometimes install incompatible/older GPU drivers.
Although the driver from the manufacturer’s website is the latest one, the OEM may not always push the latest driver to the Windows update server.
So, Windows may download and install an incompatible driver, which in turn may raise a conflict.
When this happens, the AMD software will not open and display a warning message.
To fix this, you can simply roll back the display adapter driver:
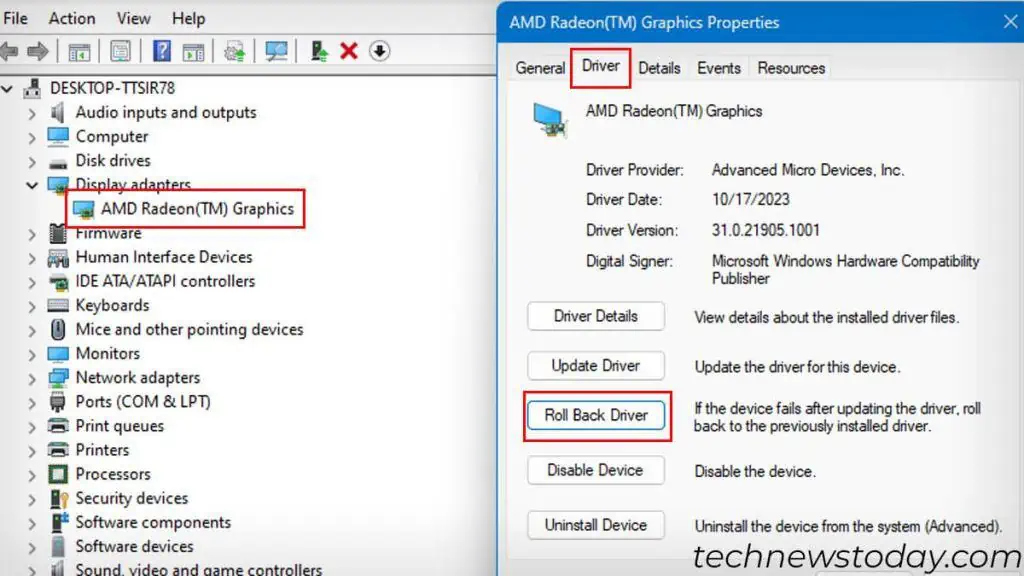
- Press the Windows + X key and select Device Manager to open it.
- Expand Display adapters and Double-click on the AMD GPU.
- Head over to the Driver tab and select Roll Back Driver.

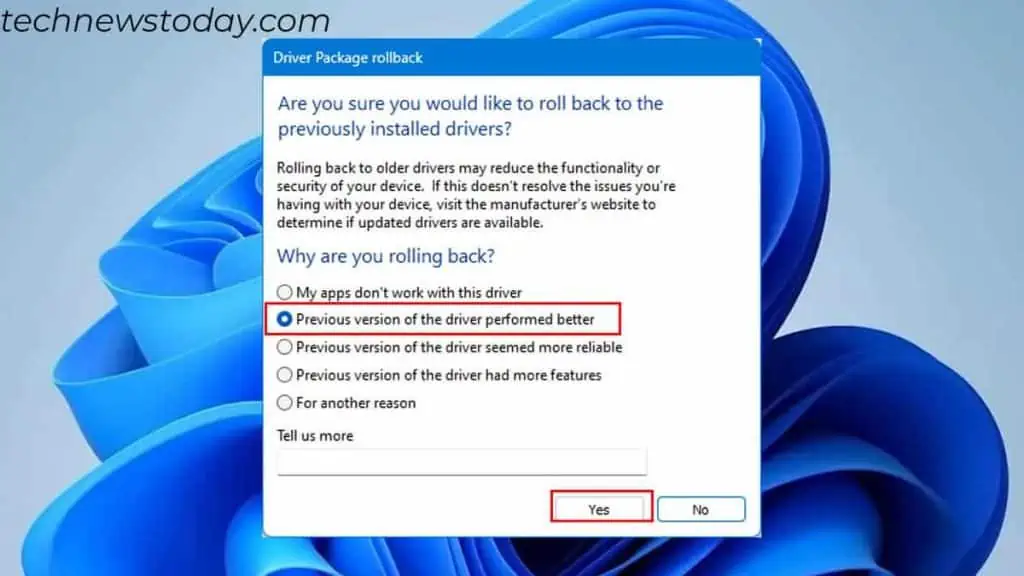
- Check the Previous version of the driver performed better option and hit Yes. The screen might flicker when it installs a new driver.

To ensure Windows does not download the wrong driver again, disable Automatic Update.
Alternatively, you can also use Show or Hide Updates Troubleshooter to hide display driver updates from Windows updates.
Change Version Name in Registry
Your system’s registry contains all the necessary settings for Windows and its application.
It also contains AMD software configurations. You can alter them to allow the software to use the current driver.
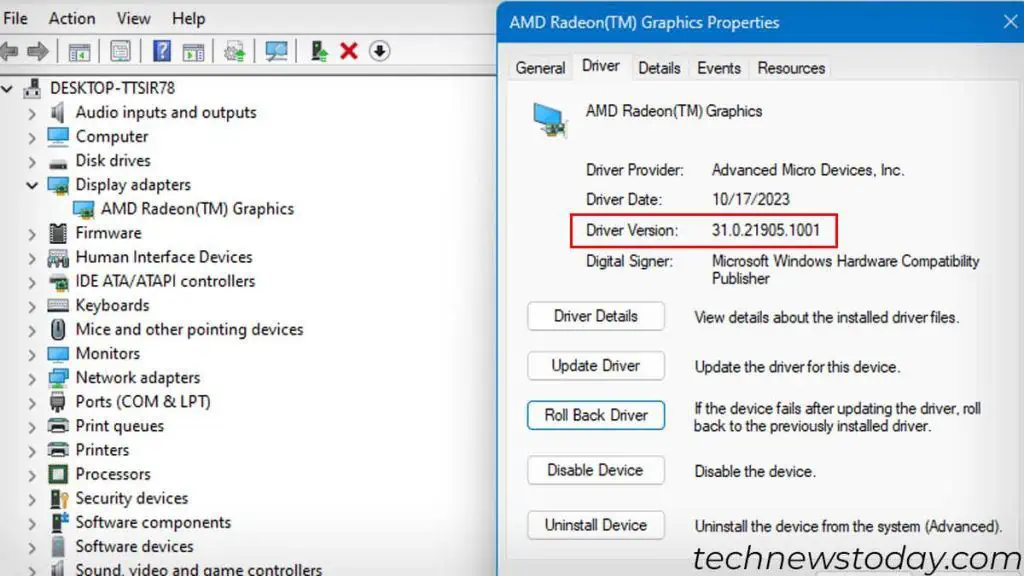
- In Device Manager, first, expand the Display adapter and double-click on your display device.
- Go to the Driver tab and copy the Driver Version. In my case, it’s
31.0.21905.1001.
- Close Device Manager, open Run, and execute
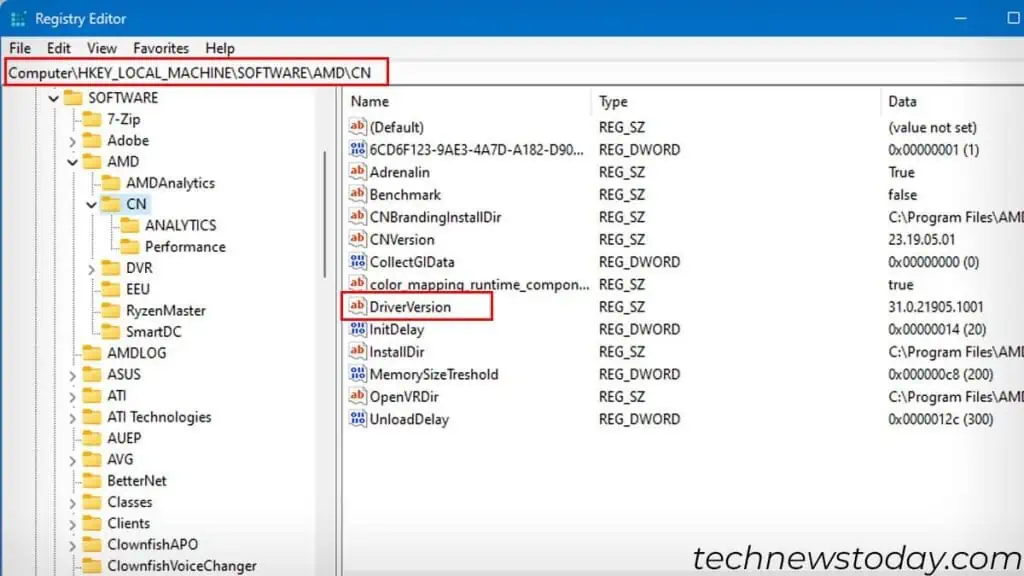
regedit. - In the Registry Editor, navigate to
HKEY_LOCAL_MACHINE\SOFTWARE\AMD\CN. - In the right panel, double-click on DriverVersion.

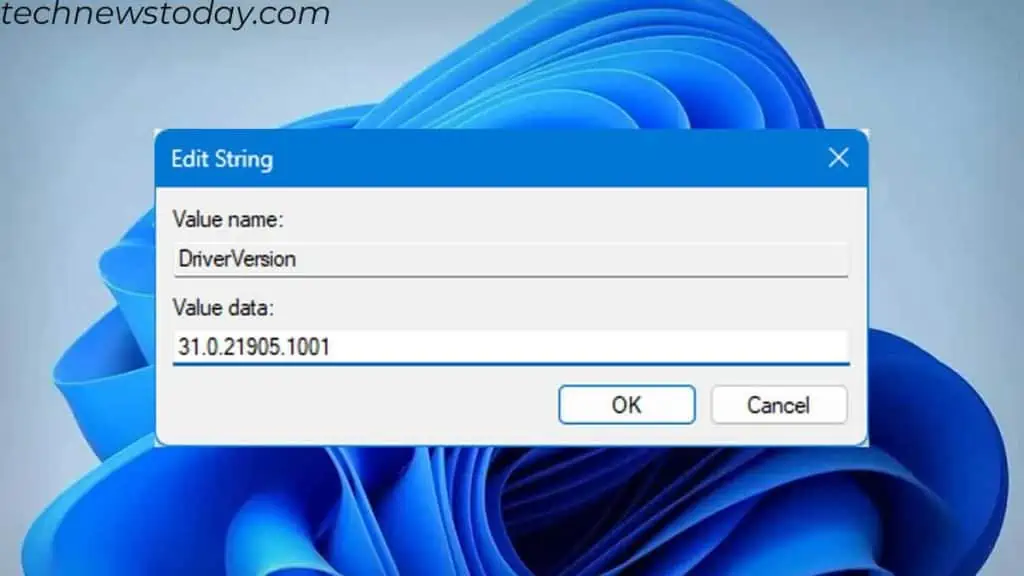
- Under Value data, paste the Driver Version that you copied in Step 3.

- Click on OK
- Restart the PC to save any changes made to the registry.
If changing the Value data does not work, leave it blank and restart the PC.
Reinstall AMD Software and Driver
In case the methods mentioned above don’t work, I recommend that you clean install both Radeon Adrenaline Software and the driver.
A clean installation means removing both the driver and software and installing a fresh one.
First, uninstall AMD Software from the Control Panel. After this, you need to get rid of the driver.
Removing the driver from the Device Manager is a viable option. But it does not remove the driver file or temporary folder.
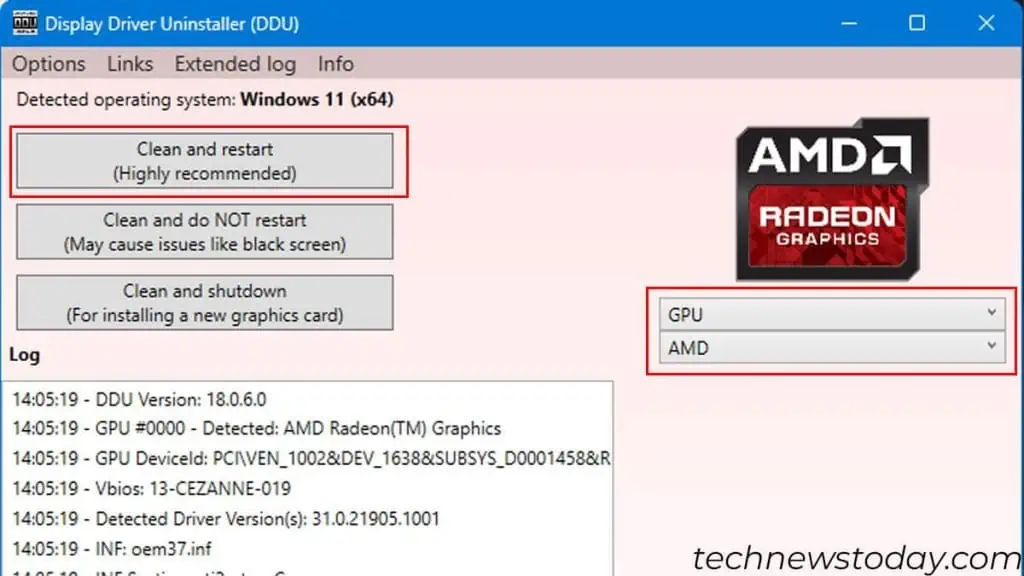
To completely remove any traces of the display, I recommend using Display Driver Uninstaller. Here is how:
- Run the DDU in Safe Mode.
- Select the Device type as GPU, and select AMD.
- Click on Clean and Restart.

- The app will uninstall the display driver and restart your PC.
Now, the system will use Microsoft’s Basic Display Adapter driver. Again, make sure that Windows Update does not auto-install the optional driver update.
For the reinstallation process, you just need to install the latest AMD Software. This will automatically install the latest driver as well.
Go to the official AMD website and click on Download Windows Drivers. After the download is complete, start the setup file and complete the on-screen instructions to finish the installation.
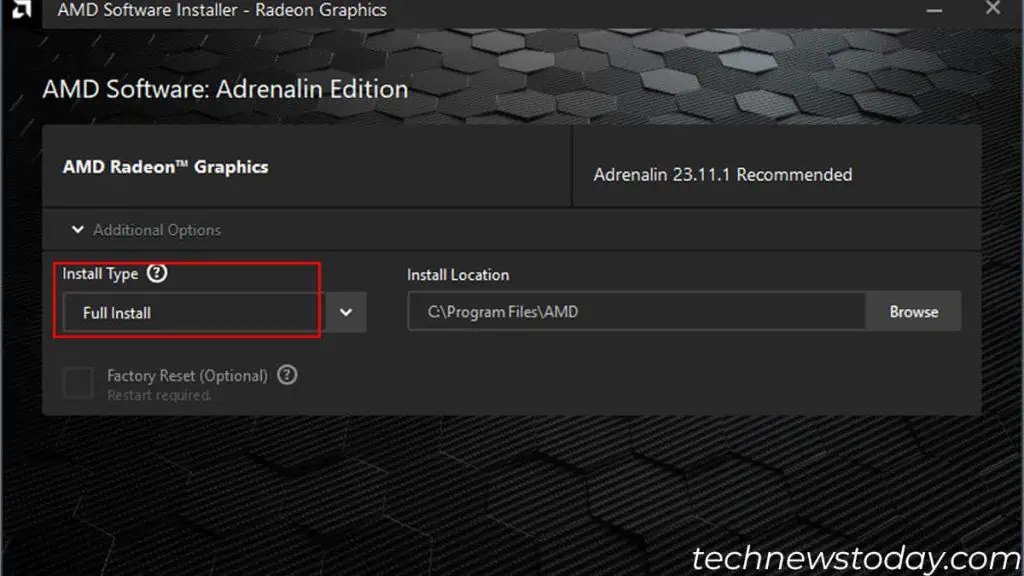
In the process, make sure you have set the Install Type to Full Install. Also, you get to update the chipset drivers for better stability (which I highly recommend).

