Realtek Audio is a driver that allows your computer to communicate with audio devices such as speakers and sound cards. It is important to have updated Realtek audio drivers to ensure that your computer can properly communicate with your audio devices.
There is no official word from Realtek on Windows 11 compatibility at this time. However, users have reported issues with Realtek audio drivers on Windows 11, including problems with sound quality, audio cutting out, and the audio not working entirely even.
If you’re having trouble with your Realtek audio not working in Windows 11, don’t worry! There are a few easy ways to fix this problem.
Causes of Realtek Audio Not Working in Windows 11
- Outdated audio driver
- Incompatible audio enhancements
- Faulty audio settings
- Conflict between Realtek and windows driver
Fixes for Realtek Audio Not Working in Windows 11
Just as there are many causes for this issue, there are several fixes as well. Here are a couple of ways to resolve Realtek audio not working in Windows 11.
Update Your Audio Drivers
One way to fix this problem is to update your audio drivers. Outdated or corrupt audio drivers can cause problems with your sound card. You may update your drivers manually by visiting your sound card manufacturer’s website. Additionally, you can automatically update your audio driver as well. To do so follow these steps.
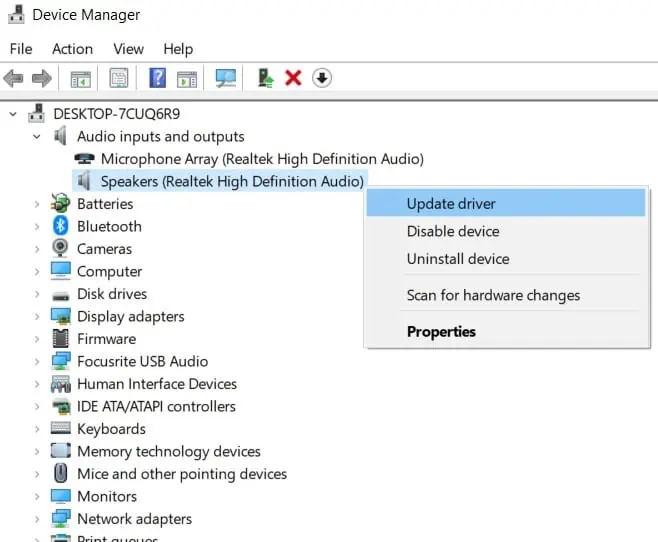
- Search for Device Manager from the search bar in the taskbar.
- Double click Audio input and outputs.
- Then, right-click on Speakers and select Update Driver.

- Click on Search automatically for drivers.

Adjust Your Audio Settings
Another way to fix the no audio problem is to adjust your audio settings. In some cases, the problem may be caused by incorrect audio settings. To adjust your audio settings, follow these steps.
- Press the Windows and R keys simultaneously.
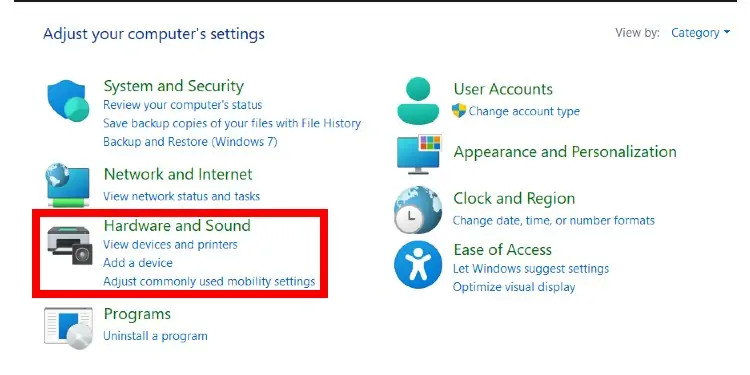
- Type ‘control’ in the search bar and hit enter.
- Go to Hardware and Sound.

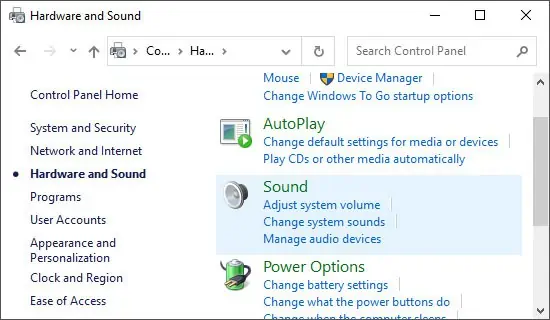
- Go to Sound.

- From here, you can change a number of settings, including your speakers and microphone.
Disable Enhancements
Another way to fix this problem is to disable audio enhancements. These enhancements can cause problems with your sound card, in a few cases. To disable enhancements, follow these steps.
- Press the Windows and R keys simultaneously to open Run.
- Type ‘control’ in the search bar and hit enter.
- Go to Hardware and Sound.

- Go to Sound. Under Playback, select your active speaker.

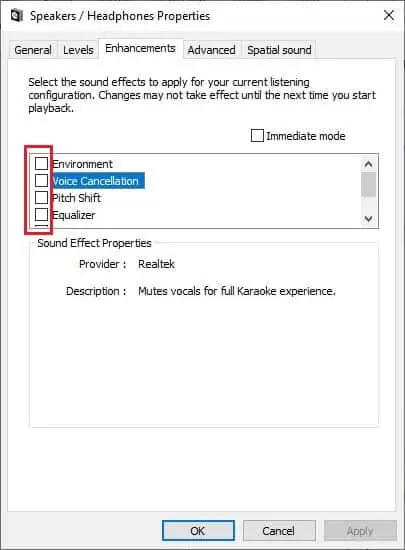
- Click on the Enhancements tab.

- From here, you can disable any enhancements that are causing problems.
Uninstalling and Reinstalling the Realtek Audio Drivers
If updating does not fix the issue, you can further try uninstalling and reinstalling the Realtek audio drivers. To uninstall the Realtek audio drivers, follow these steps.
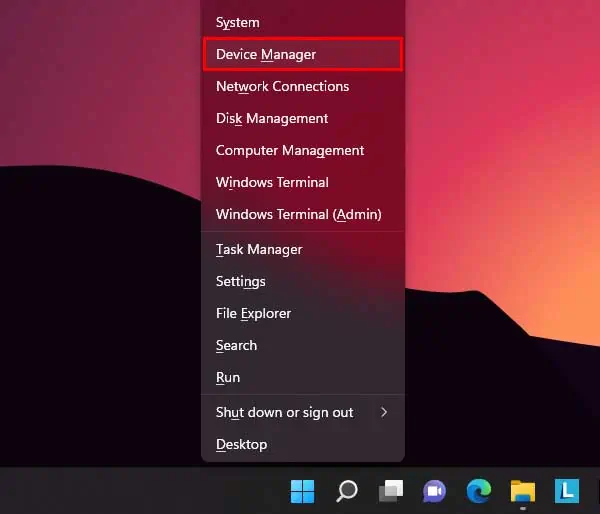
- Right-click on the Start menu.
- Go to Device Manager.

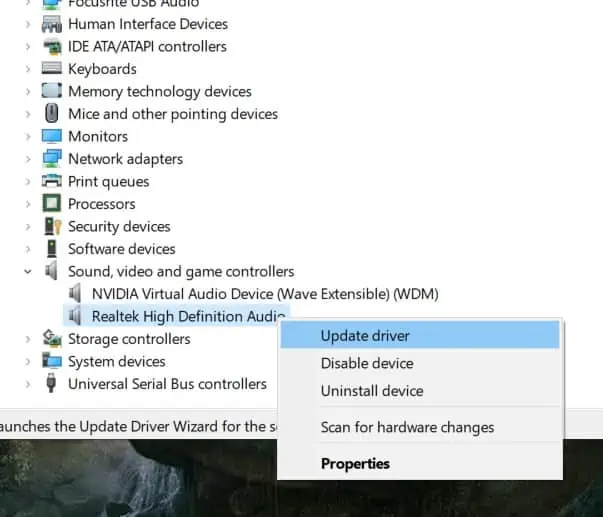
- Click on Sound, video, and game controllers.
- Right-click on Realtek High Definition Audio.
- Click on the Uninstall device option.

- Checkmark Delete the driver software for this device option.
- Click on Uninstall.
To reinstall the Realtek audio drivers, follow these steps.
- Visit product’s official website and Download.
- After the setup file has been successfully downloaded, run the installation program.
- Follow the instructions and wait for the driver to be installed.
Restart Windows Audio Service
Restarting Windows audio service is one of the easiest ways to fix audio not working in Windows 11. To restart Windows audio service, follow these steps.
- Launch the Run app by pressing the Windows + R hotkeys.
- Type
services.mscin the Run app, and press the Enter hotkey.
- Locate the Windows Audio service in the list and double-click on it.
- Then, click on the Stop button to stop the Windows audio service.

- Close the Windows Audio Service Properties window and double-click on the Windows audio service again.
- Now, click on the Start button to start the Windows audio service.
- Click on the OK button to close the Windows audio service Properties window.
Checking and Resetting the Audio Device
Checking and resetting the audio device is also a way to fix Realtek audio not working in Windows 11. To check and reset the audio device, follow these steps:
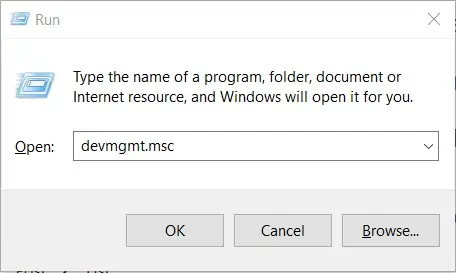
- Launch the Device Manager program by pressing the Windows + R hotkeys.
- Type
devmgmt.mscin the Run app, and press the Enter hotkey.
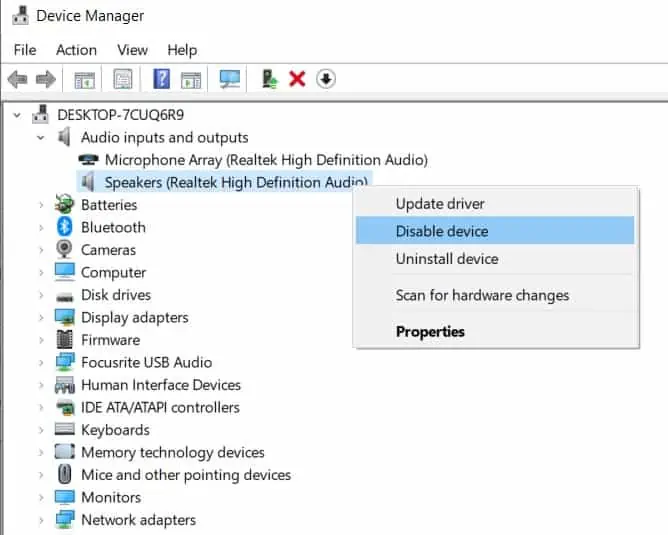
- Expand the Sound, video, and game controllers section in the Device Manager.
- Right-click on the audio device, select the Disable device option, and select the Enable device option after that.

- Close the Device Manager program.
Restart Your Computer
If all else fails, restarting your computer can sometimes fix this problem. In some cases, the problem may be caused by a temporary glitch. Restarting your computer will clear any temporary problems and allow your sound card to work properly.
Related Questions
Why Is My Realtek Audio Control Not Working?
There is no fixed answer for this issue but some of the most common causes include, corrupt system files (Realtek files), incompatible OS, outdated audio drivers, OS, and Realtek program, bugs, etc.
To fix this issue, you can re-install Realtek, and update your audio drivers, OS, and Realtek program. Moreover, you can also try troubleshooting.
Why Does My Speaker Work but Mic Doesn’t?
If the speaker works but the mic doesn’t, then it’s likely that the mic is muted or the volume is turned down too low. Additionally, the speaker and mic have different drives, while you may have updated your audio driver for speakers, you may have missed out on updating drivers for the microphone.
Moreover, the mic can be clogged by dust over time which is not an uncommon phenomenon. This can cause the mic to not work.
Why Is There No Sound After Upgrading to Windows 11?
This is probably caused by incompatibility issues; Windows 11 is fairly new and there are a lot of issues due to its incompatibility. The issue could also be caused by a corrupted Windows registry while updating the OS.


