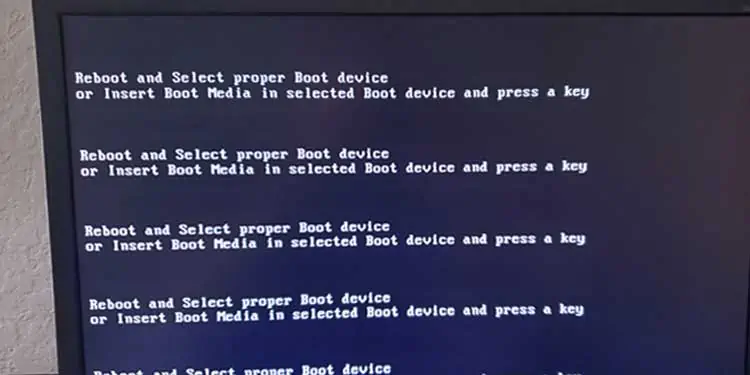
When you start your computer, your operating system loads from your boot device, which is a disk with all the necessary files. If the system can’t find the boot drive or it’s inoperable, you likely won’t be able to access your operating system or files. And the system will show this message “reboot and select proper boot device or insert boot media in selected boot device and press a key“.
Sometimes a few simple settings tweaks can make your computer work again, but this error message might also signal hardware failure.
What Does Reboot and Select Proper Boot Device Mean?
This error message is a way for your computer to tell you that it didn’t detect the proper boot device as it tried to start the computer. When it attempted to launch your operating system from the drive marked as the boot drive, it didn’t work. Therefore, the computer cannot launch your system until a proper and working boot device is selected.
What Causes Reboot and Select Proper Boot Device?
There are a few reasons why you might see this error.- You’ve selected another boot drive in BIOS that isn’t the proper drive. Your computer is trying to load from a drive that doesn’t have the correct startup and operating system files.
- The boot files on the device are damaged and can’t start. In this case, you might have to fix the boot files to start the computer.
- The drive itself is corrupt and needs to be wiped and reset.
- The drive is dead and will need to be replaced.
How to Reboot and Select Proper Boot Device
If the problem is only that the wrong boot device is selected, you can fix it quickly by simply entering your BIOS settings and changing which disk is the boot device.
Since you can’t reach your operating system, you can’t enter BIOS from the Advanced Startup Menu in Windows. Instead, you have to hit the right key at the right time during the startup process to access BIOS.
The right key depends on the company that manufactured your motherboard, as well as the model of your motherboard. Standard keys include F1, F2, F10, F12, and DEL. Tapping the right key at the right time will enable you to open your BIOS menu.
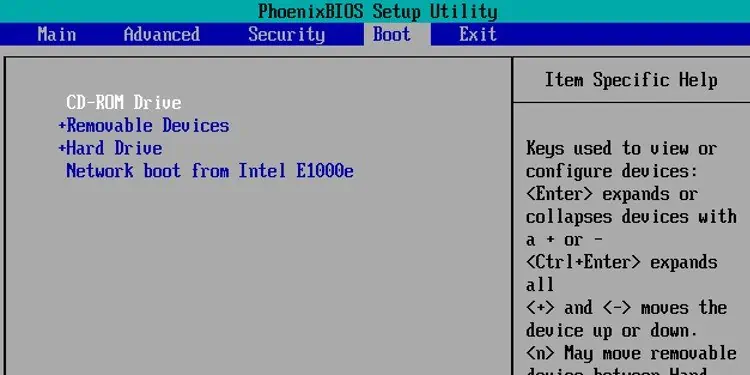
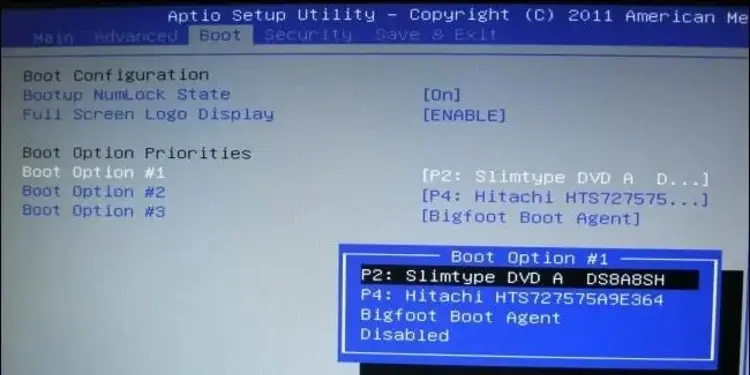
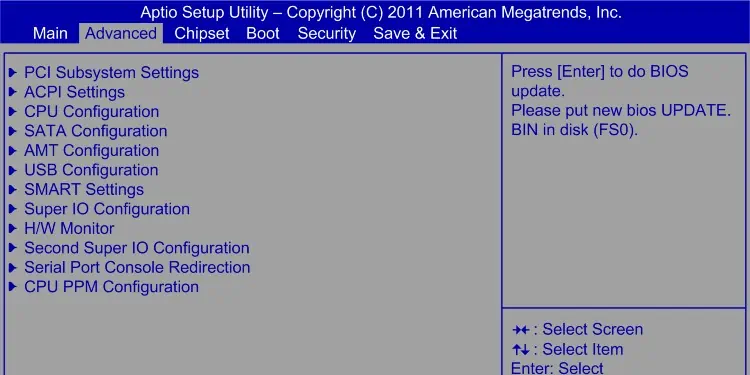
Once you’re in BIOS, you can check to see which boot device is selected. Keep in mind that steps might vary slightly depending on what BIOS you’re using.
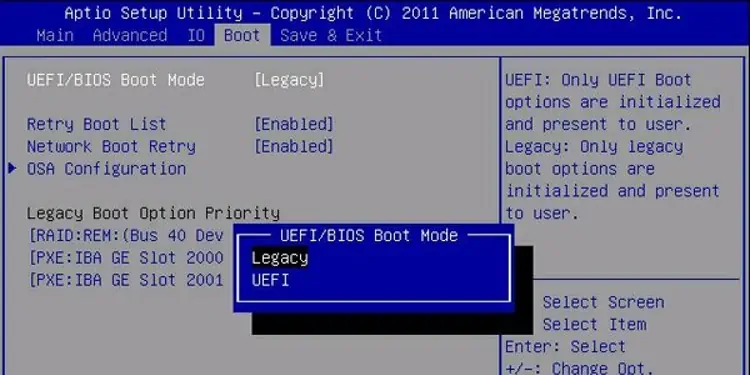
- Look for the Boot menu option in BIOS. Many systems have headings that show different areas to make changes to your system. If you don’t see it right away, look for an Advanced Options area.

- Examine the list of Boot options. It will include any kind of drive connected to your PC, including thumb drives or external hard drives. Your boot disk should be the drive that has your main operating system.
- Move the correct drive to the top of the boot order. The way you do this will vary depending on the system. For example, some systems use arrow keys or plus and minus symbols to adjust the settings.

- Choose Save Changes and Exit.
- Confirm your choice if prompted.
Your system should start up correctly, assuming the drive is bootable and working. If it still isn’t working – or if you don’t see your boot drive listed in BIOS – you’ll have to continue troubleshooting.
How to Fix Reboot and Select Proper Boot Device
Once you know that your bootable drive isn’t being detected, there are several things to try to make it work again.
Check Your Connections
If the drive isn’t showing up in BIOS – or even if it is – the connection between your drive and other computer hardware might be the issue.
If you’re comfortable, open your computer and ensure the boot drive is firmly connected to the motherboard. When that connection is impeded in any way, the motherboard will have trouble accessing the drive or might not detect it at all.
If you have extra SATA cables, using one to ensure the original cable isn’t damaged might help.
- Power down your computer and turn off the power switch on the PSU. Unplug it from the wall.
- Open your computer so that you have access to the motherboard and drives. Depending on your configuration, you may be able to check the connections without removing any other parts. If you can’t, remove the parts that need to be removed.
- Unhook the hard drive from the motherboard and examine the cable on both ends. Look for any signs of damage, including burns or bubbling.
- If the cable looks good, plug it back into the drive until it snaps into place. If it looks damaged, discard it and use a replacement cable.
- Plug the other end into the motherboard until it’s firmly in place.
- Close your computer and turn the power back on.
- Attempt to boot again.
If the computer boots right up like normal, the connection between the motherboard and the drive was the issue.
If it doesn’t, consider reopening the computer and using a different port on the motherboard. If you can see one of your storage drives in BIOS, but can’t see the boot drive, try switching that cable and port with those on the boot drive. If you still can’t see the boot drive at this point, then it might not be enabled.
Check Whether Your Hard Drive Is Enabled and Adjust Legacy Boot
Some motherboards have BIOS settings that leave hard drive connections off until they’re enabled. Once you’re using one of the disabled ports, change the BIOS to recognize a drive is connected.
If your boot drive was working before and this isn’t a new installation, this is likely not the problem. However, it’s still worth checking and is more likely to be the problem on newer systems that haven’t been booted up before.
As long as you’re in BIOS, disable the Legacy Boot option as well, if one is available. Sometimes this setting can cause the reboot and select proper boot device error.
- Enter BIOS.
- Look for a System Configuration option. It may be in Advanced Settings.

- Search for Hard Drive Detection. You’re looking for an option that determines whether the BIOS automatically detects hard drives.
- Turn the option on.
- Look in Advanced Settings or Security for a Legacy Boot option.

- Change it.
- Save changes and exit.
- Confirm your choice.
- Reboot your system.
If the reboot doesn’t take you to your operating system, re-enter BIOS and try accessing the boot menu. If the drive is listed now, pull it into the proper order and try again.
Troubleshoot Your Operating System With Repair Media
If you still have your original Windows installation media – usually a USB or CD – you can use it to troubleshoot your computer and determine whether it can be fixed so you can access your files again without wiping the drive.
Remember, if you don’t have your original installation media, you can make a bootable drive on a thumb drive or CD. You won’t need your Windows key unless you plan to reinstall the operating system. Repairs and scans can be done without it.
- Insert the bootable media into the computer.
- Enter BIOS.
- Change the boot drive to the Windows installation media you inserted.

- Save and exit BIOS.
- When the Startup and Repair screen loads, choose your language from the menu. Click Next.
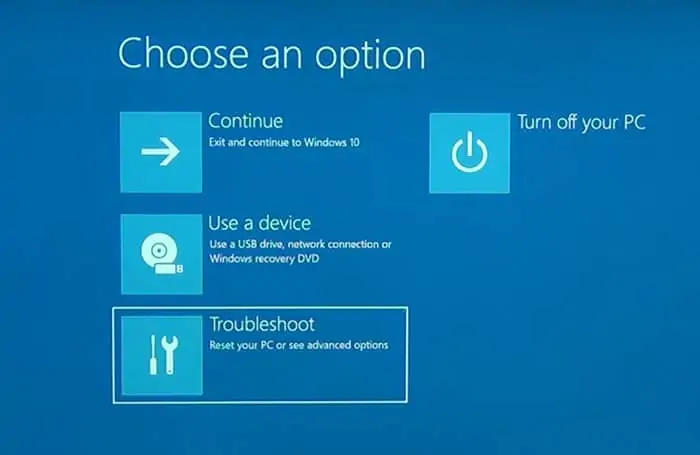
- Click Repair Your Computer.
- Choose Troubleshoot.

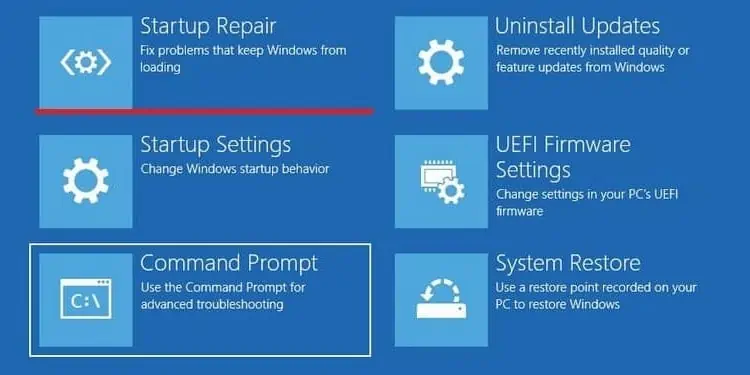
- Choose Advanced Options.
- Click Startup Repair.

- Enter your credentials if prompted, and then click Continue.
- Let the repair scan run.
- Choose to Restart.
- Enter the BIOS.
- Change the bootable drive back to the original drive.
- Exit and save changes.
Once it’s done, restart your computer to see whether it could fix what was preventing you from booting. You can try another repair using the same installation media if it doesn’t.
Sometimes Startup Repair can’t fix your computer, but you can try to manually make changes and regain access to your system.
Repair Your Boot Files
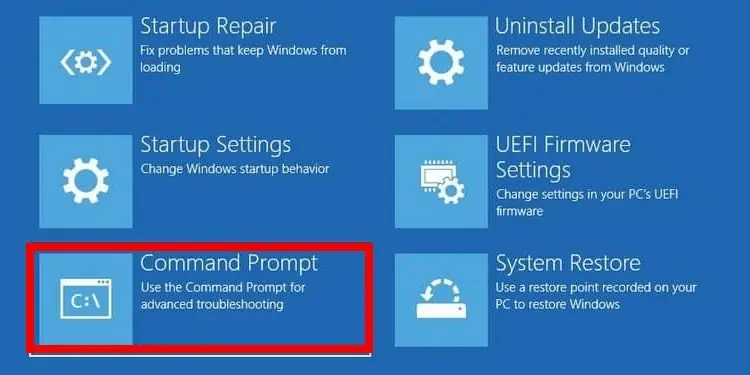
You can use a command-line utility to fix the bootable files without deleting any of your files. You must use the same installation media and set it up as the boot drive to access the command prompt option.
- Click Repair Your Computer.
- Click Troubleshoot.
- Click Command Prompt.

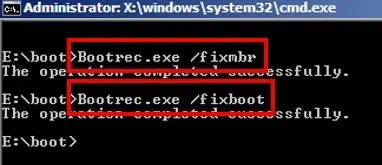
- Type
bootrec /fixmbr, and then press Enter. - Wait for the process to finish.
- Type
bootrec /fixboot, and then press Enter. - Wait for the process to finish.

- Type exit, and then press Enter.
- Restart your system and enter BIOS.
- Change the original drive back to being the bootable drive.
- Exit and save changes.
- Restart your system to see whether it boots.
If it still isn’t working and your motherboard is in proper operating condition, the problem may be that the drive is corrupt.
Try Restoring an Efi Partition on the Boot Drive
Adding an EFI partition to your boot drive can sometimes fix this error and let you regain access to your computer.
You have to use the installation media to access the command prompt to complete these steps.
- Click Repair Your Computer.
- Click Troubleshoot.
- Click Command Prompt.
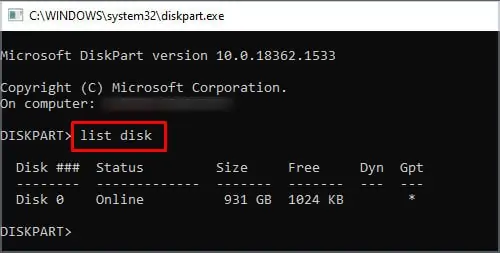
- Type
diskpart, and then press Enter. - Type
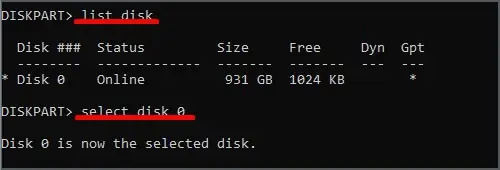
list disk, and then press Enter.
- Type “
select disk X” without quotes and replace X with the letter of the drive that contains Windows.
- Press Enter.
- Type
create partition efi size=500, and press Enter. This will create a 500 MB partition. - Type
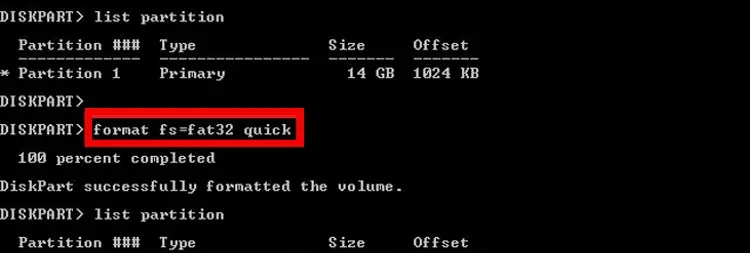
format fs=fat32 quick. Press Enter.
- Type
assign letter = F. You can choose any letter you want for the space you’re creating, but you need to use it later, so be sure to remember it. - Press Enter.
- Type
list volumeand press Enter. Find the volume that has the Windows files on it.
- Type
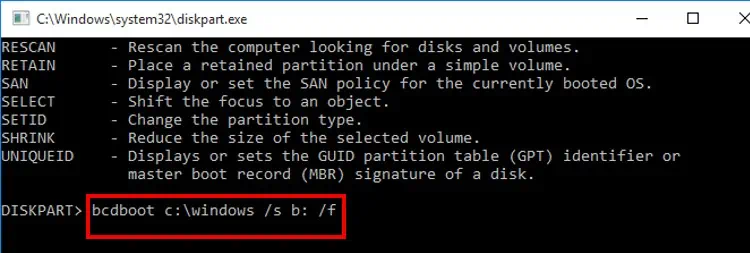
bcdboot X:\Windows /s F:. Replace X with the letter of the drive that has Windows files already on it. If you chose a different letter for your drive earlier, use that instead of F.
- Press Enter.
- Restart your system.
If this doesn’t work, you might not be able to fix the issue from the installation media troubleshooting area.
Wipe and Reinstall Windows on Your Boot Device
You’ll have to use another computer to fix your drive if you can’t access the operating system on your computer. You can also install Windows on a different drive, plug in the faulty drive as a secondary drive, and troubleshoot it on your computer if desired.
- Check to see whether it appears as a storage drive on the computer once you have it connected to a computer with a functioning operating system.
- Press Windows key + X.
- Choose Windows PowerShell (Admin.)
- Click Yes.
- Type
chkdsk X: /rand replace X with the drive letter, and then press Enter.
- Wait for the scan to complete. It should attempt to fix any errors it finds.
- Type exit, and then press Enter.
Even if CHKDSK can repair your drive, you might want to consider using it as non-essential storage and getting a new drive for your operating system. Once damaged, it’s unlikely that the drive will be as secure as a new one that hasn’t experienced those errors.
If you can’t access the drive on other computers, it is probably damaged and needs to be replaced.
