The motherboard of a computer is where all the connections and circuitry lie. Your Power Supply Unit, Storage Disk, RAM, GPU, and Processor coordinate through the motherboard. It distributes the power to all the components and instructs them to perform the desired task.
Hence, it is obvious that the motherboard will detect any issues in this hardware.
It has many ways to show that your system is at fault somewhere. Among them, the blinking of an LED light, especially red on the motherboard is the one sign you should not ignore.
The red LED on the motherboard can indicate several issues, from basic improper or loose connection and seatings to serious hardware damage.
Sometimes, the red light blinks along with beeping sounds, and sometimes, with display loss. These all can mean different things depending on the system.
Don’t worry; it’s not that a ventilator’s life support is beeping and blinking in the hospital. Using this guide, you can easily identify and fix the red CPU light issue for most of them.
Why is There a Red CPU Light on My Motherboard?
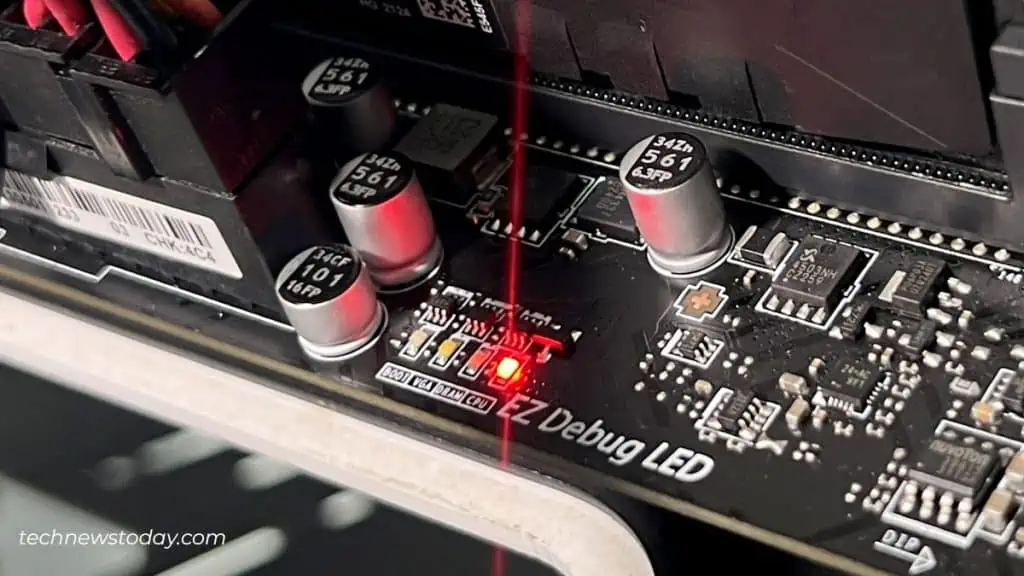
In the older motherboard, only a single LED displays the problem. So, it is difficult to pinpoint which hardware actually is in trouble. However, in the modern ones, we have an ease of narrowing down the issues by the presence of hardware-specific four LEDs.
Each of the four LEDs is named CPU, DRAM, VGA, and BOOT indicating the problem on those components when blinked. Still, the red LED on the CPU can glow for many reasons.
Let’s look at the most probable causes of encountering a red CPU light on your motherboard.
- Faulty CPU fan or loose CPU fan connection
- Improper CPU assembly
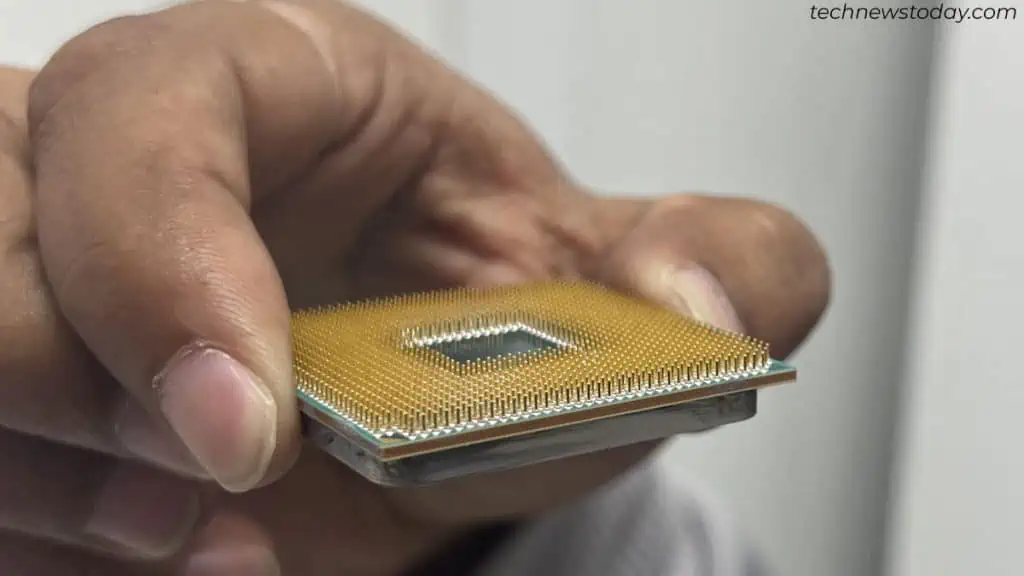
- Damaged processor pin
- Overheating CPU or motherboard
- Incorrect RAM placement or damaged RAM
- Loose GPU connection
- Unable to access hardware during start
- Could not detect hard drives or operating system
- Corrupt BIOS file
Now that you are familiar with the possible causes, Let’s hop on to eliminate the issue causing the red CPU light to flash.
How to Fix Red Light on a Motherboard
Even though the causes behind the red light on your CPU look formidable, you can rectify most of these issues by taking care of a few things.
You will have to perform a few simple diagnostic procedures first to ensure that the PSU or motherboard is not at fault. This will help narrow down the possible causes.
So, don’t panic, and please follow the step-by-step process, and you can have a problem-free system at the end.
Healthy Fan and Its Connection on Motherboard
If you find the red light blinking on the LED that indicates a CPU problem in the newer motherboard, it might be because the processor is not working well. But this does not mean that your CPU is damaged.
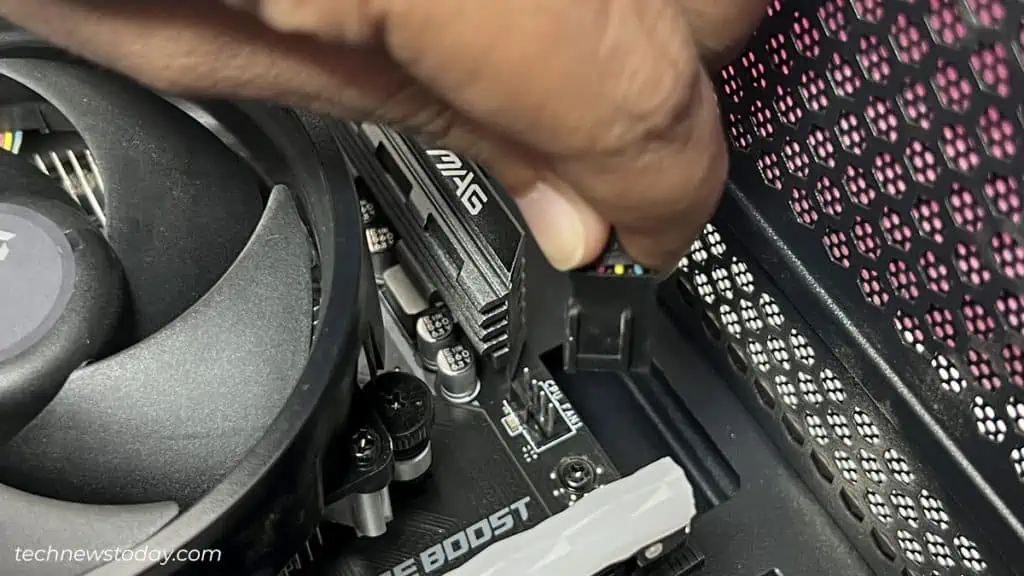
This can mostly happen if the fan over the CPU is not working as it should. Sometimes, the connection might be loose, or the fan itself might be faulty. If you tend to disassemble your system’s hardware, you might have forgotten to connect the fan back to its port.
When the CPU fan is not working, the processor will heat up much more than its threshold. Extreme heating up of the CPU is a really bad sign, and your system won’t function at all.
So, let’s look at how to inspect the fan’s health and connect it properly to the motherboard.
- Disconnect the power supply to your computer.
- Open the cover of your system’s casing.
- Unplug the fan cable from the board if connected.

- Reconnect the fan cable.
- Run your computer to see if the fan works properly.
- If the fan operates well, inspect whether the red LED blinks again.
- If the fan does not work, connect your fan to the motherboard of a working computer and see whether it functions well.
- If the fan does not operate, then it’s probably faulty. You will have to change it.
- But if the fan worked well on another computer, then the port on your motherboard might be damaged.
If that is the case, you should fix your motherboard’s fan port from the nearest service point.
If the fan works and still the red LED flashes, let’s move on to the next solution.
Proper CPU Connection
If the red light still appears, then the motherboard probably cannot detect your processor yet. Again, this does not mean your CPU is corrupted.
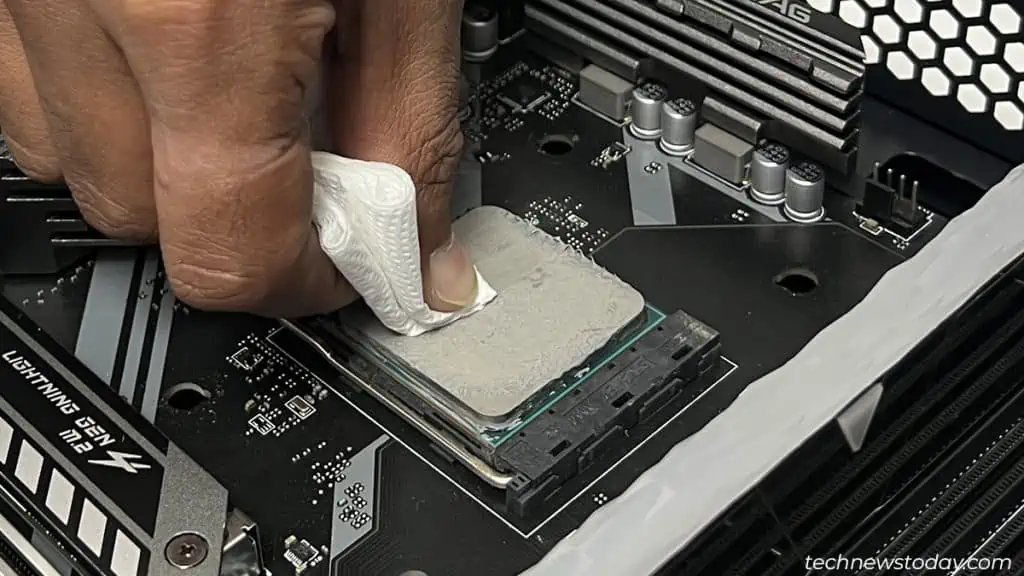
Another reason for your motherboard to not detect the CPU is if the processor is not properly seated in its position. It is also possible that the thermal paste on your processor has vanished, raising the temperature. As we have mentioned earlier, overheating the CPU or motherboard can be seriously hazardous.
But it is better if you check the physical condition of the processor as well.
You will have to follow the instructions below to ensure the CPU is healthy and properly connected.
- Open your computer casing’s cover after disconnecting all the cables.
- Unplug the connection of the fan from the motherboard.
- Take the fan out carefully after unscrewing and unlock the metal hinge holding the CPU in position.

- See underneath the CPU to find if any pins are broken or deviated.

- If this is the case, you will have to replace the CPU.
- If the processor is fine, then remove the thermal paste remaining on the CPU.

- Place the CPU appropriately in the position with all edges seated properly.
- Lock the CPU with the metal hinge.
- Procure fresh thermal paste and apply it to the surface carefully.

- Tighten the fan and connect its cable to the motherboard and run the system again.
Examine if the problem appears on the next start.
A CPU or motherboard does not always heat up because of a lack of thermal paste or non-functioning RAM. There are several causes for it, and most of them are easily fixable.
Check Power Supply Unit
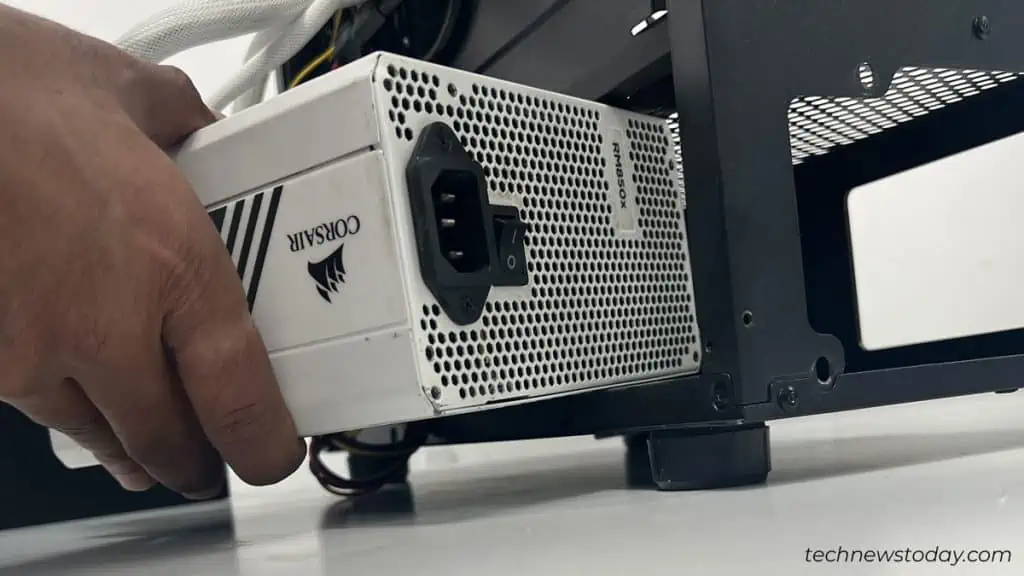
The power Supply Unit consists of several connectors and among them, it has a specific cable to power up your processor. Since the PSU supplies the power to the motherboard and hence, your PSU might be faulty causing the red CPU light to blink.
Or, It might be just that the CPU connector coming from PSU is damaged.
You should first reconnect all the power cables coming from the PSU. If the problem persists, you should check if the PSU is working well by following the instructions below.
- Remove all Connections to the computer and open the casing.
- Unplug all the wires connected to the motherboard and hardware from the PSU.

- Unscrew the PSU and remove it from the inside.
- Check the PSU on a working computer.
- If it does not work, obtain a new Power Supply Unit and assemble it to your system properly.

- Place the PSU inside, screw the nuts and reconnect all the connectors.
Inspect whether the problem has disappeared.
Reseat Your RAM and GPU
A red light on the RAM indicator means your system is not detecting RAM. It might be because the RAM is not properly placed in its position. But this might sometimes cause the system to misread and the CPU indicator might glow red.
This is quite common as we need to push the RAM a little more into its slot.
Sometimes, if your system has two RAMs, the red light can appear even if one is not functioning. Hence, it always helps to see whether the RAM is working.
Let’s see the way to check the RAM and reseat it.
- Open your casing cover after removing all the power connections.
- Look into the motherboard and find RAM slots.
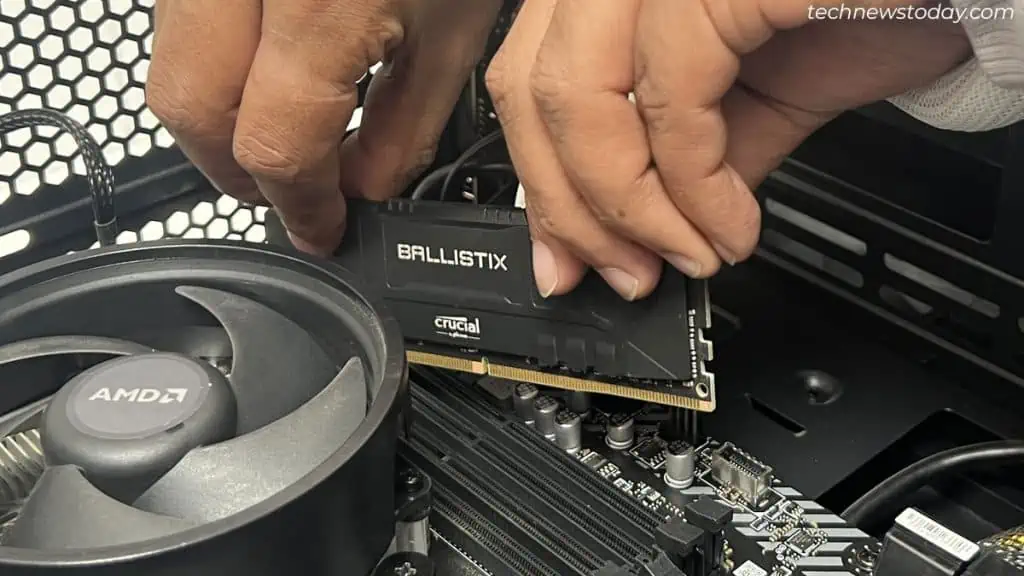
- Remove the RAM(s) from the slot.

- Clean it with a soft cloth and the slots as well.

- If you have two RAMs, seat each of them one by one.
- Make sure that you hear a “Click” sound and find both the hinges come into place.
- Insert one RAM in a slot and see if the problem vanishes.
- If not, then try the RAM in another slot. Do this for both RAMs to find the culprit.
- If it does not work, you should try using the RAM on a working computer.
If you find the RAM functioning well, then there might be some problem in your RAM slots. The RAM might have been corrupted if it showed the same issue in another system.
Similarly, as with the RAM, the connection to GPU might be loosened, disconnected, or damaged. It is common for cables to malfunction over a period of time.
You can follow a similar process by reconnecting the GPU cables and ensuring the problem has vanished.
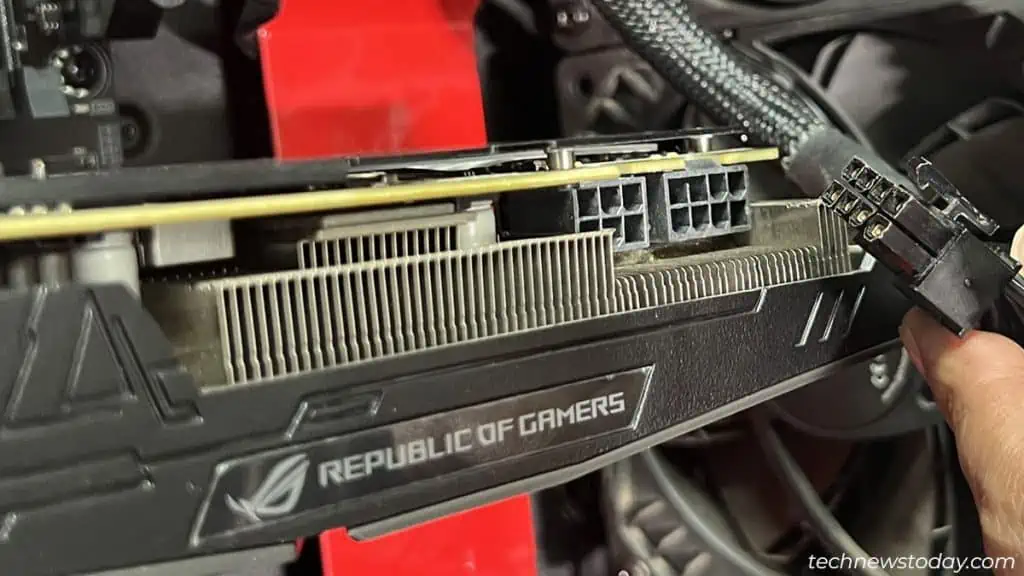
If the problem still persists, you can always check the condition of your GPU on another system if it is removable.
Let’s move on to the next fix if it does not solve the problem.
Reconnect the Storage Drives
Sometimes, the motherboard might detect a problem on the storage drives and flash a red LED to indicate the problem.
Even though this red light is typically shown in BOOT indicator, sometimes, the CPU LED can also notify the issue. This means that your system may not be able to detect the connection to your HDD or SSD connection.
Please follow the procedures to ensure the HDD or SSD connection to the motherboard and power supply are good and strong.
- Look into the motherboard inside your casing after shutting down all the power.
- Disconnect the SATA cables going into the storage drive. You might find a Molex cable instead of SATA if it is an older HDD.

- Clean the drive properly and reconnect the cables safely.
- Check if the problem goes away.
- You can always check the drive on another functioning system and ensure its health.
You can see if the boot drives are showing in BIOS. If not, you should move on to rectify that problem.
It is also possible that your Operating System Software is faulty or the system cannot detect it. In such a case, you should try to repair the OS, reset it or install a fresh one.
If it does not work, even if your storage drive is healthy and the OS is working fine, then you should look at the next solution.
Reset or Update BIOS
One of the errors that causes the LEDs to blink can also be faulty BIOS settings or a corrupt BIOS.
BIOS is the firmware that tells your motherboard to coordinate with your hardware and operating system. If the instruction itself is damaged, then no way your computer can function well.
If you find a red light on the CPU indicator or BOOT indicator, then there might be some error in BIOS as well.
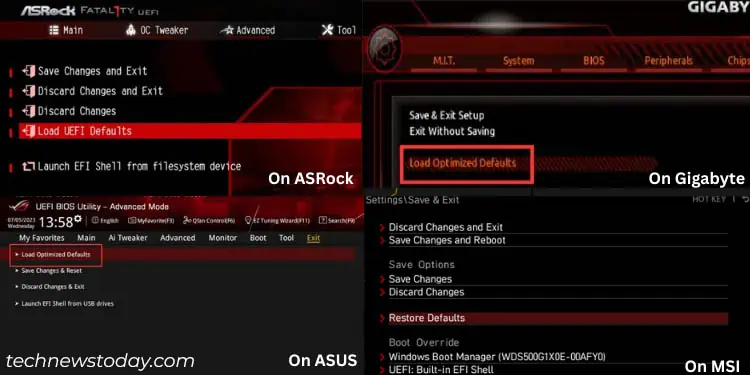
You should try changing your BIOS settings to default. You can follow the process below to reset your BIOS.
- Restart your system.
- Repeatedly press the respective key for your system such as F2, F12, Delete, Esc right after the computer starts to open BIOS.
- You will see an instruction Load Defaults and the key associated with it at the lower end. Press the key.

- Find another option named Save and Exit and press the respective key.
- Press OK. Your system will restart, and the BIOS will be reset.
There are several other ways to safely reset the BIOS settings if the way mentioned above does not work.
If resetting BIOS did not fix your issue, you might need to update the BIOS. However, updating the BIOS is a risky job, and you will have to follow the safest instructions to do it.
Check if the problem persists after updating your BIOS.
Functioning CMOS Battery
When you look into your motherboard, you might have seen a small battery on it. This is the CMOS battery used to power an electronic chip named CMOS that stores the BIOS information.
If the CMOS battery is damaged, your system cannot load BIOS firmware. This might also be why the red light still appears even after resetting and updating the BIOS.
You can try changing the CMOS battery from your motherboard in the following ways.
- Disconnect the power and open your system’s casing.
- Find the CMOS battery on the motherboard.
- Unlock the hinge and remove the battery.

- Place a new one and lock it.
- Assemble everything and run your computer.
If the CMOS battery is not damaged, then taking it out for around 5 minutes will also reset the BIOS settings.
You should see if the issue still exists.
Reconnect All Hardware
Sometimes, the problem is not big, and it’s just that your system needs reassembly.
You can disconnect all the hardware, internal cables, and pins from the motherboard and computer and reassemble the parts.
Finally, you should find that the red light has stopped blinking.

