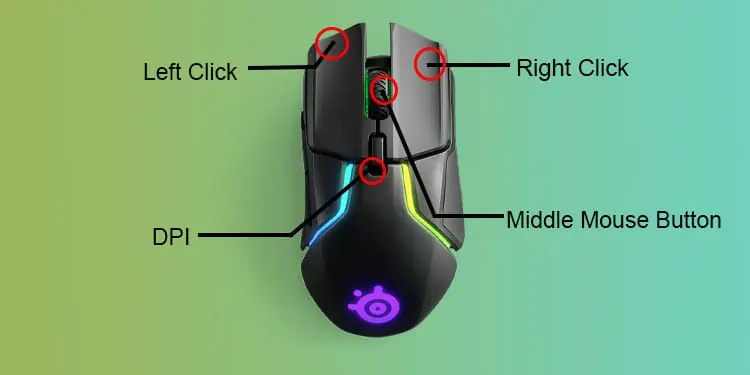
Remapping the mouse buttons will make use of all those extra buttons on your new mouse. Most mouse nowadays comes with a minimum of 5 buttons. Generally, mouse buttons four and five perform back and forward operations. However, you can easily remap them according to your convenience.
Not only this, you can even remap all the buttons in your mouse using a mouse control application. In this article, we are here to guide you through the process of remapping mouse buttons in multiple ways. So, without further delay, let us get right into it.
How to Remap Mouse Buttons?
Whether you want to re-configure your mouse or change the gesture on your touchpad, you can either re-configure them using a separate application or Windows setting.
Below, we have mentioned a step-by-step guide to remapping the mouse buttons.
Change Primary Mouse Buttons
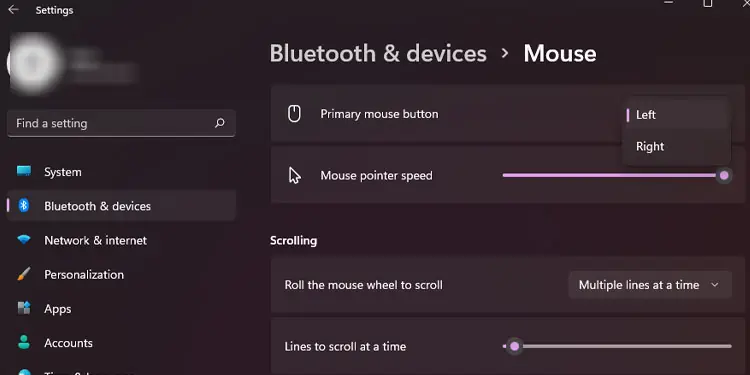
Changing the primary mouse buttons from windows will do the trick if you want to interchange the left and right mouse buttons. However, perform another one of our solutions if you want to remap the middle mouse or the side mouse button.
- Press the Windows + I key to open Settings.
- Go to Bluetooth and Devices > Mouse.
- Set the Primary mouse button as the left or right mouse button according to your choice.

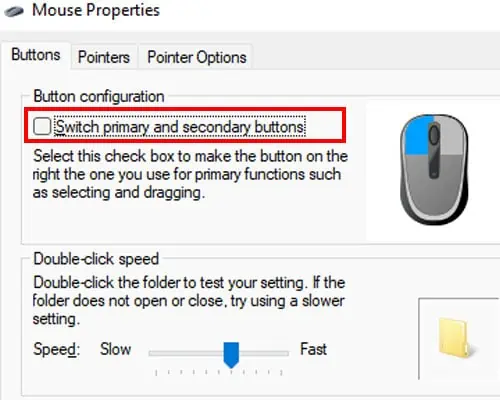
Alternately, you can also follow the steps mentioned below to change the primary mouse button.
- Press the Windows + R key to open Run.
- Type
main.cplto open mouse settings. - In the buttons tab, under button configuration, select Switch primary and secondary buttons to set the left mouse button as primary mouse buttons and uncheck to set the right mouse button as the primary mouse button.

Remap Using Dedicated Mouse Application
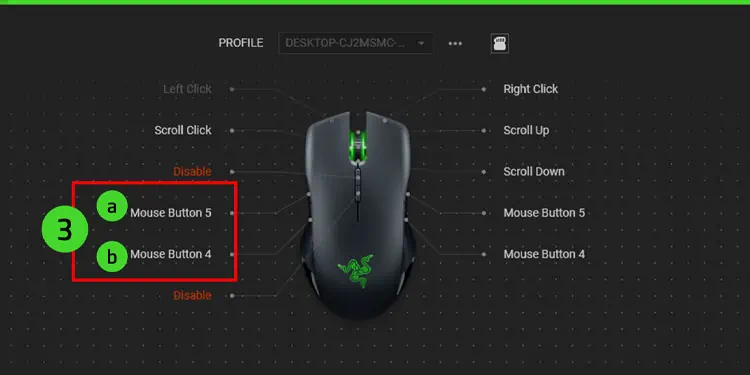
Premium gaming mouse produced by companies like Razer, Logitech, Corsair, or SteelSeries will have a dedicated application that controls their specific mouse. If you use a high-end mouse like these, there is a high possibility that it too has a dedicated application.
If you are unsure, refer to the user manual that came with the mouse. If you don’t have a manual, you can scour the internet to get its manual. The manual will have information about the application. Download and install the application from the official manufacturer’s website.
Third-Party Mouse Control Application
Using a third-party application is also a viable option if you want to remap mouse buttons. This can be especially useful if you do not have a dedicated application that controls the mouse.
A third-party mouse control application can control and remap any mouse, whether it be a premium or a non-premium. There are a few mouse control software that you can find on the internet, such as AutoHotkey, Mouse Manager, X-Mouse Button Control, and ClickyMouse.
Among these, we have explained the process of remapping the mouse button for a couple of these applications depending on their ease of use.
Mouse Manager
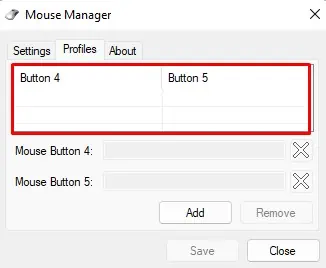
Using the Mouse Manager, you can configure the side buttons, Mouse button four and Mouse button five. Although Mouse Manager only allows the user to configure two buttons, its user-friendly UI makes it easier for the first-time user to re-configure their mouse buttons.
- Download Mouse Manager and install the application.
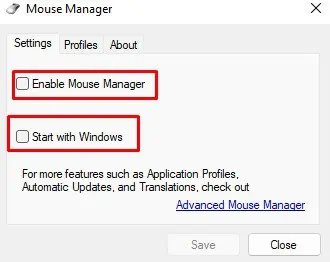
- Run the application and go to the Settings tab.
- Check Enable Mouse Manager and Start with Windows.

- Go to the Profiles tab and set the desired Mouse Button 4 and Mouse Button 5.

- Click on Save.
Using Mouse Manager, you can set multiple button configurations as well. Check the configurations to activate them.
X-Mouse Button Control
X-Mouse Button Control is another app with a user-friendly UI that lets you remap all the buttons on your mouse. Besides remapping the entire mouse, it also has features to invert vertical and horizontal scrolling, wheel scroll in pages instead of lines, and many more.
To remap your mouse using X-Mouse Button Control, download X-Mouse Button Control from the internet and follow the steps mentioned below.
- Once the download is complete, install and run X-Mouse Button Control.
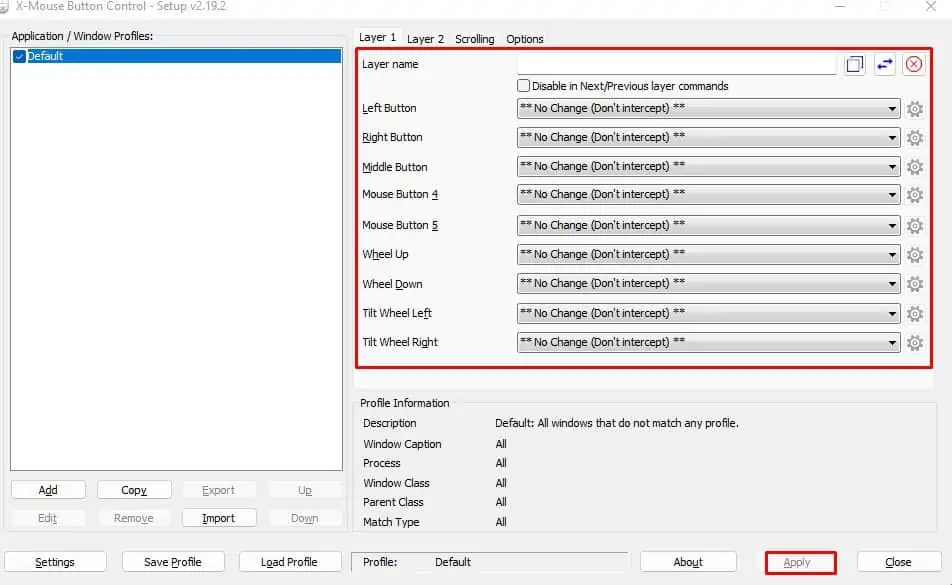
- On the right panel of the screen, in the layer 1 tab, you can see all the mouse buttons.
- Click on the drop-down menu and select the desired action.
- Once you have made the necessary changes to the mouse, click on Apply.

- If the new remapped settings do not work, make sure that the Scroll Lock is off.
- If you want to change the settings to default, set the button to **No Change (Don’t intercept) **.
How to Configure the Touchpad Gestures?
Scrolling through an application can take a short but considerable time using the touchpad instead of gestures. Re-configuring touchpad gestures to convenient settings will definitely come in handy when navigating Windows on your laptop.
Below are the steps to re-configure touchpad gestures on your laptop.
- Press the Windows + I key to open Settings.
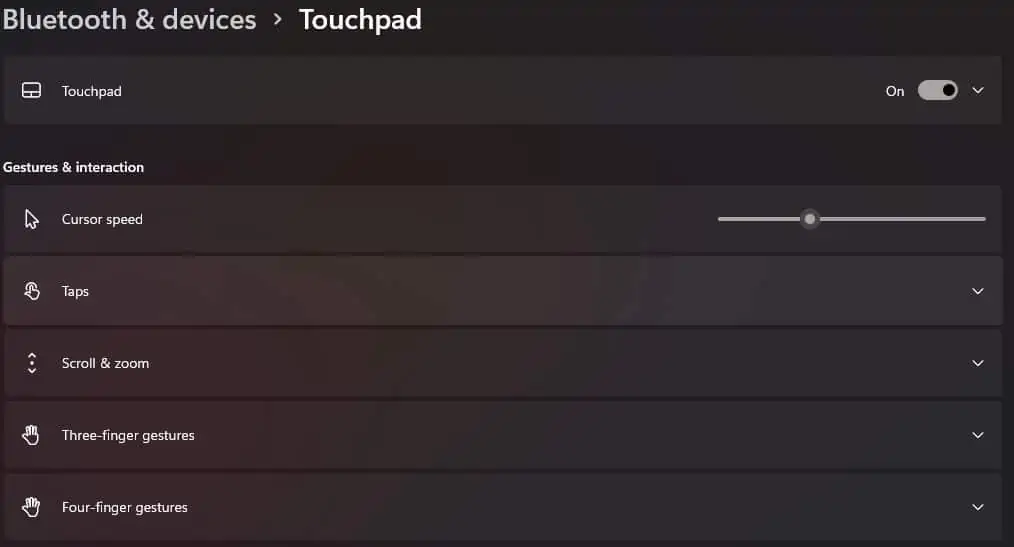
- Go to Bluetooth & Devices > Touchpad.
- Under Gestures & Interaction, you can adjust your taps, scroll & zoom, and three and four-finger gestures.

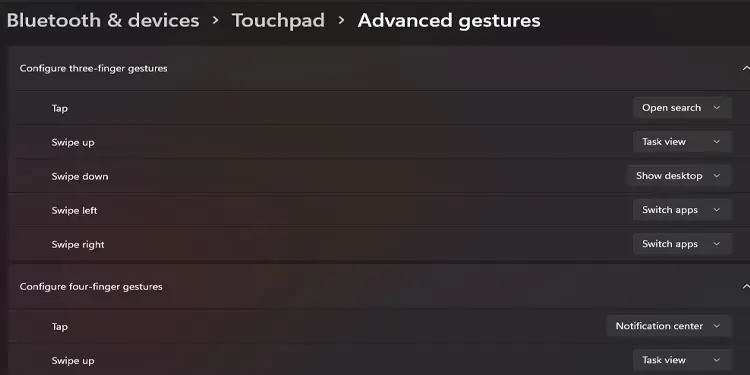
- Under Related settings, select Advanced gestures.

- Here, you can configure three-finger or four-finger gestures according to your choice.

