When you want to connect to your personal computer remotely, Remote Desktop is your best friend. However, first-time users may face problems while trying to use the Remote Desktop (RDP) feature in Windows.
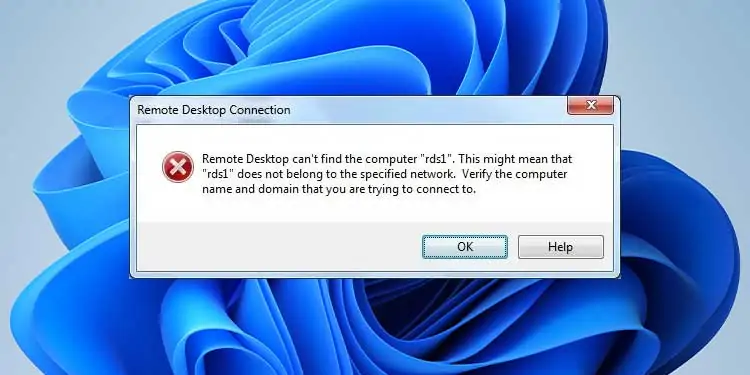
One of the common errors while using Remote Desktop is not finding the computer that you are trying to locate. Although the error may pop up because of wrong credentials, multiple connectivity issues can cause the “Remote Desktop can’t find the computer” issue.
In this article, we have listed a few of the reasons the Remote Desktop cannot find the computer and what we can do to fix these problems.
Why Can’t Remote Desktop Find the Computer?
Here is a list of a few reasons you may be facing the issue with Remote Desktop.- Blocked by antivirus software
- Bad internet connections
- Wrong credentials
- Incorrect DNS server address
- DNS cache
- Remote Desktop disabled from System Properties.
How to Fix “Remote Desktop Can’t Find the Computer”?
Here are a few ways you can fix the remote Desktop Can’t find the computer error.
Enable Remote Desktop
When accessing a computer through Remote Desktop, the first thing you want to check is if both computers have Remote Desktop enabled. We cannot connect to a computer unless this feature is ON for both computers.
- Click on the Start menu and click on Settings.
- Now, scroll down and click on Remote Desktop on the left side of the Setting windows.
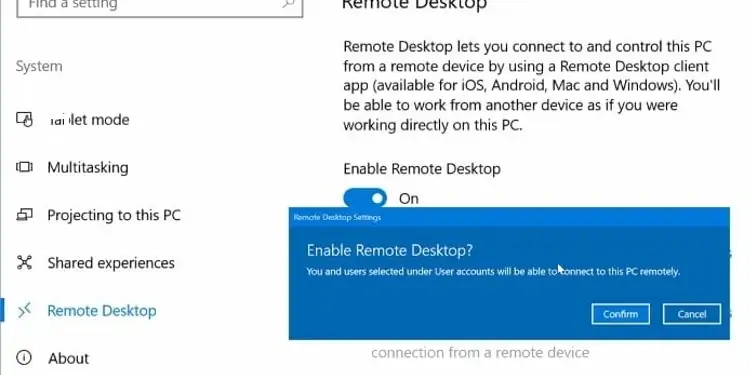
- Here, you can see Remote Desktop with a radio button, toggle it to On.
- The computer will prompt you to a confirm dialog box. Click on Confirm.

- Then, another list item will appear under Remote Desktop called PC name, and this is the name of your PC. Copy this name somewhere to use it to connect to the computer remotely.
Repeat this step on both computers. If enabling Remote Desktop doesn’t work, you also need to allow Remote Desktop services.
Enable Remote Desktop services
Multiple Remote Desktop services need to be running if you want a remote computer to find your personal computer through Remote Desktop.
- Click on the start menu and type “services.msc” without the punctuation mark.
- A window called Services will open, which shows all the services running in the background.
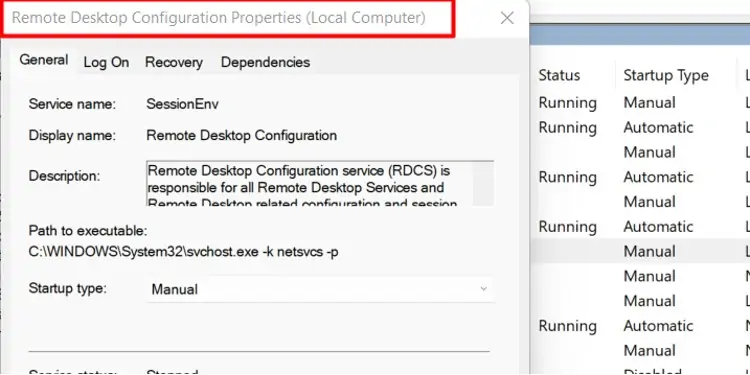
- Scroll down until you see Remote Desktop Configuration. Double click on it.

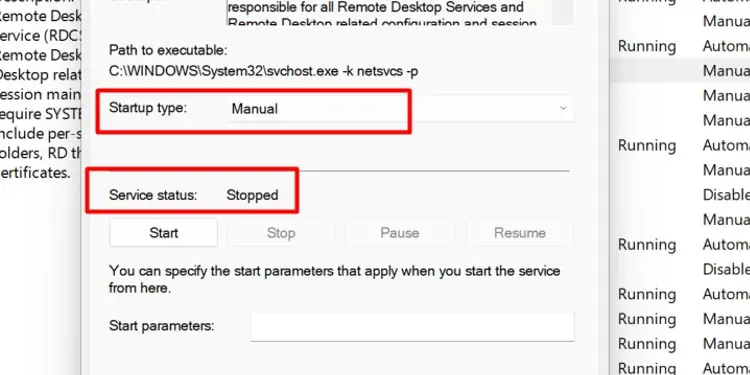
- You will be greeted with the Remote Desktop Configuration Properties dialog box. Here, make sure that the Startup type is either Manual or Automatic.
- Service status should indicate Running.

- Click on Apply if you make any changes. Then, click OK.
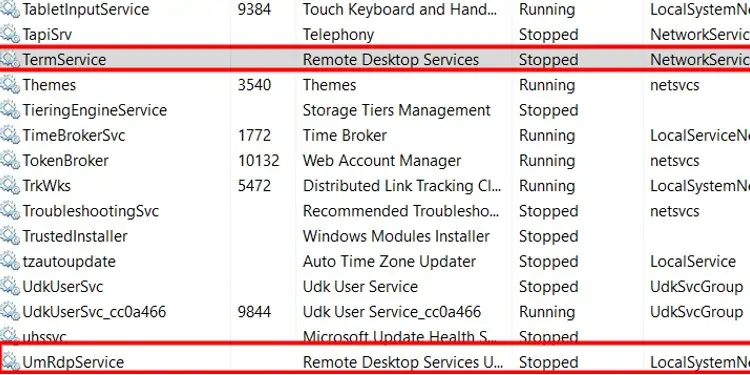
- Remote Desktop Services
- Remote Desktop Services UserMode Port Redirector
Alternately, you can also check if these services are running from the Task Manager. Follow these steps to make sure that these services are running.
- Press Ctrl + Alt + Dlt key simultaneously.
- Click on Task Manager.
- Go to the Services tab.
- Make sure that TeamService and UmRdpService have the Status of Running.

Change Firewall Settings
The firewall settings also have the ability to manage the connectivity of any application that connects to the internet. Therefore if the firewall has blocked the ports to Remote Desktop, it cannot find the computer even if all the credentials are correct.
You can follow these steps to change Remote Desktop Firewall settings.
- Click on the Start menu and search for Control Panel.
- On the top right corner of the Control Panel dialog box, male sure View by is set to Large icons.
- Click on Windows Defender Firewall.

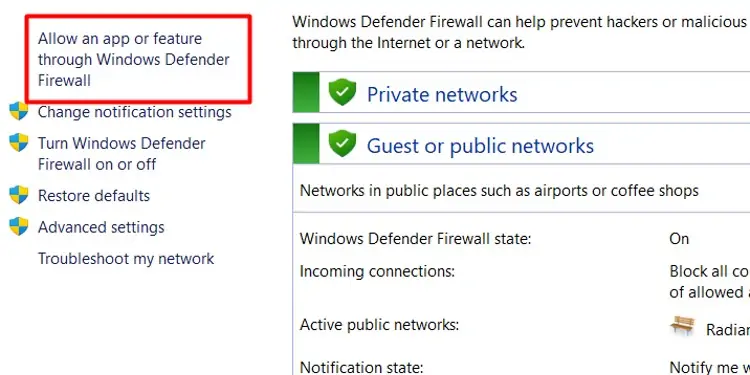
- Click on Allow an app or feature through Windows Defender Firewall on the left side.

- Here, you will see all the applications and ports that the firewall allows or blocks.
- Click on Change Settings.
- Scroll down to Remote Assistance and Remote Desktop. Make sure you tick both Private and Public checkboxes.

Flush DNS
Flushing the DNS will clear frequently used addresses stored in cache locally. However, these addresses can sometimes cause connectivity issues. In this case, it may also cause Remote Desktop to malfunction.
To Flush your computer’s DNS,
- Press the Windows + R key.
- Type “cmd” without the punctuation mark and press Ctrl + Shift + Enter to run Command Prompt as Administrator.
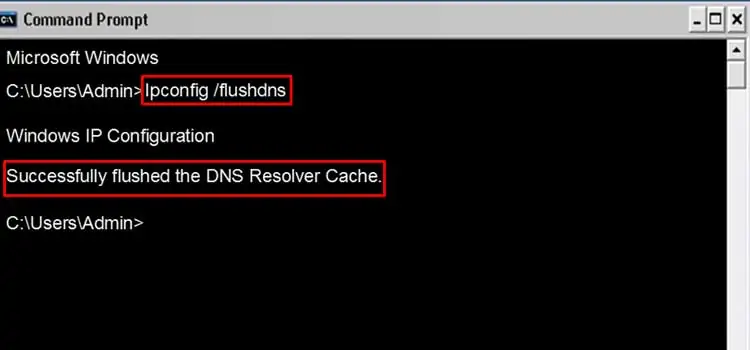
- Type the following command:
ipconfig /flushdns
- Press Enter.
System Properties Remote Setting
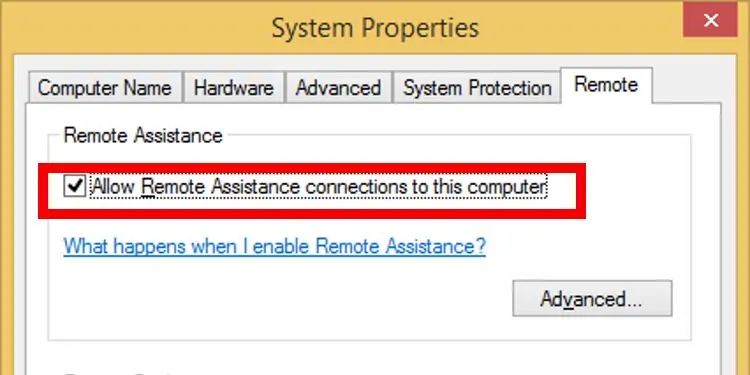
It’s important to check Allow Remote Assistance connections to this computer if you want to connect to use your system from a different computer. Please follow these steps to check this setting.
- Click on the Start menu and click on Settings
- On the right side, scroll down and click on About
- Click on Advanced System Settings. A System Properties dialog box will open
- Click on the Remote tab. Under Remote Assistance, check Allow Remote Assitance connection to this computer.

Change RDP Port Number
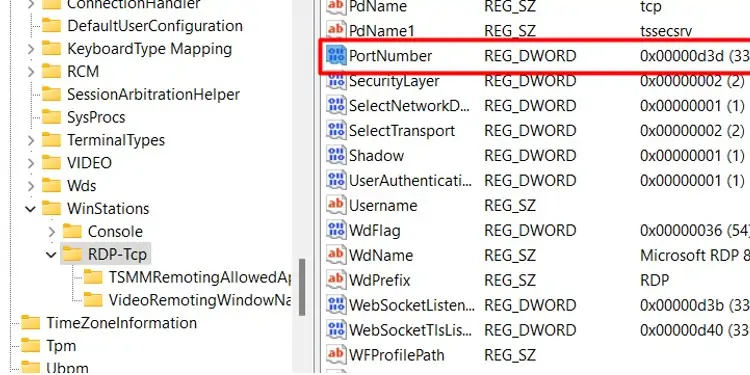
The default port number used by the Remote Desktop to communicate data is 3389. However, if another application uses the same port, the Remote Desktop cannot connect to a computer. If this is the case, you will need to change the default RDP port number from Registry Editor.
Please follow these steps to change the RDP port.
- Press the Windows + R key.
- Type “Regedit” without the punctuation mark and press enter. The Registry Editor dialog box will open.
- On the left side of the dialog box, navigate to
Computer\HKEY_LOCAL_MACHINE\SYSTEM\ControlSet001\Control\Terminal Server\WinStations\RDP-Tcp - Now, on the right side of the dialog box, double-click the list item named PortNumber

- Another dialog box will open with the title Edit DWORD (32-bit) Value
- Here, under Base, check Decimal and change the value under Value date to 3390.

- Click on OK.
Disable Antivirus and Windows Defender
If changing the firewall setting does not work, you can disable the antivirus and the Windows Defender. Antivirus applications and the Windows Defender may block the resources used by the Remote Desktop feature. You can confirm this by disabling them.
If the Remote Desktop works correctly, then configure the Windows Defender and the Antivirus to stop blocking the Remote Desktop.
Troubleshoot Internet Connection
The Remote Desktop requires a stable internet connection to work properly. Sometimes, you cannot access the internet even when the computer says Internet Access, or there may be some error with Remote Desktop itself.
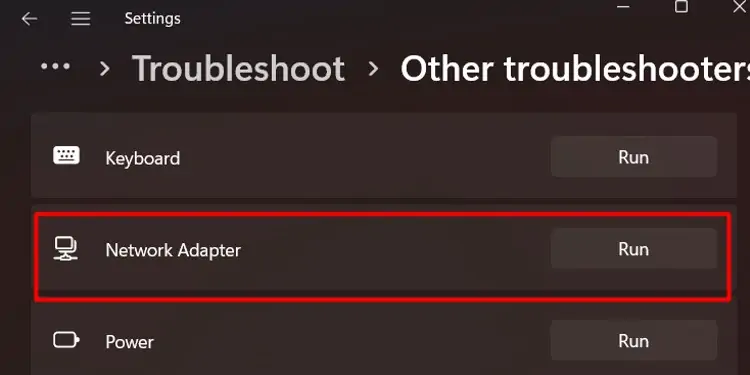
Run the Network adapter troubleshooter to check for errors. To run the Network adapter troubleshooter, please follow these steps.
Click on the Start menu, and go to Settings > System > Troubleshoot. Scroll down and click Run on Network adapter. Now, choose Connect to this computer using Remote Desktop Connection. The troubleshooter will take some time to diagnose any problem with the RDP. Once it is complete, you will get details of things stopping the RDP connection.
Change Network Profile Type
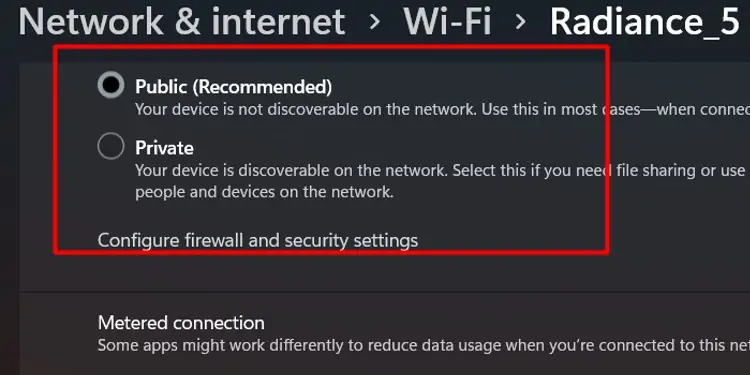
If your network profile type is set to Public, RDP blocks any connection with the remote computer. Follow these steps to check your Network profile type.
For Windows 10
Click on the Start menu and go to Settings > Network & internet > Status > Properties. Here, choose Private.
For Windows 11
Go to Settings > Network & internet > Properties. Then, choose Private.

