The Removable Storage Devices folder may suddenly appear on your Desktop or the file explorer navigation pane after using an external storage device.
In most cases, you won’t be able to delete this folder, and it opens to an empty folder or This PC. It usually happens due to unresolved system issues left behind by a system update or some malware.
How to Delete Removable Storage Devices Folder
Here are some of the ways of erasing the Removable Storage Devices folder from your PC:
Before You Begin
There are some simple fixes you can apply before you try more technical solutions:
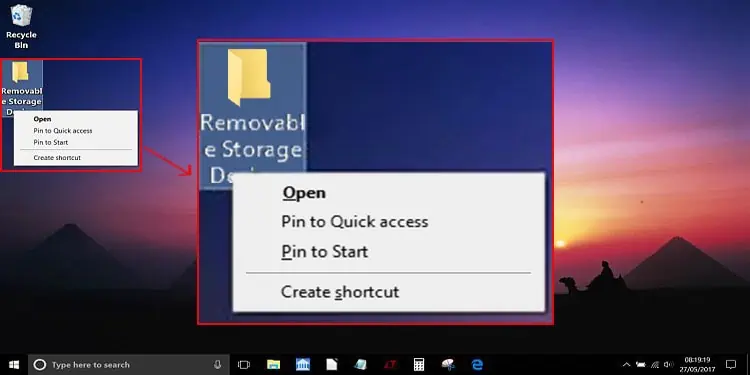
- Manually delete the folder: You may be able to do delete the folder in some cases. Also, if the folder appears in the Quick access window, right-click on it and select Remove from Quick access to delete it.
- Refresh your Desktop: This works as a permanent solution for some users and a temporary one for others.
- Restart your PC: Similar to the above, restarting your PC may temporarily or permanently fix this issue.
Check Windows Updates
Most of the users have experienced this error after a system update. So, try uninstalling the latest windows updates to resolve this issue. However, an even better solution would be to update to successive builds if they are available. It’s also a wise idea to enable automatic checking for updates.
Update Storage Spaces Controller Driver
Your system uses the Storage Spaces Controller to access any disks, even virtual ones. You might be able to delete the Removable Storage Devices folder after updating the driver of this controller. Here’s how you can do so:
- Enter
devmgmt.mscon the Run dialog box. It will direct you to the Device Manager. - Here, Look for and expand Storage controllers.
- Then right-click on Microsoft Storage Spaces Controller and choose Update driver.

- Select Search automatically for drivers.

Then wait for the driver to update and restart your PC.
Reinstall Storage Spaces Controller Driver
If the driver is fully updated, you can try reinstalling it to remove any bugs present in the software. To do so,
- Launch the Device Manager and expand Storage controllers.
- Then right-click on Microsoft Storage Spaces Controller and choose Uninstall device.
- Click Uninstall.
Then, restart your PC. It automatically installs the driver during the reboot.
Delete Some Registry Keys
Sometimes the Removable Storage Devices folder only appears on the Navigation Pane of your File Explorer. In such cases, you can remove it from here through the Registry Editor.
Changing registry values haphazardly might result in serious system issues including system failure. Make sure to backup your registry before you begin tinkering with it.
Here are the steps to remove the folder from the Navigation Pane using the Registry Editor:
- Open the Run dialog box and enter
regedit. It will launch the Registry Editor. - Here, navigate to the the following registry path:
Computer\HKEY_LOCAL_MACHINE\SOFTWARE\Microsoft\Windows\CurrentVersion\Explorer\Desktop\NameSpace\DelegateFolders\{F5FB2C77-0E2F-4A16-A381-3E560C68BC83} - Right-click on {F5FB2C77-0E2F-4A16-A381-3E560C68BC83} and select Delete.
- Confirm with Yes.
- Now, go to
Computer\HKEY_LOCAL_MACHINE\SOFTWARE\WOW6432Node\Microsoft\Windows\CurrentVersion\Explorer\Desktop\NameSpace\DelegateFolders\{F5FB2C77-0E2F-4A16-A381-3E560C68BC83} - Repeat step 3 to Delete this key as well.
- Then, restart your PC and check if the folder is still present.

Scan for Malware
Sometimes some computer viruses or malware programs may also be the reason for the Removable Storage Devices folder showing up on your PC. It is always better to enable real-time protection on your antivirus program to protect your system from system issues, including this one.
It’s best to perform a full scan of your system if you encounter this error. Here’s how you can do so using the Virus & Threat Protection:
- Click on the Windows Security (Shield) icon from the notification tray (right side of the Taskbar).
- Click on the menu and select Virus & threat protection.
- Under Current threats, find and click Scan options.
- Then, check the Full scan option and choose Scan now.
- Please patiently wait for the scan to complete. Then, check if the issue resolves.

Launch DISM and SFC Utilities
You can also try running the System File Checker (SFC) and the Deployment Image Servicing and Management (DISM) tools to repair the integrity of your system files. Sometimes this problem can occur due to system issues, and these tools might be able to resolve it.
- Type cmd in the Run Command and press Ctrl + Shift + Enter. It will direct you to the elevated Command Prompt.
- Paste the following commands and press Enter after each to execute them:
dism /online /cleanup-image /restorehealthsfc /scannow - Restart your PC after running them and check if the issue resolves.
If you can’t run DISM with the online source, you can try using an offline source. Here are the general steps to do so:
- Insert a bootable drive with Windows OS into your PC.
- Now, open the elevated Command Prompt.
- Enter the following command while replacing the source file path with the one in your Drive:
dism /online /cleanup-image /restorehealth /source:E:\Sources\install.wim /limitaccess - The install file may also have the extension .esd, so make sure to check the file from inside the Sources folder before running this command.
Perform System Restore
If the previous methods don’t work, you can try restoring your system as a last resort. This method will restore your system to a previously created restore point.
Follow the instructions below to perform a system restore:
- Open the Run command, type
systempropertiesprotection, and press Enter. - It will load the System Protection tab in System Properties.
- Here, click on System Restore.
- Then, select the restore point you want.
- Follow the on-screen instructions.

You also get an option to check for affected programs. Click on it if you want to know which apps you’ll need to install after restoring your system. Finally, restart your system after the system restore.