When a USB drive becomes write-protected, you’ll face trouble copying files, formatting, or setting permissions.
If it’s done at the OS or application level, the issue persists only on your computer. However, USB drives can also be protected at the hardware, malware, or firmware levels, which may restrict performing write operations on every device.
Considering the different types of write protection, here are some effective ways to remove it.
Check for Write-Protection Switch
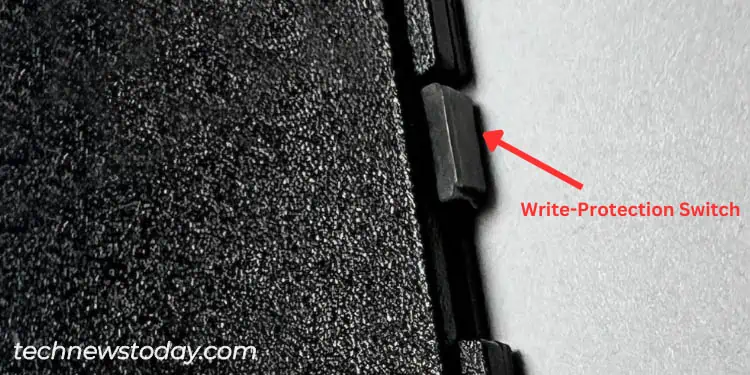
Some high-end flash drives are equipped with a physical switch that lets you enable/disable write protection at the hardware level.
There’s a chance that you have accidentally shifted the latch to the ‘lock’ position. Unlike SD cards, most USBs do not include this, which is also why many users were reportedly unaware of this feature.
- Disconnect the drive and check the indication at the bottom or the side.
- Now, all you have to do is slide the switch to the ‘unlock’ position, which should remove the write protection.
- Reinsert your USB drive and try copying files or formatting it to confirm that it’s now working.
Clear Read-Only Attribute Using Diskpart
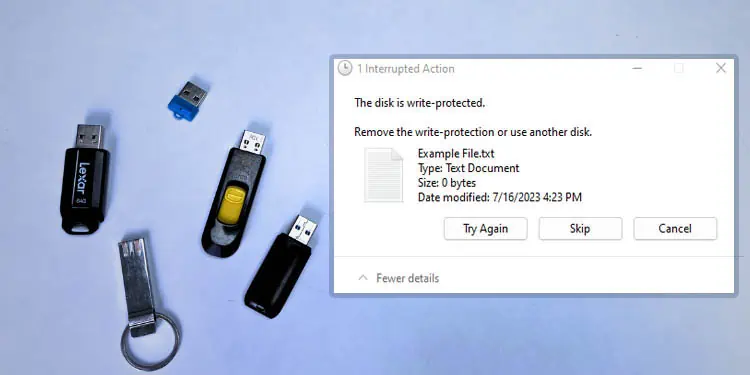
In most cases, your USB drive is set to Read-Only mode, and you’re accompanied by “The disk is write protected” and “Remove write protection and use another disk” errors.
You can easily disable this using a dedicated command. Also, some third-party drive management applications allow you to do it.
Since Read-Only is enforced within your operating system (through system calls to the kernel), the write protection gets implemented only on your computer. So, you shouldn’t have issues copying/formatting/setting permissions on other devices.
To remove the write protection on the operating-system level, here’s what you can do:
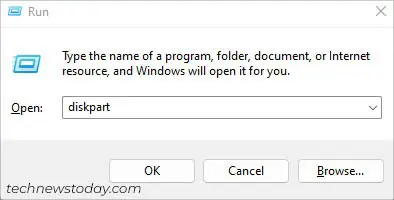
- First, launch the Run app by pressing Windows + R hotkey.
- Execute
diskpartcommand.
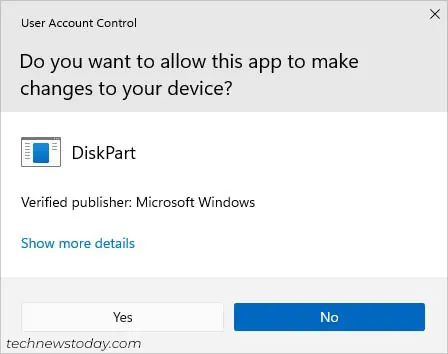
- You’ll need to press Yes in the User Account Control prompt to launch the utility.

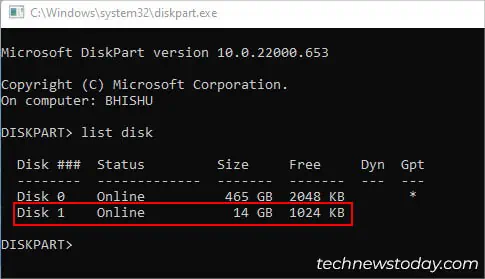
- Run the
list diskcommand and check for your flash drive based on its size.
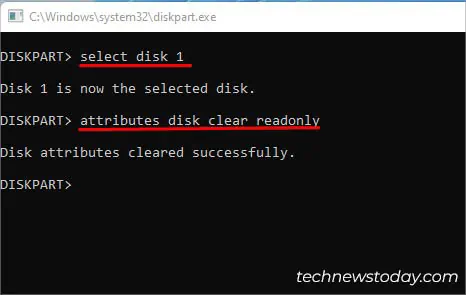
- Then, execute the
select disk <disk_no>(for example,select disk 1). This should select your USB drive. - Now, type
attributes disk clear readonlyand hit Enter. This will remove the Read-Only mode on the selected disk.
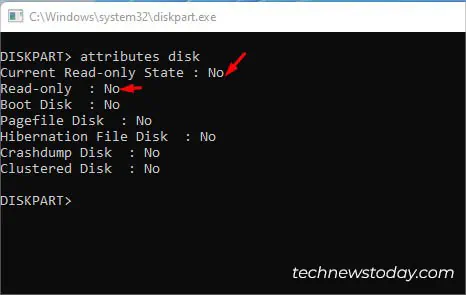
- To verify, run the
attributes diskcommand. Here, both the Current Read-Only State and Read-Only fields should display No.
Note: If you’re unable to perform write actions and instead receive a “You need permission to perform this action” message, it’s indicating a write permission issue rather than write protection.
Change Registry Entry
Sometimes, you may encounter ‘Yes’ in Current Read-Only State and ‘No’ in the Read-Only field when checking your disk’s attributes. In such cases, just clearing the read-only attribute won’t help.
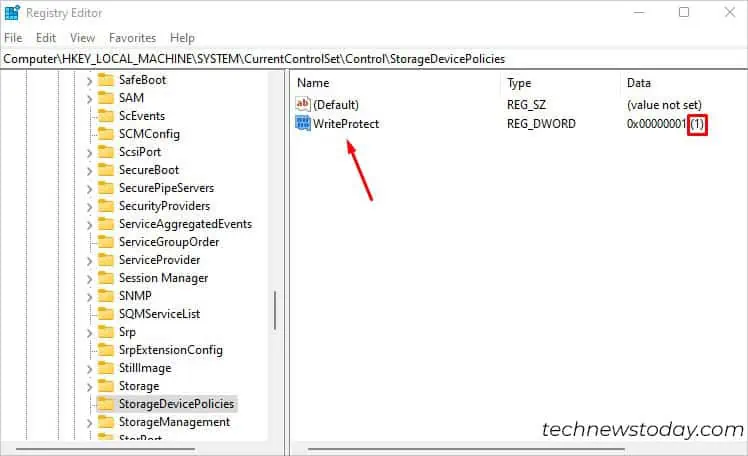
Before focusing on other write protection levels, I advise examining your registry keys first. Windows lets you tweak the DWORD values that can enable/disable read-only mode for all your external storage devices. Here’s how:
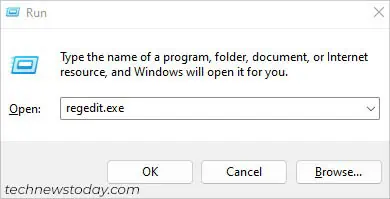
- Use Windows + R to launch Run and execute
regedit.exe.
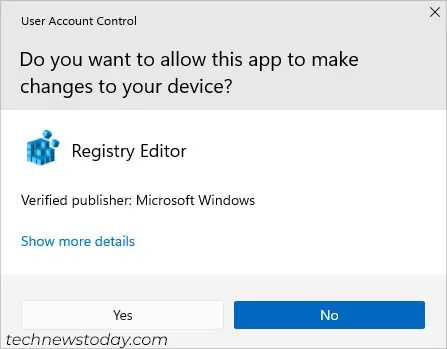
- Once prompted, hit Yes and the Registry Editor window should open up.

- Paste the following path in the address bar and hit Enter:
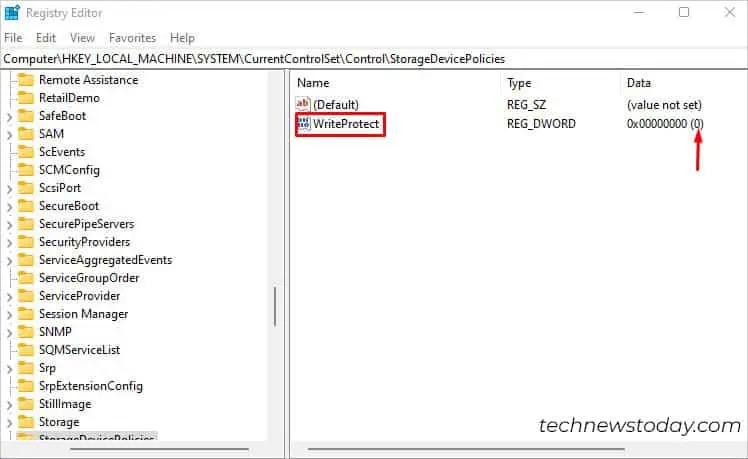
Computer\HKEY_LOCAL_MACHINE\SYSTEM\CurrentControlSet\Control\StorageDevicePolicies - Double-click on the WriteProtect DWORD value or similar indication from the right pane.

- Change the value to
0and press Ok.
- Now, reboot your computer and reinsert the flash drive.
- Try copying a file into the USB drive to see if changing the registry entry has removed the write protection.
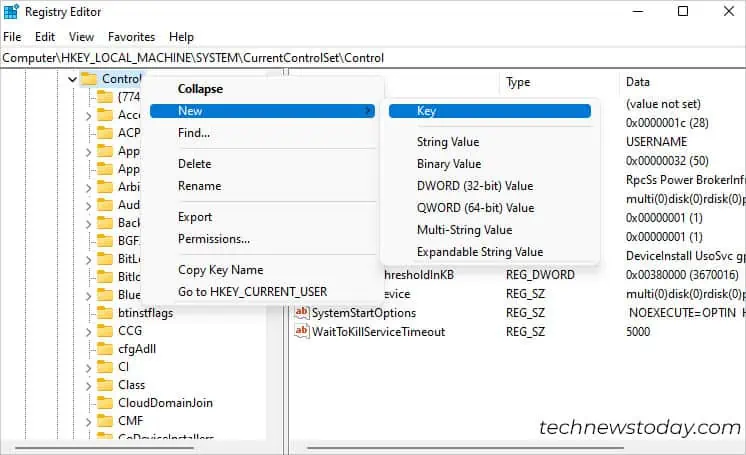
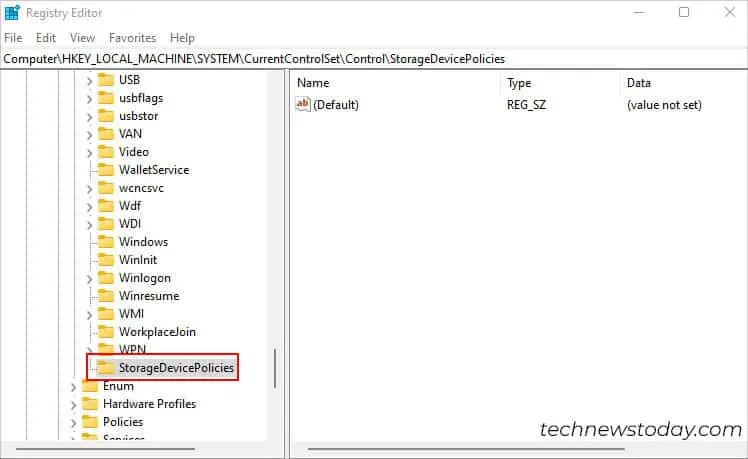
In case you didn’t find the StorageDevicePolicies key, you may manually create one. This can help allow write access by introducing the missing key.
Also, it can fix possible registry corruption that could have caused additional problems with the write access.
- Right-click on the Control key and select New > Key.

- Rename this to StorageDevicePolicies.

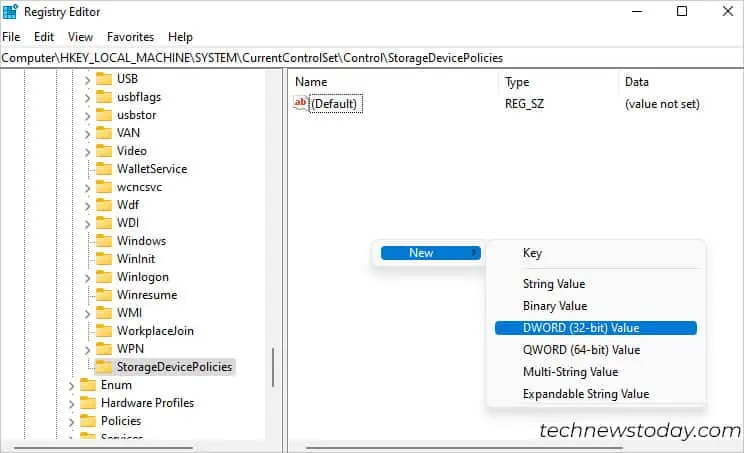
- Right-click anywhere in the empty area. Then, select New > DWORD (32-bit) Value.

- Rename it to WriteProtect.
- By default, the value should be 0. Nonetheless, you can still verify by checking the Data field.

- Reboot your PC and reinsert the USB drive. Then, check if you get access to write data in your flash drive.
Perform Malware Scan on Your USB Drive
You might have noticed that certain files on your USB drives can’t be deleted. It throws unexpected errors that keep you from removing it.
This possibly means that your file is infected by malware capable of write protecting certain files or even the entire drive.
A simple workaround here is to use reliable antivirus software. You can have multiple ones but if you do not even own one, you may utilize the built-in Antivirus program on Windows:
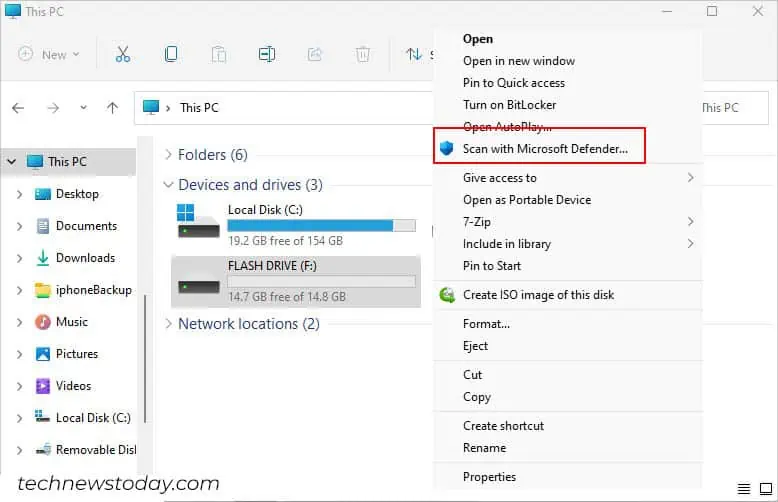
- Use Windows + E hotkey to launch the Explorer.
- Select This PC from the left pane.
- Expand Devices and drives (if needed), right-click on your USB drive, and pick Scan with Microsoft Defender.

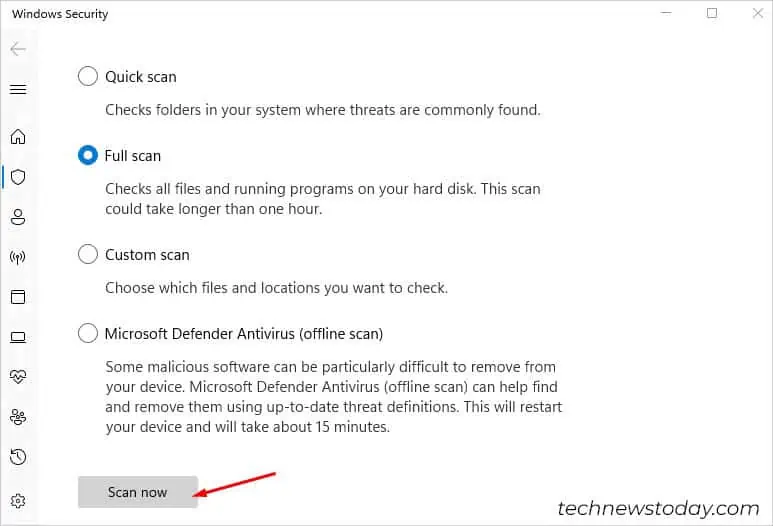
- Once the Windows Security app opens up, select Full Scan and hit Scan Now.

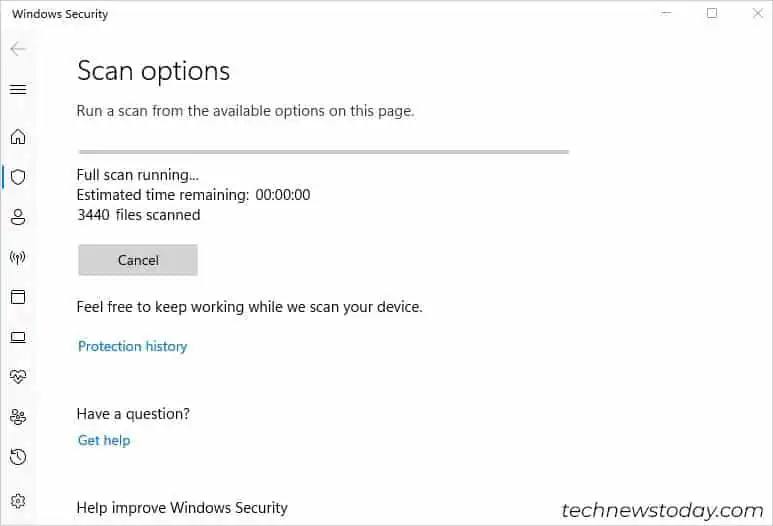
- Wait for the built-in antivirus to scan and remove possible malware that could have led to write-protection errors.

- Once that’s done, you can now format the USB drive or wipe it to ensure the malware is removed for good. Now, you should be able to perform write operations if the culprit was malware.
Format and Remove Encryption
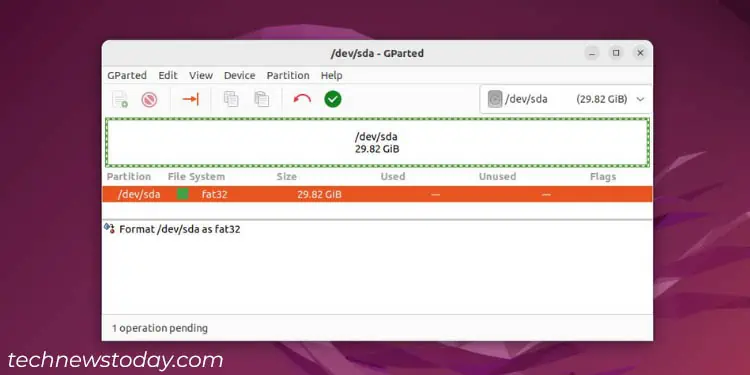
If none of the above methods helped you out, you can certainly use a reliable application to bypass the write protection on your USB drive.
- There are plenty of third-party applications that let you modify the write-protection settings. Just make sure you have downloaded a reliable one to perform this action.
- In case that doesn’t help, try reformatting the drive. A few high-end third-party drive management utilities should allow it even when the ReadOnly mode is enabled.
- You can even try formatting your flash drive using Linux-based utilities, like Gparted.
- While most HDDs and SSDs offer dedicated applications to control firmware-level write protections, there might be limited ones for USB flash drives. Kingston Format Utility and Apacer USB Repair Tool are some popular ones.
- You can check your manufacturer’s website to find out if they have a dedicated program for your Pendrive.
- Some vendors offer encryptions to lock the USB flash drives. Without a password, you won’t be able to access any content from the disk.
- So, if you notice a ‘lock’ icon on your drive or get the “Access is denied” error when trying to copy files, you need to enter the appropriate password to gain access first.
- If the USB drive is encrypted using Windows Bitlocker, you need to use the correct credentials here as well.
- To ensure you get access the next time, you can now turn it off from Control Panel > System and Security > BitLocker Drive Encryption.
- In case your PC doesn’t support Windows BitLocker or you do not remember the password, you may format it to gain back the read and write access.
When doing so, you will lose all your data. So, only opt for this if you’re not worried about your files (or you have already backed up your data).
Dump Your USB Drive
Even if none of the above solutions worked for you, your flash drive could have automatically enabled write protection as it’s on the verge of its end life. Different sectors of the disk could have worn out and are no more reliable.
Unlike SSDs, the lifespan of a flash drive is even shorter. However, there’s no standard factor to measure this and even vendors do not provide a dedicated specification for it.
Also, it’s possible that the internal chip of your flash drive has detected an unrecoverable failure. While there might be some advanced tools that can help you reset the write protection flag, this might not be a feasible option for everyone.
While it might be disheartening to hear, it’s possible that your USB drive can no longer write data. So, the only option is to try recovering the files in it using advanced software. Then, you may physically destroy it (which happens to be the best way to dump the drive in this scenario).

