Resetting a router is an easy fix for various common router issues. The one downside is that, in some cases, you’ll have to reconfigure it afterward manually.
Until you do so, you won’t be able to connect to the internet as your router was reset and doesn’t yet have the necessary credentials to connect to the Network Service Provider.
In this article, we’ve detailed how you can reconfigure your router and the steps you should take afterward.
How to Fix Router Not Working After Reset?
As stated, routers sometimes have to be manually reconfigured after resetting. Additionally, updating your router firmware, if available, can also help. And to foolproof your router against such issues in the future, it’s best to backup your router configurations as well. You’ll find more details on each topic in the sections below.
Check Physical Connection
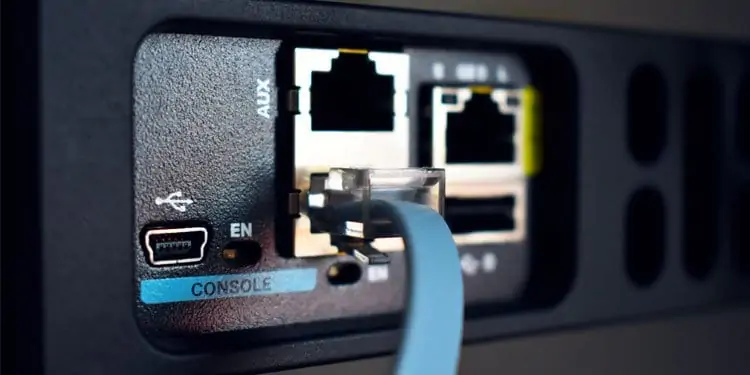
People often unplug all the cables when resetting and make the wrong connections afterward, which often leads to this issue. To check for this, make sure the network cable from your service provider is plugged into the WAN port on the router.
If you have a separate router and modem, make sure the network cable is connected to the Internet or WAN port on the modem. Then, use an Ethernet cable to connect the Ethernet port on the modem and the WAN port on the router.
Additionally, in the case of an ONU device used to translate optical signals to digital signals, contact the service provider as they can set up the device remotely, or it comes custom configured as per the connection requirements.
Reconfigure Your Router
As an example, we’ve detailed how to reconfigure a TP-Link router, but the process is very similar on most other routers. With that said, here are the preliminary steps:
- First, check the default router IP and login values on the back of the router.
- Launch a web browser and enter the router’s IP (typically 192.168.0.1) into the URL bar.
- Input the login credentials (typically admin/password by default).
- You should arrive at the Router Setup page. If not, open the Quick Setup or similar tab manually.

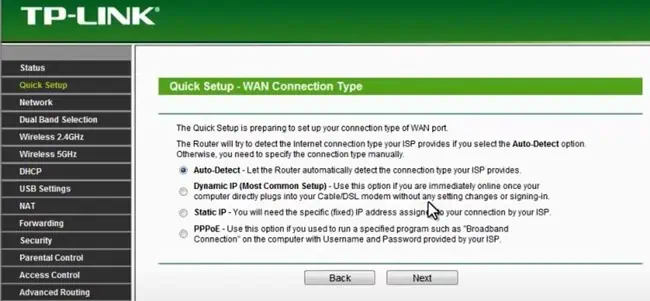
- You’ll need to specify your connection type as Dynamic IP, Static IP, or PPPoE. Select Auto-Detect if you’re unsure of the correct one.
- Press Next and follow the rest of the steps from the appropriate section below.
- Dynamic IP: Dynamic IP is the most common setup. With this, the DHCP server automatically assigns your modem the IP address, so the configuration is automatic.
- Static IP: If you were using a Static IP, you’ll have to input the IP Address, Subnet Mask, Gateway, and DNS. You’ll need to contact your Network Service Provider if you don’t remember these values.
- PPPoE: PPPoE is used in the case of broadband connection with encryption. You’ll have to reenter the PPPoE details such as username and password. And once again, if you don’t remember these, you’ll have to contact your Network Service Provider.
Reconfigure WiFi
After configuring your connection type, you should land at the wireless configuration page. If not, open the wireless tab manually and follow the steps listed below to reconfigure your WiFi:
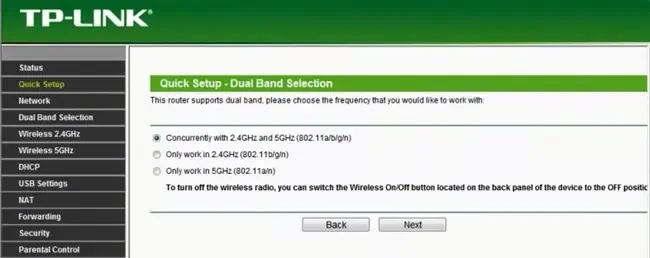
- For dual-band routers, specify whether you want to transmit 2.4GHz, 5GHz, or both.

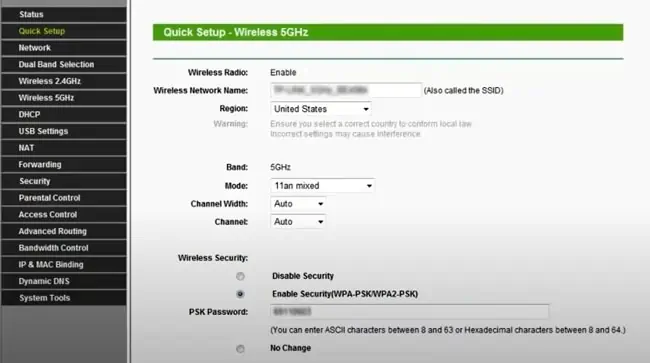
- Input the wireless network name (SSID).
- Select WPA2-PSK and enter your password.

- Leave the channel settings to auto (default) and configure SSID broadcast as you prefer.
Update Router Firmware
Updating your router firmware can improve its functionality and performance and solve various minor issues. In the rare case that your router doesn’t work despite reconfiguring it, this can be helpful.
The firmware update process varies from router to router. Modern routers either receive firmware updates automatically or have the option to check and update the firmware directly via the router settings page.
If you have to update the firmware manually, you can follow the general steps listed below:
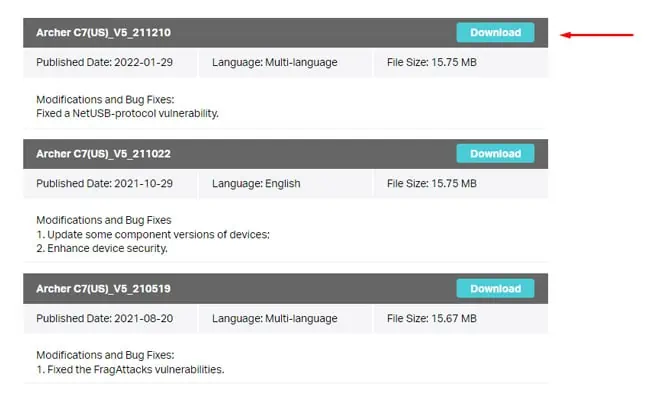
- First, go to your router manufacturer’s support site.
- Search for your router model and switch to the firmware section.

- If a new firmware update is available, download the file and extract it.
- Go to the Firmware section on the Router setup page and click on Choose file.

- Select the extracted firmware file from Step 3 and press OK.
- Make sure that firmware update isn’t interrupted. Once it’s complete, reboot the router if it doesn’t do so automatically.
Backup Router Configurations
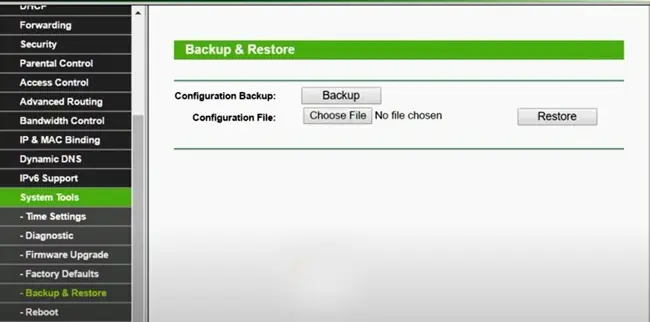
After you get your router working again, we highly recommend backing up the current configurations as a safeguard for the future. Here’s how you can do so:
- Access your router settings and go to the System, Maintenance, Administration, or similar page.
- Under Backup Settings, press Back Up.

- Specify the location and save the backup.

