Windows provides many ways to open the Settings app. However, none of the methods may work if some of your system files, user profile or the Settings app itself becomes corrupt.
In some cases, the system administrator of your computer or domain may have prohibited access to Settings using Group Policy or Registry configuration.
Reset/Reinstall Windows Settings App
The first thing you should do if Settings doesn’t open is to reset or reinstall this application altogether. The only way to do so in your situation is through the PowerShell command-line.
- Open Run by pressing Windows + R.
- Type
powershelland press Ctrl + Shift + Enter to open the Windows PowerShell with administrative privileges. - Enter the Administrator password if you have to.
- Type
Get-AppxPackage *windows.immersivecontrolpanel* | Reset-AppxPackageand press Enter.
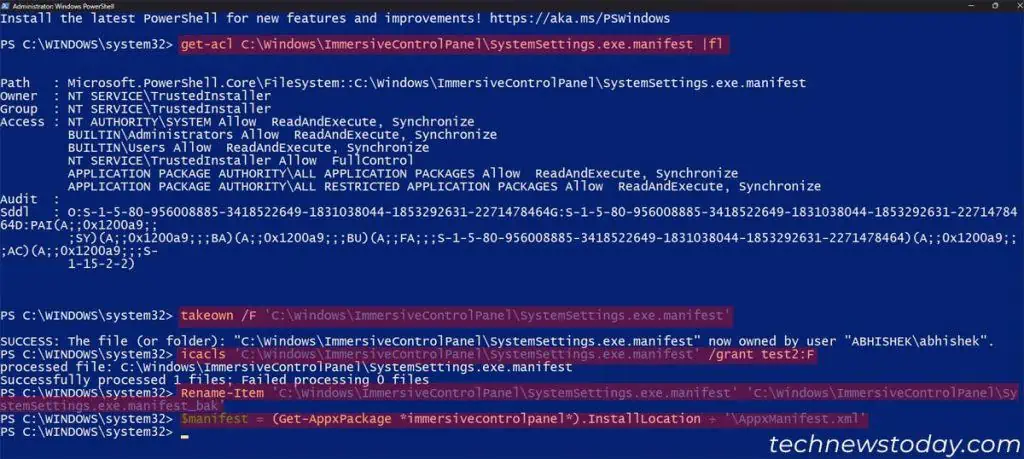
- If (and only if) it shows an error instead, type the following commands and press Enter after each:
get-acl C:\Windows\ImmersiveControlPanel\SystemSettings.exe.manifest |fltakeown /F 'C:\Windows\ImmersiveControlPanel\SystemSettings.exe.manifest'icacls 'C:\Windows\ImmersiveControlPanel\SystemSettings.exe.manifest' /grant “username”:F (Replace “username” with current User Name)Rename-Item 'C:\Windows\ImmersiveControlPanel\SystemSettings.exe.manifest' 'C:\Windows\ImmersiveControlPanel\SystemSettings.exe.manifest_bak'$manifest = (Get-AppxPackage *immersivecontrolpanel*).InstallLocation + '\AppxManifest.xml'
powershell, check Create this task with administrative privileges and click OK.Repair Corrupt System Files
You will also encounter this issue if some critical system files have become corrupted.
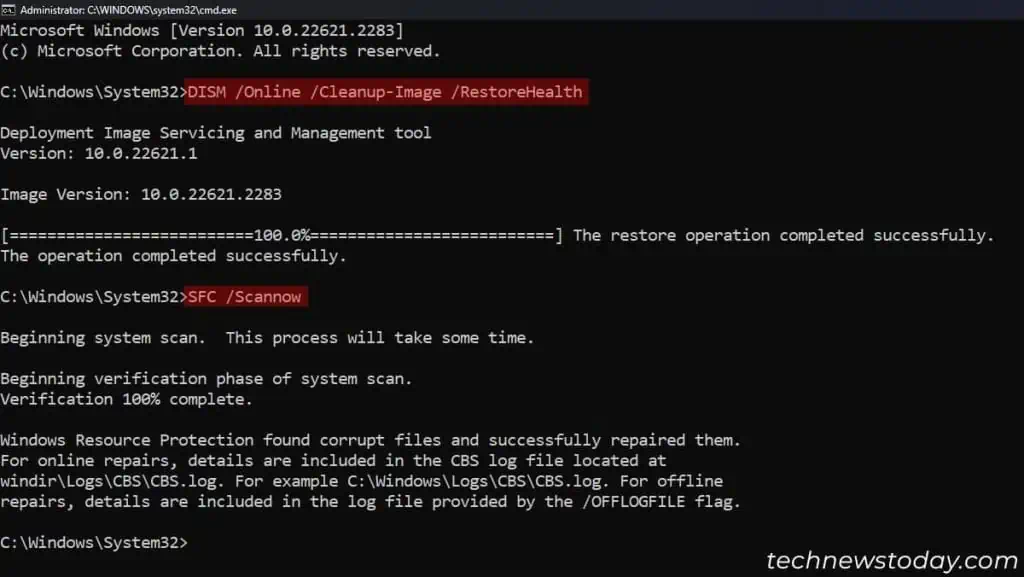
Run the Deployment Image Servicing and Management (DISM) and System File Checker (SFC) to repair all possible corruption.
- Open Run.
- Type
cmdand press Ctrl + Shift + Enter to open the Command Prompt as an admin. - Enter the admin password if you have to.
- Type the following commands and press Enter after each:
DISM /Online /Cleanup-Image /RestoreHealthSFC /Scannow
Create New User Account
Another common reason for this issue, especially if you have just upgraded your system, is a corrupted user profile. Manually troubleshooting the profile is too time consuming and will not succeed in most cases.
It’s easier to create a new user account and start using that instead. Since you can’t access the Account Settings, use the Command Prompt to create the account.
- Open Command Prompt as Admin.
- Type the following commands while replacing the username and password, and press Enter after each:
net user /add “New Username” “New Password”net localgroup administrators “New Username” /add(to make the account an admin)
- Press Ctrl + Alt + Delete and click on Sign out. Confirm your choice if necessary.
- Log in with the account you just created and check whether the Settings App works.
If it does, transfer all non-hidden files and folders from C:\Users\<Old_Username> to C:\Users\<New_Username>. Then you can delete your old user account and its user profile.
Check Group Policy and Registry Settings
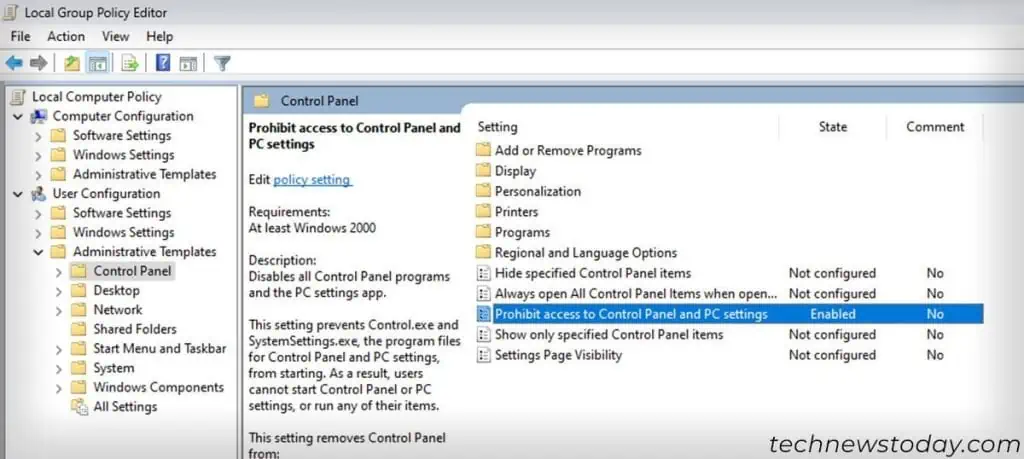
Windows comes with some group policies and registry settings that prevents the user from accessing the Settings and the Control Panel.
If your computer’s administrator has applied such settings for your user account, you can’t open the Settings app at all. Also, if you try to open the Control Panel (not Settings), you will get the following error message.

In this case, follow the steps below to revert these settings on the Local Group Policy Editor and the Registry Editor on your user account.
- Open Run.
- Type
gpedit.mscand press Ctrl + Shift + Enter to open the Local Group Policy Editor as admin. - Enter the administrator password if prompted.
- Go to User Configuration > Administrative Templates > Control Panel.
- Double-click on Prohibit access to Control Panel and PC Settings.

- Check Not Configured and click OK.
- Then, open Run again.
- Type
regeditand press Ctrl + Shift + Enter to open the Registry Editor as admin. - Enter the admin password if prompted.
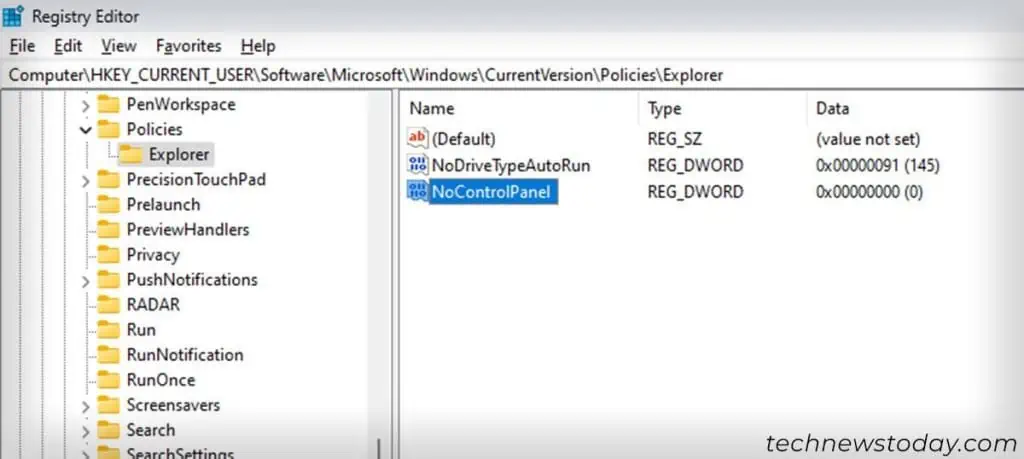
- Navigate to
Computer\HKEY_CURRENT_USER\Software\Microsoft\Windows\CurrentVersion\Policies\Explorer - If you see the option, NoControlPanel, double-click on it, set the Value data to
0and click OK.
- Then, go to
Computer\HKEY_LOCAL_MACHINE\SOFTWARE\Microsoft\Windows\CurrentVersion\Policies\Explorer - If you see NoControlPanel, set its Value data to
0in the same way.
Note: If your computer is part of a domain, you need to contact your domain admin and have them check these settings on the respective group policy object.
Also, if you get the “Windows cannot find ‘gpedit.msc’ error, you only need to make the registry changes.
