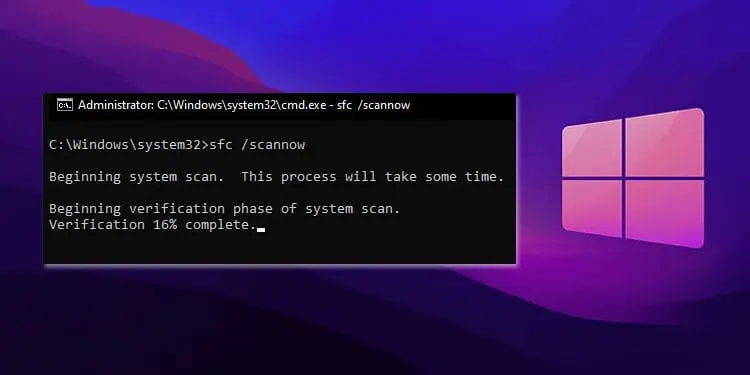
The System File Checker (SFC) program is the traditional Windows utility you can use to repair corrupt system files. It scans for any corruption or integrity issues with the protected files in your Windows system and attempts to repair them.
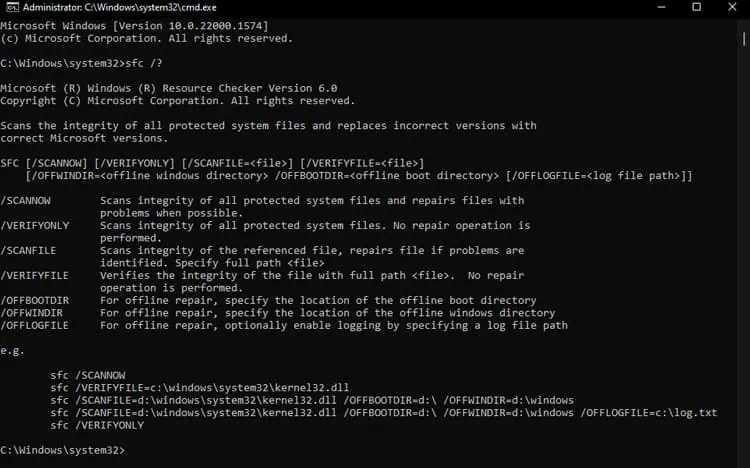
You need to append the Scannow switch on the SFC Command to check for and fix such issues. However, there are other things you need to consider as well.
For instance, just running the default Command Prompt may not execute this command. Sometimes, you will also need to repair your files without logging in to your account. So, I will explain how you can run this command in all situations in this article.
Working Mechanism of SFC /Scannow
Before Windows Vista, System File Checker would use the cached copy of the system files in a compressed folder inside the %WinDir%\System32\dllcache directory for scanning and repairing corrupt system files.
Now, however, Microsoft integrated SFC inside the Windows Resource Protection (WRP) feature. This feature prevents outside sources from replacing the crucial built-in system files and registry data.
Whenever you run SFC /Scannow, Windows Resource Protection performs the following operations to scan and repair the protected files:
- First, it checks the hash signature of the files and compares it with the registry entries in the COMPONENTS registry hive to see if they are in the proper location.
- The system files are hard-linked to the components inside the WinSxS folder. Only the files inside the folder actually exist, and the usual system files simply link to these components. So, if WRP finds inconsistencies, it checks system files against the contents of the
%WinDir%\WinSxSor%WinDir%\WinSxS\Backupfolders (Windows Component Store). - It looks out for all broken hard links and repairs them. This way, it recreates all missing or corrupt files in their proper location.
How to Use SFC /Scannow on Online Windows?
You can use the Elevated or Admin-level Command Prompt to run the SFC utility in an Online system. Here, online refers to the Windows environment you are currently using. That is to say, if you are logged in inside a Windows user account, your Windows is online.
- Open Run by pressing Windows key + R.
- Type
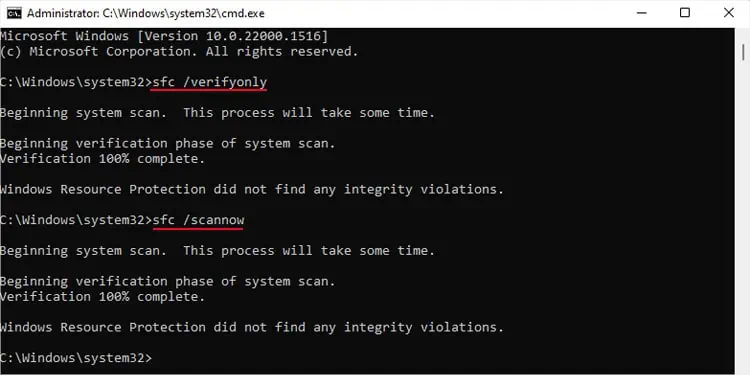
cmdand press Shift + Ctrl + Enter to run the Command Prompt as admin. - If you only want to verify system file integrity, you can type
sfc /verifyonlyand press Enter. - To scan and repair all file integrity issues, type
sfc /scannowand press Enter.
If it did not find any issues, it would return the message “Windows Resource Protection did not find any integrity violations.”
If it found the issues and successfully resolved them, you will get “Windows Resource Protection found corrupt files and successfully repaired them.”
But there are two situations where it does not provide the desired result:
- If WRP fails to resolve the issue, it gives the “Windows Resource Protection found corrupt files but was unable to fix some of them” error message.
You can usually resolve this issue by running the commandDISM /Online /Cleanup-Image /RestoreHealthand thensfc /scannow - In some cases, WRP can’t run or scan the files. In such scenarios, running SFC gives the “Windows Resource Protection Could Not Perform the Requested Operation” error message.
It also creates a log file, %windir%\Logs\CBS\CBS.log, which includes the details on the process.
You can check the log by entering the command findstr /c:"[SR]" %windir%\Logs\CBS\CBS.log >"%userprofile%\Desktop\sfcdetails.txt" on Prompt to create a readable .txt file on your Desktop.
How to Use SFC /Scannow on Offline Windows?
You may need to run SFC /Scannow on an offline Windows environment in some scenarios. If you are unable to log in to your account or if you have a multi-boot system, the program may not find the OS you wish to repair.
You can boot into the Advanced Startup or Windows Recovery environment and then run this program in such cases.
You will need to specify the offline Windows and the boot directory for this method. Also, the recovery environment temporarily reassigns the drive letter for these directories, so you need to figure them out as well.
- First, you need to get to the Advanced Startup Environment. There are various methods to do so, such as:
- Force shutdown your computer three or four times and then power it up again. On the fourth boot, the computer will load the Startup Repair screen. Here, click Advanced options.
- Click on the power icon on the login screen or start menu. Press and hold Shift key while clicking Restart > Restart Now.
- Boot using a Windows installation media. Set the language preferences, and on the Install screen, select Repair your computer.
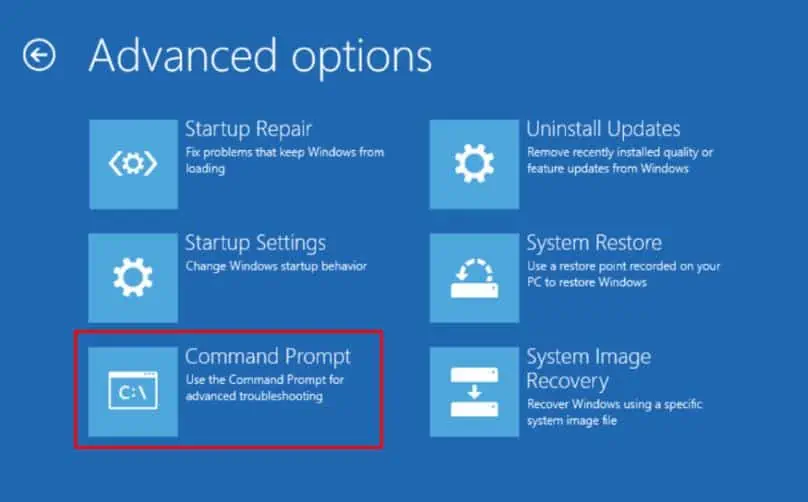
- Then, go to Troubleshoot > Advanced Options > Command Prompt.

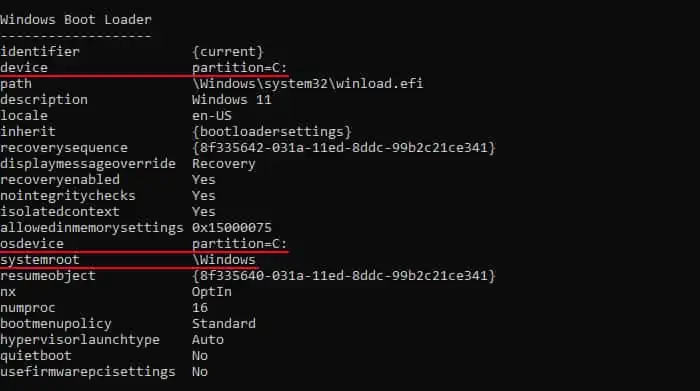
- Type
bcdeditand press Enter. - Note the following parameters under Windows Boot Loader:
deviceosdevicesystemroot
- Enter the command below while replacing the values from the parameters:
sfc /scannow /offbootdir=“device drive letter” /offwindir=“osdevice drive letter\systemroot”
For instance,sfc /scannow /offbootdir=C:\ /offwindir=C:\Windows
