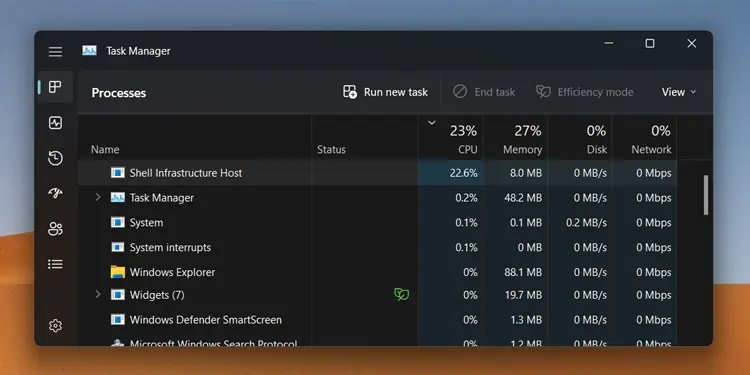
Shell Infrastructure Host, or sihost.exe, handles various graphics UI elements in Windows, such as the desktop background, taskbar, and Start menu.
Due to a memory leak bug with the default Photos app, users face the Shell Infrastructure Host High CPU usage issue when browsing through a large number of photos. Even after closing the faulty app, sihost.exe still lingers around with high CPU usage for hours, which can understandably be quite annoying.
So, in this article, we’ve detailed what steps you can take to fix the Shell Infrastructure Host High CPU usage problem.
What causes Shell Infrastructure Host High CPU Usage?
sihost.exe to query the registry continuously, which leads to the high CPU usage.
This leak has existed since Windows 10 and hasn’t yet been patched in Windows 11. Additionally, it’s also possible that the high CPU usage is due to corrupt system files or various UI related settings.
How to Fix Shell Infrastructure Host High CPU Usage?
Even though this bug has been around for quite some time, Microsoft still hasn’t addressed it. As such, as of July 2022, there is no way to permanently fix the Shell Infrastructure Host High CPU Usage issue at its root.
However, that’s not to say that you can’t work around it. There are a number of ways to resolve the high CPU usage issue, which we’ve discussed in the sections below.
Use Different Photo Viewer App
The memory leak problem is with the default Photos app only. If you use a different Photo viewer like the classic IrfanView, for instance, you will no longer face the high CPU usage problem. We highly recommend this method, as this is more or less a permanent fix, while the other methods are only temporary workarounds.
Here’s how you can change the default photo viewer app on Windows 10:
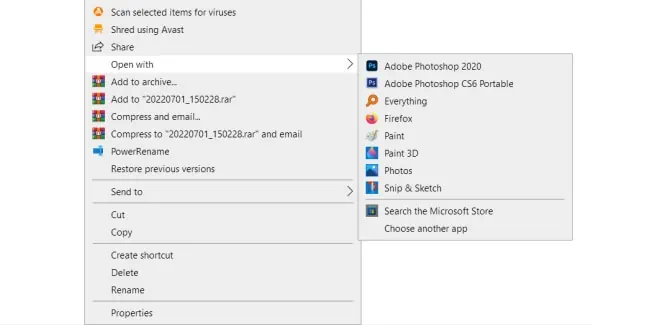
- Right-click the photo and select Open With > Choose another app.

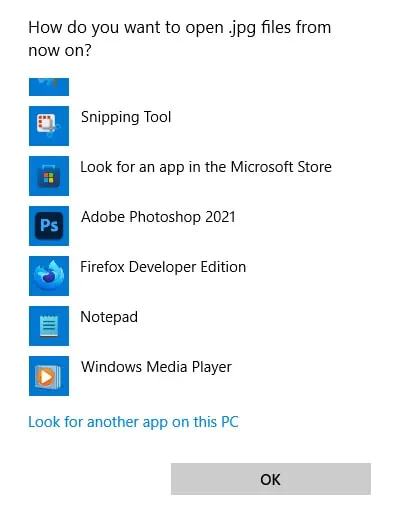
- Select the photo viewer app of your choice. If you don’t see it on the list, select More apps > Look for another app on this PC and browse the app executable.

- Enable the Always use this app to open
.jpgfiles option and press OK. Repeat all the steps for.pngand any other photo formats you use as appropriate.
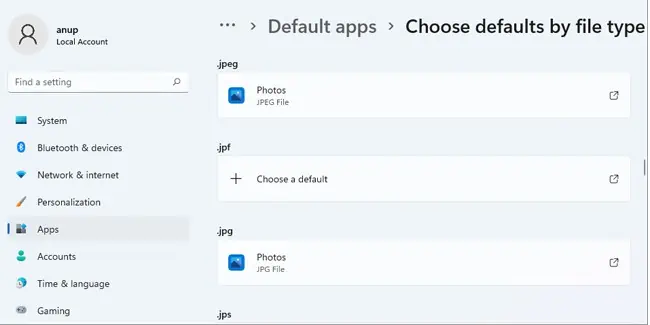
Default apps work slightly differently on Windows 11. Here are the steps to change the default photo viewer app on Windows 11:
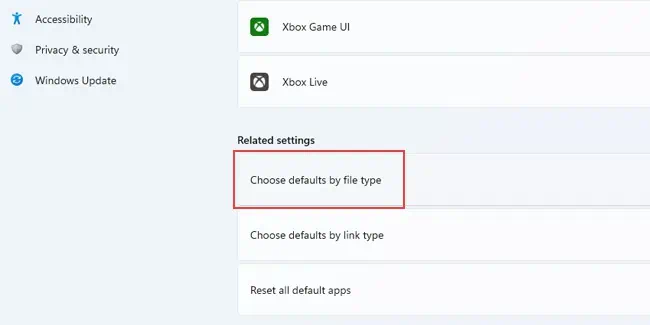
- Press Win + I and select Apps > Default apps. Scroll down and select Choose defaults by file type.

- Locate
.jpegor any other image format, and click on the Photos app.
- Select the new photo viewer app from the list. If you can’t find it from the list, select More apps > Look for another app on this PC and browse the app launcher.
- Repeat these steps for
.pngor any other image formats you wish to change the default photo viewer for.
End Sihost.exe via Task Manager
If the sihost.exe CPU usage is excessive, you can also end the process via the Task Manager to deal with it swiftly. Here are the steps to do so:
- Press CTRL + Shift + Esc to launch the Task Manager.
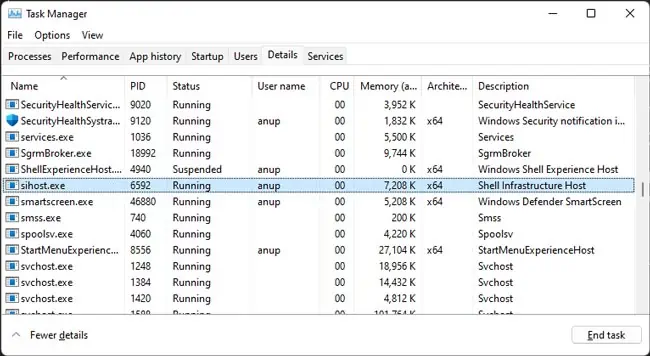
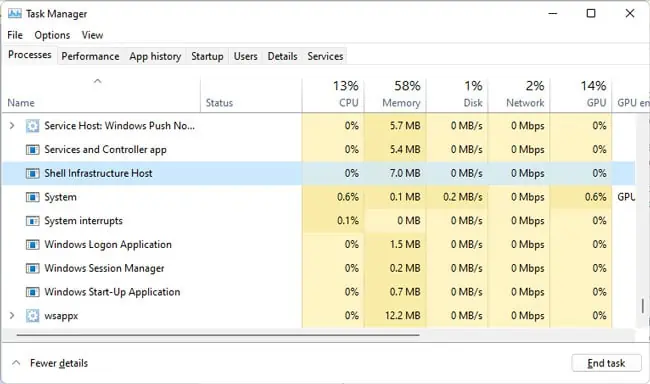
- In the Processes tab, click on the CPU heading to sort by CPU usage. You should be able to find
sihost.exeeasily this way. Alternatively, you can also switch to the Details tab and sort by name.
- Select the Shell Infrastructure Host or
sihost.exeprocess and click End Task. The UI will glitch for a couple of seconds before returning back to normal.
- In some cases, the
sihost.exehigh CPU usage persists. In such cases, end explorer.exe as well.
Repair Photos App
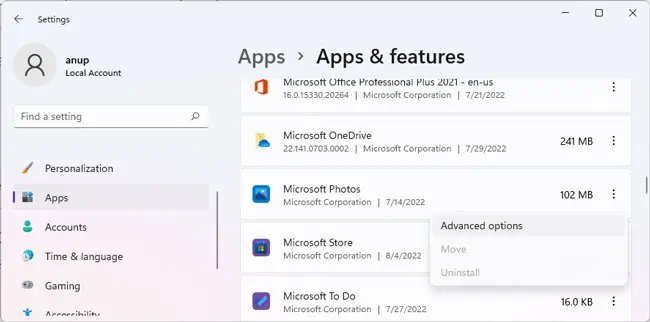
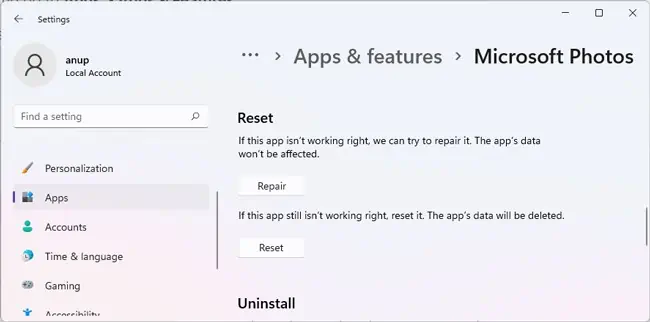
According to user reports, repairing the Microsoft Photos app can also resolve this issue. Here’s how you can try this fix:
- Press Win + I and go to Apps > Apps & Features.
- Click on Microsoft Photos and select Advanced Options.

- Repair the app and check if that resolves the issue.

Log Off or Restart Your PC
Another easy workaround is to simply log off. If logging off doesn’t work, you can restart your PC instead. Most users facing the Shell Infrastructure Host High CPU usage issue found that after restarting, the high CPU usage doesn’t occur again for a day or two.
The caveat with this workaround is that you need to keep restarting every couple of days, which can get annoying. As such, we recommend changing the photo viewer once again as a permanent fix.
Repair Corrupt System Files
Corrupted system files are a common reason why Windows components like sihost.exe malfunction and cause high CPU Usage. As such, we recommend using the SFC and DISM utilities to find and repair corrupt system files with the following steps:
- Press Win + R, type
cmd, and press CTRL + Shift + Enter. - Execute the following commands:
DISM /Online /Cleanup-image /Restorehealth
Sfc /scannow
Disable Background Slides
Some users have reported high CPU usage when using slideshow backgrounds. As using a solid picture background instead fixed the issue for them, we recommend trying the same with the following steps:
- Press Win + I and select Personalization > Background.
- In the Personalize your background field, select Picture or Solid color.

Disable Automatic Color Change and Transparency
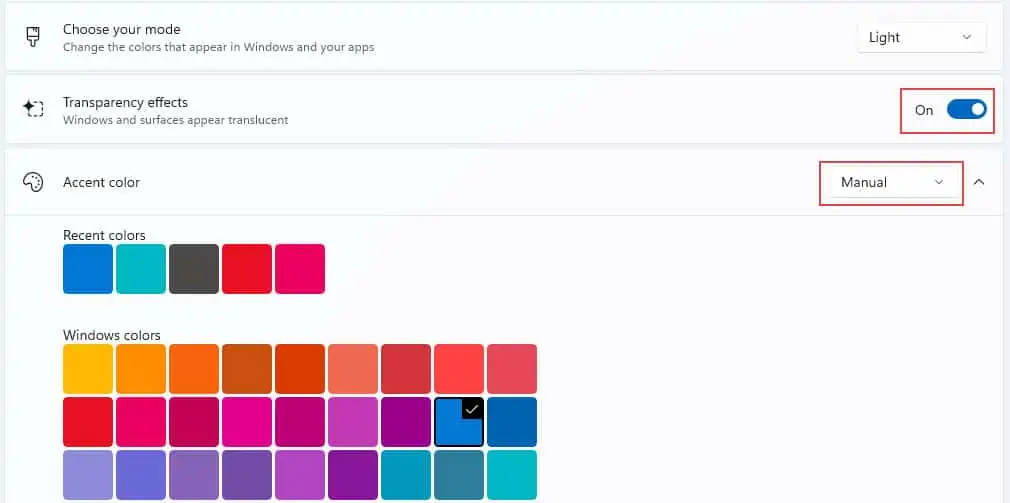
Similar to the background slides scenario, some users were also able to resolve the high CPU usage problem by disabling the automatic color change and transparency features. We recommend that you do the same with the following steps:
- Press Win + I and navigate to Personalization > Colors.
- Toggle transparency effects OFF.

- Make sure the Accent color is set to Manual.
Enable Virtualization
A few users also reported that they fixed the sihost.exe high CPU usage by enabling Virtualization. This is a niche solution for sure, but if none of the other fixes have worked so far for you, this is still worth trying.
First, press CTRL + Shift + Esc to launch the Task Manager. In the Performance tab, check if Virtualization is disabled. If it is, you can enable it with the following steps:
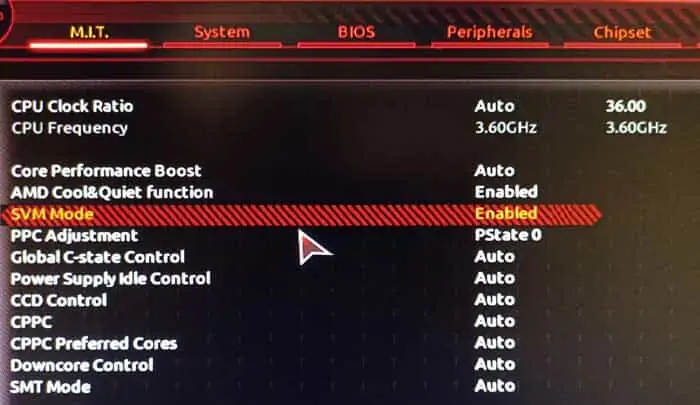
- Reboot your PC and press the BIOS Setup Key (usually Del or Fn keys).
- In the BIOS Setup Utility, switch to the Advanced, CPU, or Overclocking tabs.
- Enable the Virtualization option. Depending on your motherboard manufacturer, it may be named Intel Virtualization Technology, VT-d, AMD-V, SVM, or something similar. If you’re unable to find it, we recommend referring to this detailed article for help with enabling Virtualization on various motherboards.

- Press the Save and Exit key shown on the screen (usually F10).
Keep Windows Updated
As stated, this problem has been around for a while now, and lots of users have reported it to Microsoft. As such, Microsoft will likely patch the issue sometime soon in the future. By keeping Windows updated, you’ll receive this patch as soon as it comes out. In the meantime, the latest updates will keep you safe from other bugs and issues as well.

