Your Windows 11 becomes slow when your current hardware isn’t enough to handle all the active and background processes. However, there may be other reasons such as malware infection, fragmented hard drives and so on.
To fix Windows 11 getting slow, either limit your background activities or upgrade your current devices. Disable startup apps and services, or scan for malwares to reduce the background tasks.
Also, enable storage sense, increase virtual memory and set a higher power plan to get the best performance out of your current system.
Set Power Plan to High Performance
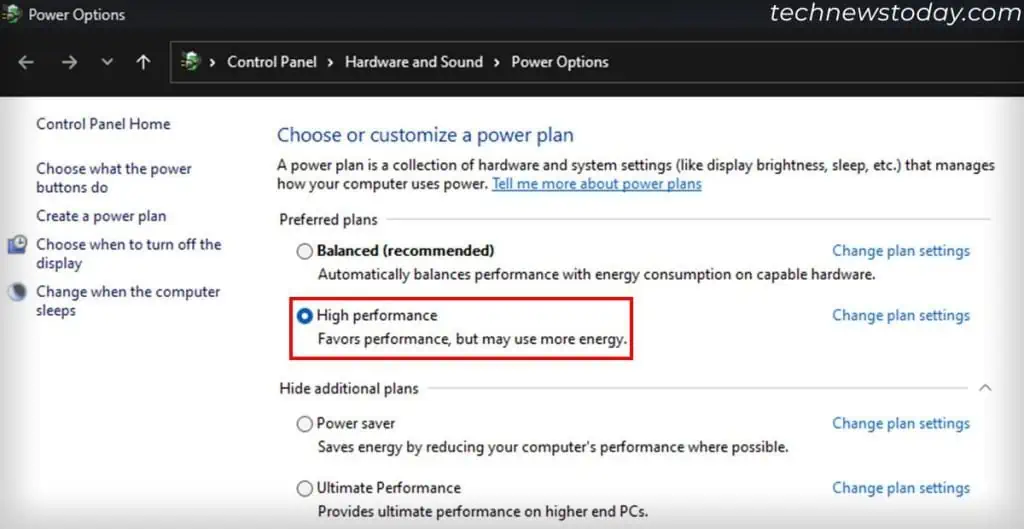
Windows comes with many pre-configured power plans that affect the system performance. By default, your system sets a Balanced configuration. However, you can enable High Performance mode to get better performance, albeit with more power consumption.
If your computer supports it, you can even enable Ultimate Performance. But keep in mind that it can reduce the lifespan of your hardware components.
Regardless, here’s how to change the power plan:
- Open Run.
- Type
powercfg.cpland press Enter. - Check High performance or Ultimate Performance.
- If you don’t find these options, expand Show additional plans first.
Check Processes Using Most Resources
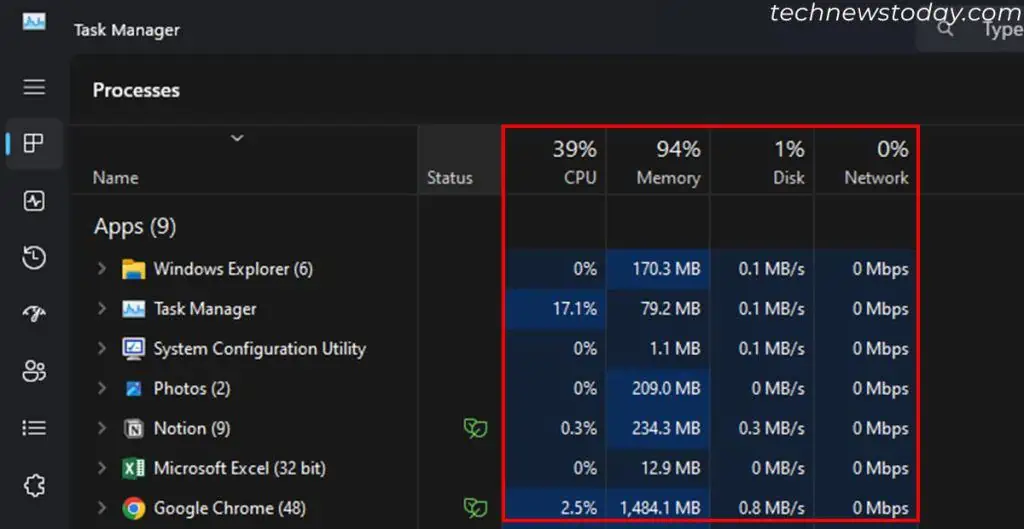
This issue usually occurs due to background processes hogging a lot of system resources. Identify the processes first, and deal with them accordingly. You can use the Task Manager for this purpose.
- Press Ctrl + Shift + Esc to open the Task Manager.
- Look for any applications using up a lot of system resources (CPU/Memory/Disk/Network) under Apps and Background processes.
- If you see any unnecessary processes, right-click on them and select End Task to close them. It should free up your memory and other resources.
- Some of these may be scheduled processes. For example,
- Microsoft OneDrive will use a lot of resources whenever it’s syncing data with the cloud.
- Antimalware Service Executable is an executable file of the Virus & threat protection utility and it mught be running a scan.
- If you see such processes, pause or close them if you need to do something urgently or simply let them complete.
- If any application keeps using most of your resources constantly, it might be a memory leak issue due to bugs in the app’s software. In such cases, check out their official sources or forums for any suggestions.
Disable Startup Applications
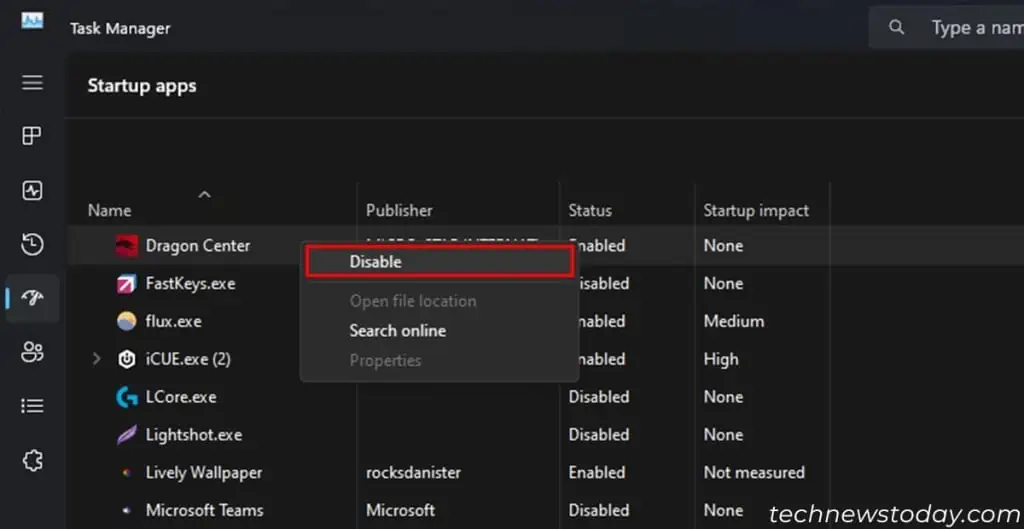
If a lot of unnecessary background processes run on your system, they are likely apps that run at startup. To prevent any such performance issues, disable these from startup altogether.
- Press Ctrl + Shift + Esc to open the Task Manager.
- Go to the Startup tab.
- Select all apps you don’t want to open on startup and click Disable.
- If you don’t know which application the process refers to, right-click on it and select Open file location. Or get help from the internet.
There are also some other ways your App can open on startup, like using the Task Scheduler. Check out our article on How to Stop Apps From Opening on Startup to disable the apps using all possible methods.
Disable Unnecessary Startup Services
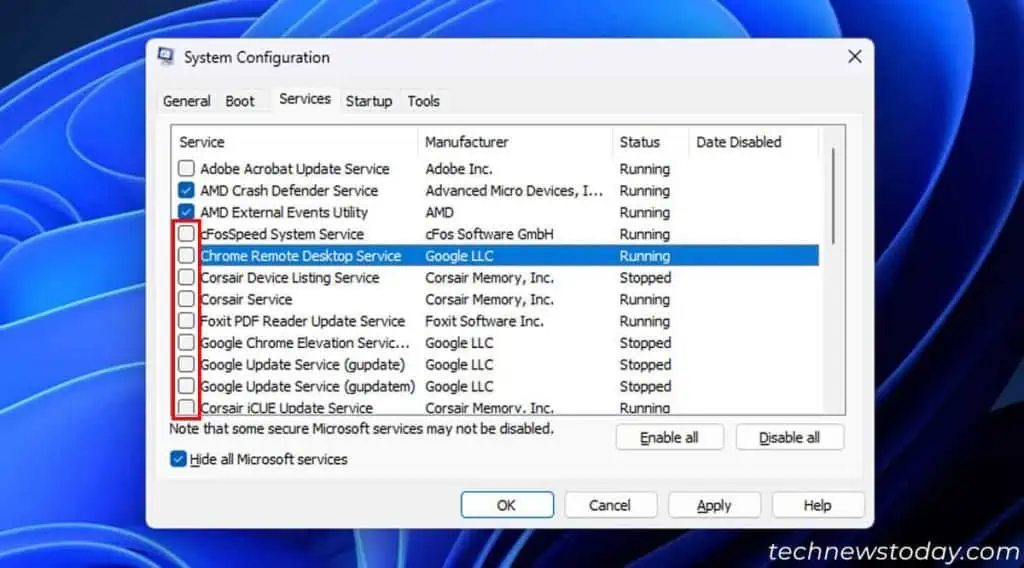
Similar to startup apps, some services, like app update services, also run automatically on your system. It’s better to disable all such unnecessary and third-party services if disabling startup apps doesn’t help much.
- Open Run.
- Type
msconfigand press Enter to open System Configuration. - Go to the Services tab.
- Tick Hide all Microsoft services.
- Look for all the remaining services and deselect unnecessary ones. You can also search on the internet if you want to know more about some services.
Enable Storage Sense
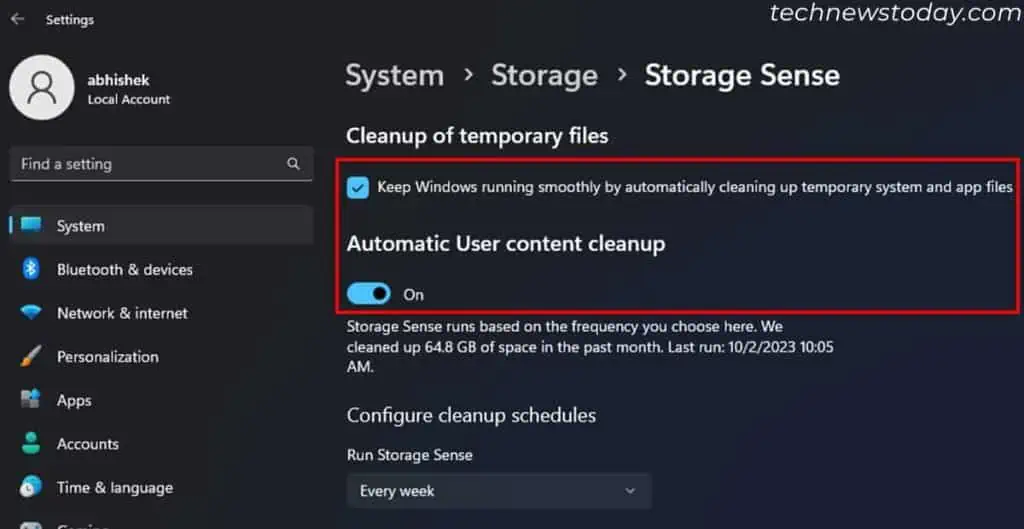
Storage Sense is the current alternative to the Disk Cleanup tool, which automatically frees up disk space by clearing temporary files.
Having low space on the C drive will significantly slow down your system as it can’t properly extend its pagefile (virtual memory) or create any temporary files. So it’s best to enable storage sense from Windows Settings to routinely clean this drive.
To do so,
- Press Windows + I to open the Settings.
- Go to System > Storage > Storage Sense.
- Check Keep Windows running smoothly by automatically cleaning up temporary system and app files.
- Then, toggle On Automatic User content cleanup.
- Set Run Storage Sense to Every day or Every week depending on your need.
- Specify the other options for the Recycle Bin and Download Folder contents.
Now your system should regularly run Storage Sense. If you want to do so manually, click Run Storage Sense now.
Check Pagefile Settings
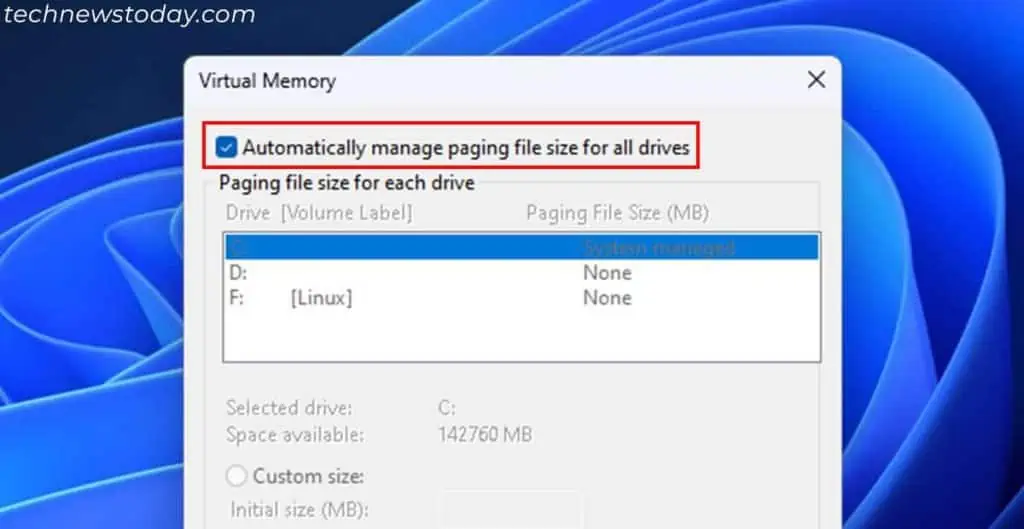
By default, your system creates a pagefile.sys file in your storage drive as virtual memory as an extension to the RAM. So if the RAM is not enough for all the running processes, your system uses this storage space instead.
Make sure there’s nothing wrong with the virtual memory by going through this setting.
- Open Run.
- Type
systempropertiesadvancedand press Enter. It will load the Advanced tab of System Properties. - Look under Performance and click Settings. Then, go to Advanced > Change.
- Check Automatically manage paging file size for all drives and click OK > OK > OK.
- Restart your PC.
In some cases, the default setting may not be enough for you, especially if you keep encountering 100% memory usage issues. Manually increase the virtual memory in such cases.
Manually Update Windows
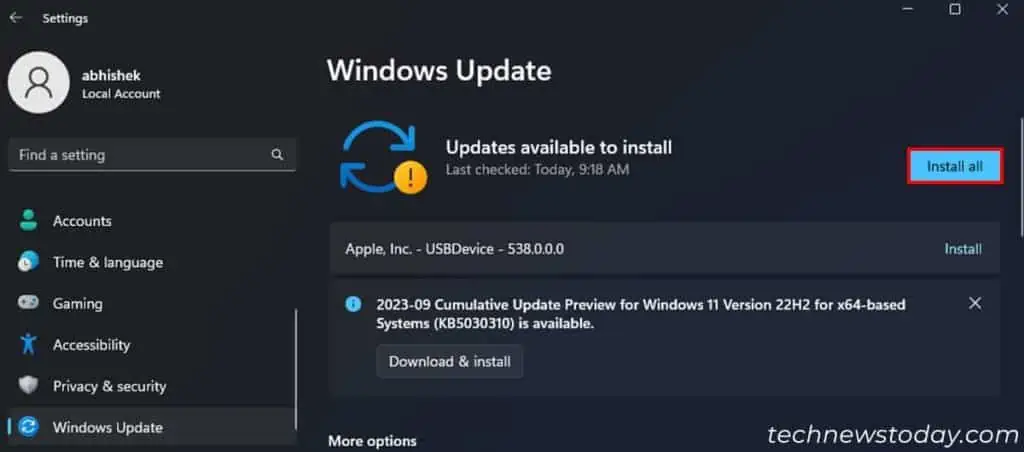
Microsoft regularly rolls out different updates for Windows to provide additional features while resolving previous issues. So you should regularly update your system in case the update comes with any speed improvement features or resolves memory leaks in certain apps.
Microsoft also provides driver updates for your devices together with the OS updates. So this process will also resolve any possible performance issues due to corrupt or faulty drivers.
However, updates use up your system resources to download and install the necessary software components in the background. So it’s better to pause automatic updates when performing any important tasks on your computer.
Scan for Malware
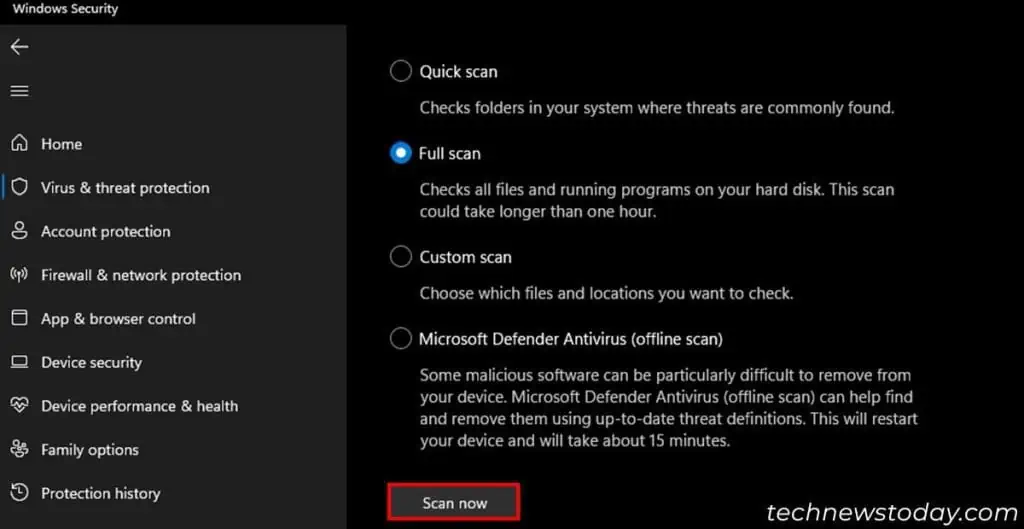
Some malwares can use up a lot of system resources and affect the system performance. So if your computer is getting slow even with powerful enough hardware and less background tasks, malware infection is a possible cause.
In such cases, use any antivirus software you have to fully scan your system. To do so using the built-in Windows Security,
- Open Windows Settings.
- Go to Privacy & security > Windows Security > Virus & threat protection > Scan options.
- Check Full scan and select Scan now.
Defragment Hard Drives
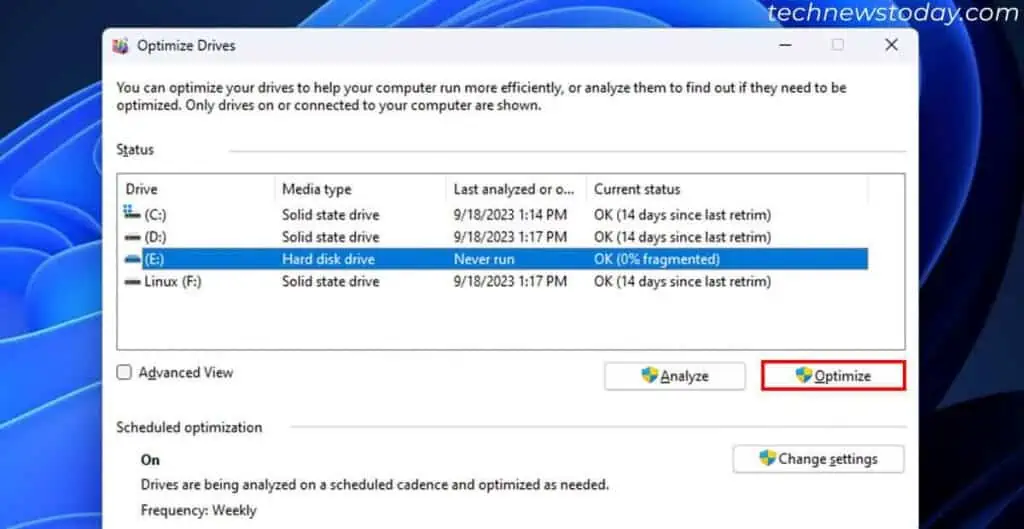
If your storage drive is a hard disk drive, it might have gotten fragmented. This phenomenon significantly reduces its read/write speeds and therefore the system performance. So it’s always better to defragment your hard drives regularly.
However, keep in mind that you should not defrag your SSDs. They operate differently and do not experience performance drops due to fragmentation. Defragmenting them will instead affect their lifespan.
If you have a HDD,
- Open Run.
- Type
dfrguiand press Enter. - Select your Hard disk drive and click Optimize.
Upgrade Computer Hardware
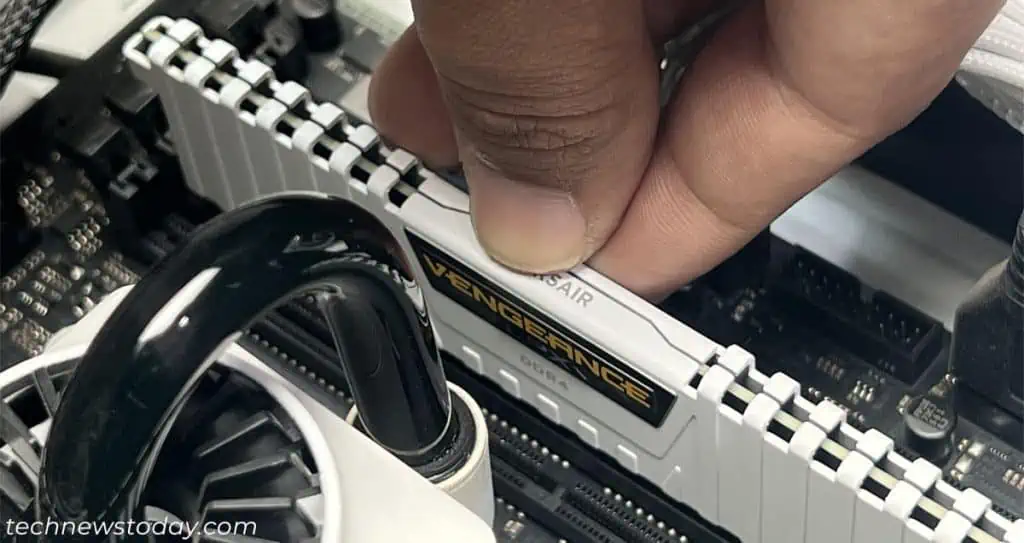
The above solutions should resolve any performance issues as long as your PC specs are enough. If your hardware components are limiting the system speed, you have to upgrade them.
First, try upgrading your RAM. Make sure to get one that is compatible with other components. Alternatively, you can add more RAM sticks to use them in multi-channel mode.
If you are using a hard drive, upgrade to an SSD and start using it as the system drive. The best way is to create a system image backup of your HDD and restore it to the SSD. If upgrading your HDD is not applicable, you can still try increasing its disk speed.
Similarly, if your computer slows down while running games or other GPU-intensive apps, install a dedicated graphics card or upgrade your current one.
Restore or Reset Your System
If you have high system specs but still can’t resolve the issue, restore your system to the point where it was not so slow. If you don’t have an appropriate restore point, factory reset or clean-install Windows.
