If your Steam Client application stops responding randomly, there may be problems with either Steam’s background process, Windows configuration, or the client application itself.
You can start troubleshooting by force-closing the Steam application and running it with elevated privileges. If that doesn’t work, try clearing the cache and repairing the crucial Steam files.
Sometimes, other factors, such as third-party firewall software and high RAM usage, can also cause Steam to stop responding. So, make sure you also consider them while fixing Steam.
Force Restart Steam
Steam relies on multiple processes to get all its features up and running. If a crucial process gets bugged out during the startup, Steam will bug out and stop responding.
While Steam can auto-repair the glitched process after a while, you can also perform a force restart from the Task Manager if the process takes too long.
- Press the Ctrl + Shift + Esc shortcut keys to open the Task Manager.
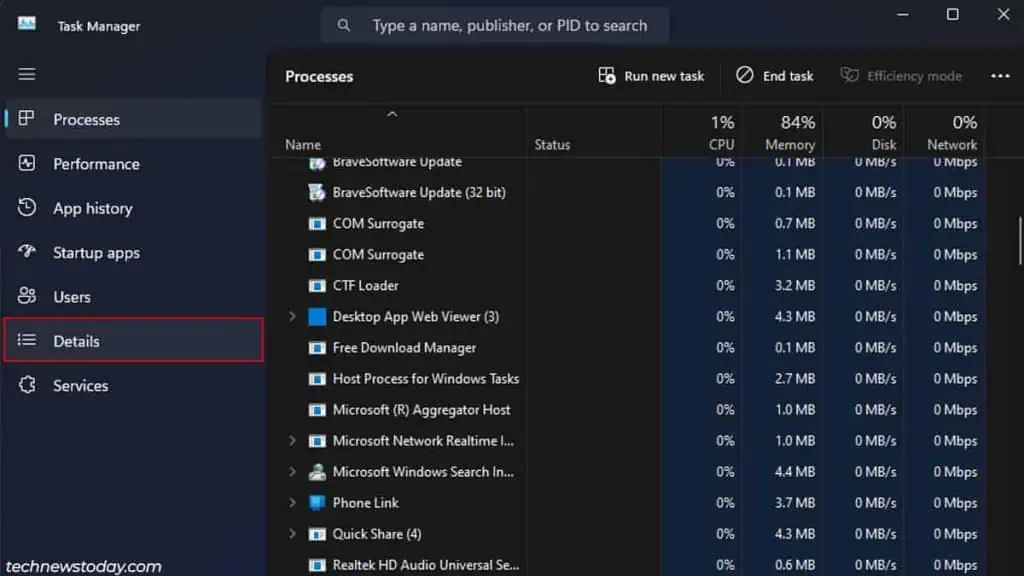
- Switch to the Details tab.

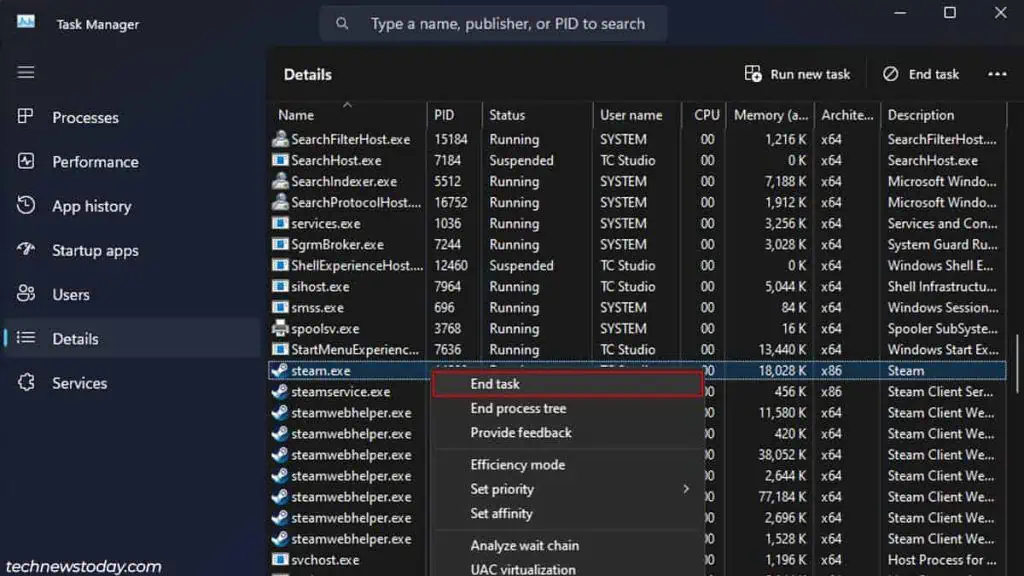
- Right-click on steam.exe and select End task.

- Click the End process button to close the prompt.
- Launch Steam normally.
Run Steam with Elevated Privilege
Sometimes, Windows can randomly suspend some of Steam’s crucial background services/processes for not having enough permissions. This can interrupt Steam’s overall process and prevent it from running smoothly.
To fix this, you can run Steam with the highest privileges by running the application as an administrator. You can do so by right-clicking on the Steam executable file and selecting the Run as administrator option.
If you want to set the administrator right as default, follow the steps below:
- Open Steam’s installation directory or navigate to “C:\Program Files (x86)\Steam”.
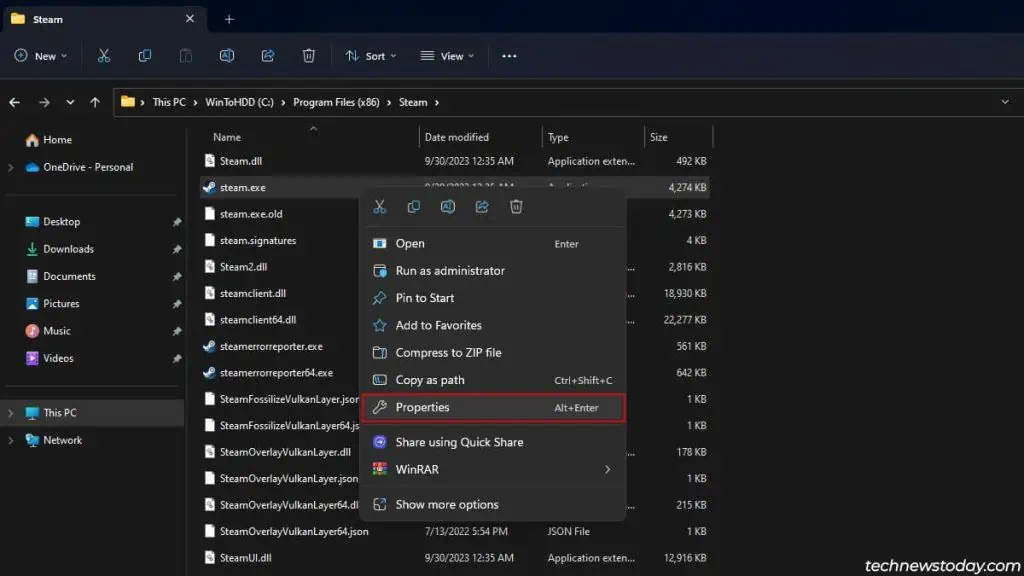
- Right-click on the Steam executable file and select Properties.

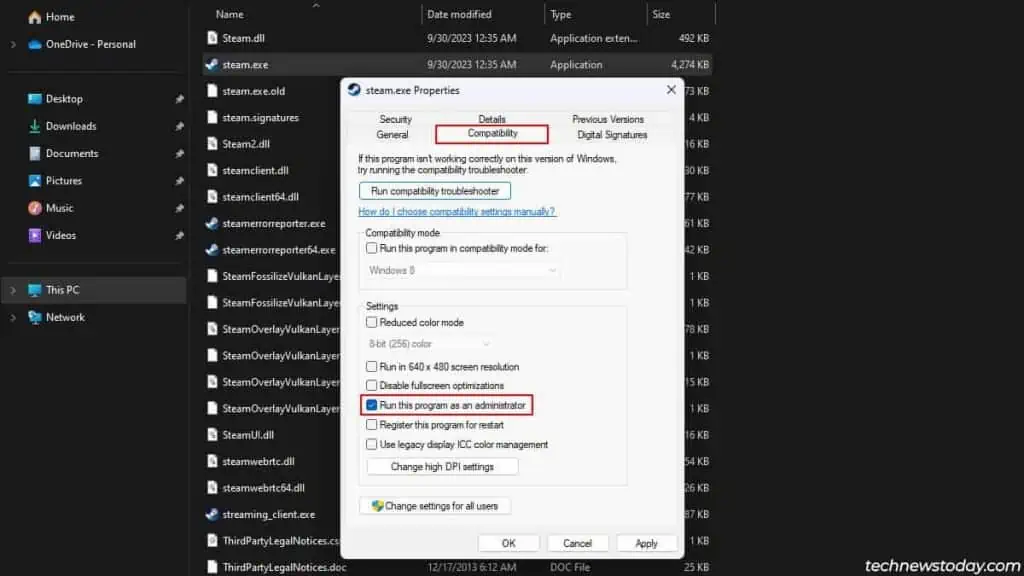
- Switch to the Compatibility tab.
- Tick the Run this program as an administrator checkbox.

- Hit Apply and then OK to save changes.
Clear Cache Files
Steam stores and uses cache files to load data from their servers quickly. However, as these files accumulate over time, they can create problems.
Furthermore, if your client application still uses outdated cache files, it can also create incompatibility issues.
Your best bet to resolve any cache-related issues is to completely clear out the outdated cache files.
Follow the steps below to clear out the Browser and Download cache file.
- Launch Steam.
- Click Steam on the menu bar and select Settings.

- Switch to the Downloads tab and hit the Clear Cache button. Click on Confirm to delete cache files. You will also need to re-login to your Steam account.

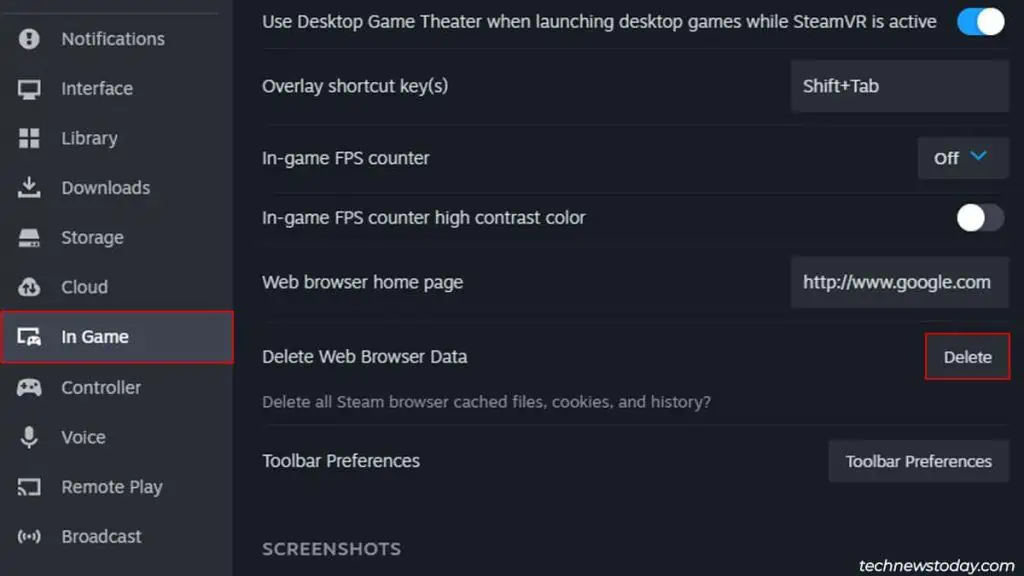
- Next, switch to In Game and click the Delete button. Hit the Confirm button to close the prompt.

Repair Steam Files
SteamService.exe is a core file in the client application that handles important background processes such as loading the store page, updating game files, syncing user profiles and games save files to the cloud, etc.
Any issues with the file can cause the Steam client application to malfunction and freeze up.
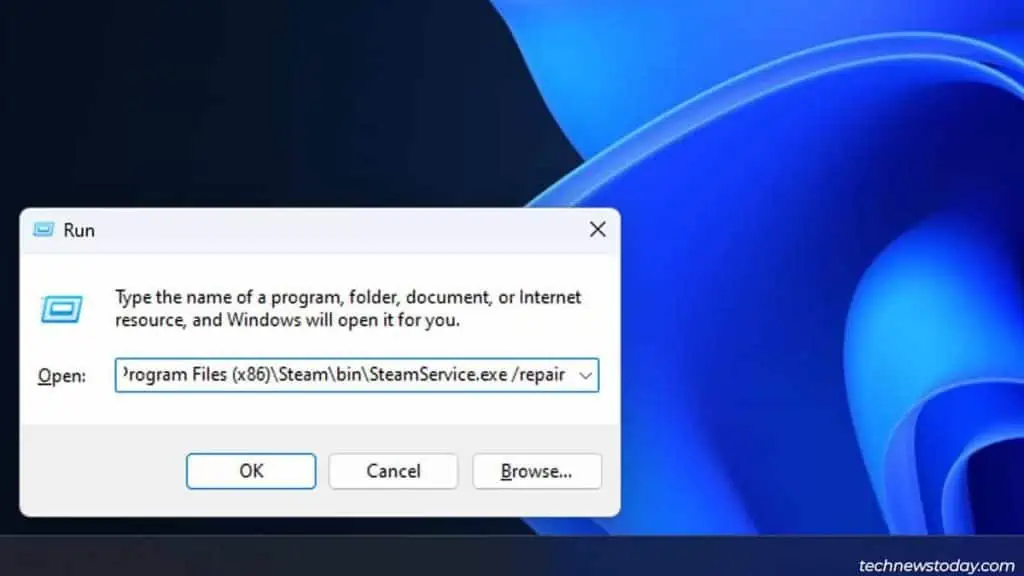
To repair a problematic SteamService.exe file, you can run a command line in the run terminal. But first, make sure to close the Steam Client Application fully.
- Open the Run Command by pressing the Windows + R shortcut keys.
- Type in
C:\Program Files (x86)\Steam\bin\SteamService.exe /repairand press Enter. Click Yes on the User Account Control Prompt.
- A terminal will briefly appear and close automatically.

- Launch Steam normally.
Disable Compatibility Mode
Running Steam in compatibility mode can cause conflict with Steam’s features and functionalities, so much so that even Valve recommends their users to turn it off to avoid any conflicts.
Here’s how you can turn off compatibility mode.
- Open the Steam installation folder or navigate to “C:\Program Files (x86)\Steam”.
- Right-click on steam.exe and select Properties.

- Switch to the Compatibility tab.
- Uncheck the Run this program in compatibility mode for checkbox.

- Hit Apply, then OK.
Check Your Memory Usage
Like any other Windows application, Steam requires sufficient memory to run all its processes and services smoothly.
If your system’s RAM capacity is low or if you’re running multiple memory-hogging applications simultaneously, then Steam will likely freeze frequently and crash.
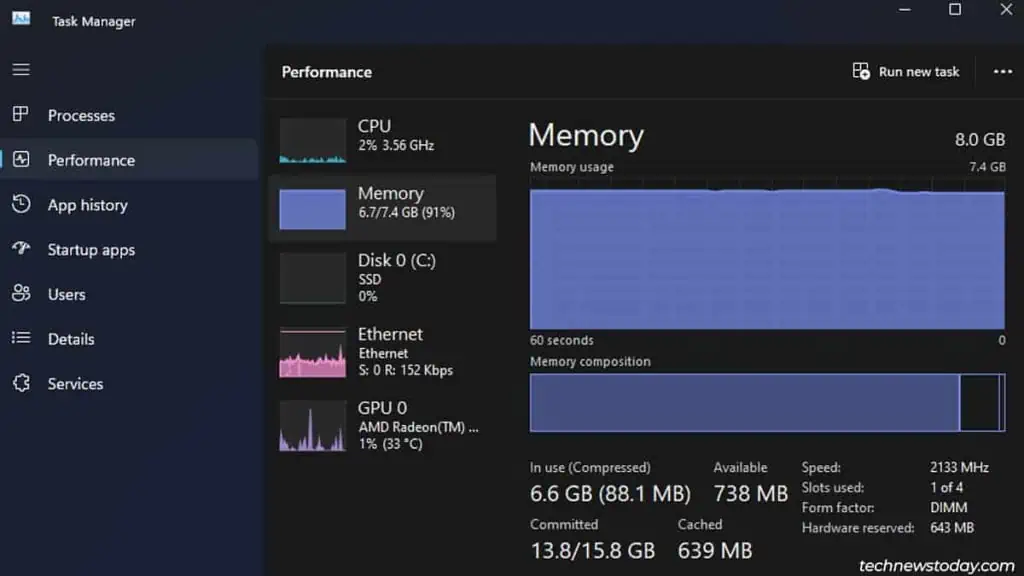
So, make sure to free up some memory before launching Steam. You can also install additional sticks of RAM to increase the total memory of your system.
Check Your Antivirus Software
Some third-party antivirus software (like Bitdefender, Norton, or CCleaner) often bundle service packages that monitor and control online processes. Sometimes, these processes can falsely block Steam services and create conflicts.
You can verify this issue by running Steam while temporarily turning off the antivirus software. If the software is causing the issue, you can either disable it or add Steam services to the exception list.
Perform a Full Re-installation
Frequent freezes and crashes can also result from problematic application installation or updates. For such cases, it’s best to remove the faulty client application from your computer entirely and install the latest version.
- Enter
appwiz.cplon the Run Command. - Right-click on Steam and select Uninstall to run the uninstallation wizard.

- After removing the application, visit Steam on your web browser.
- Hit the green Install Steam button to download the latest version of Steam.

- Run the setup file to re-install Steam on your system.


