When your computer abruptly stops working, and the screen turns blue, it means that an error has occurred that Windows can’t recover from without restarting.
Memory Management is a common stop code that many people see when their computer is having issues. It’s usually pretty easy to fix by going through your software settings, but sometimes it can indicate a physical problem with your memory.
Causes of Stop Code Memory Management
The memory management stop code is related to things like:
- Failing RAM
- Obsolete Windows
- Outdated or corrupt drivers
- I/O Issues
- Damaged system files
- Unstable overclocking
- Problems with other hardware components
Trying to fix any potential software errors before looking for hardware errors is the best way to approach fixing the problems. That way, you don’t have to take apart your computer or find other components to use in testing until it’s more likely those issues are present.
Fixing Stop Code Memory Management
Since the memory management stop code can be caused by so many things, troubleshooting it can be a process. You’ll have to try a few different things until you find the one that works.
Before You Begin
It’s essential to ensure that you’re getting the correct error code. Many people don’t have time to note the stop code when Windows shuts down because they have automatic restart turned on.
Seeing other stop codes can help you refine your understanding of what’s wrong with your system.
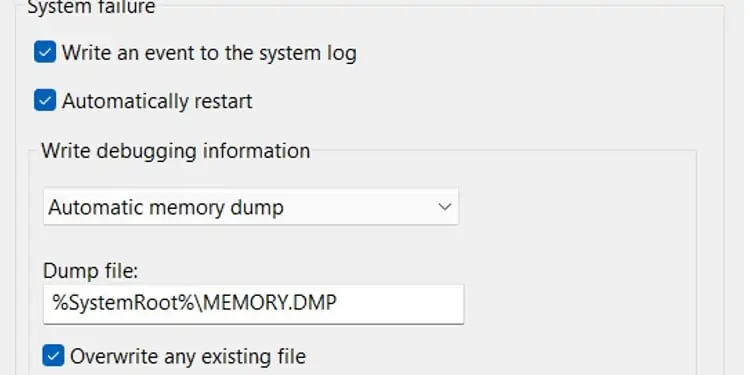
Turn off automatic restarts so that you have to manually restart the computer after you have all the information.
- Press Windows key + R.
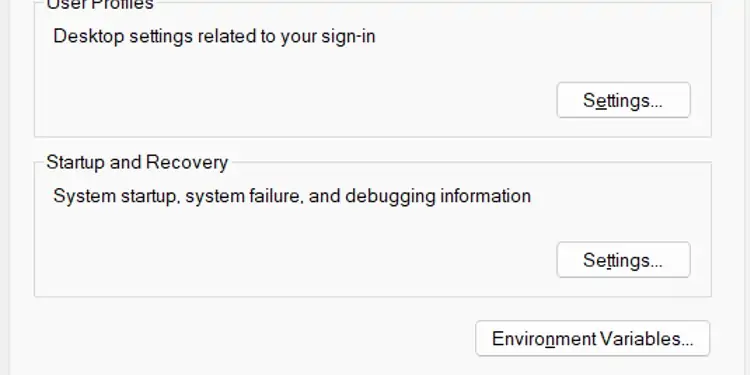
- Type “SystemPropertiesAdvanced” without quotes into the dialogue box.
- Press Enter.
- Click Settings in the Startup and Recovery box.

- Uncheck Automatically Restart.

- Click OK.
Now when your computer has a blue screen, you’ll be able to see all the information before manually restarting.
Try Using the Computer in Safe Mode
Safe mode runs Windows with the lowest possible amount of drivers and programs. It eliminates many things that can affect your computer.
- Press Windows key + I.
- Choose Update and Security.
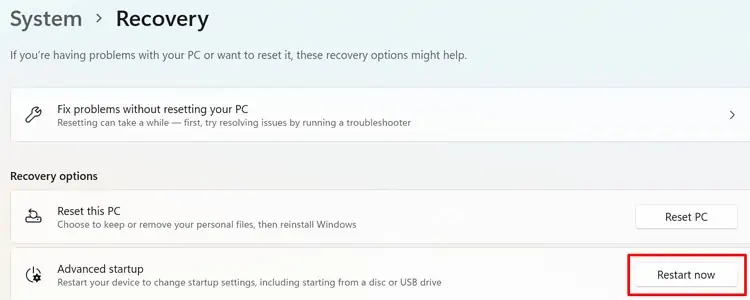
- Click Recovery in the left side panel.
- Under Advanced Start-up, Click Restart Now.

- Once the computer reboots, choose Troubleshoot.
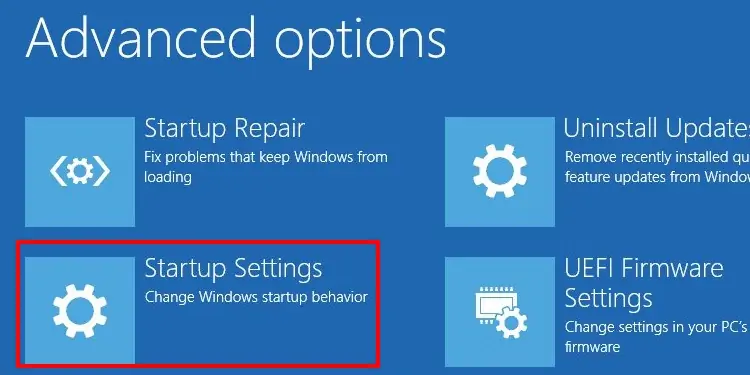
- Choose Advanced Options.
- Click Startup Settings.

- Choose Restart.
- Choose to restart in Safe Mode or Safe Mode with Networking if you want to use the Internet.
Once you have the computer in safe mode, leave it on for a while to see whether you get another stop code. You can also run some of the tests below in safe mode and again when you boot it up normally.
Perform a Memory Test
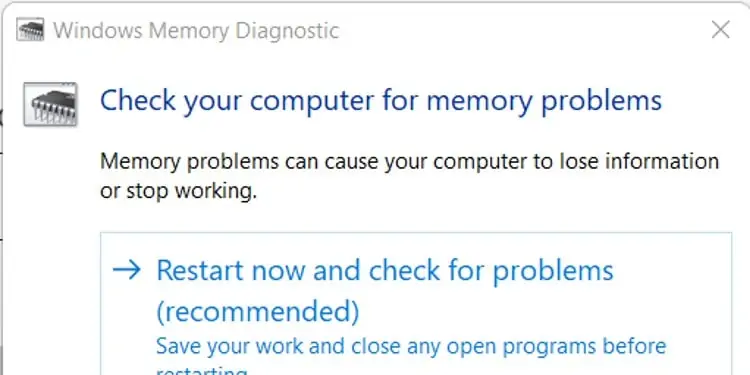
While a memory management stop code doesn’t always mean there’s a problem with your physical memory, a memory test is an excellent place to start.
- Press the Windows key.
- Type “Windows Memory Diagnostic” without quotes.
- Click the corresponding app.
- Click “Restart now and check for problems.”

- Wait for the test to run.
- Read the results on the screen once it reloads.
If the test shows there are issues with your computer, you can do a few things.
- Replace RAM sticks.
- Resolve issues with outdated or corrupted files on your PC.
- Turn down any overclocking and check your temperatures.
- Test your other components.
Luckily, these are all steps you should take to resolve memory management stop codes anyway. So even if the memory diagnostic finds errors, keep trying to troubleshoot your stop code to see if you can make them disappear.
Run a Hardware Scan
Windows has a hardware troubleshooter that might find and fix the problems causing you to get a stop code.
Update Your Drivers
Any drivers that aren’t updated on your computer can cause issues with your system. It’s quick and easy to check for driver updates.
You can update drivers through Device Manager by right-clicking each component and updating individually. That should take care of most of the devices on your computer.
If you’re using AMD or NVIDIA GPU hardware, you might also want to update graphics drivers through their programs.
Check for Windows Updates
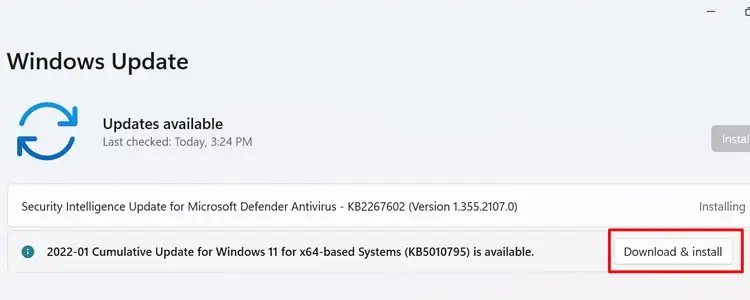
If you don’t have Windows updates set to install automatically, check if any are available. Sometimes they include fixes that solve issues like stop codes.
- Press Windows key + X.
- Click Settings.
- Choose Update and Security.
- Click Check for Updates.
- Click Download and Install.

- Follow the prompts to complete your update.
You can also click View Optional Updates under the standard update window. Here, you can see optional driver updates. Only choose them if you have a specific problem with a connected device.
Run SFC
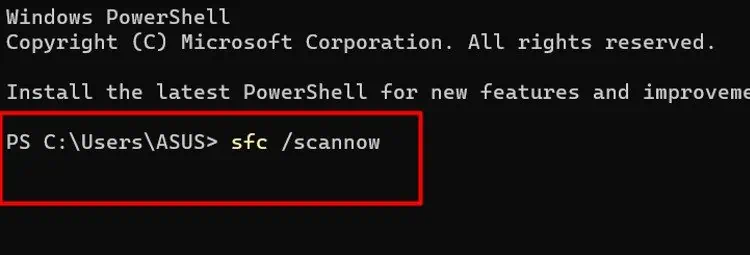
The System File Checker is a Windows utility that finds corrupt system files and replaces or fixes them.
- Press Windows key + X.
- Choose Windows PowerShell (Admin).
- Click Yes.
- Type “sfc /scannow” without quotes.

- Press enter and let the scan run.
- Read the results.
If the utility locates errors and can’t repair them, you’ll have to reinstall Windows or find a new copy of the system file to replace it with.
Replacement is possible, but in most cases, the best thing to do is to back up your files and restore Windows. That way, you don’t have to track down a copy of the file and go through the steps to take administrative ownership of it and replace it on your system.
Suppose you can’t find any errors on your computer and continue getting the memory management error code. In that case, a fresh operating system installation is an excellent way to ensure that all your settings and file errors are solved in any case.
Try CHKDSK
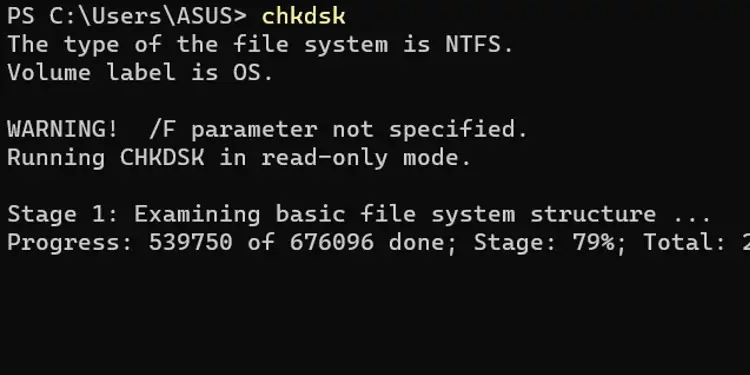
CHKDSK is another utility that can check your system files. It may also be able to fix the errors it finds. It compliments SFC, so it’s better to run both utilities rather than just one.
- Press Windows key + X.
- Choose Windows PowerShell (Admin).
- Click Yes.
- Type “chkdsk” without quotes.

- Press Enter.
- Type “chkdsk /f” without quotes.
- Press Enter.
Use the command /f to fix errors. If you want to check for physical errors on the drive, replace /f with /r.
This only performs CHKDSK on the default hard drive, like C drive. To run it on other disks, type “chkdsk X:” where the drive letter replaces X.
Use DISM
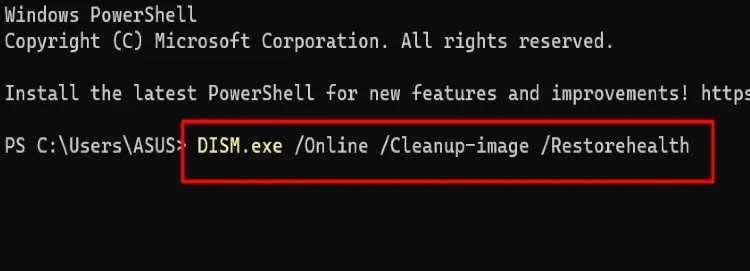
DISM stands for Deployment Image Servicing and Management. It can help you restore files that have been damaged by a variety of activities and problems.
- Press Windows key + X.
- Choose Windows PowerShell (Admin).
- Click Yes.
- Type “DISM.exe /Online /Cleanup-image /Restorehealt” without quotes.

- Press Enter.
- Wait for the program to finish.
Once DISM is complete, shut down your computer. Try to rerun the other two utilities, especially if they encounter errors. The errors they found might be fixed after this is done.
Clean Your PC and Reseat Your RAM
Problems with heat management can come from having dust build up in your computer. These problems can lead to issues with your hardware and computer’s performance.
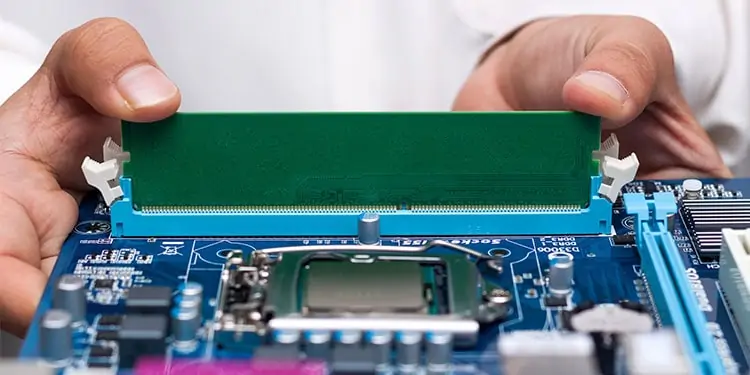
Since the memory management code is related to RAM, take out your RAM, clean it and the computer, reseat it, and then try to use your computer again. This will help fix heat management issues and the RAM being seated improperly.
- Shut down the computer and turn off the PSU power switch. Unplug it from the wall. Hold down the power button to discharge any excess electricity.
- Open your computer in a clean, level workspace. You can lay it on the side to make it easier to remove the RAM.
- Pull the RAM free of the RAM slots. Depending on your build, you may have to remove other components. Most machines also have RAM slot clips that you have to remove. Don’t be too rough, and don’t force it out of the slots.
- Use compressed air to blow off any dust.
- Use a lint-free swab dampened with 99 percent isopropyl alcohol to clean the contacts on the RAM. When they’re clean, let them air dry for at least four hours.
- Blow the dust out of the rest of your computer, making sure to focus on the heat-management systems, the motherboard, and the RAM slots. Inspect the RAM slots and motherboard for any apparent physical damage.
- Gently insert it back into the RAM slots when the RAM is dry. Latch the clips, if required.

- Restart your computer and see whether or not this fixed the stop codes.
As long as you have your computer open, check to ensure your fans are running as usual. You should also be monitoring your CPU and GPU temperatures from time to time. If you notice increasingly high temperatures, it might be time to replace fans, get a new cooler, or reapply a new thermal paste.
Examine Your Motherboard for Damage
If you can get a clear view of your motherboard, you can examine it to see whether there’s damage on the surface. If there is, it might be contributing to the memory management stop code you’re receiving.
There are a few different signs of physical damage.
- Burned marks moving across the surface of the motherboard.
- Blown capacitors that looked bulged or out of shape.
- Breaks in the board itself.
- Any signs of melting.
Not every problem with the motherboard will be visible, but it’s an excellent way to see whether there’s some kind of problem with it. You can use a light to take a closer look and perhaps see more minor signs of damage.
At this point, what seems to solve the problem for most people is resetting Windows. Make sure you back up all your files. A complete wipe that eliminates everything is your best bet for a clean system.
Frequently Asked Questions
Can a GPU Cause BSOD?
Yes, a graphics card can cause a blue screen of death. The graphics card itself could experience an issue. The drivers that support it can also conflict with something or be damaged and cause your computer to stop working.
What Causes Memory Management Blue Screen?
The memory management blue screen is the same as a memory management stop code. It’s probably linked to the RAM, outdated drivers, or running a corrupted driver. Working through the steps above should help you fix the problem.
How Do I Stop My Computer From Blue Screening?
You can’t turn off blue screens. The only way to stop them is to fix the problem causing them.

