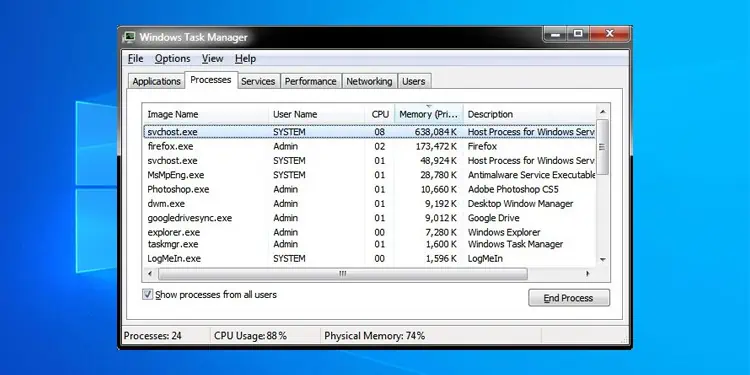
Any Windows component that you use, from your user profile to Windows Update, works because of various processes and services running in the background. Some of these processes can be found under the label Service Host or svchost.exe, in the Task Manager.
To quote Microsoft, “Service Host (svchost.exe) is a shared-service process that serves as a shell for loading services from DLL files.” As you may now see, the svchost.exe high CPU usage issue is actually an issue with a specific service (ex. Windows Update – wuauserv) rather than Service Host itself.
And as for how to fix this issue, the exact solution will depend on what service is causing the high CPU usage in the first place and why. We’ve detailed the most common ones and how to resolve this in the sections below.
What’s Causing Svchost.exe High CPU Usage?
- Update issues
- System file corruption
- Malware
How to Fix Svchost.exe High CPU Usage?
Before we start, if the CPU usage is so high that your system is crashing, you can end the problematic process via the Task Manager. It will likely restart again and accumulate CPU usage eventually, but this should still buy you some time for troubleshooting.
Identify Problematic Service
Press CTRL + Shift + Esc to launch the Task Manager and click on More Details if necessary to switch to Expanded View. In the Processes tab, you should be able to identify which specific service is causing the high CPU usage issue. If the problematic service is not essential, you can disable it with the following steps:
- Right-click the service and select Open Services.
- Locate the service in the Services utility and double-click it.
- Stop the service, change the Startup type to Disabled, and press OK.

In some cases, the problematic service may be a critical system component that you can’t or don’t want to disable, like Windows Update, for instance. For such scenarios, we recommend applying other solutions as appropriate from the ones listed below.
Revert Recent Changes
Often, after installing a new program such as an antivirus, users notice increased CPU usage from Service Host. This is because the program is conflicting with some background services. The same applies to system configurations as well.
For instance, some users reported high CPU usage after making changes to the firewall settings. As it turns out, the new firewall configurations made network-related services such as Internet Connection Sharing (ICS) malfunction, which ultimately showed up as high CPU usage by Service Host.
Of course, this is just one example. The culprit is most likely different in your case. The takeaway here is that if you installed any new programs or made any system changes, especially security-related ones, right before the issue began, reverting that change is very likely to help.
Troubleshoot Windows Update Issues
The Windows Update service (wuauserv) is the service that most often causes the svchost.exe high CPU usage issue. The underlying reason why this service malfunctions so much varies, but here are some of the most effective ways to fix it:
Use Windows Update Troubleshooter
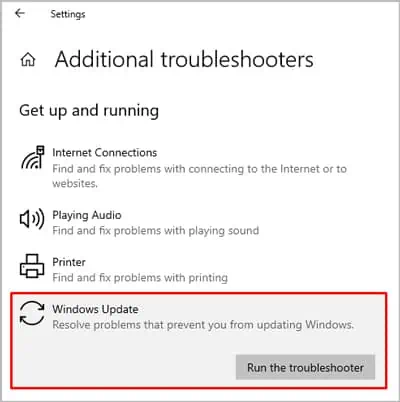
Windows has a dedicated troubleshooter for dealing with update issues. You can use it with the following steps:
- Press Win + I and navigate to Update & Security > Troubleshoot > Additional troubleshooters.
- Click on Windows Update and select Run the troubleshooter.

- Follow the on-screen instructions to fix any issues found.
Troubleshoot Update with Error Code
Press Win + I and select Windows Update. If you see a specific error code such as 0xc1900101 here, look up the code online and take steps to troubleshoot that specific error. We also have numerous troubleshooting guides on our website for such errors, which you may find helpful.
Manually Install Failed Updates
Navigate to Windows Update > Update History and check the Update History log. Windows could be trying to install an update and failing, then repeating the process in a loop, which ends up causing high CPU usage. To fix this, you can note down the failed update and install it manually from the Microsoft Update Catalog.
Clear Update’s Download Cache
Finally, by clearing the update’s download cache, you can force Windows to re-download a clean copy of the files, replacing any corrupt files in the process. Here are the steps to do so:
- Press Win + R, type
cmd, and press CTRL + Shift + Enter. - Execute the following commands:
net stop wuauserv
net stop bits
net stop cryptsvc
net stop trustedinstaller
del %systemroot%\softwaredistribution
del %systemroot%\system32\catroot2
net start wuauserv
net start bits
net start cryptsvc
net start trustedinstaller
- Restart your PC. You should be able to update successfully now, which means
svchost.exehigh CPU usage won’t be an issue anymore either.
Disable SysMain (Superfetch)
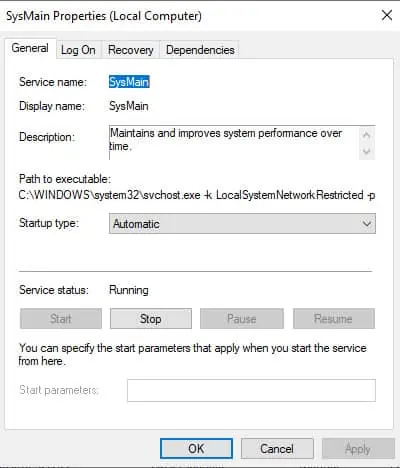
SysMain is a Windows feature that analyzes your application usage patterns and preloads some of them into the Standby memory. As the applications are already loaded, this reduces the load times. Unfortunately, SysMain malfunctions quite often, meaning aside from Windows Update, this is the most common service behind the svchost.exe high CPU usage.
SysMain does have its good points. So, we recommend giving this in-depth article on SysMain a quick read, but if you do decide to disable it, here are the necessary steps:
- Press Win + R, type
services.msc, and press Enter. - Locate SysMain from the list of services and double-click it.
- Stop the service, change the Startup type to Disabled, and press OK.

Repair Corrupt System Files
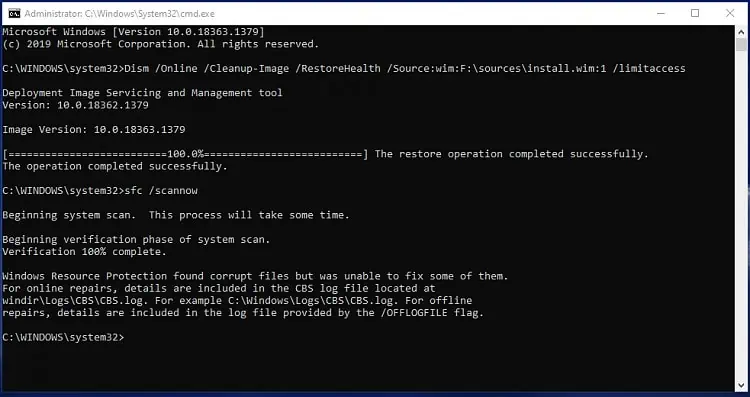
System file corruption is a very common reason why various Windows components stop working properly. Such corruption often happens due to system crashes, update issues, or malware. Regardless of the cause, here’s how you can repair the corrupted files and fix the svchost.exe high CPU usage issue:
- Press Win + R, type
cmd, and press CTRL + Shift + Enter. - Execute the following commands to check for corrupted system files:
dism /online /cleanup-image /scanhealth
sfc /verifyonly - If corrupted files are found, execute these commands next to repair them:
dism /online /cleanup-image /restorehealth
sfc /scannow
Scan for Malware
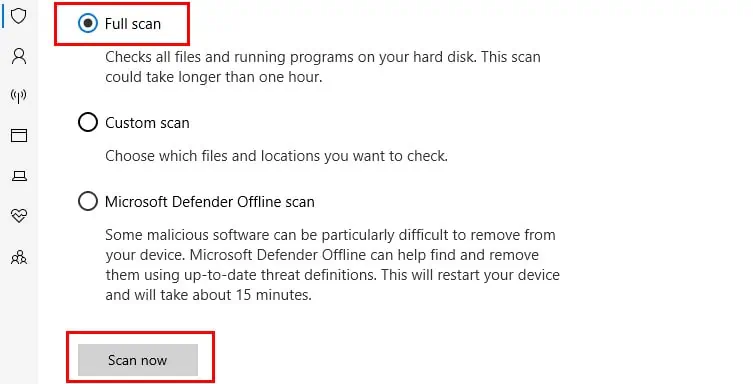
Users have reported cases where malware disguised itself as a system process and caused the svchost.exe high CPU usage issue. Generally, a full scan with your antivirus or Windows Defender will suffice to deal with the virus. Here are the steps to do so using Windows Defender.
- Press Win + I and navigate to Privacy & Security > Virus & threat protection.
- Select Scan Options > Full Scan and press Scan Now.

- Let the scan run its course and clear any threats found.
There have also been cases where rootkits caused the high CPU usage via the winrscmde process. Although rare, this is something worth noting. In such cases, Windows Defender or an antivirus won’t be of much help. We recommend using Rkill and TDSKill instead.

