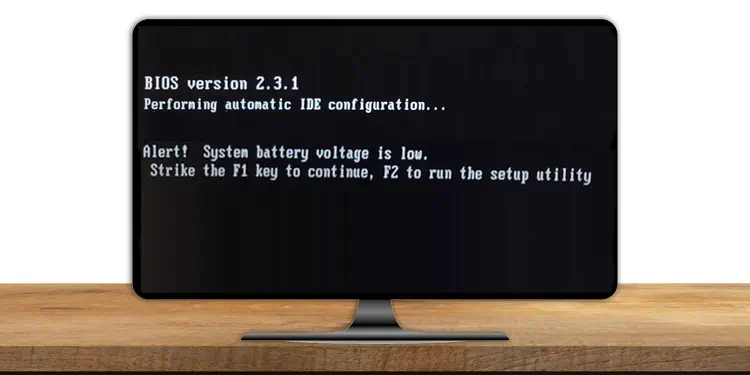
Sometimes, you may find your boot screen gets stuck with an error message “System Battery Voltage is Low” waiting for you to press the F1 key to continue.
This generally happens when the BIOS has difficulty fetching the hardware information from the CMOS. It can be caused by a depleted or faulty CMOS battery or a faulty sensor.
Whatever the causes, in this guide, we are going to provide workable fixes to get your system rid of this error.
How to Fix the “System Battery Voltage is Low” error?
A small battery powers the CMOS chip that stores the BIOS information for a system startup. This battery is not perpetual; its voltage can get low over time. This causes the system to be unable to connect with the CMOS chip and cannot load the boot information. As a result, it shows the error.
As the issue is related to the CMOS and BIOS, changing the battery or making some changes in the BIOS setting should solve the issue.
So, let’s not delay anymore and get into fixing the “System Battery Voltage is Low” error right away.
Reset BIOS Settings
Sometimes, the BIOS information may get corrupted due to the installation of incompatible hardware, power failure, or Power-On-Self-Test (POST) errors. As a result, the BIOS may not be able to recognize the components or receive the boot information properly, causing the error.
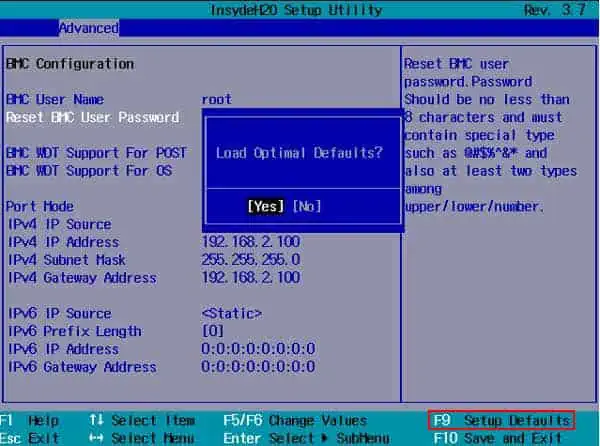
So, resetting the BIOS settings should fix the problems in most cases. Let’s go through the way to reset BIOS settings to default.
- Power your System on.
- Repeatedly press F2, F12, or the respective key right after the system starts to open the BIOS page.
- Find the key that is associated with Load Defaults or a similar option. Press the key.

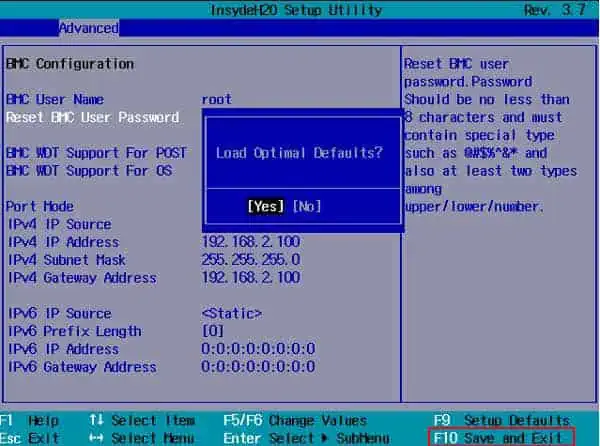
- Look for the key that will save the changes and press that button.

- Restart your system.
See if the problem goes away.
Clear System Event Log in BIOS
The system event log (SEL) in BIOS consists of the power, temperature, failure, and diagnostics events during boot. Resetting BIOS does not clear SEL. So, if the memory allotted for storing the log files gets filled, or the SEL experiences some errors, then the issue of low system voltage may arise.
Clearing the system event log frees up the space and can fix the file solving the problem. But all the computers may not have access to the system event log in BIOS. So, if your system’s BIOS provides the function, let’s see the way to clear SEL.
- Restart your system and press the F2 or respective key repeatedly to get into the BIOS page.
- Find Advanced Options or similar.
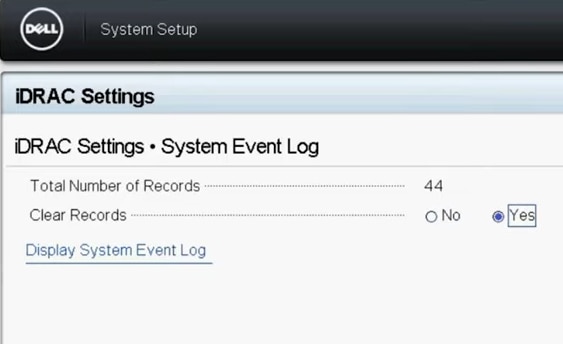
- Look for System Event Log or IPMI and find System Event Log inside it. In Dell PCs, you may find the settings inside iDRAC Settings in BIOS.

- Set Clear System Event Log to Enable or Yes.
- Press F10 to save the settings and exit BIOS.
Inspect whether the problem is still there.
Reinstall or Replace the CMOS Battery
This error can mostly occur if the CMOS battery gets affected by some means. The battery might have become loose, or it may actually have gotten low in power. The CMOS battery sensor operates between 2.6 to 2.9 V. And the system will continuously show the error if the battery voltage gets below it.
If that is the case, removing and reinstalling or replacing the CMOS battery will fix the issue. Let’s move on to checking the CMOS battery and reinstalling it.
- Power off your system and remove all the cables.
- Perform a power cycle by pressing the power button for around 15 seconds, thus removing all residual powers from the system.
- Unscrew the casing to access the motherboard.
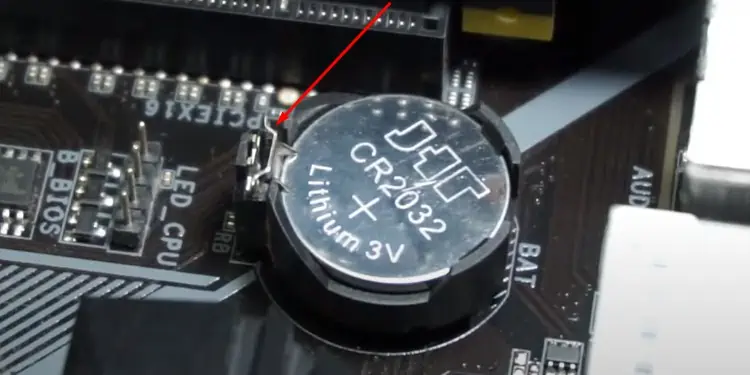
- Find the round-shaped CMOS battery on the motherboard and press the lock sideways to remove it. In some systems, the GPU may be above it. You will have to remove the GPU to access the battery.

- Check the motherboard’s CMOS socket to find any damage.
- If you find it all good, reinstall the battery such that the negative end remains on the bottom and the lock holds it properly.

- Run the system to see if the problem is resolved.
- If not, replace the battery with a new one following the same process.
- Go to BIOS and set the date and time accordingly.
Check if the error has now gone away.
Reset CMOS using Jumper
Normally, reinstalling the battery resets the CMOS and BIOS settings. But if you perform the operation within a few seconds, then the residual power of the capacitors prevents the CMOS from getting erased. Furthermore, some modern systems may have soldered CMOS battery. In such a case, you can reset the BIOS or CMOS using a jumper.
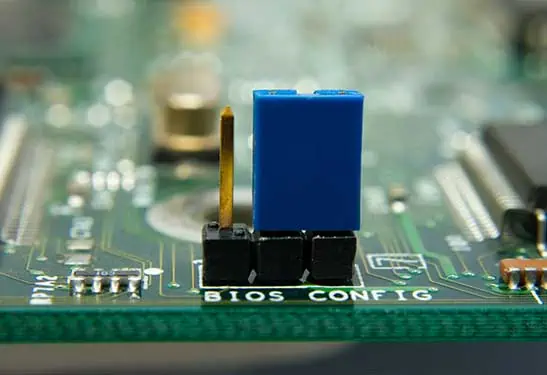
A jumper is a small plastic connector that acts as a switch to short any circuit. It is available in most desktop motherboards in 2-pin or 3-pin switches. Here are the ways to use a jumper to reset the CMOS.
- Shut down your system and remove all the power cables. Press the power button for around 15 seconds to drain residual powers completely.
- Remove the casing cover to access the motherboard.
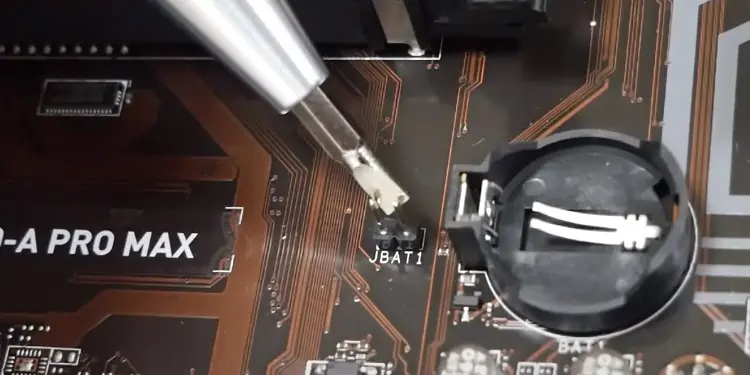
- Look for labels like CLR, CLEAR, CLEAR CMOS, RTCRST, JBAT1, and similar to find the jumper switch. You can use your motherboard’s manual to find the correct one.
- If it is a 2-pin jumper, use a screwdriver or anything similar to keep the two pins in contact. Alternatively, you can find the PSWD jumper, remove the plug from it and insert it into the CMOS jumper switch.

- If it is a 3-pin jumper, use the jumper plug connecting Pin 1 and 2 instead of the default Pin 2 and 3.

- Keep the jumper plug connected and connect the power cable to your system.
- Remove the power cable after 10 seconds, return the jumper plug, and switch to their original state.
You should find your CMOS cleared and the “system battery voltage is the low” issue solved. However, we do not recommend doing this on a laptop as it does not have a jumper. And, it requires a steady hand and knowledge to short the circuits in the laptop without a jumper.
Check Surge Protector and other Hardware
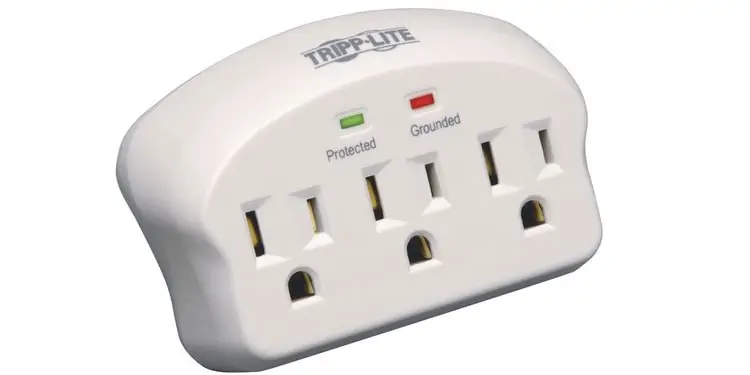
A surge protector prevents voltage fluctuation in any electronic system. But if the surge protector is damaged by some means or you are using a cheaper one, it may not work properly. As a result, your system might not be protected, causing the issue. It may even have damaged the CMOS sensor.
You should check whether the surge protector is functioning well and providing stable voltage. Most surge protectors have a green and red LED to indicate their state. If you have a green LED turned on, then it is working well. The surge protector may be faulty if the red LED or no LED is turned on. However, the LEDs may not always show the state accurately.
If you find some faults in it, you can get an optimum surge protector for your system.
Similarly, some new hardware or cables can also cause this issue. If the error started after making such changes, try removing them to see whether the issue goes away.
Update BIOS
BIOS update fixes a lot of issues related to CMOS and BIOS firmware. If the system’s low battery voltage issue arose due to some bug in BIOS, then updating it can do the trick.
However, updating BIOS is a risky endeavor, and you have to take important precautions before doing it. We have prepared a comprehensive guide on updating BIOS safely to assist you in this front.
What if Replacing CMOS Battery Does Not Solve the Issue?
As we mentioned earlier, the CMOS battery is detected by a sensor that works between the voltage of 2.6 to 2.9 V. If your motherboard’s battery is in full capacity and the error still does not go away, then the sensor may faulty. A damaged sensor cannot detect the battery, and the computer believes there is no battery at all.
We do not recommend checking or repairing the sensor yourself, as some errors may cause the whole motherboard to be damaged. So, take the system to the nearest service point or a professional for inspection and repair.
Related Question
How Does a Jumper Reset CMOS?
The BIOS keeps the boot information in the non-volatile memory of CMOS. Every time the system starts, the BIOS asks for the hardware information to CMOS and uses it to initiate them. A jumper closes the CMOS circuit instructing BIOS to work directly without getting to the CMOS chip. It also disconnects the battery causing the saved settings to erase, hence resetting the CMOS.

