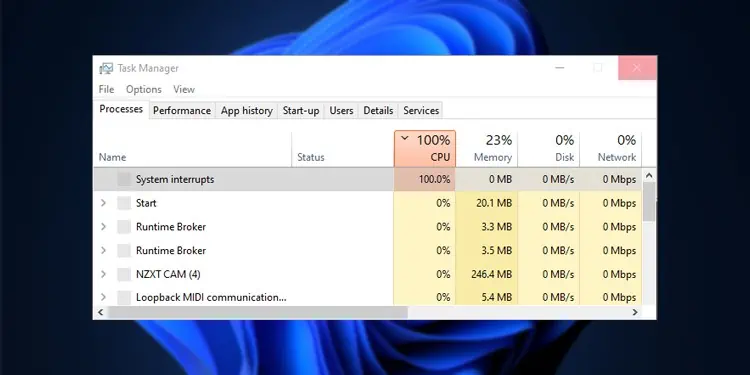
100% CPU usage due to system interrupts indicates that some hardware component or device driver is failing and generating more interrupts than your system can handle.
To fix this, you should first use tools like Process Explorer to identify the faulty component. Then, you can update or roll back the device driver. Or if dealing with faulty hardware, you can remove and replace the devices.
I’ll walk you through this entire troubleshooting process and also provide some additional general fixes in this article.
Diagnose the Faulty Component
First of all, reverting any changes you made right before this problem started could be the easiest solution. Besides that, if your system is non-responsive due to high CPU usage, restarting should get it temporarily working.
Process Explorer
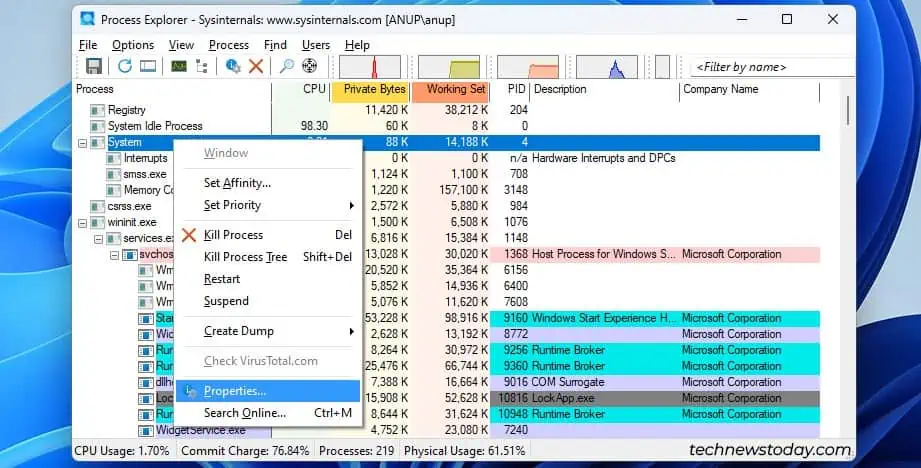
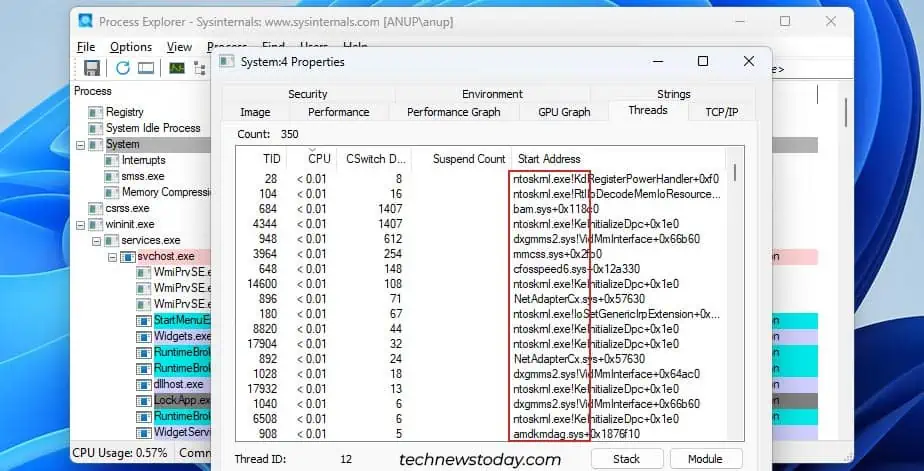
Process Explorer lets you take a deeper look inside the System process and identify which exact threads are maxing out the CPU usage. This can lead you to the driver generating all these interrupts.
- Download Process Explorer and launch it with the executable.
- Right-click the System process and select Properties.

- Google the entries with the highest CPU usage to identify them. For reference, some usual culprits seen here include
risdxc64.sys(card reader driver),avc3.sys(BitDefender driver),aswbidsdriver.sys(Avast driver), etc.
- Troubleshoot the drivers with the fixes described further in the article.
Driver Verifier
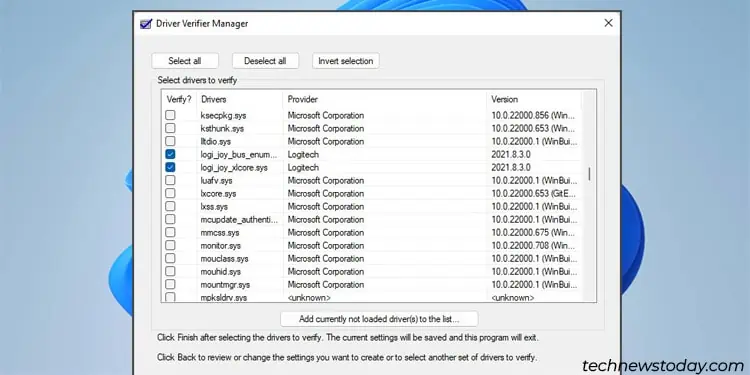
Driver Verifier stress tests the drivers with the goal of detecting any problematic behavior. In rare cases, this can lead to further crashes with the Driver Verifier Detected Violation loop. So, only use this if you’ve tried other diagnostic methods with no success.
With that out of the way, here’s a general overview of the process:
- Create a system restore point before you start.
- Use Driver Verifier to test one or a few non-Microsoft drivers at a time. The linked guide provides step-by-step instructions for the entire process.

- After Driver Verifier generates a bugcheck, analyze the dump file to identify the faulty driver.
- Reset Driver Verifier, then troubleshoot the driver that you just identified.
Third-Party Tools
The System Interrupts item in the Task Manager represents the total CPU usage of all interrupts. Interrupts are normal as they’re how your devices communicate with the CPU.
But the CPU is supposed to handle these swiftly by invoking interrupt handlers. They postpone lower-priority tasks until the interrupts are dealt with. This mechanism is called Deferred Procedure Call (DPC).
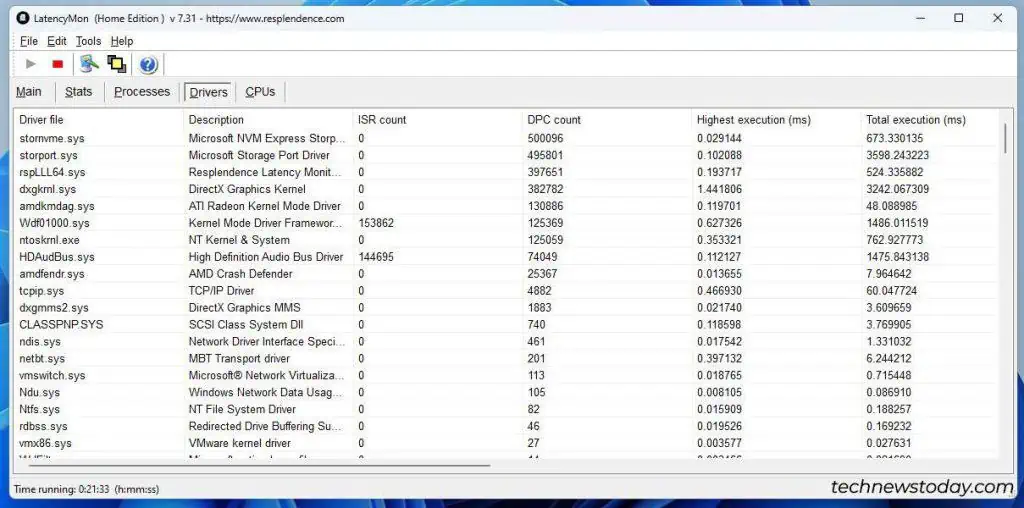
Third-party tools like LatencyMon can count the DPC per driver. This lets you identify the drivers that are likely causing the highest number of interruptions. If Microsoft’s tools don’t help you, you can check out such third-party options.
Disable, Remove or Replace Devices
If you’ve followed the steps so far, you should have a few potential culprits. I’ve seen drivers related to everything from network adapters and webcams to monitors, GPUs, and mice cause this problem.
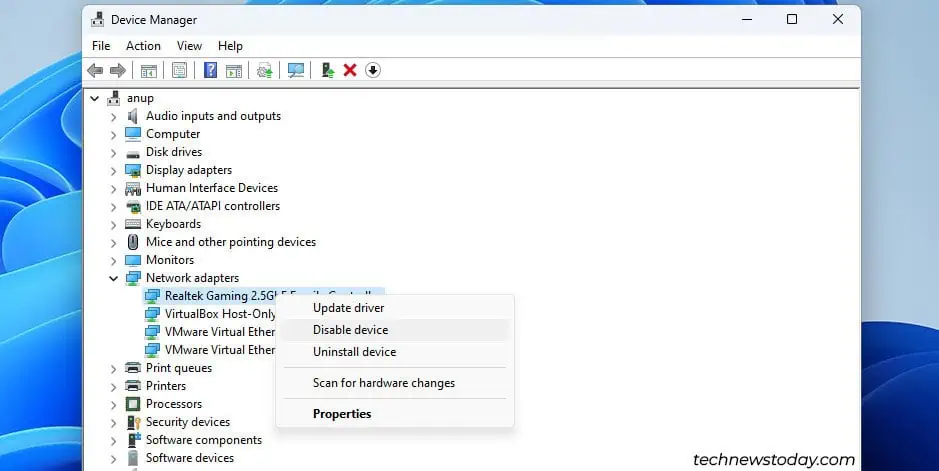
So, go through your culprit list, starting with non-critical devices like the webcam or network adapter. For such devices, it’ll be fastest to disable them from the Device Manager.
- Press Win + R, type
devmgmt.msc, and press Enter. - Right-click the first device and select Disable device.

- Check the CPU usage in the Task Manager.
- You can re-enable the device if you don’t find any change in the CPU usage. Afterward, repeat these steps for the other devices.
With certain components like the mouse or keyboard, you should unplug the devices from their ports so that you can easily reconnect them later. Similarly, with critical components like the GPU or the storage drive, you’ll need to temporarily replace them with spare parts.
Troubleshoot Device Drivers
When a faulty device driver is the root of the high CPU usage, updating or rolling back the driver usually fixes the problem.
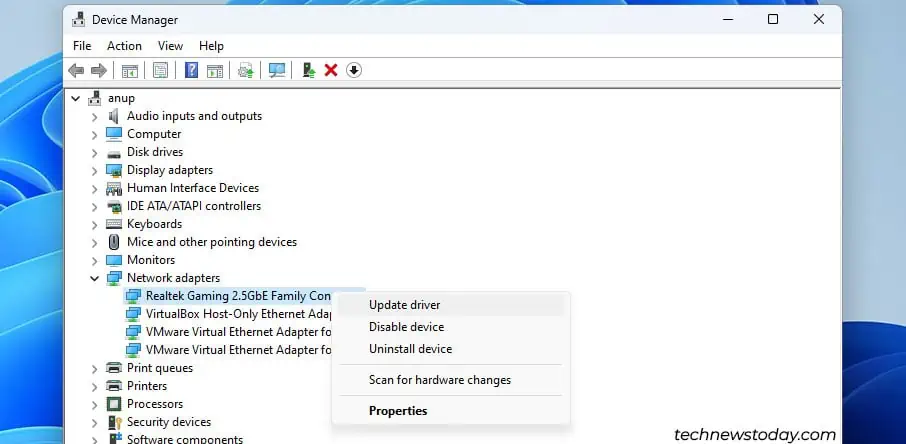
- To start, you should update the device drivers from the Device Manager.

- If available, you can also download the drivers directly from the device manufacturer or use their Driver Manager application.
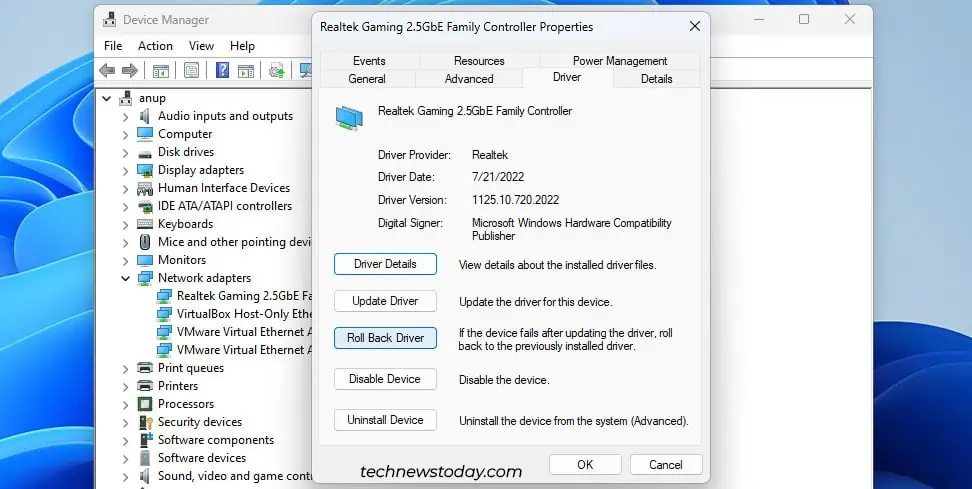
- If updating to the latest version doesn’t help, consider reverting to an older stable version instead.

- If that doesn’t help either, uninstall the driver so that your system uses the default drivers from Microsoft. These are intended for compatibility rather than performance, so they’ll work in most cases.
Troubleshoot ACPI Driver (Situational)
Refer to the diagnosis results from the start and check if the Acpi.sys driver was causing high CPU usage. It is one of the most common culprits, while also being one of the most difficult ones to successfully debug.
This is because the ACPI driver provides an interface for power management of Plug and Play (PnP) devices, and even SoC devices in some cases. As your system has a lot of ACPI-managed devices, finding the problematic one won’t be easy.
Here are some fixes that are most likely to help you in this case:
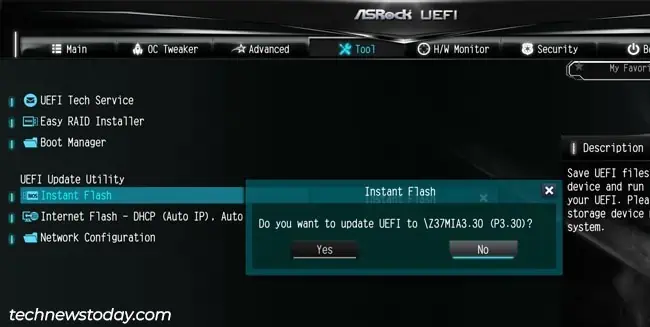
- Update your BIOS version to ensure the best hardware compatibility and patch any bugs.

- Load the default BIOS settings afterward to make sure you’re using the default power configurations.

- On Intel systems, installing the Intel RST driver can help. Even if you don’t use RAID, it’s worth a try as simply installing this storage controller driver has fixed this issue for many users.
General Fixes
At this point, you have two ways to proceed. You could create a live Linux USB and boot from it. If you face high CPU usage in Linux as well, you’ve got some hardware that you need to replace.
But if the CPU usage problem exists in Windows only, that confirms that there’s some device driver issue or software incompatibility. In this case, here are some general fixes that are proven to work:
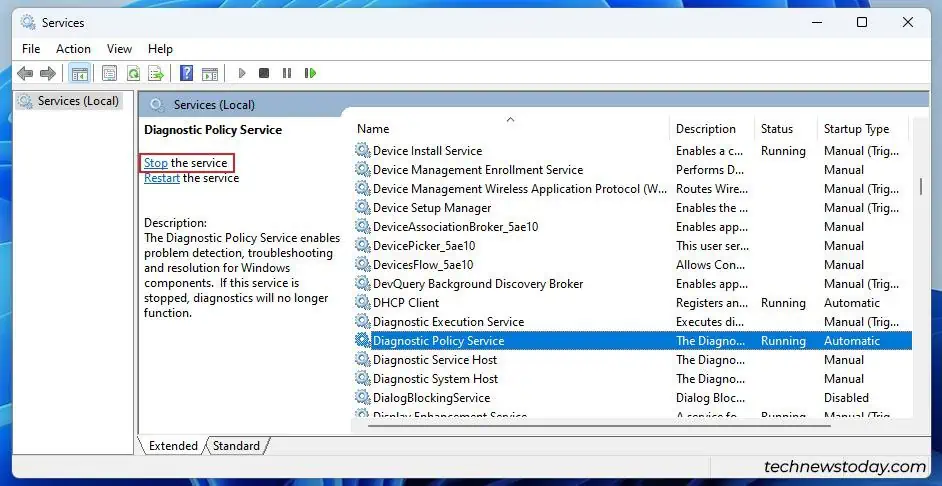
- Stop Diagnostic Policy Service from the Services Manager.

- Restart or temporarily disable Windows Defender. It often conflicts with services like Easy Anti-Cheat, which leads to high CPU usage.
- Ensure Windows is up-to-date.
- If the problem still persists, backup your files to an external drive and reinstall Windows.

