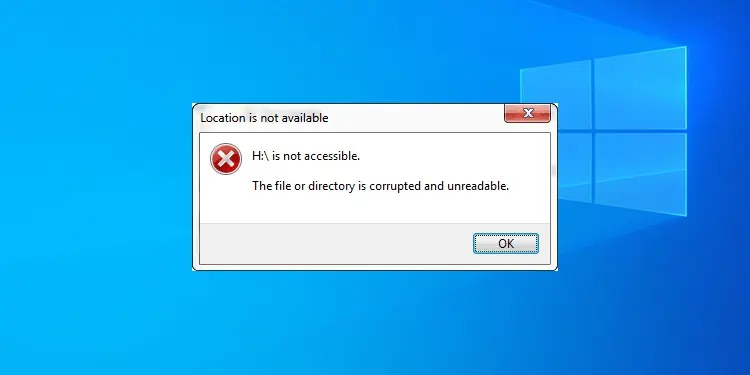
You usually get “The File or Directory is Corrupted and Unreadable” error while trying to open a corrupt external drive or one that has the RAW file format. However, you can also encounter it while trying to open files in your local drives or an accessible external drive.
You can easily solve the logical disk corruption issue with the disk-checking utility. Having said that, to troubleshoot for other causes, you need to apply additional methods, which we have explained down below.
Causes for “The File or Directory is Corrupted and Unreadable” Error
Here are the potential causes for “The File or Directory is Corrupted and Unreadable” error on your system:
- Corrupt disk sectors.
- Corruption of a software project’s executable file due to faulty cache or temporary files.
- File names not conforming to Windows naming convention.
- Bugs with the NTFS file system.
- Improper SATA mode.
How to Fix “The File or Directory is Corrupted and Unreadable” Error
First, try restarting your system and check if you still get this error message while opening or moving the file or folder. If you do, apply the possible solutions we have mentioned below.
Move Files to Another Location
The first thing you should do if some files are showing this issue is to move or copy them to another location and check if it still shows this error. You can do so regardless of whether you encountered this issue on your internal disk or an external one. If the particular drive has corrupted sectors, trying to repair it might destroy the data.
- Try copying the file to another drive and check if it shows the same error in the new location.
- If yes, copy it to another working computer or other device and check again.
Run CHKDSK Utility
The most common reason for this error is the corruption of disk sectors. So, you need to run the CHKDSK utility to scan for and repair such errors. It resolves the logical partition errors and marks the damaged sectors as inaccessible so that your system skips these sectors during its read-write operations.
However, this process may affect the data in the damaged sectors, so make sure to recover them beforehand.
First, you need to make sure the drive is not write-protected as CHKDSK can’t run on these drives. So, check if there’s a physical write-protection switch and disable it. Otherwise,
- Press Win + R to open Run.
- Enter
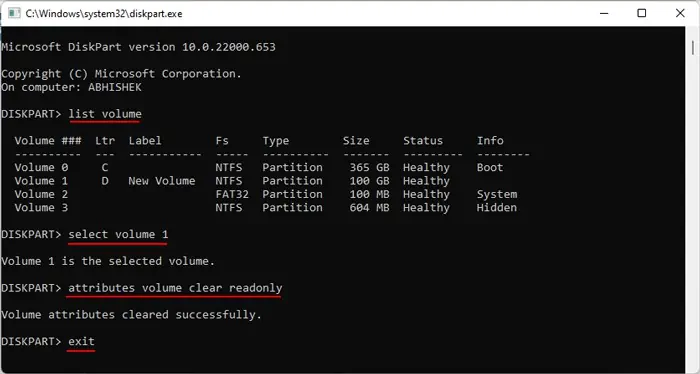
diskpartto open this Command line. - Enter the following commands:
list volume(check the volume number of the drive)select volume #(replace # with the volume number from above)attributes volume clear readonlyexit
Then, you can use CHKDSK using the steps below:
- Open Run.
- Type
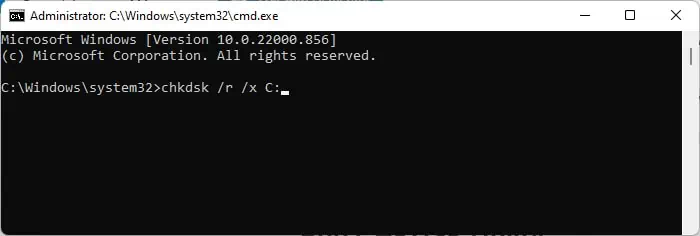
cmdand press Ctrl + Shift + Enter to open the Elevated Command Prompt. - Enter the command:
chkdsk /r /x <drive letter>. Make sure to replace <drive letter> with the appropriate drive letter, e.g., F: or G:
If CHKDSK seems stuck for more than 4 hrs, force shut down your PC and try again.
Change SATA Mode in BIOS
Most modern hardware can only support SATA with AHCI (Advanced Host Controller Interface). Older disks require you to operate the SATA on IDE (Integrated Drive Electronics) mode.
So if you encounter this issue on a SATA-connected disk, internal or external, you need to make sure your BIOS has the correct configuration for this mode. Here’s how you can do so:
- Get to BIOS/UEFI on your PC.
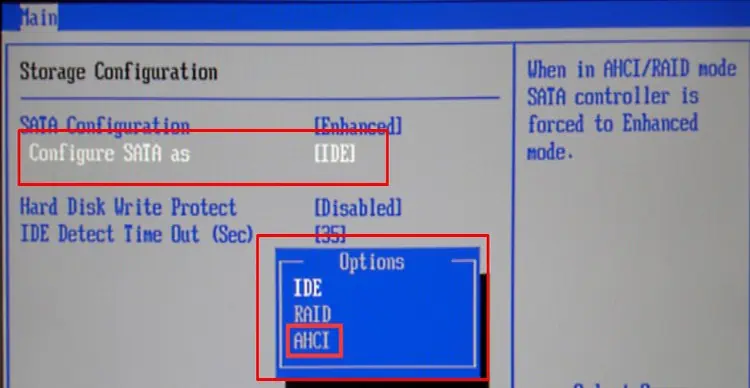
- Search for SATA Mode or a similar setting. You can usually find it inside Storage Configuration. We recommend checking the official website to learn the exact option and how to get there.
- Set the SATA Mode to AHCI if it’s a newer device, else set it to IDE.

- Save changes and exit the BIOS/UEFI.
You can cycle through all the options for this setting in the BIOS until you resolve the issue. If the options don’t help, set the mode to AHCI unless you are using older hardware and move on to the successive solution.
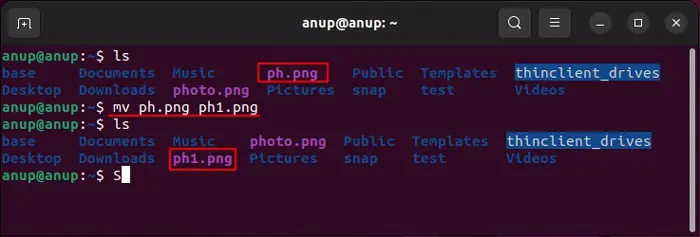
Rename Files in Linux System
Another possible reason for the error is that the file’s name doesn’t match the Windows naming convention. In such a scenario, running CHKDSK gives some error message that says the files in the directory are incorrect.
- You need to rename the files to resolve the issue. You can’t do so on a Windows system, so we recommend using a Linux system to rename the file.

- After renaming the files, transfer them back to Windows and check if the issue reoccurs.
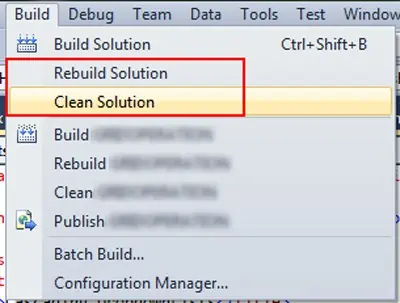
Rebuild the Project
This issue also occurs when you are building an executable file for a software project due to issues with the cache or other temporary reasons.
- You can resolve this issue by cleaning the project and then rebuilding it. You might need to delete the temporary files or caches before rebuilding it.

- The process to do so depends on the software program you are using, so seek help from official websites to learn the location of the cached files.
Update Windows
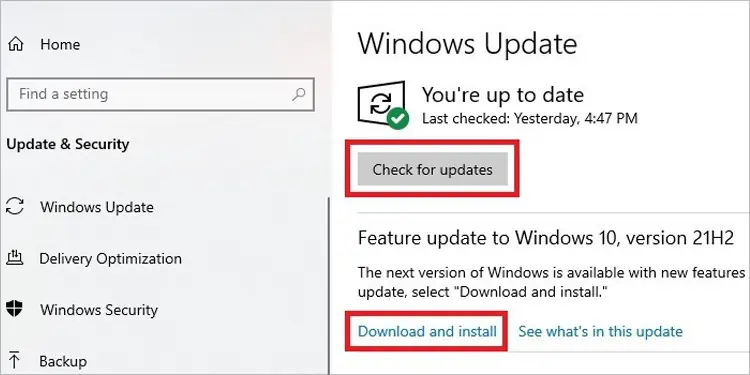
This problem also used to occur in Windows Server 2003 with NTFS file system. It happened when you use a program to move and rename a file at the same time.
The different NTFS threads handle the move and rename operations separately, which can cause the file system to think the parent folder’s name is the same even after moving it to another location. So opening the file gives this error message.
Microsoft has already released fixes for this issue in the subsequent updates. Nevertheless, we can’t be certain that such issues won’t occur again in the future. So, it’s always best to keep your system fully updated. And if you encounter this issue, report it to Microsoft so they can quickly release the bug fixes.
Format Drive
If multiple files in the drive have the same issue or CHKDSK couldn’t repair the sectors, it indicates the physical corruption of the disk or drive. So, your drive is likely failing.
In such cases, you need to format the drive. You also need to format the drive if it is in RAW format (check from the Disk Management utility).
Formatting erases all the contents of the drive so you need to back up all uncorrupted files. You can also try restoring the important corrupt contents using recovery software.
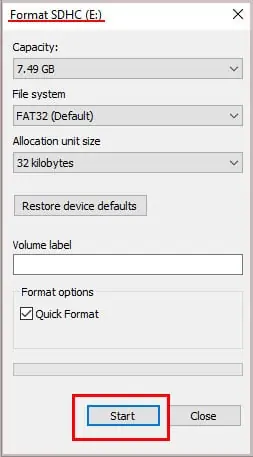
Then, format the external drive using the steps below:
- Right-click on the drive in the file explorer and select Format.
- Set the settings you want and click Start.|

- After formatting, click OK.
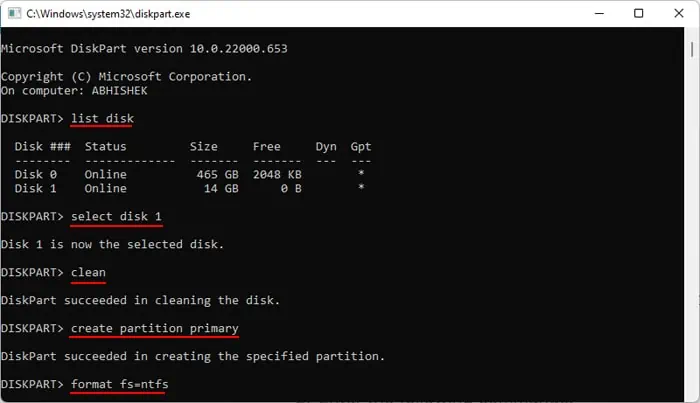
Now, move a file to this location and check if the issue reoccurs. If it does, you need to use the Diskpart Command line (CLI) to format the drive:
- Open Run and enter diskpart to open this CLI.
- Enter the following commands:
list diskselect disk X(replace X with your disk number)
cleancreate partition primaryformat fs=ntfsexit
- If the clean command doesn’t work, try using
clean all. Also, you can use other file systems like fat32 or exfat instead of ntfs.
If the drive’s physical volume reduces after the format, it is failing and you need to replace it soon.
Furthermore, if you are experiencing this issue on an internal disk, your last resort is to clean install Windows after backing up the necessary files.
