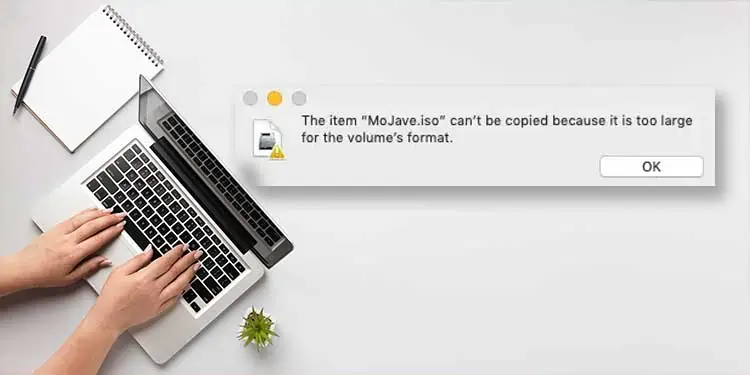
This error occurs when you’re trying to move a file larger than 4GB into a drive with the FAT32 file system. It happens because the maximum possible size for a file on a FAT32 volume is 4 GB.
You can fix this by changing the drive’s file system from FAT32 to exFAT or NTFS in Windows. Mac users can instead use Mac Extended, APFS, or exFAT.
Find detailed steps to fix the “The Item Can’t Be Copied Because It Is Too Large For The Volume’s Format” problem in the tutorial below.
Why Really You Can’t Copy The File
The reason why you can’t copy your files is that the USB/hard drive you’re trying to copy your files to is using the FAT32 file system.
As an old file system (introduced with Windows 95 in 1996), FAT32 has excellent compatibility. It is supported on most operating systems (Windows, MacOS, Linux, Xbox, Playstation, etc.) But on the flip side, it only supports up to 32GB partitions and 4GB files. A single file can’t be larger than that.
This is why if you try to copy a file larger than 4GB, you receive the Can’t Copy Too Large For Volume’s Format Error. The solution for this is very straightforward; format the device as a different file system like exFAT, NTFS, APFS, or macOS extended.
Fixing “Can’t Copy: Item Too Large for the Volume’s Format” on Windows
Windows users can easily fix this error by formatting the drive to a different file system like exFAT or NTFS.
NTFS is the default system for internal drives in Windows. It’s the fastest file system, has the most features and improvements, and you never have to worry about file size limits either. It’s great for using on Windows specifically, but it’s not compatible with most other operating systems.
exFAT offers the best of both worlds. It has good compatibility and modern features without the restrictions of the dated FAT32 system.
Format FAT32 to NTFS/exFAT
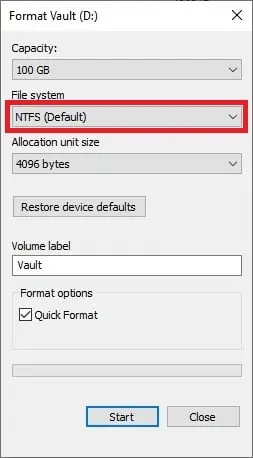
You can format your USB drive to NTFS/exFAT using Disk Management or File Explorer. The steps are the same for both NTFS and exFAT.
Format Through Disk Management
- Press Windows + R simultaneously to access the Run command window.
- Type diskmgmt.msc and press the Enter key.

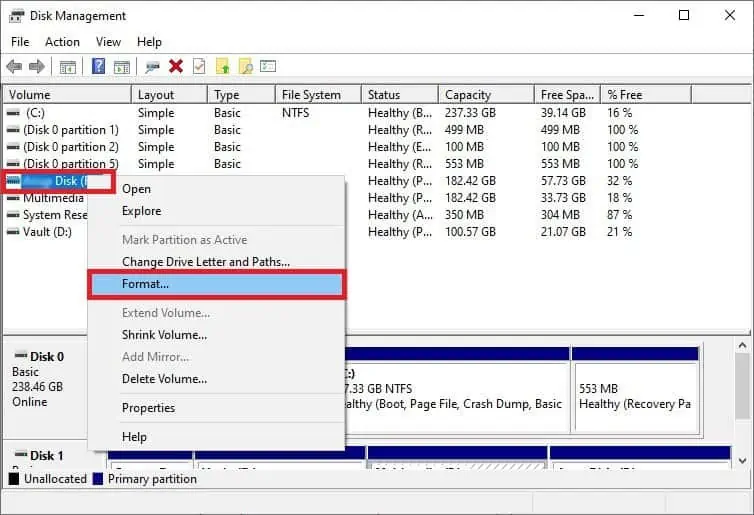
- Right-click the drive you’re trying to format and select Format.
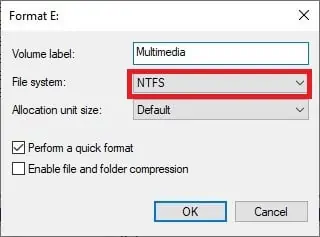
- Change the drive’s name if you want and select NTFS or exFAT as the file system.

- Press OK to proceed and wait for the formatting to finish.
Format Through File Explorer
- Press Windows + E keys to open Windows File Explorer. Alternatively, you can also open My Computer and select your drive from there.
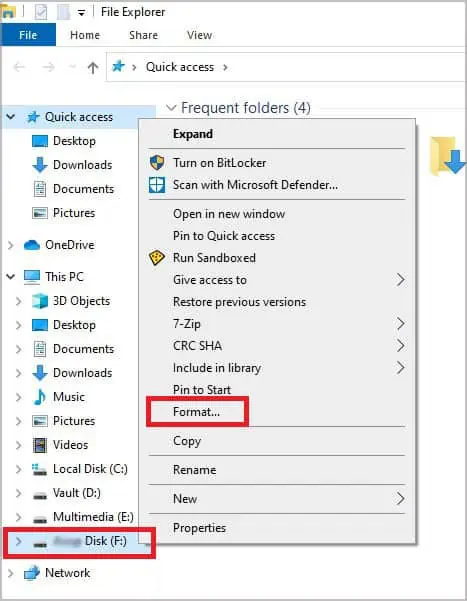
- Right-click the drive you want to format and select Format.

- Set the drive’s name and select NTFS or exFAT as the file system.

- Press OK to proceed and wait for the formatting to finish.
Fixing “Can’t Copy: Item Too Large for the Volume’s Format” on Mac
Mac users can format to MacOS Extended, APFS, or exFAT to fix this error. Read the section below to figure out which one is right for you.
MacOS Extended vs. APFS vs. exFAT vs. NTFS for MAC
Mac OS Extended (or HFS+) is the default file system on most Macs. Newer devices will instead have Apple File System (APFS) as the default one. APFS is much faster, more reliable, and packed with more features. But its compatibility is terrible. Any Mac older than 2016’s macOS Sierra will not be able to write to APFS-formatted drives.
If you use your drive on both Mac and Windows, you’ll instead want ExFAT. ExFAT is the best option for compatibility as it works with both Windows and Mac, and on both new and old devices.
NTFS format is read-only on Mac. It can’t be written to, meaning you can’t edit the contents of an NTFS drive in Mac. You can bypass this restriction using a third-party NTFS driver, Bootcamp or macOS Terminal. But the other file systems are better most of the time, so we don’t recommend NTFS on Mac.
Format to MacOS Extended, APFS, or exFAT
- Press Command + Shift + A to launch Utilities.
- Open Disk Utility.
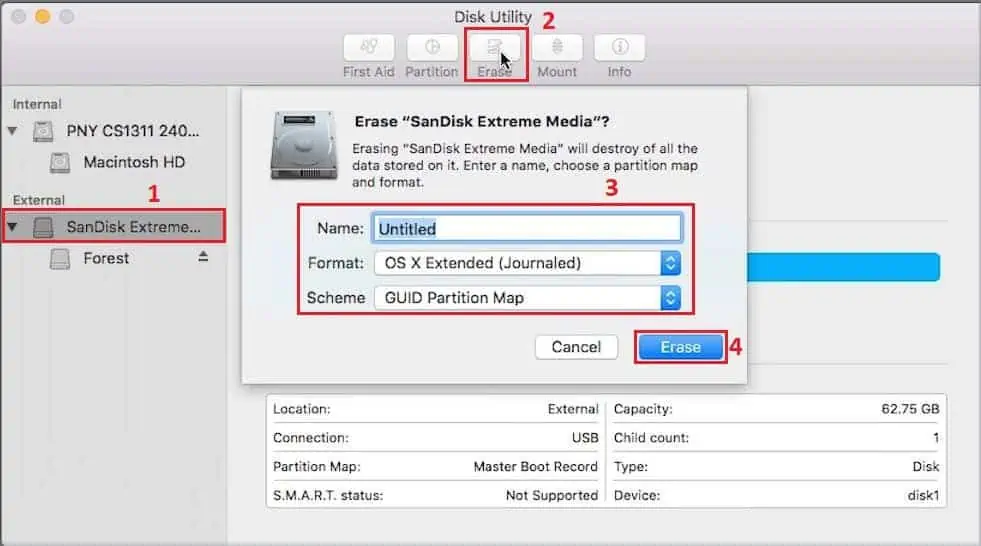
- Select the drive you’re trying to format from the left side.
- Click on Erase at the top.

- Choose GUID Partition Map for the scheme and enter a name in the name field.
- Choose MacOS Extended, APFS, or exFAT as you prefer from the drop-down menu for Format. Refer to the section above if you aren’t sure which one to pick.
- Name the drive and Press Erase.
Format to NTFS
Note: Formatting to NTFS is not recommended for reasons discussed earlier. Nonetheless, here’s how to format to NTFS using third-party software.
- Download and install an NTFS driver. Some popular ones include Tuxera NTFS for Mac, NTFS-3G, or NTFS for Mac OS X 8.0.
- Navigate to Applications > Utilities and open Disk Utility.
- Select the USB Drive you’re trying to format in the left window and press Erase.
- Open the Format menu and select NTFS. Name your USB Drive as you prefer in the Name field and click Erase.
If you don’t want to use third-party software to format to NTFS, you have two more options; Bootcamp and the macOS Terminal.
Bootcamp is an in-built multi-boot utility for installing Microsoft Windows on your Mac. You can dual-boot Windows and macOS at the same time using this feature. With this, you can use NTFS-formatted drives on your Mac device.
You can also use the macOS terminal to enable write support for specific Windows disks. But as this is an experimental feature, there’s a chance that you may corrupt your system and/or lose valuable data. So we don’t recommend this. Instead, you can try out some of the other methods in our guide.

