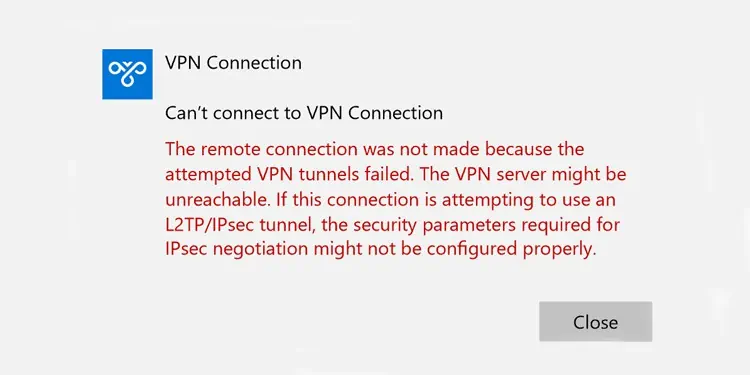
“Remote connection wasn’t made” is a VPN error that frequently occurs due to issues in accessing the remote server, modem, or network. The most common error that causes this error is the failure to establish VPN tunnels.
The majority of VPN tunnel attempts fail if the VPN settings are incorrect. However, other factors such as firewall restrictions can also contribute to this.
In the article below, we’ve detailed all the reasons for this error and possible troubleshooting methods.
What Causes the VPN Tunnels Failed Issue?
- Firewall restriction
- RasMan service is not running
- VPN Passthrough is disabled
- Poor internet connection
How to Fix the VPN Tunnels Failed Error?
Let’s get the minor things out of the way first. Reboot your PC and router. If this doesn’t work, please follow these steps.
Perform Ping Tests
Perform ping tests to your default gateway and VPN server address.
In case of high packet loss with the default gateway, you should troubleshoot your internet connection and try to get a better signal. If you only get high packet loss when pinging the VPN server, the issue is on the provider’s end, and you’ll need to wait until they resolve the problem.
If the internet connection seems fine, you should move on to the solutions listed below.
Check VPN Configuration
Entering the wrong credentials when trying to connect to the VPN leads to this error in the majority of the cases. Here’s how you can resolve this:
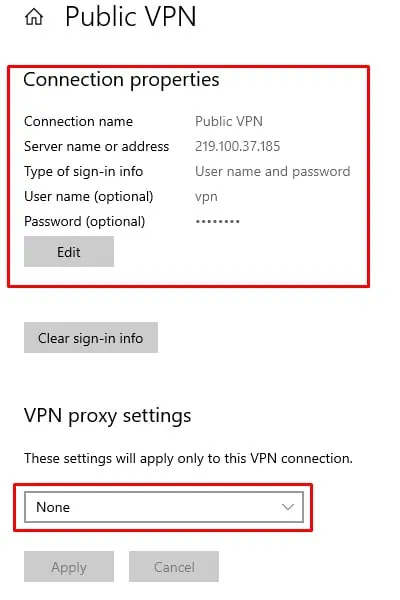
- Press Windows + I and go to Network and Internet > VPN.
- Click on the VPN and open Advanced Options.
- Under VPN Proxy Settings, select None and press Apply.
- Under Connection Properties, press Edit.

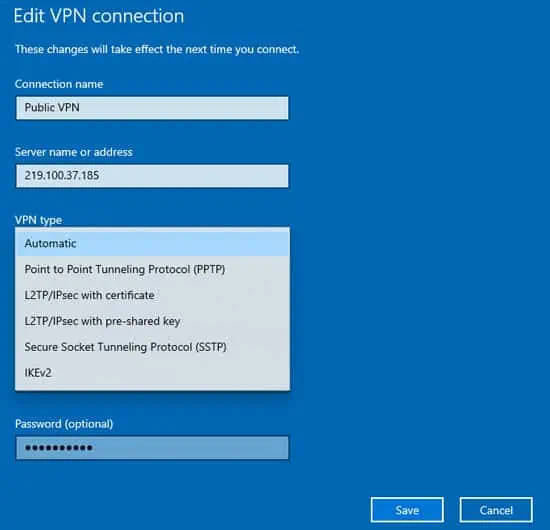
- Make sure that you’ve entered the same values given by your VPN provider. Most importantly, select the correct VPN tunnel type. You can find more info on this in the section below.

- Finally, press Save to apply the changes, then try to establish the VPN connection.
By default, the tunnel type will be set to Automatic. Generally, this is fine, but it’s best to select the tunnel type recommended by your VPN provider specifically. Depending on which you select, there are a few things you should check:
- PPTP Ensure that port TCP 1723 isn’t blocked by your firewall.
- L2TP/IPsec Ensure that port UDP 1701 isn’t blocked and that the correct pre-shared key or machine certificate is present on the client and server.
- SSTP Ensure that valid machine certificate and trusted root certificate are installed on the server and client machines respectively.
- IKEv2 Ensure that UDP port 500 and 4500 aren’t blocked by the firewall, and the correct machine certificate are present on both the client and server machines.
If the issue is resolved now, that’s great! But even if it’s not, now you should receive a very specific error such as GRE blocked for PPTP, Certificate error for L2TP, SSL negotiation errors for SSTP, etc. Thanks to this, you should be able to fix the issue at its root.
Restart RasMan Service
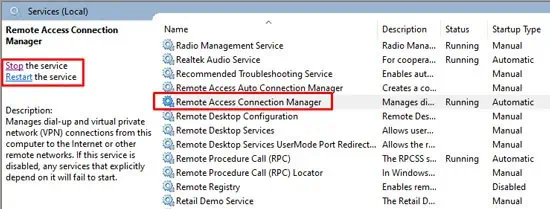
The Remote Access Connection Manager (RasMan) service is responsible for managing VPN connections along with other remote connections on your PC. You should ensure that it’s running, and if so, restart it with the steps listed below:
- Press Windows + R, type
services.msc, and press Enter. - Select Remote Access Connection Manager and press Start. If it’s already running, press Restart instead.

- Alternatively, you can also do the same by executing the following command in an elevated Command Prompt window:
net stop RasMan & net start RasMan
- Try to connect to the VPN now.
Modify Firewall Settings
If you’re using a third-party firewall, you should temporarily disable it and try to connect to the VPN. You can do so easily by right-clicking the firewall from the taskbar and selecting Disconnect or Stop Service. You’ll also find a similar option if you launch the firewall app.
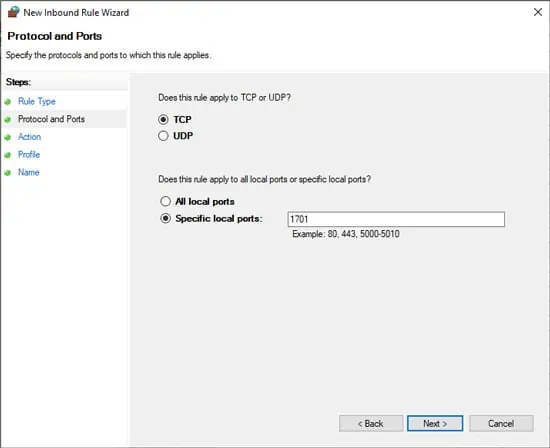
In case the firewall in use is Windows Firewall, we don’t recommend disabling it. Instead, you should make sure the necessary ports for the VPN are open with the following steps:
- Press Windows + R, type control firewall.cpl, and press Enter.
- Click on Advanced Settings from the left pane.
- Click on Inbound Rules and press New Rule.

- Select Port > TCP or UDP and enter the value for specific local ports.

- Select Allow the Connection and press Next > Next.
- Enter a name and description for this rule and press Finish.
Ensure VPN Passthrough is Enabled
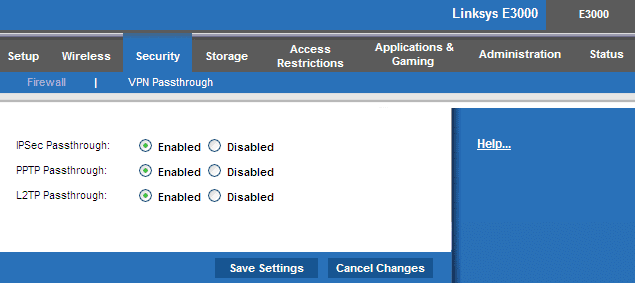
As the name implies, if the VPN Passthrough feature is disabled, the VPN traffic won’t be able to pass through your router. Here are the steps to check and enable this:
- Open any browser and log in to your router settings page.
- Switch to the Security or similar tab and select VPN Passthrough.
- Enable the following protocols if they aren’t already:
- IPSec Passthrough
- PPTP Passthrough
- L2TP Passthrough

- Click on Save Changes and see if you can connect to the VPN now.

