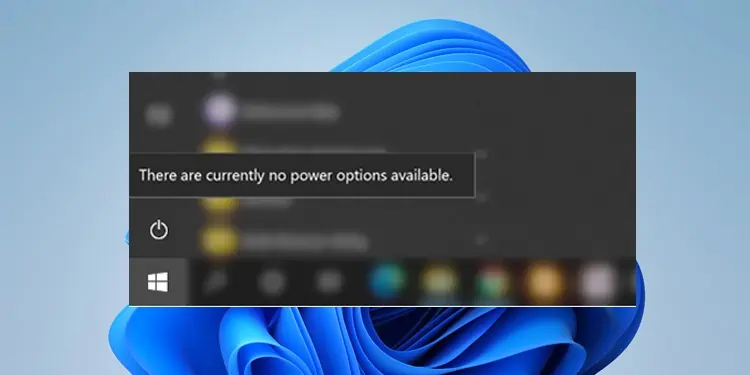
After clicking on the Power icon in the Start menu, you may have seen the “There are currently no power options available” message. However, there is no need to panic even if you can’t shut down or restart your computer.
It is a minor issue caused by incorrectly configured power or policy settings. As a result, adjusting those settings should resolve the problem. Even if this error is not resolved, there are ways to access your PC’s power options.
You may find a blank box in place of the message. It is also the same problem, and the methods in this article can be useful in both cases.
Why Are the Power Options Not Available?
Many users have experienced this problem after a system update. So, the most likely reason would be the unwanted changes in the system settings.
Errors in power settings, registry entries, system policies, etc., are probable culprits. Users themselves may also alter those settings causing this error. The common causes include:
- Glitches in Power Options settings
- Incorrect value of the NoClose registry entry
- User Rights Assignment conflicts in the Local Security Policy Editor
- System file corruption
- Registry corruption due to third-party apps
How Can I Solve This Problem?
This problem does not completely remove the power options from your PC. It only does so from the Start menu and the Windows Security dialog window.
There are other methods to access those options. Some of them are:
- Pressing Alt + F4 on the desktop without any active windows.
- Signing out and using the power options from the log-in window.
- Using commands in the Command Prompt for those operations.
These methods do not fix the underlying issue causing this error, though. You will need to change the policy and power settings to fix those.
Resolve Username Conflict in Local Security Policy Tool
The improper configuration of the Shut down the system policy is a common cause for this error. If there are conflicts with your username, the power options won’t be available. To fix this issue, follow the directions below:
- Press Windows key + R and enter
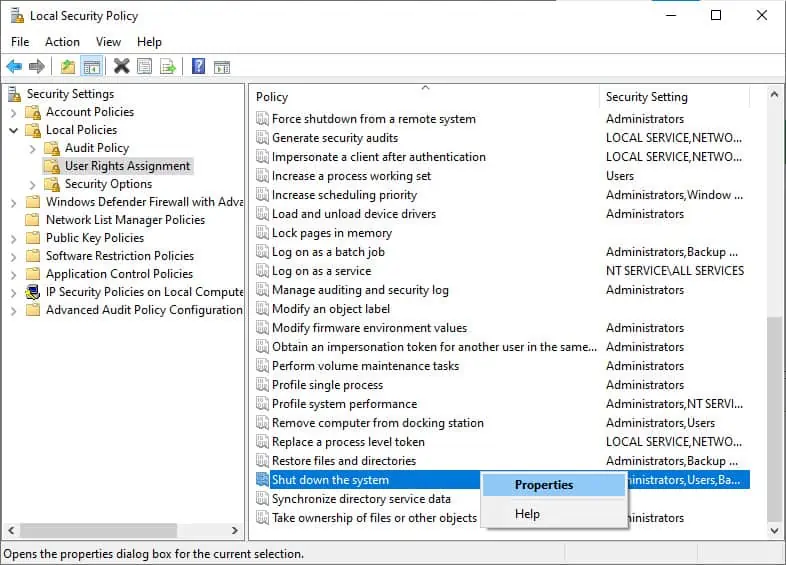
secpol.mscto open the Local Security Policy Editor. You can also search for and open it by using the search bar. - Navigate to User Rights Assignment under Local Policies.
- Inside the right windows, locate Shut down the system and double-click on it. You can also right-click and select Properties.

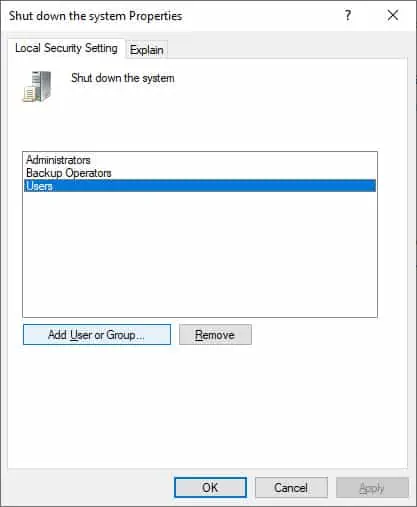
- Click Add User or Group in the pop-up window and Advanced in the next one.
- Here, click on Object Types and check all available options. Then select Ok.
- Now, click on Find Now. You’ll see a list of all users in the search results.
- The only users/groups you require are Administrators, Users, and Backup Operators. Select these by holding the Ctrl key and clicking on them. Click on Ok to enter the users and hit Ok again. You can also manually add the users one by one.
- Click on Apply and Ok to apply the changes.

- Restart by signing out first or through Command. After restarting, check if the power options are available.
You can also use the command-line interface to reset all the security entries to default. This way, you don’t have to go through the hassle of navigating through the dialogue boxes and prompts. To do so, follow these steps:
- Search for cmd in the search bar. Then Right-click on the command prompt and select Run as administrator.
- Click Yes on the permission prompt if it appears.
- Enter the command
secedit /configure /cfg %windir%\inf\defltbase.inf /db defltbase.sdb /verboseand press enter. - Then, restart your PC.
Launch Power Troubleshooter
Running the power troubleshooter may solve the issues related to its settings. Follow the instructions below to do so:
- First, press Windows key + I to launch Settings. You can also open the Start Menu and click on Settings (cogwheel symbol).

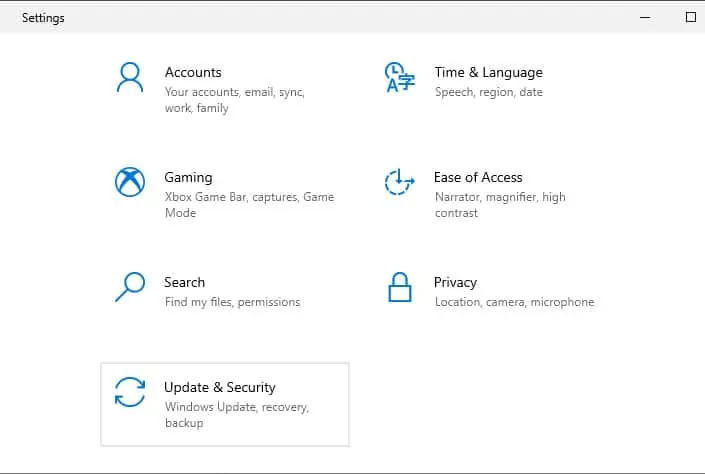
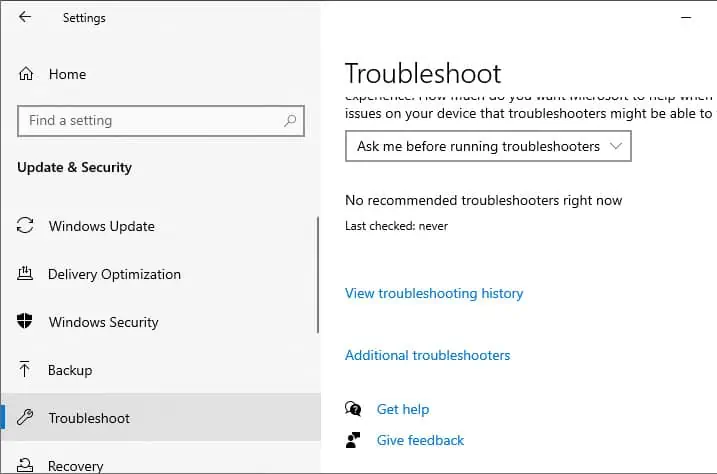
- Click on Update and Security and then select Troubleshooter from the left bar on the new tab.

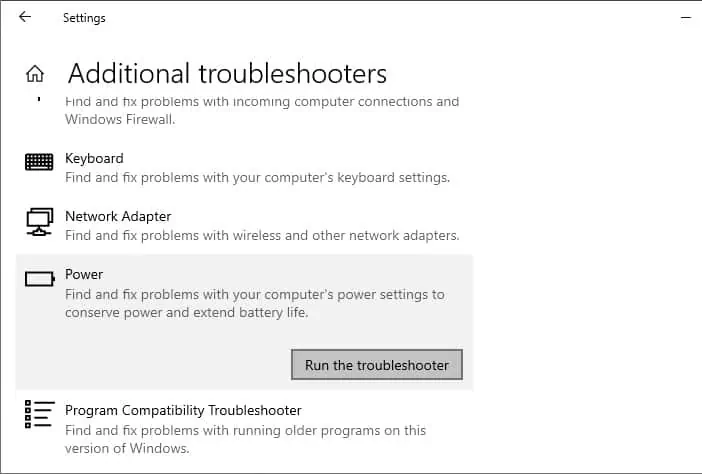
- Scroll down and click on Additional Troubleshooters. In the new tab, locate the Power option. Click on it and select Run the troubleshooter.

- Confirm any on-screen instructions to apply fixes. Then restart your PC using the available methods.
Change Access Settings through Local Group Policy Editor
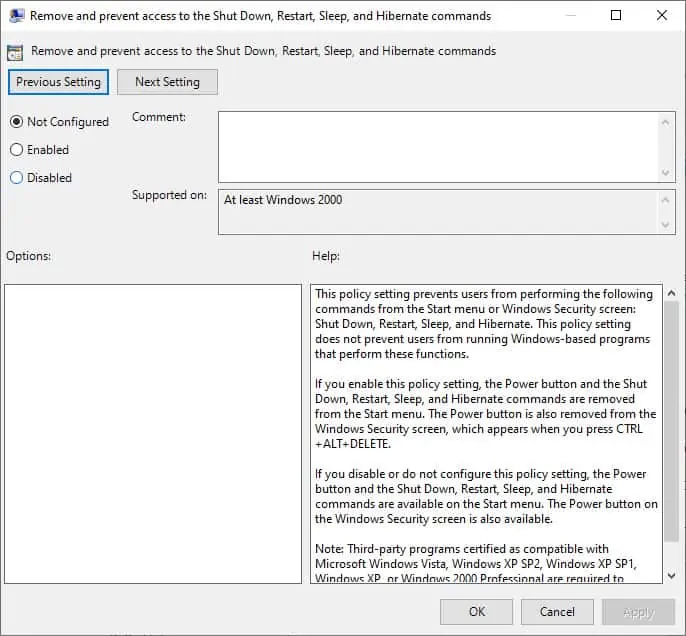
There is an option in the Local Group Policy Editor that handles access to power options. Enabling this policy removes the power options from the Start menu and the Windows Security dialog box. To locate and disable this policy, follow these directions:
- Press Windows key + R and enter gpedit.msc to open the Local Group Policy Editor. You can also search for and open it by using the search bar.
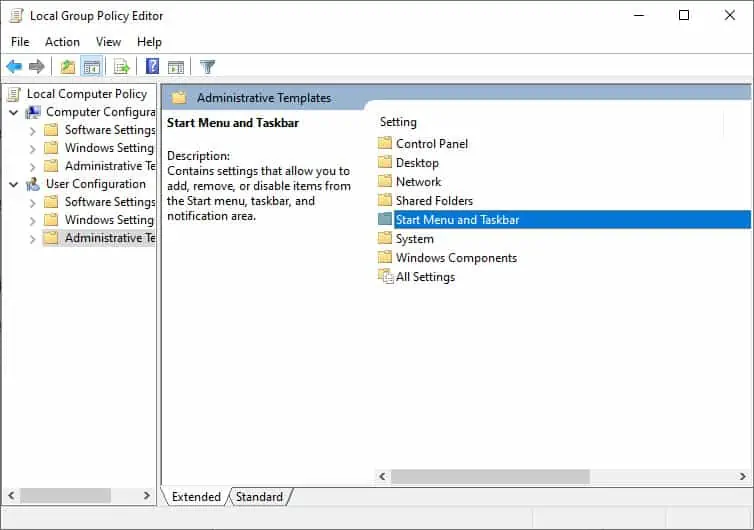
- Click on Administrative Templates under User Configuration from the left sidebar. Then, open Start Menu and Taskbar.

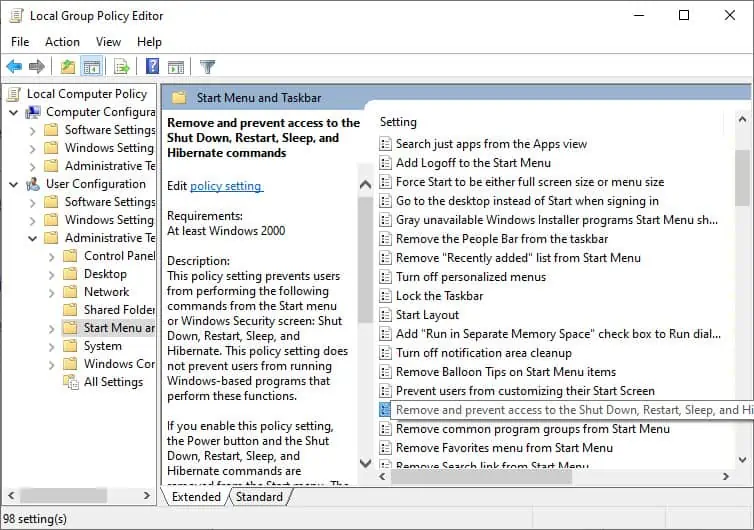
- Locate Remove and prevent access to the Shut Down, Restart, Sleep, and Hibernate commands on the right.

- Double-click on it and choose the Disabled or Not Configured option from the next window.

- Click on Ok. Then restart your PC using the possible options.
Change NoClose Value in Windows Registry
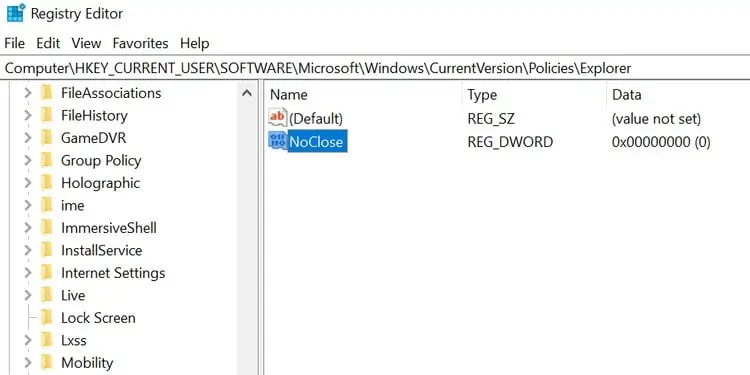
This method creates the same output as the above method. Enabling the NoClose key hides the power options from the Start menu. However, it is possible to change the NoClose entry with the Registry Editor. Follow the steps below to do so:
- Press Windows key + R and enter regedit to open the Registry Editor. You can also search for and open it by using the search bar.
- Click on Yes if you see the User Control Account prompt.
- Navigate to the path:
HKEY_CURRENT_USER\Software\Microsoft\Windows\CurrentVersion\Policies\Explorer - Double-click on the NoClose key, set its value as zero (0) and select Ok.

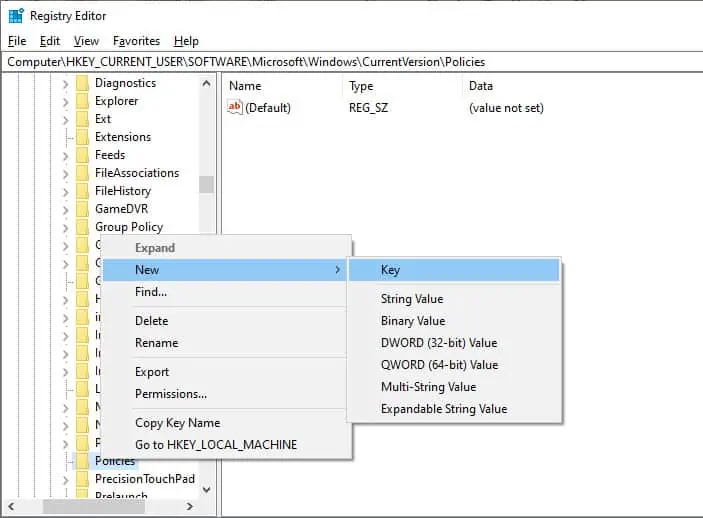
- If the above path does not exist, navigate to Policies. Then right-click on Policies and select New > Key. Name it as Explorer.

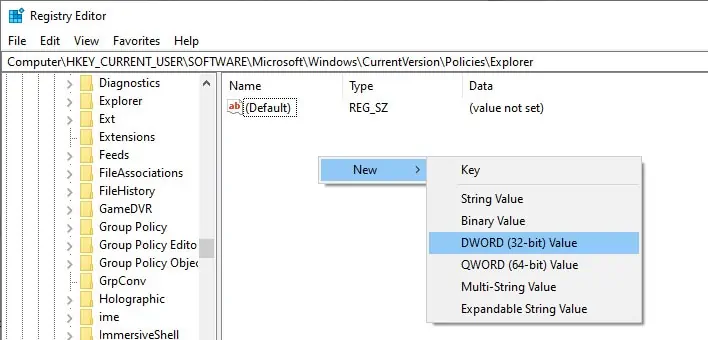
- Then, right-click on the empty area and choose New > DWORD (32-bit) Value. Set its name to NoClose and value to zero.

- Restart your PC using available options.
- If you still experience the problem, navigate to:
HKEY_LOCAL_MACHINE\SYSTEM\CurrentControlSet\Control\Power - Here, change the value of CsEnabled from 1 to 0. Restart and check again.
Restore to Default Power Plan
There may be changes in the power plan configuration that causes Windows to hide the options. Installing system updates may have caused this issue.
This fix is true for the hibernation and the sleep options but may not work if all the options are missing. Still, some users have found restoring the power plan to its default settings a viable solution. Follow the steps below for this method:
- Search for cmd in the search bar. Then Right-click on the command prompt and select Run as administrator.
- Click Yes on the permission prompt if it appears.
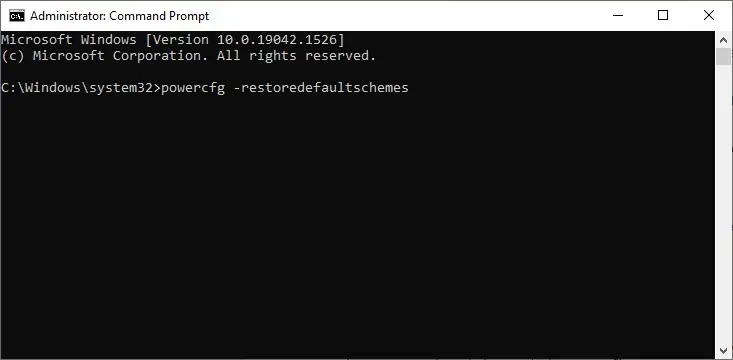
- Type the command
powercfg –restoredefaultschemesand press enter.
- Now, restart your computer and check if the problem resolves.
Fix Corrupt System Files
If this problem is due to system file corruption, a possible solution is using the SFC and the DISM. The System File Checker and the Deployment Image Servicing and Management tools can scan and repair damage in the system files.
Even if it fails to solve this error, performing both processes is still a good idea. Perform the following instructions:
- Search for cmd in the search bar. Then Right-click on the command prompt and select Run as administrator.
- Click Yes on the permission prompt if it appears.
- Type the commands below and press enter after each to execute them. Wait for each to complete.
dism /online /cleanup-image /restorehealthsfc /scannow
- We recommend executing DISM before first. DISM can restore missing files that are not backed up by SFC which increases the success rate for this operation.
- Reboot your PC and check if the error persists.
System Restore
System Restore creates a snapshot of your system and saves it as a restore point. It allows you to revert to the restore point whenever you need to. Keep in mind, though, that this removes any changes you have made after creating the restore point.
You should try this method only if no other methods work. To perform a system restore, follow the steps below:
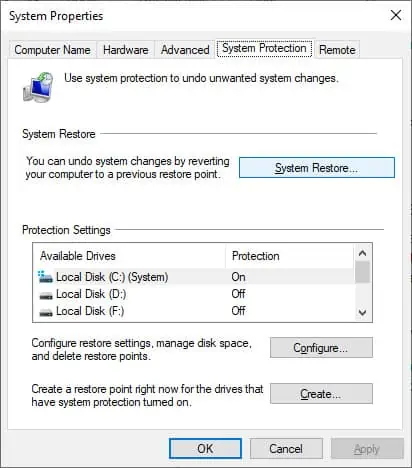
- Type restore in the search bar and open Create a restore point. It opens the System Protection tab in System Properties.
- Click on System Restore to start the process.

- Follow the on-screen instructions. You can select any restore point you want.
- There is also an option to check for affected programs. You may need to reinstall those programs after the process completes.
Reset PC
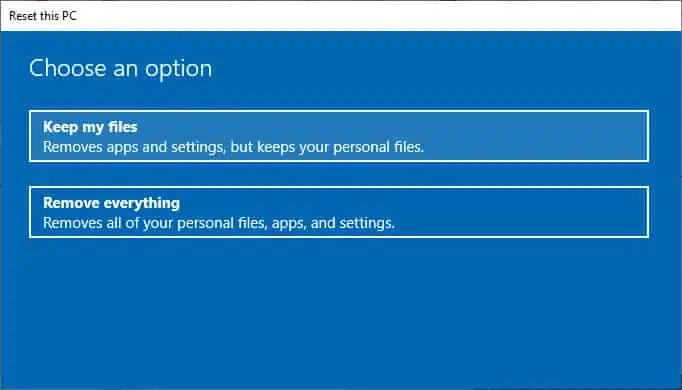
If no other methods work and you don’t have an appropriate restore point, the last option is to reset your OS. You will have two options if you want to reset your PC. The first option deletes only the system data, while the second one deletes all data on your PC.
We still recommend you backup all your important data before performing this method. For this, follow these steps:
- First, press Windows key + I to launch Settings. You can also open the Start Menu and click on Settings (cogwheel symbol).
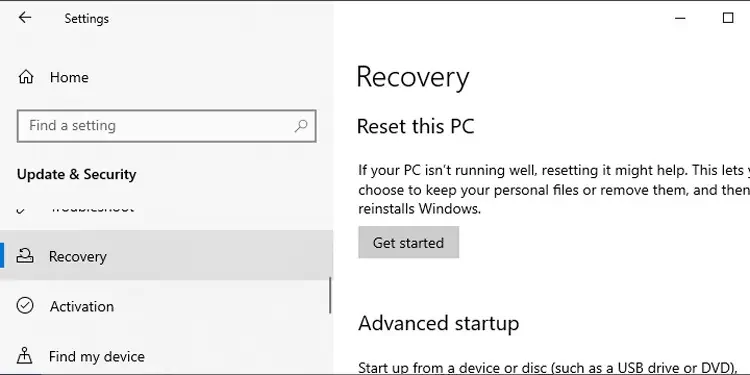
- Click on Update and Security and then select Recovery from the left bar on the new tab.

- Choose the Get started option under Reset this PC. Other versions may have different options for this.
- Select Keep my files when prompted and click Ok.

- Follow the on-screen instructions.
