Laptops come with pre-applied thermal paste and are supposed to require less maintenance. Its thermal paste should usually last you for 5+ years, and by this time, you are likely going to replace the laptop altogether.
However, if you want to keep using an older laptop, its thermal paste may be in poor condition. If the laptop is prone to overheating and shows issues with its performance, it might be the time you replace its thermal paste.
To apply thermal paste on a laptop, first open the laptop and unscrew the heatsink. Then, clean the old paste using a microfiber cloth soaked in isopropyl alcohol and apply a suitable amount of new thermal paste. Finish up by reinstalling the heat sink and reassembling the laptop.
While this process may seem straightforward, I would recommend seeking professional help if you are new to opening your laptop. Regardless, I will guide you through the complete process in detail.
Prepare Necessary Equipments
Let’s start with preparing all the tools and materials you’ll need during the procedure. You don’t want to get to the middle of the process and find out that you are missing something.
- Toolkit containing screwdrivers and prying tools
- Lint-free or Microfiber cloths (preferably more than one)
- Microfiber or cotton swabs
- Isopropyl Alcohol (70%-90%)
- High quality thermal paste
- Compressed Air Can (to clean the rest of the laptop)
You should also prepare an anti-static wristband or an antistatic mat to ground yourself while applying the paste. Static electricity builds up on your body due to friction with clothes or carpets, and direct contact with PC components can discharge the static electricity and damage the components.
After checking if you have everything with you, let’s move on to opening the laptop.
Open Laptop
You need to be very careful while opening the laptop. Forcing things during the disassembly can cause physical damaging to the laptop.
The exact disassembly process also depends on the manufacturer and model of the device. So, the steps you need may be slightly different than what I have provided.
If you encounter any issues, I recommend checking official sources or the user manual. In general,
- Power off your laptop.
- Remove the external battery of your laptop, if it has one. Disconnect all peripherals as well.
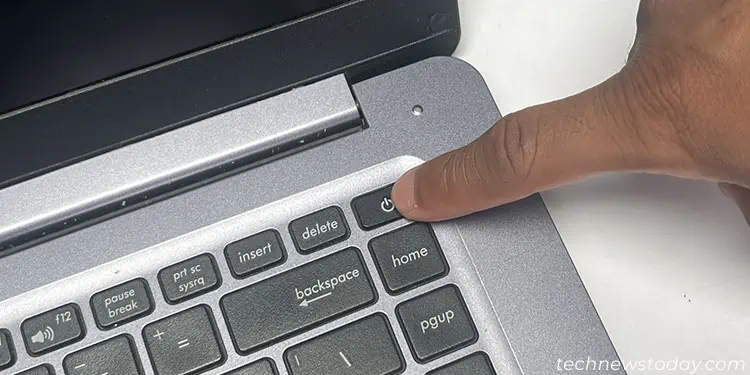
- Press and hold the power button for a few seconds to power cycle the device.

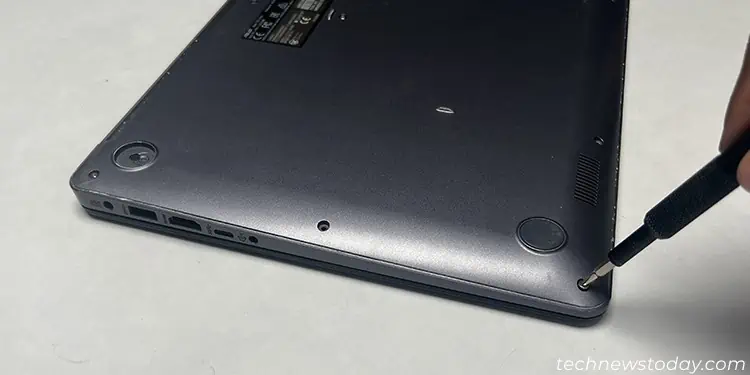
- Remove all the screws on the bottom of the laptop to unlock the back panel. Some screws may be hidden inside the rubber feet or stickers.

- If your laptop has multiple mini-panels on the back, you may need to remove only one of the panels or their entire back panel.
- For some laptops, you need to remove the keyboard panel to access additional screws holding the back panel. You can use a spudger on the clips to unlock the keyboard panel in such cases. Then, remove all the necessary screws.
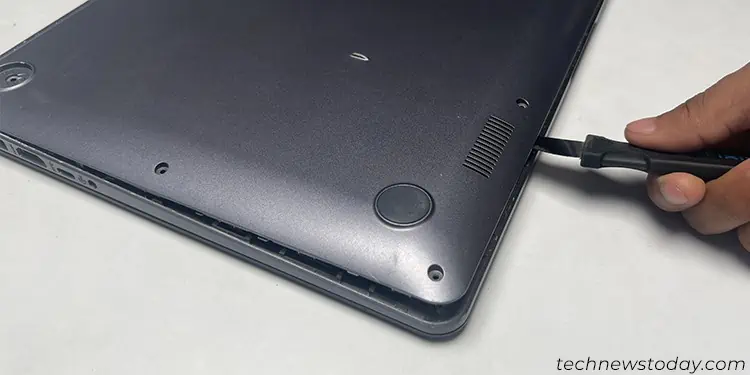
- After that, use a spudger or other prying tools to unclip and pry out the back panel. Be gentle so as not to damage the locking clips.

- On some laptops, you will see additional shields inside that are protecting the internal components. In such cases, unscrew and remove the shields to access those components.
Remove Heatsink
Laptops use heat sinks with a pipe to transfer heat from the CPU/GPU to fans at different spots. You have to remove the heat sink to expose the processors. To do so,
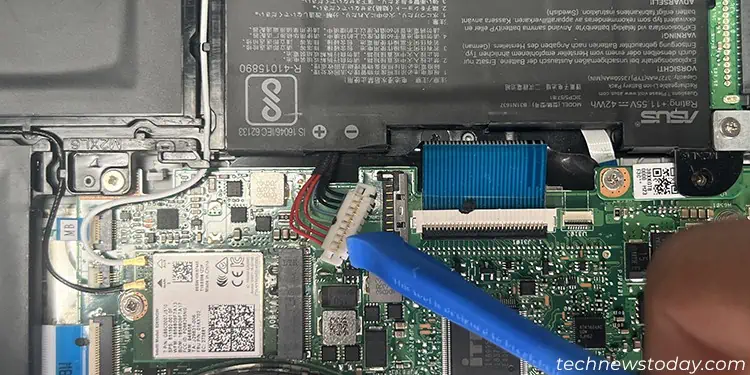
- Disconnect the internal battery cable from the motherboard. I recommend you use a spudger instead of your hands for this purpose.

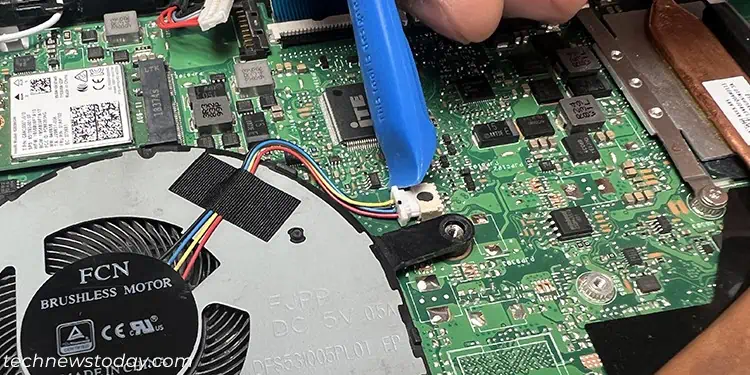
- Carefully disconnect the fan cables from the motherboard.

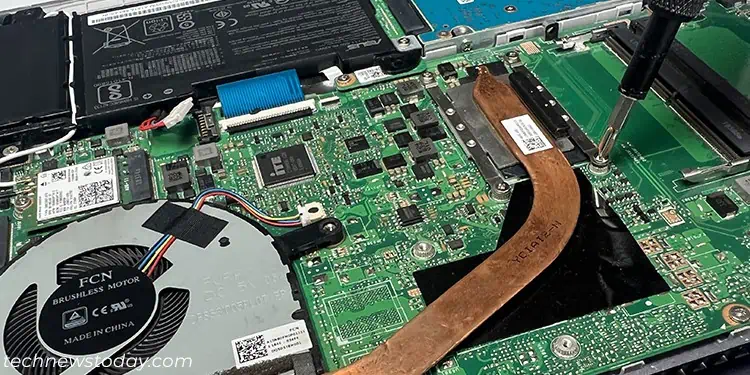
- Then unscrew the heatsink. If your laptop has a dedicated GPU, the same heat sink will span over both the CPU and the GPU.

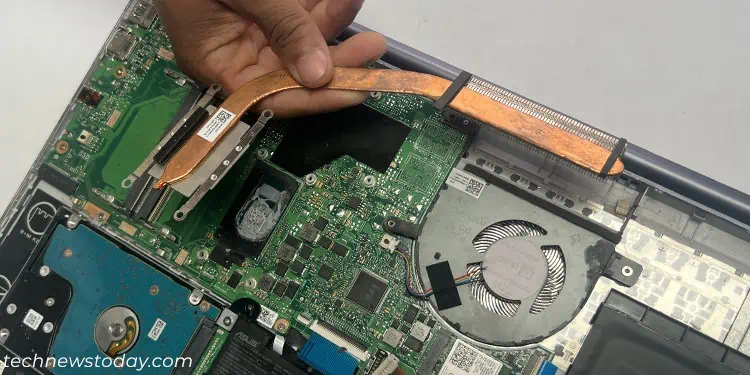
- Gently pull out the heat sink. If it doesn’t come off easily, wiggle the heat sink slightly but don’t force it out. For some laptops, you may need to unscrew the fans to be able to remove the heat sink.

Clean Thermal Paste
You should never reapply a new paste over an old one. Thermal paste degrades over time and the old paste may have dried or may be close to drying.
Even if it is not dry, applying a new paste over the old one can create unnecessary air pockets that hamper the heat dissipation process. So you need to properly clean off all the paste before reapplying a new layer. For that,
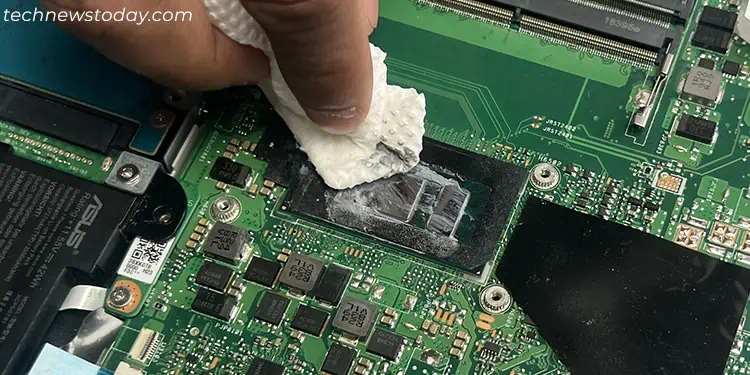
- Use a small microfiber cloth soaked in a few drops of isopropyl alcohol to clean the thermal paste on the CPU and/or GPU die. Be gentle so that you don’t damage other components.
Don’t use any other solvents as they may be corrosive or not compatible with electronic components.
- If the paste has dried out, you can softly scrape it away with a small blunt plastic object first.
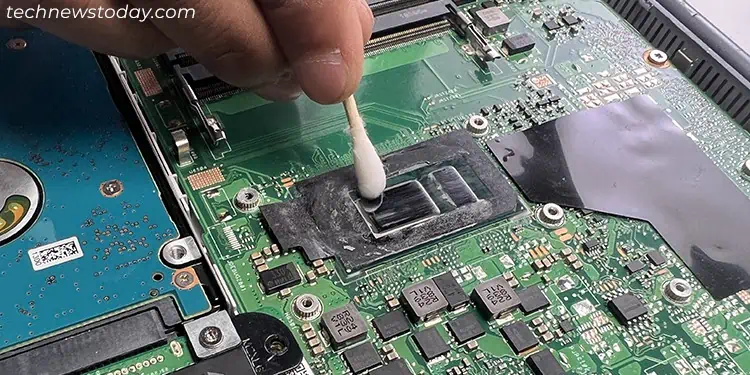
- Then, soak a Q-tip or microfiber swab in isopropyl alcohol and clean the excess thermal paste from the sides of the processor die and the underlying circuit.

- After you are done cleaning the paste as much as you can, it’s better to clean the heatsink, fan and rest of the laptop. To do so,
- Use a dry microfiber cloth to wipe the heat sink and most of the system board.
- Then, clean the fans, vents, and rest of the laptop using a compressed air can. Don’t shake or tilt the can as it may spray the liquid inside instead of its compressed vapor.
Reapply Thermal Paste and Reassemble Laptop
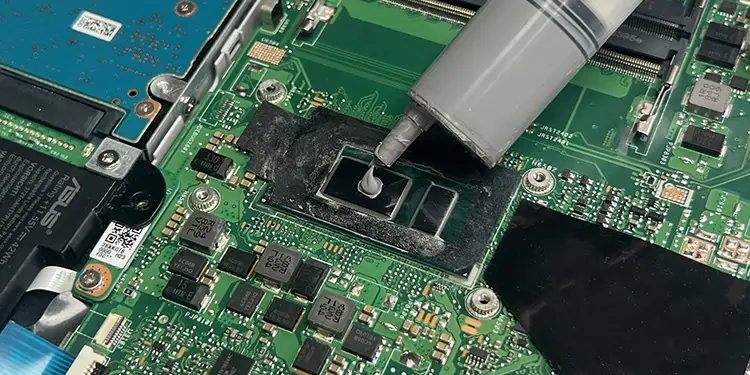
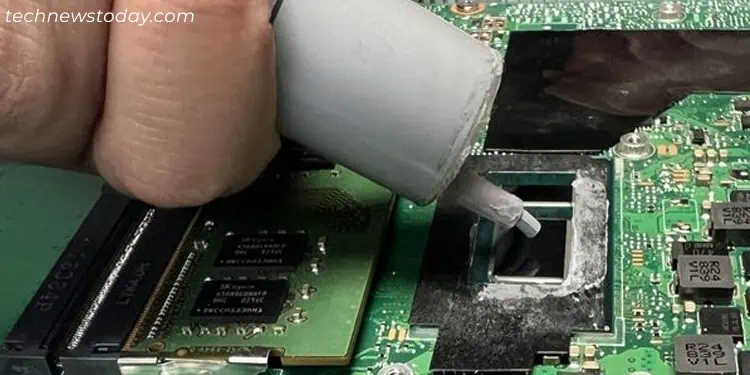
After cleaning the thermal paste, you have to reapply a new layer onto the CPU and/or GPU die. The amount of the thermal paste must be enough to cover all of the CPU/GPU but not so much that it overflows to the circuit.
- Since the dies are smaller, you can simply use a pea-sized dot in the middle of the die instead of using any fancy patterns. If the CPU has an integrated GPU, make sure that the paste will spread over both the chips after installing the heat sink.

- You can also use a spreader if you are new to cleaning the paste and find it difficult to judge the necessary amount.
- Then, put back the heatsink and the fans without wiggling them too much. Shaking them can spread the paste to the circuit.
- Screw the heat sink and the fan in place.
- Then, connect the fan cable to the board’s connector and reassemble the laptop by reversing the above steps.
After that, it’s better to operate your laptop and make sure everything is working properly. You can also run stress tests or monitor the CPU temperature/GPU temperature to look out for any enhancements or inconsistencies.
