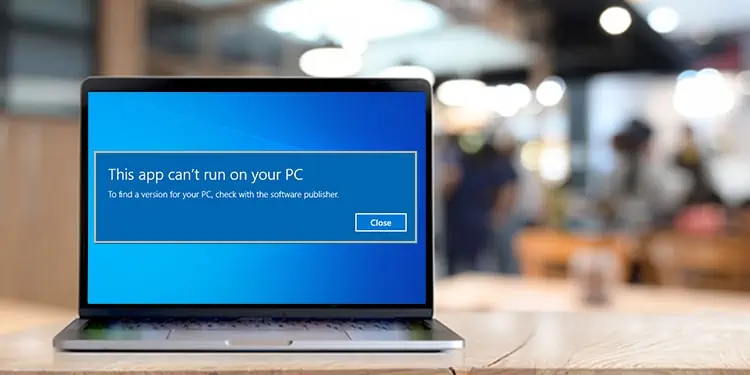
Although Window is one of the oldest operating systems, not all apps are made for it. Therefore while running these apps, you might get an error message saying, “This app can’t run on your PC.” The probable cause can range anything from software conflict to computer viruses.
Furthermore, Windows systems can sometimes malfunction and show this error in almost every Windows application. When this happens, your PC becomes unusable and just a decoration piece.
This error is mostly a software issue and can be fixed by yourself.
What Causes “This App Can’t Run on Your PC” Error?
There are several reasons for this error message, and it isn’t easy to pinpoint just one cause. It could also literally be that your Windows PC can’t run the application because it wasn’t made for Windows.
There are several reasons for this error message, and it isn’t easy to pinpoint just one cause. It could also literally be that your Windows PC can’t run the application because it wasn’t made for Windows.
However, here are other common reasons why the error message still pops up in Windows-compatible apps.- Incompatible software version
- Corrupted User account
- Software Conflict
- Problematic System Files
- Computer Viruses and Malware
- Improper Installation
- Faulty Drivers
How to Fix “This App Can’t Run on Your PC” Error
Fixing the error message popping up isn’t that hard of a task, but determining which fix is appropriate is difficult. Before trying anything else, you should first check if the app is supported on windows or not. Also, try restarting your pc, deleting cache and temporary files, and updating your OS and drivers.
If the error message still shows up, try the following fixes.
Run Program Compatibility Troubleshooter
If the app was made for an older or specific Windows version, it could show this particular error message. You can run the program compatibility troubleshooter to fix this issue.
Follow the steps below to run Program Compatibility Troubleshooter.
- Open settings from the start menu.
- Click on Update & Security.
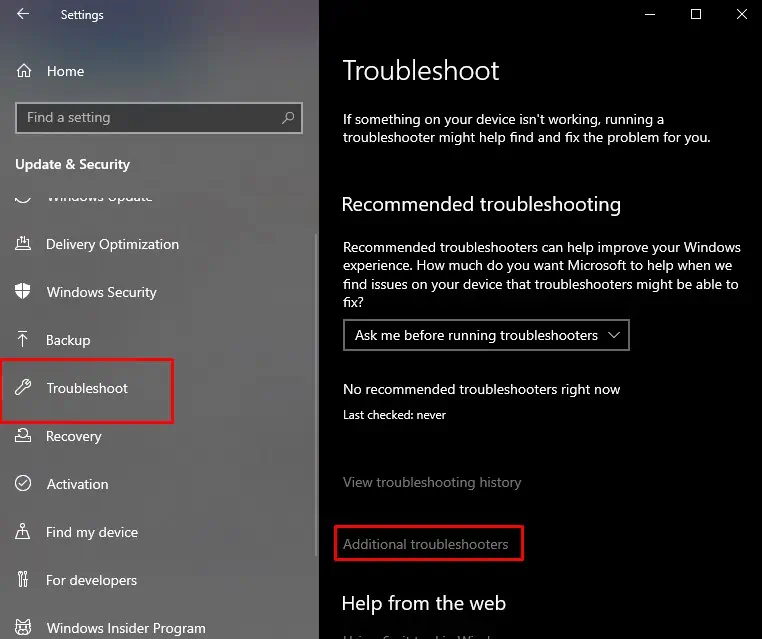
- Select the Troubleshoot option from the sidebar and click on Additional troubleshooters.

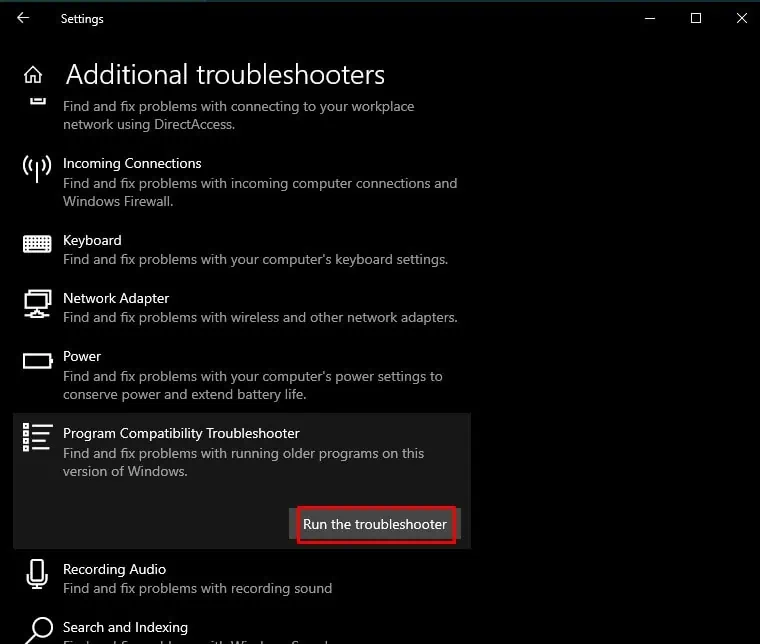
- Scroll down, click on Program Compatibility troubleshooter, and hit Run the troubleshooter.

Use Compatible Software
Most Windows computers come in two architectures. They are a 32-bit system and a 64-bit system. While a 64-bit system can run 32-bit applications, a 32-bit system can’t run 64-bit applications. So, you must ensure that your application is compatible with Windows architecture.
Furthermore, some old apps and games are 16-bit applications. While a 32-bit system can run 16-bit applications, a 64-bit system can’t run 16-bit applications. Even if the application is 32-bit, but uses a 16-bit compiler, then your 64-bit system won’t be able to run it.
You can check your Windows architecture with the steps below:
- Press Windows key + I to open settings
- Click on System
- Select About
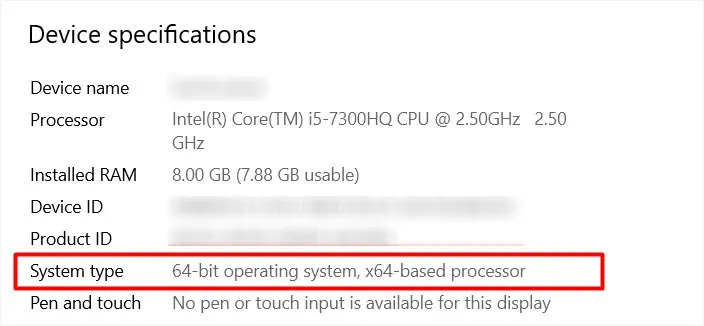
- Check the ‘System Type’ tab to find the Windows architecture.

If you have an x64-based processor, you can upgrade to a 64-bit system anytime. If you have an x86-based processor, you can’t upgrade to a 64-bit system. To run the application, you must install windows architecture-compatible software or replace your hardware.
Check for Viruses and Malware
This error message can also show if your computer is infected with viruses and malware. In the worst cases, almost all apps on your computer may show this error message, becoming unusable.
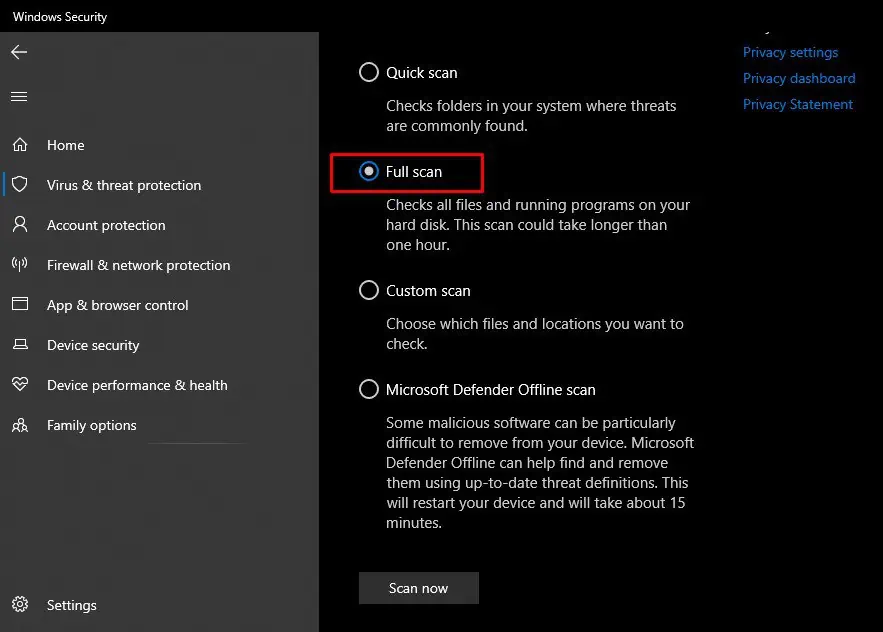
A full computer scan would be the best option to locate and clean up any viruses or malware. Follow the steps below to perform a full scan of your PC.
- Search Windows Security in the search bar and open it.
- Click on Virus & threat protection.

- Tap on Scan options and hit Full Scan.

- Tap on Scan now.
You should fully scan your pc every once or twice a week.
Disable SmartScreen
Smartscreen, as its name suggests, screens any downloads and applications for potentially harmful software. It is an inbuilt windows software and runs in the background. However, Smartscreen can sometimes get buggy and stop apps from starting.
To disable SmartScreen, follow the steps below.
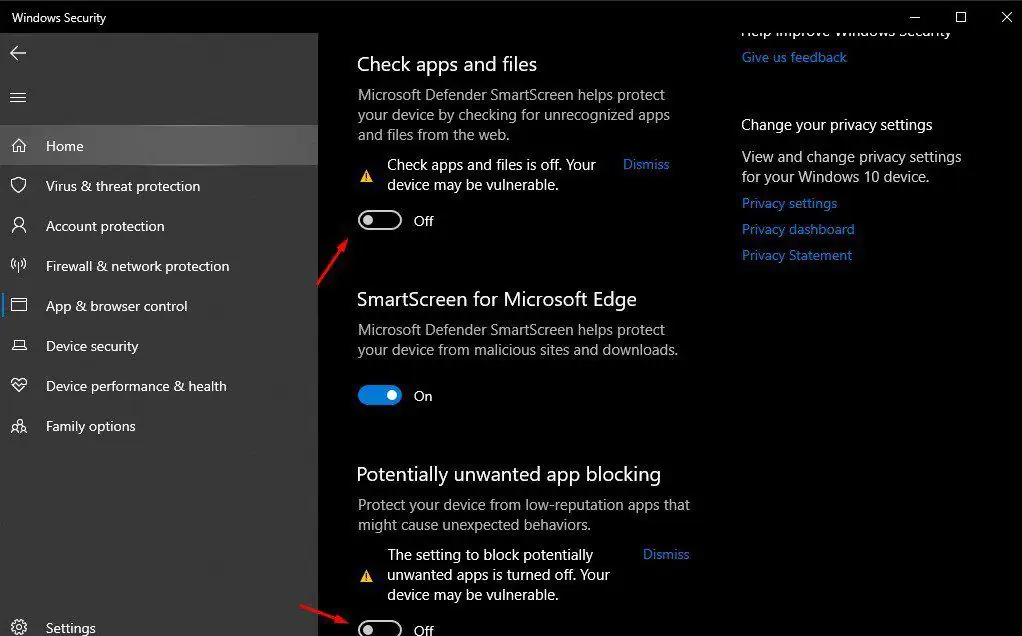
- Search App & browser control and click on the best match.
- Click on Reputation-based protection settings.

- Toggle off the options, Check apps and files, and Potentially unwanted app blockings.

You can also disable Smartscreen for Microsoft store and Microsoft Edge with the same toggle options. If the error message still pops up, enable Smartscreen again, and try the other fixes on this list. Disabling SmartScreen is generally not recommended, as it protects you from downloading and running potentially harmful applications.
Run a Copy of the Executable File
The “This app can’t run on your PC” error is pretty common in gaming, especially if you download a setup file of the game. A handy workaround for this issue in gaming is to make a copy of the .exe file and run it again.
In some instances, renaming the .exe file also helps launch the application.
Use this method if one or only a few apps are showing the error. This fix will not be useful if every application shows an error message.
Uninstall or Reinstall the App
If only a single application is showing the error message, you can try to uninstall and reinstall the application. If you can’t delete the application, try reinstalling the app without uninstalling it (run the setup file again). It could have been an issue in the compiler or an incorrectly downloaded application.
Furthermore, you can also try uninstalling unnecessary apps. The error message could also show up because of software conflict. Some poorly coded apps or software that modify your system could cause this issue.
Disable VPN or Proxy
Some apps or software show this error message because of geographical and regional restrictions. If you use an app banned in the US with a VPN of US enabled, your application will show the error. To fix this, disable your VPN.
This method also works in reverse. If an app is banned in your region, use VPN to change locations.
Enable Developer Mode
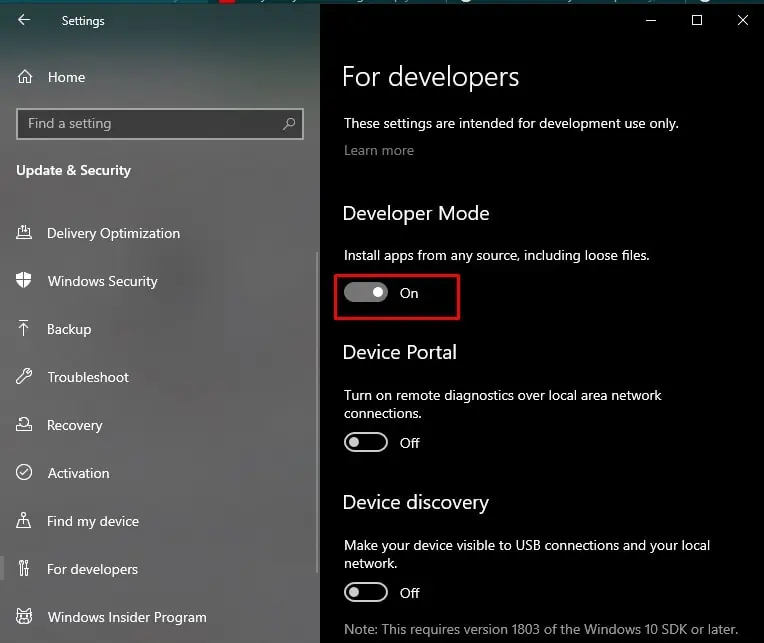
Enabling developer mode lets you download and install apps from any source. Windows may block some applications if downloaded from sources not included in its list of trusted sources and stop them from running. To fix this error, enable developer mode by following the steps below.
- Open Settings from the Start menu.
- Click on Update & Security.
- Select For developers from the sidebar.

- Toggle on the Developer Mode option.
Create a New Local or Administrator Account
Another cause for this particular error message showing could also be because of a corrupted user account. It is easy to check if your user account is corrupted by creating a new one.
Here’s how to create a new user account.
- Open settings from the start menu.
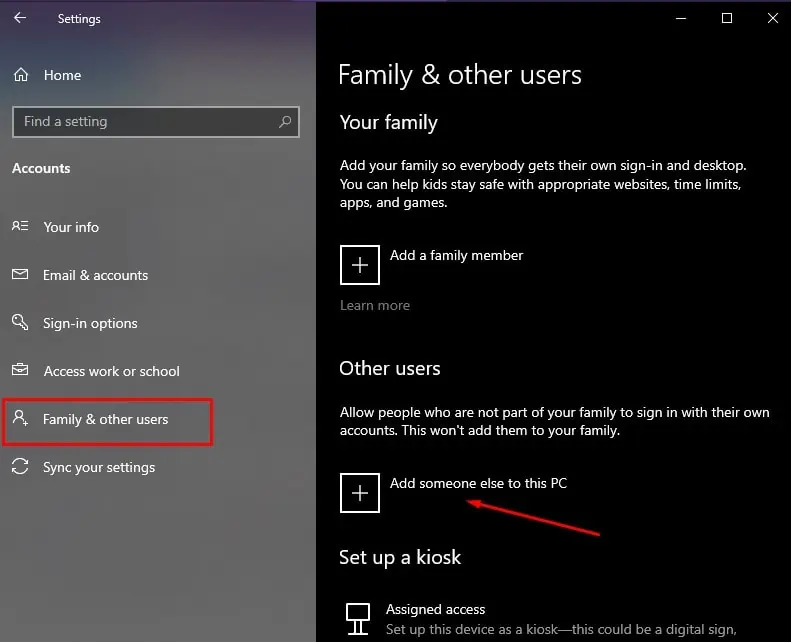
- Click on Accounts and select Family & other users.

- Select Add someone else to this PC.

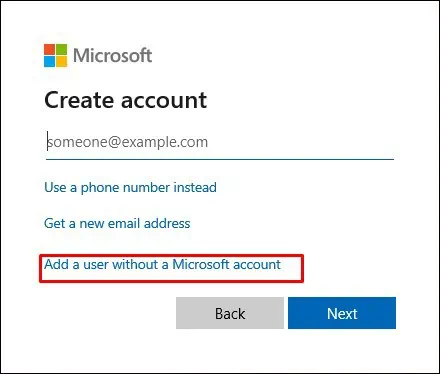
- Click on I don’t have this person’s sign-in information and select Add a user without a Microsoft account.

- Fill in the username, password, and password hint and select Next.
Log in with your new account, and check to see if the error message still appears in the new account. If it doesn’t show up, transfer all your data to your new account and change it to Administrator.
Follow the steps to change your newly created user account to an administrator account and transfer all your data.
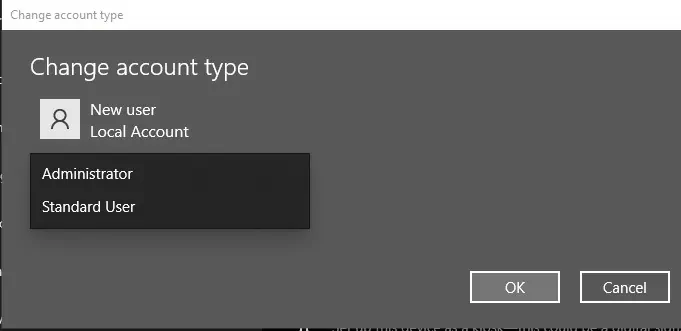
- Open Settings > Accounts > Family & other users, and select Change account type.

- Under Account type, select Administrator, then select OK.

- Restart your PC and log in from the new account.
- Open File Explorer from the taskbar.
- Select This PC and go to
C:\Users\<Old_Username>(Old username being your previous account’s username) - Copy all the files and folders in
C:\Users\<Old_Username>and paste them toC:\Users\<New_Username>(New username being your new account’s username.) - You may need to click on the replace all button.
Run CHKDSK, SFC, and DISM Command
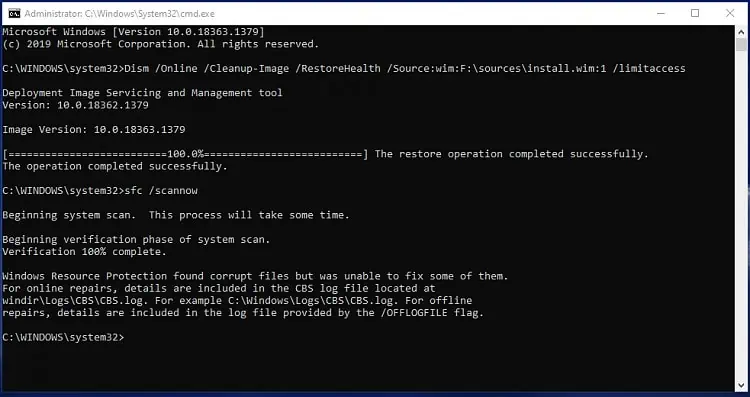
CHKDSK, SFC, and DISM are troubleshooting commands that deal with different issues in the Windows system. SFC checks and fixes errors within the files. CHKDSK checks and fixes errors with the drive. DISM checks and fixes errors within the Windows image.
Here’s how to perform them.
- Search Command Prompt in the search bar and right-click Command Prompt.
- Select Run as Administrator and select Yes in the dialog box.
- Type
Chkdsk /f D:in the panel and press Enter. (D: is the drive, you can also use C: to scan Volume C)
- Type
DISM /Online /Cleanup-Image /RestoreHealthand press Enter. - Type
sfc /scannowand press Enter.
If you encounter any issues during the process, kindly refer to our article on repairing corrupted windows files.

