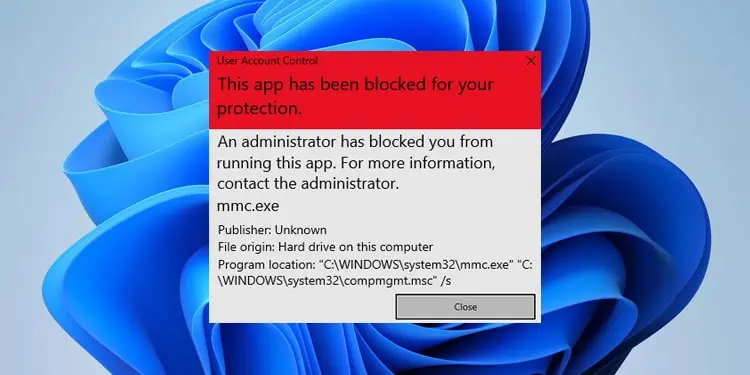
The ‘This app has been blocked for your protection’ prompt appears when your system’s list of trusted authorities does not include the digital signature of the app. It is a security feature to protect your system from harm but your system can also block apps due to the improper configuration of services.
These normally appear as bugs in a system or an insider build. You can debug this issue by installing system updates as soon as they are available. Updating OS also updates root certificates, and new digital signatures may become authorized.
If you encounter the error even with an updated OS, you need to apply the possible solutions below.
Disable UAC Setting in Group Policy
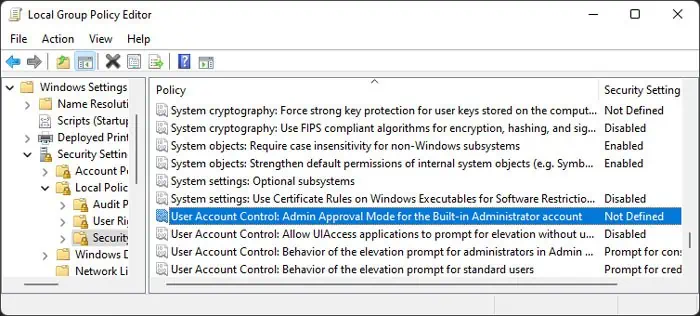
The most common reason for the error is the Run all administrators in Admin Approval Mode policy being enabled on your system. This way, if an app doesn’t have a valid digital signature or Publisher, your system won’t allow you to open it.
However, you may also encounter the error on default programs if there’s some issue with your OS. If your system is fully updated but you get the error on apps you don’t think will harm your system, you can temporarily disable the above policy to run the app.
- Open Run by pressing Win + R.
- Type
gpedit.mscand press Enter to launch the Local Group Policy Editor. - Go to Computer Configuration > Windows Settings > Security Settings > Local Policies > Security Options.
- Look for and double-click on User Account Control: Run all administrators in Admin Approval Mode.

- Check Disabled and hit Ok.
You can also disable this setting by changing the corresponding registry entry if you don’t have the Local Group Policy Editor. To do so,
- Open Run.
- Type
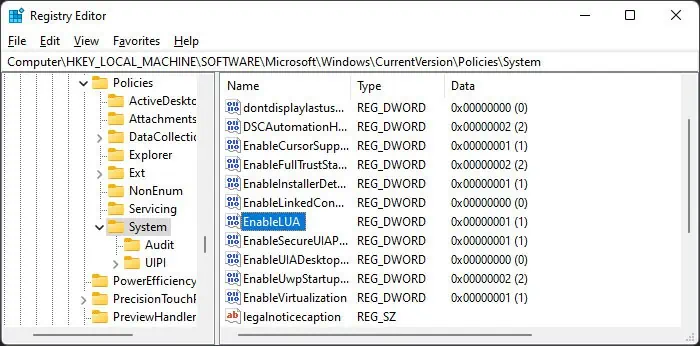
regeditand press Enter to open the Registry Editor. - Navigate to
Computer\HKEY_LOCAL_MACHINE\SOFTWARE\Microsoft\Windows\CurrentVersion\Policies\System - Double-click on EnableLUA and set its value to
0
Note: If you are part of a domain or connected to a school/work account, you need to contact the admin and have them make the necessary changes for your user account or computer.
Enable Permission for MMC Snap-ins
If you encounter this error while trying to open the MMC snap-ins like the Device Manager, Local Security Policy Editor, etc., it’s likely because a different policy is restricted from the Group Policy. Similar to the above case, you need to enable it to resolve the error. If you are part of a domain, you need to make these changes on the GPO relevant to your local computer instead.
- Open the Local Group Policy Editor.
- Go to User Configuration > Administrative Templates > Windows Components > Microsoft Management Console > Restricted/Permitted snap-ins.
- Look for the blocked program and double-click on it.

- Set it to Enabled and click OK.
Restart your PC and check if the error persists.
Open With Command Prompt
It is possible to launch the file using the elevated Command Prompt to bypass the error. To do so,
- Go to the file, right-click on it and select Copy as path.

- Then, Open Run.
- Type
cmdand press Ctrl + Shift + Enter to open the Elevated Command Prompt. - Press Ctrl + V. It pastes the file’s path as a command. For older Windows versions, you’ll need to type the file path manually.

- Press Enter to run the file.
Disable Windows Defender SmartScreen
Windows Defender SmartScreen is another security feature to protect your system, which can block your apps. We don’t recommend disabling it, but you can do so if you believe the application it is blocking to be harmless.
However, make sure to re-enable this feature when you stop using the app.
- Open Settings by pressing Win + I and go to Privacy & security.
- Click on Windows Security and select Open Windows Security.
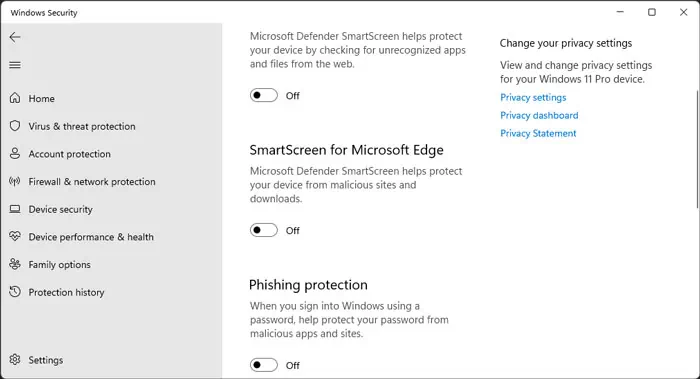
- Go to App & browser control and click Reputation based protection settings under Reputation-based protection.
- Set all the options to Off.

Then, open the file showing the “This app has been blocked” prompt and check if you can launch it this time.
Unblock File in Properties
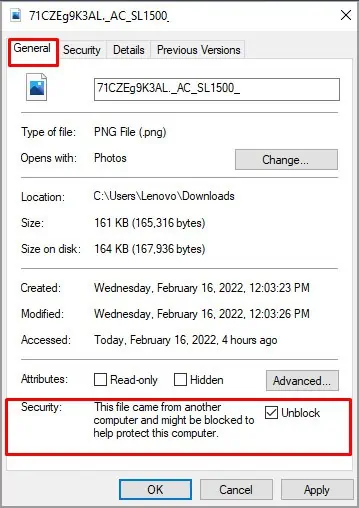
Your system will block any files you download from the internet directly. Depending on your user account control settings, this blockage can lead to the above error message. You need to unblock the file from its properties to resolve the issue.
- Go to the file that shows this error.
- Select it and press Alt + Enter to open its Properties.
- Near the bottom of the General tab, you will see an unchecked Unblock box.
- Click on it to check the option and select Apply and Ok.

Update/Reinstall Application
Some applications will update their digital signatures after they are expired. So, make sure to update the application to the latest version. If no later updates are available, you need to report the error to the manufacturer. In the meantime, you can use alternative applications.
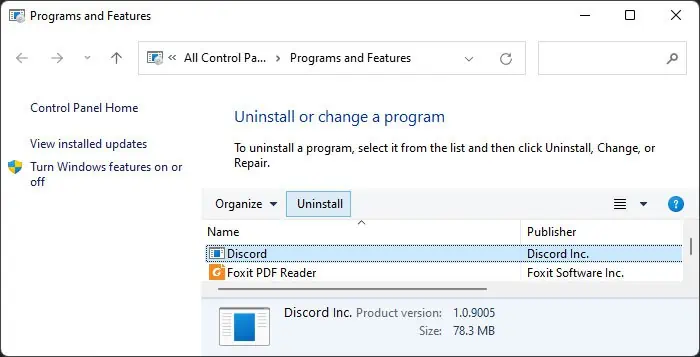
Also, sometimes the app can contain bugs that make your system mistake its digital signature as unauthorized. You need to uninstall and then reinstall it in such a scenario. We recommend reinstalling the latest version to perform both tasks at the same time.
- Launch the Run command.
- Type
appwiz.cpland press Enter to open Programs and Features. - Search for and select the app with the error and select Uninstall or Uninstall/Change > Uninstall.

- Then download the latest installer from the official website and install the program.
Configure Cryptographic Services
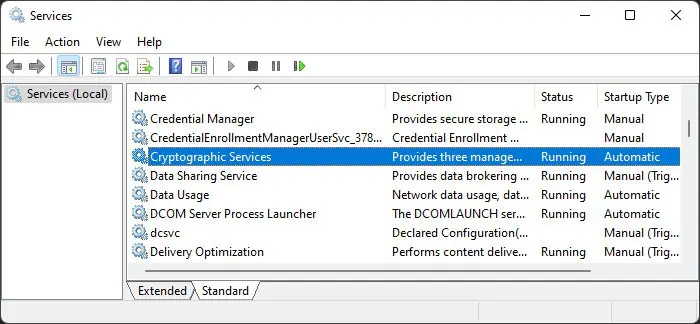
Your system uses Cryptographic services to verify the digital signature of your apps. So, you need to make sure this service is running properly.
- Open Run.
- Type
services.mscand press Enter to open Windows Services. - Search for Cryptographic Services and double-click on it.

- Set the Startup type to Automatic and click Ok.
- Then, open Run again.
- Type
powershelland press Ctrl + Shift + Enter to open Windows PowerShell in Admin mode. - Enter the following commands:
Stop-Service cryptsvcRename-Item -Path "C:\Windows\System32\catroot2" -NewName catroot2.oldRestart-Computer
Check Automatic Root Certificates Update
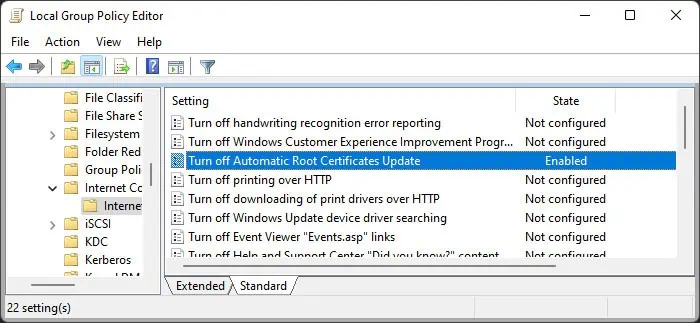
By default, your system will automatically update root certificates when it encounters an untrusted source or during a system update. However, you may have unknowingly disabled such a setting. To check and enable this setting,
- Open the Local Group Policy Editor.
- Navigate to Computer Configuration > Administrative Templates > System > Internet Communication Management > Internet Communication settings.
- Look for and double-click on Turn off Automatic Root Certificates Update.

- Check Not Configured or Disabled and click Ok.
- Restart your PC to apply the policy.
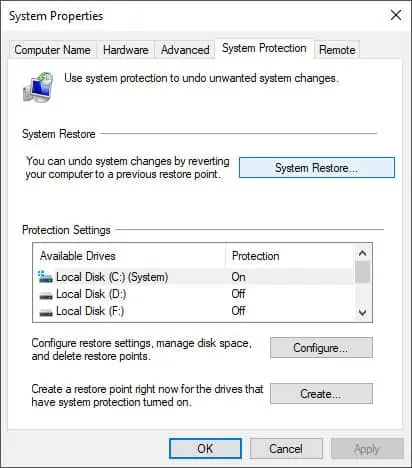
Perform System Restore
If you suddenly started experiencing this error on a previously accessible application, you can try restoring your system to an appropriate restore point. This method will remove all the errors that occurred afterward.
- Open the Run dialog box.
- Type
rstruiand press Enter to open System Restore.
- Select a suitable restore point and follow the on-screen instructions.
