Most laptop users are proficient touchpad users that let them navigate the UI without a mouse. However, is your touchpad behaving jittery or not working at all?
One of the reasons for touchpad not working on laptop is hardware issues. It’s also possible that you have disabled your touchpad accidentally. Damaged or corrupted drivers are other probable causes. Furthermore, touchpad can be disabled in the BIOS.
In this article, we have compiled a list of helpful methods that will let you diagnose why your touchpad is not working. Hopefully, you will find a fix before you scroll down to the last one!
What to Do When the Laptop Touchpad Does Not Work?
Below we discuss the causes for your laptop’s touchpad not working, ranging from simple accidental disable to hardware issues, and their fixes. Please go through them one at a time.
Check BIOS Setup
You might wonder why a BIOS-related fix appeared so early in the list. That is because your touchpad can be enabled or disabled from the BIOS. We’ve had many users report that they were able to fix their touchpad not working by going into the BIOS.
- Restart your laptop and boot into BIOS.
- Navigate inside your BIOS menu to look for a touchpad setting. In most BIOS, the touchpad will be referred to as “Internal Pointing Device.”
- Turn this setting to Enabled.
- Save and exit the BIOS.
Check if a Function Key Has Disabled the Touchpad
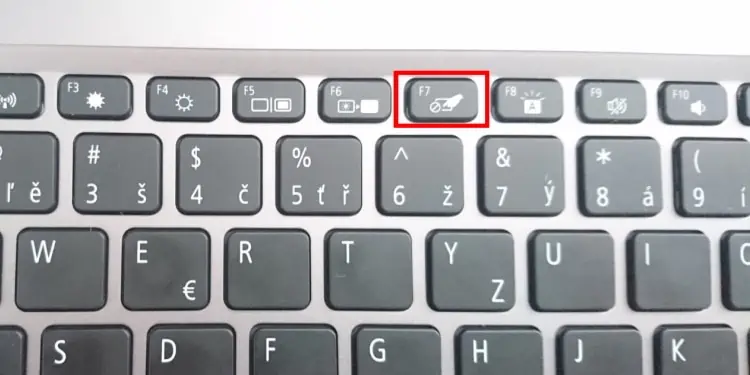
Most laptops have extra functionalities built into the functions key (F1-F12), activated by pressing the Fn button and a function key. One of these actions will be activating and deactivating the touchpad.
The action will be bound to different function keys depending on the make and model of your laptop. If there is one, it will look like a tiny touchpad icon. Press the Fn and function keys together to execute a keystroke combination.
Enable Touchpad in Settings
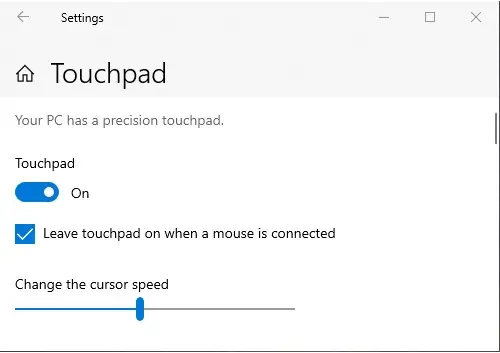
If you could not find a touchpad-related Fn-key setting bound onto a key on your keyboard, you can change this from within the Windows settings.
Windows 11:
- Press Win + I to launch Settings.
- Navigate to Bluetooth & devices > Touchpad.
- Toggle the button next to Touchpad to On.
Windows 10:
- Press Win + I to launch Settings.
- Navigate to Devices > Touchpad.
- Toggle the button next to Touchpad to On.

See if the touchpad is functioning now.
Reset Touchpad Settings
If you’ve navigated to the touchpad settings but found that the touchpad is already “On,” you can try resetting the touchpad settings. On the touchpad settings screen, you can scroll down until you see Reset your touchpad. Click the Reset button and see if the touchpad works now.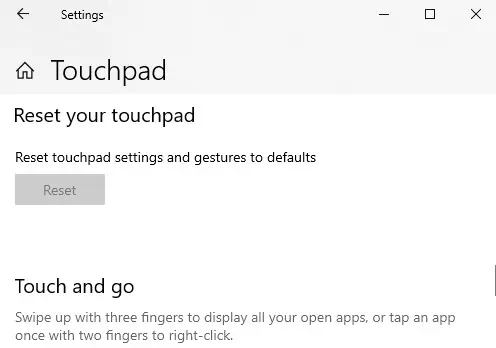
Unplug External Input Devices
In some cases, having an external input device can automatically disable your laptop’s in-built touchpad.
To see if this is the case, unplug the external device and see if the touchpad works.
Reinstall and Update Device Driver
Drivers are essential software that facilitates communication between your OS and the hardware they are made for. A faulty or outdated device driver could be causing your touchpad to not work. Let us try reinstalling and updating the driver to see if that fixes the issue.
- Press Win + R and type in
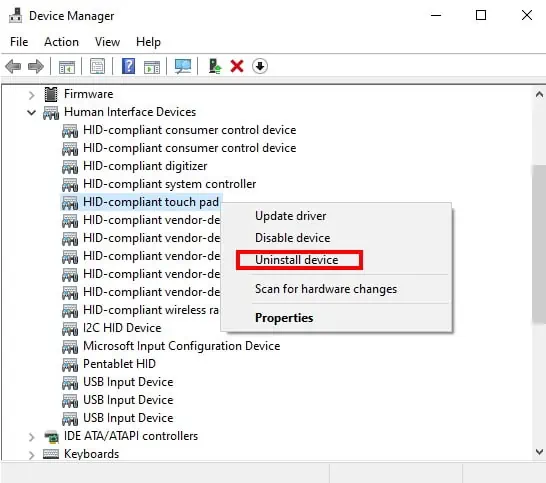
devmgmt.mscto launch the Device Manager. - Expand the Human Interface Devices section.
- Right-click on HID-compliant touch pad and select Uninstall device.

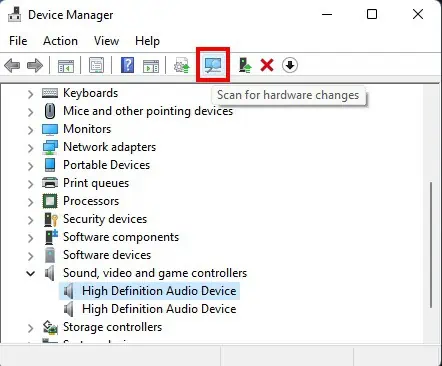
- Click on Scan for hardware changes button at the top and let Windows reinstall device drivers.

- Again, right-click on the HID-compliant touch pad. This time, select Update driver.
- In the next screen, select either Search automatically for drivers or Browse manually for drivers depending upon whether you want Windows to search for drivers automatically or you’ve already downloaded an updated driver.
Disable Tablet Input Service
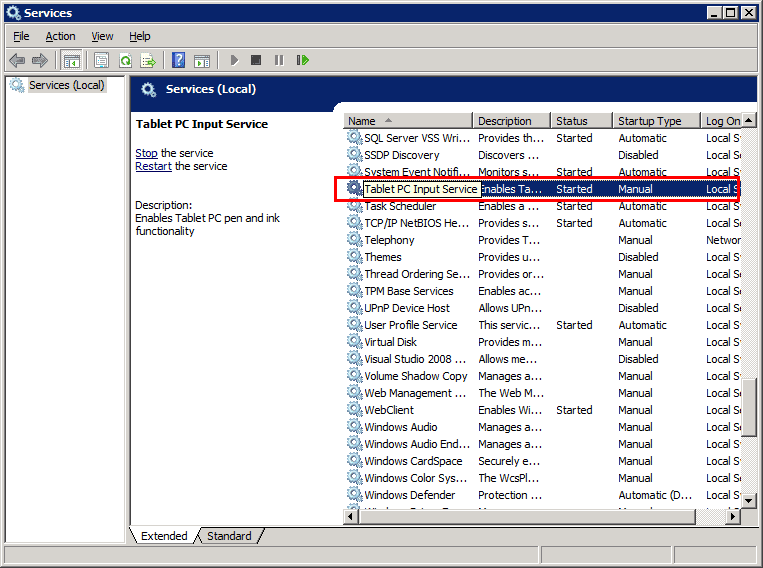
This fix is applicable for the users of hybrid tablets with a touchscreen. Such devices have Tablet Input Service, which controls the stylus functionality of the device. This service can sometimes cause a conflict with your touchpad, causing it to not work. You can fix this by disabling the Table Input service.
- Press Win + R and type
services.mscto launch the Windows Services Manager. - Scroll down to find Tablet PC Input Service, right-click on it and select Stop.

- Again, right-click on Tablet PC Input Service, this time select Properties.
- In the General tab, under Startup type, select Disabled from the drop-down menu.
- Click Apply > OK and close the service manager.
Update Windows
Another avenue for fixing defective drivers is the Windows Update. There could be a compatibility issue with the last Windows update and your then-available latest touchpad drivers, which could have been rectified in the latest Windows update. Check to see if this is the issue, then fix it by updating your Windows.
- Launch Settings by pressing Win + I.
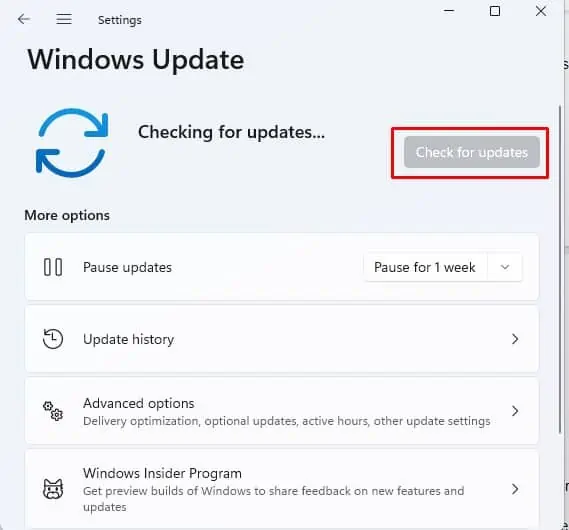
- Navigate to Windows update, click on Check for updates.

- Install any updates available.
- Restart your system.
Repair System Files
Windows system files that are corrupted could sometimes manifest issues with your hardware, including the touchpad. When this happens, the problem might not disappear by merely reinstalling/updating drivers or tinkering with settings.
In such cases, you can try to scan for, and repair corrupted system files by using DISM and SFC tools built into Windows.
- Press Win + R, type in
cmd, and press Ctrl + Shift + Enter to launch the elevated command prompt. - Initiate DISM by typing the following at the prompt:
DISM /online /cleanup-image /restorehealth - Next, use the SFC tool by entering the following:
SFC /scannow - Close the command prompt and restart your system.
Repair Defective Touchpad
You’ve gone through all the fixes but your touchpad still does not work. In this case, the possibility that your hardware is defective becomes very strong. At this level, the fix is out of the hands of a general user and specialized help needs to be called in.
Please take your device to the nearest authorized repair shop and let them fix this issue for you.
Frequently Asked Questions
Why Isn’t My Touchpad Clicking?
Most often the reason for your touchpad not clicking is that the setting has been disabled. You will need to turn this setting back on and you will be able to click with taps on the touchpad again.
Windows Users:
- Launch the Control Panel by pressing Win + R, and type in
control. - Navigate to Hardware and Sound > Mouse.
- Look for a tab labeled Touchpad, Clickpad, Device Settings, or something similar and switch to that tab.
- Put a check mark on Enable Tapping box, then click OK.
MacOS users:
- Click on Apple menu button and select System Preferences.
- Click the trackpad icon to open its menu.
- Check the Tap to click option.

How to Reset Touchpad on MacOS?
- Launch the Terminal.
- At the terminal, enter the following commands:
defaults delete .GlobalPreferences com.apple.trackpad.scalingdefaults delete .GlobalPreferences com.apple.trackpad.scrolling

